S.M. U-1 (a new RC project)

Collapse
X
 
  • Time
  • Show
Clear All
new posts
  • DrSchmidt
    Rear Admiral
    • Apr 2014
    • 1100

    S.M. U-1 (a new RC project)

    Those who know me and my journey through the aeons of this board will remember the first build I showed here....a topic with almost the same name, S.M. U1 the first submarine of the German Imperial Navy (seems like the original thread is gone).

    I built this boat semi scale and quite large, about 1,8 meters long. Still have it, still like it, but as it was my first RC scratch build it has shortcomings that annoyed me over the years, nevertheless. So about a year ago I decided to re-draw the CAD model of the hull and I talked a bit with Mr. Merriman about a smaller scale boat and a WTC that would fit. We decided that 1:48 and a 2" Cylinder might be a good idea, as it makes the boat comfortable 88 cm long.

    Lately I was a bit bored, and my 3D-printer had nothing to print, so I checked, If I can chop up the hull in reasonably large segments, that are still printable on my Saturn. Turned out that 5 x 16cm long segments are ideal. I decided that I want to make a master for a GRP hull. So I cut up the CAD model and decided that the alignment and stability of the segments will be provided by a 25 mm x 25 mm stainless steel tube. I designed the corresponding square tunnel into the segments, made a test print, adjusted the CAD model in size and gave it a go.

    This it the result. I'm quite pleased how everything turned out. I'll have to make minor adjustments on the sides, where I had the support structure, but besides that ... perfect. When I find the time I'll make the adjustments, glue the segments onto the stainless tube and start filling the little gaps between them. Should be straightforward.

    Click image for larger version

Name:	U1-001.jpg
Views:	692
Size:	56.5 KB
ID:	174679

    Click image for larger version

Name:	U1-002.jpg
Views:	696
Size:	66.6 KB
ID:	174680

    Click image for larger version

Name:	U1-003.jpg
Views:	692
Size:	46.9 KB
ID:	174681

    Click image for larger version

Name:	U1-004.jpg
Views:	694
Size:	46.0 KB
ID:	174682

    Click image for larger version

Name:	U1-005.jpg
Views:	690
Size:	45.2 KB
ID:	174683
  • JHapprich
    Captain
    • Oct 2017
    • 759

    #2
    Very nice! What are the improvements over your first model?

    Comment

    • DrSchmidt
      Rear Admiral
      • Apr 2014
      • 1100

      #3
      The compete hull is a new designe and much more accurate than the first version. The bow is new and has the right cross sections, the stern has the right cross sections, the deck is curved the radii on the transition from deck structure to lower hull are right. The general look ist the same, but it's a completely new hull.

      And no idea about the wtc yet. The boat can fit 2" tube. That's all what I care about right now. Making a good master in a technique that I haven't employed before is the main thing right now.

      Comment

      • DrSchmidt
        Rear Admiral
        • Apr 2014
        • 1100

        #4
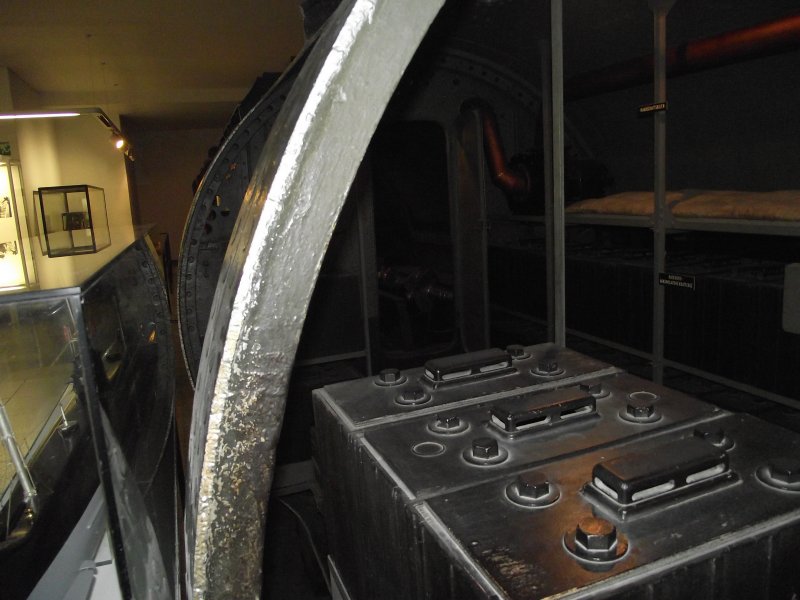
        There is an awesome cutaway model in the Deutsche Museum where the U-1 is located today....

        Dies steht im deutschen Museum. Hallo Alfred, das ist ja wirklich sehr beengt! Vielen Dank für die Bilder


        Cheers Andreas

        Comment

        • Davidh
          Captain
          • Nov 2010
          • 719

          #5
          Andreas,

          I will be looking forward to seeing how this goes. Loved your U-1. It helped inspire my U -23 build, a boat that is a lot of fun the drive.


          Click image for larger version

Name:	IMG_0087.jpg
Views:	645
Size:	52.7 KB
ID:	174776

          David H.

          Comment

          • DrSchmidt
            Rear Admiral
            • Apr 2014
            • 1100

            #6
            Yeah, I like your U-24. Is it a good runner? I like these early Imperial German boats, but the arrangement of the control surfaces (all on the bow side of the propellers, not after them, in the prop stream) usually makes them a bit hard to turn and pitch control is tough.

            Comment

            • JHapprich
              Captain
              • Oct 2017
              • 759

              #7
              Its probably the best kit David produced so far. Shame shame mine is still resting on the attic, taped together and awaiting construction

              Comment

              • Davidh
                Captain
                • Nov 2010
                • 719

                #8
                Yes U -23 runs nicely. I thought it would porpoise with the boat hull shape, but it doesn’t. It looks awesome on the water.

                Joerg, Thankyou for the compliment. I’m glad it isn’t in your Garage!

                Comment

                • JHapprich
                  Captain
                  • Oct 2017
                  • 759

                  #9
                  What garage?!

                  wintertime sees attic-action!

                  Comment

                  • DrSchmidt
                    Rear Admiral
                    • Apr 2014
                    • 1100

                    #10
                    In a first step I glued all the segments onto the 25 mm x 25 mm steel tube suing epoxy resin. The seams between the segments were filled with epoxy resin that was transformed into a putty using micro balloons. Resin mixed with micro balloons can fill large gaps without cracking, is easy to sand, and gives a good foundation for the polyester putty that will be applied next.

                    Click image for larger version

Name:	U1-006.jpg
Views:	586
Size:	41.5 KB
ID:	175182

                    Click image for larger version

Name:	U1-007.jpg
Views:	593
Size:	41.2 KB
ID:	175183

                    Click image for larger version

Name:	U1-008.jpg
Views:	596
Size:	38.0 KB
ID:	175184

                    Comment

                    • DrSchmidt
                      Rear Admiral
                      • Apr 2014
                      • 1100

                      #11
                      A little progress....master building galore: I filled the seams between the 3D-printed segments using polyester putty and now it's grinding, grinding, grinding....

                      Click image for larger version

Name:	U1-009.jpg
Views:	536
Size:	54.7 KB
ID:	175870

                      Comment

                      • DrSchmidt
                        Rear Admiral
                        • Apr 2014
                        • 1100

                        #12
                        Wet sanding the seam....I really hate it. But I make progress.

                        Click image for larger version

Name:	U1-010.jpg
Views:	527
Size:	63.9 KB
ID:	176015
                        Attached Files

                        Comment

                        • DrSchmidt
                          Rear Admiral
                          • Apr 2014
                          • 1100

                          #13
                          I have filled and sanded all the seams and obvious geometric flaws. Looks not like much, given the hours of sanding that went into the master so far. But it feels very different by touch and one can see form the putty areas, that there were quite a few uneven regions that are now straight. Next I'll glue some threaded insets into the keel to get attachment points for painting and mounting and the we are ready for the first round of 2K filler....

                          Click image for larger version

Name:	U1-011.jpg
Views:	475
Size:	34.3 KB
ID:	176354

                          Click image for larger version

Name:	U1-012.jpg
Views:	485
Size:	41.4 KB
ID:	176355 Click image for larger version

Name:	U1-013.jpg
Views:	485
Size:	39.7 KB
ID:	176356 Click image for larger version

Name:	U1-014.jpg
Views:	473
Size:	34.3 KB
ID:	176357

                          Attached Files

                          Comment

                          • DrSchmidt
                            Rear Admiral
                            • Apr 2014
                            • 1100

                            #14
                            Lots of progress...well, invisible one, as filling and grinding doesn't change the shape of the boat much, bit it will be visible, when the filler is applied. And that's what 's going to happen next. To be able to apply the filler/primer, I have to suspend the boat somehow. as there is no obvious attachment pint, I had to create it myself. So I glued two M4 threaded insets into the keel and made a suspension frame with a counter weight. Now the boat hangs straight and freely accessible under the ceiling of the work shop. Next I will degrease it once more with "Silikonentferner" (I guess something like the soft solvent David uses). And then it's going to be 2K epoxy filler/primer.

                            Click image for larger version

Name:	U1-015.jpg
Views:	450
Size:	53.9 KB
ID:	176713

                            Comment

                            • DrSchmidt
                              Rear Admiral
                              • Apr 2014
                              • 1100

                              #15
                              Time for some 2K epoxy filler....nasty but good. Went well. When the filler is cured it's 600 grid wet sanding and then'we'll see. I guess I'll need some more bondo here and there, but as the master determines how good the grp hulls will be, it's worth the effort.

                              Click image for larger version

Name:	U1-016.jpg
Views:	438
Size:	46.9 KB
ID:	176760

                              Click image for larger version

Name:	U1-017.jpg
Views:	436
Size:	55.4 KB
ID:	176761

                              Click image for larger version

Name:	U1-018.jpg
Views:	433
Size:	47.5 KB
ID:	176762

                              Comment

                              Working...