A U-Boat In Ireland

Collapse
X
 
  • Time
  • Show
Clear All
new posts
  • The Boattrainman
    Commander
    • Mar 2016
    • 443

    A U-Boat In Ireland


    This build thread will detail the building of a R/C static diving 1/40 scale U-Boat with working lights and sound.


    Following my build and test bed for ideas detailed in my 'A Skipjack in Ireland' thread, I'm commencing a 1/40 (ish) U-Boat build using the old warhorse of a Robbe 1/40 'semi-scale' kit.......

    Click image for larger version  Name:	IMG_1093 (800x600).jpg Views:	1 Size:	367.2 KB ID:	121885

    ..........long out of production, I found this perfect example on Ebay for 380 Euro.

    Combined with a 900ml Engel Piston Tank and their Bayonet Lock with Accurate Model Parts decals and the Modellbau-Wikinger upgrade parts.....................

    Click image for larger version  Name:	IMG_1091 (800x600).jpg Views:	1 Size:	315.1 KB ID:	121886Click image for larger version  Name:	IMG_1092 (800x600).jpg Views:	1 Size:	309.2 KB ID:	121887

    ............ which includes scale decks, flood/drainage holes, conning tower, railings (Wintergarden), scopes, and a 'Tech Rack' designed for Engel internals (total 320 Euro).


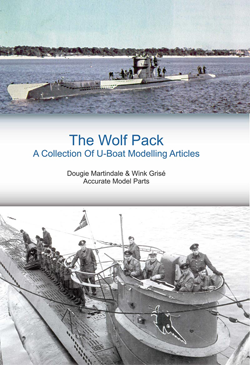
    Now before anyone chimes in with the comments about the Robbe U47 kit and it's flaws, let me quote from the staggeringly researched work 'The Wolf Pack: A Collection Of U-Boat Modelling Articles' free to download from:-

    http://amp.rokket.biz/docs/the_wolf_pack_compr.pdf


    The Wolf Pack


    ''This semi-scale kit is an ideal starter kit for radio-controlled submarine modellers, and fulfils this

    remit successfully. It bears a passing resemblance to its intended subject – the VIIB U 47 – but is

    inaccurate in almost every respect to the real boat. This effectively precludes the building of an accurate

    replica''


    This is a harsh and mostly accurate verdict, however having built one of these kits into a fairly decent U-203 in 2006/2007, time has moved on and we have a huge amount of assistance from small suppliers with accurate upgrade parts. Also, this is the only large scale U-Boat I can get into my vehicle as it breaks into two smaller parts.

    So I will be disarding the Robbe decks, tower, flooding slots, props, prop shafts, tech rack and other parts for better commercially available versions or scratchbuilt items.

    Two major hurdles have to be crossed before I can begin, firstly choosing a boat from over 700 examples at an exact time period and trying to get a handle on the details contained in the above book. Using this source and other material I will narrow the choice over the next few weeks based on the available research and hopefully some good images of my chosen boat if discovered.

    I expect I will need 18 months to 2 years to complete this project.

    Secondly, as no good deed goes unpunished I recently fractured my hand helping my niece fix up her new house........


    Click image for larger version  Name:	IMG_1094 (800x600).jpg Views:	1 Size:	281.8 KB ID:	121888

    ............so it's mostly parts acquisition and research for the moment!!!!


    The Boattrainman
    Last edited by The Boattrainman; 07-27-2017, 08:02 AM.
    ''We're after men, and I wish to God I was with them........!''
  • The Boattrainman
    Commander
    • Mar 2016
    • 443

    #2
    Interesting comparison between the Robbe and Wikinger parts. Here are the two decks side by side, total length 1700mm.


    Click image for larger version  Name:	image_35155.jpg Views:	1 Size:	396.9 KB ID:	121891


    There is superb moulded on details on the Wikinger parts.

    For CNC cut plastic the details are great compared to the 'coarse' scale Robbe deck.

    Click image for larger version  Name:	IMG_1097 (600x800).jpg Views:	1 Size:	356.7 KB ID:	121893Click image for larger version  Name:	IMG_1098 (600x800).jpg Views:	1 Size:	398.3 KB ID:	121894


    The flood/drain slots are good too, I may be wrong but the Wikinger parts in black look modelled on the Revell 1/72 kit upgrade available in brass.

    Click image for larger version  Name:	IMG_1099 (800x600).jpg Views:	1 Size:	243.2 KB ID:	121895


    There was a brass deck for the Robbe U47 a few years ago, but I hear it was a bit on the heavy side, despite being a stunning piece of kit. Despite this upgrade kit some of the slots are still wrong depending on boat choice.

    The Boatrainman


    Last edited by The Boattrainman; 06-09-2017, 08:07 AM.
    ''We're after men, and I wish to God I was with them........!''

    Comment

    • The Boattrainman
      Commander
      • Mar 2016
      • 443

      #3
      Just one example of the Photo-Etched parts that are available, this is the rear deck light.


      Click image for larger version  Name:	IMG_1100 (800x600).jpg Views:	2 Size:	183.8 KB ID:	121902


      The Boattrainman


      ''We're after men, and I wish to God I was with them........!''

      Comment

      • RCSubGuy
        Welcome to my underwater realm!
        • Aug 2009
        • 1768

        #4
        Looks like this will be a great build! Looking forward to the updates!

        Comment

        • The Boattrainman
          Commander
          • Mar 2016
          • 443

          #5
          A start is made on the tower which will be 'Turm 0' early period, although the Wikinger upgrade item has some mistakes which need to be sorted.

          The three piece frame is made around which the plastic tower is wrapped.

          Click image for larger version  Name:	IMG_1101 (800x600).jpg Views:	1 Size:	262.7 KB ID:	122007


          The lights are my standard fit of connections, brass heat shield and reduction resistor encased in epoxy.

          Click image for larger version  Name:	IMG_1102 (800x600).jpg Views:	1 Size:	235.6 KB ID:	122008 Click image for larger version  Name:	IMG_1103 (600x800).jpg Views:	1 Size:	230.2 KB ID:	122011


          The lights are Robbe plastic lenses with 3mm LEDs, once working I will build a scale surround on each.

          Click image for larger version  Name:	IMG_1104 (800x600).jpg Views:	1 Size:	247.8 KB ID:	122012Click image for larger version  Name:	IMG_1105 (800x600).jpg Views:	1 Size:	253.6 KB ID:	122009


          The light housings, wind deflector, seats, wooden insulation on the inner walls and forward instrument area are all scratchbuilt.

          Click image for larger version  Name:	IMG_1106 (800x600).jpg Views:	1 Size:	256.4 KB ID:	122010


          The Boattrainman


          Last edited by The Boattrainman; 06-23-2017, 02:22 PM.
          ''We're after men, and I wish to God I was with them........!''

          Comment

          • The Boattrainman
            Commander
            • Mar 2016
            • 443

            #6
            Some more detail is added to the Tower. The side and rear lights get thin brass surrounds and plastic hats.

            Click image for larger version  Name:	IMG_1108 (800x600).jpg Views:	1 Size:	226.6 KB ID:	122027Click image for larger version  Name:	IMG_1109 (800x600).jpg Views:	1 Size:	236.8 KB ID:	122031


            The attachment points for the lifebuoys and aerial rigging (spare white metal parts), the metal strip under the grill plus four raised marks as per photos.

            Click image for larger version  Name:	IMG_1110 (800x600).jpg Views:	1 Size:	217.7 KB ID:	122028


            The fog horn in the larger forward port side hole is a small piece of round plastic with a cocktail stick as the speaker horn.............

            Click image for larger version  Name:	IMG_1111 (800x600).jpg Views:	1 Size:	227.5 KB ID:	122029


            ..................and the hole for the aerial wire inlet is round plastic tubing inserted at an odd angle and sanded flat to the tower. I'll sort the insulator later.

            Click image for larger version  Name:	IMG_1112 (800x600).jpg Views:	1 Size:	203.4 KB ID:	122030

            So now I've got this far, I know I'm confined to U69-72, U93-98, U551-557 and U331 as these had the slatted air intake and no MAH (the round piece seen on most U-Boats on the port side that housed an extra antenna).

            The handrails are next and in this area the Wikinger tower is wrong as some of the pilot holes are misplaced.

            The Boattrainman
            Last edited by The Boattrainman; 06-26-2017, 06:57 AM.
            ''We're after men, and I wish to God I was with them........!''

            Comment

            • trout
              Admiral
              • Jul 2011
              • 3545

              #7
              The added details look great. This will be a spectacular display piece. I am right that this is just a display model, no RC. Right?
              If you can cut, drill, saw, hit things and swear a lot, you're well on the way to building a working model sub.

              Comment

              • The Boattrainman
                Commander
                • Mar 2016
                • 443

                #8
                Hi Trout,

                Sorry for the delay in responding, was away on hols with the family.

                This will be no mantlepiece ornament!

                I'm going for full static diver, based around a 900ml Engel Tank, working lights and sound and I'm going to try to add enought detail to overcome the limitations of the Robbe kit including correct flooding hole patterns, S-Gerat on the nose, scale deck, scratchbuilt periscopes and housings etc. etc. etc.

                Will be out of the pub for a long time on this one.

                Rob

                ''We're after men, and I wish to God I was with them........!''

                Comment

                • The Boattrainman
                  Commander
                  • Mar 2016
                  • 443

                  #9
                  The handrails are now completed.

                  Click image for larger version  Name:	IMG_1113 (800x600).jpg Views:	1 Size:	272.0 KB ID:	122210Click image for larger version  Name:	IMG_1115 (800x600).jpg Views:	1 Size:	248.2 KB ID:	122211


                  The smaller details include the jackstaff and the fitting on top of each rail for the torpedo loading equipment.

                  Click image for larger version  Name:	IMG_1114 (800x600).jpg Views:	1 Size:	269.5 KB ID:	122213Click image for larger version  Name:	IMG_1116 (800x600).jpg Views:	1 Size:	269.3 KB ID:	122212


                  A major concern was the attaching of the vertical rails to the base of the circular Wintergarden, photos show these are welded to the sides, but gluing metal to plastic is problematic and would be vulnerable to breaking.

                  The solution was split pins with the same diameter hole as the railing, inserted into holes and the vertical railings inserted into these and trimmed and soldered.

                  Click image for larger version  Name:	IMG_1117 (800x600).jpg Views:	1 Size:	322.6 KB ID:	122214Click image for larger version  Name:	IMG_1118 (800x600).jpg Views:	1 Size:	254.7 KB ID:	122215


                  Some of the railings are a bit over 'scale', this is deliberate as I want them as strong as possible to avoid damage.


                  Click image for larger version  Name:	IMG_1119 (800x600).jpg Views:	1 Size:	282.8 KB ID:	122216


                  A bit of cleaning up to do, and more small details are required.

                  The Boattrainman
                  Last edited by The Boattrainman; 07-12-2017, 06:58 PM.
                  ''We're after men, and I wish to God I was with them........!''

                  Comment

                  • trout
                    Admiral
                    • Jul 2011
                    • 3545

                    #10
                    Speaking from being a gorilla handling delicate things, your rails look great and resistant to breakage. I think it shows a lot of wisdom and skill.
                    Great work sir!
                    If you can cut, drill, saw, hit things and swear a lot, you're well on the way to building a working model sub.

                    Comment

                    • The Boattrainman
                      Commander
                      • Mar 2016
                      • 443

                      #11
                      Thanks Trout!

                      Some more small details, the gimballed fitting for the forward compass and the voice pipe (the compass will be a separate fitting and dropped into the gimbal), there's two compasses in the conning tower.

                      Click image for larger version

Name:	IMG_1120 (800x600).jpg
Views:	1340
Size:	234.0 KB
ID:	122260


                      The guide fitting for the aerials on the railings.

                      Click image for larger version

Name:	IMG_1123 (800x600).jpg
Views:	1321
Size:	226.4 KB
ID:	122261


                      I spotted a major problem when it was too late to remedy properly. The Uberwasserzeiloptik or UZO is a torpedo aiming device for use when the sub is on the surface. I'm sure the Wikinger conning tower floor is based on the Revell 1/72 kit because as per the Revell sub it has the UZO base off centre to port (third round shape from left in below photo), the straight line down the centre is where it should be placed.

                      Click image for larger version

Name:	IMG_1121 (800x600).jpg
Views:	1321
Size:	281.8 KB
ID:	122262


                      To fix it I stuck the thinnest piece of styrene I had over the wrong shape, and marked out a new circle, then drilled new drain holes in line with the rest of the floor. It's not perfect but will have to do.


                      Click image for larger version

Name:	IMG_1122 (800x600).jpg
Views:	1363
Size:	330.9 KB
ID:	122263


                      The Boattrainman
                      ''We're after men, and I wish to God I was with them........!''

                      Comment

                      • The Boattrainman
                        Commander
                        • Mar 2016
                        • 443

                        #12
                        The aerial inlets/insulators are bent tube for the rear pair, and three small diameter tubes inside each other for the forward.

                        Click image for larger version  Name:	IMG_1126 (800x600).jpg Views:	1 Size:	264.2 KB ID:	122274Click image for larger version  Name:	IMG_1125 (800x600).jpg Views:	1 Size:	217.3 KB ID:	122275


                        Favourable comparison with this photo I think.

                        Click image for larger version  Name:	u557.jpg Views:	1 Size:	85.0 KB ID:	61984


                        Click image for larger version  Name:	IMG_1124 (800x600).jpg Views:	1 Size:	292.5 KB ID:	122276


                        Have to fashion the slit surround for the rear light.

                        The Boattrainman
                        ''We're after men, and I wish to God I was with them........!''

                        Comment

                        • The Boattrainman
                          Commander
                          • Mar 2016
                          • 443

                          #13
                          Next up is the attack periscope base, the rear of one is below.

                          The problem with this item is it's very fiddly, with lots of parts that could be damaged when in use, the challenge is to make it tough, and also insure the periscope will function out of the top.


                          Click image for larger version  Name:	stebetojai[1].jpg Views:	1 Size:	96.2 KB ID:	122290


                          To make the basic shape I used metal tubes sleeved to give an approximate shape, glued together and then covered with filler and sanded.

                          Click image for larger version  Name:	IMG_1128 (800x600).jpg Views:	1 Size:	239.0 KB ID:	122291


                          The basic components were..............

                          Click image for larger version  Name:	IMG_1129 (800x600).jpg Views:	1 Size:	257.1 KB ID:	122292


                          ............ plastic tube for the compass gimbal, two gauges of soft/brass wire for the handrails and footrails, plastic rod for the bolt heads to deck, plastic bar for the V strengtheners at deck level and a split pin for the hatch holding mechanism.

                          Click image for larger version  Name:	IMG_1130 (800x600).jpg Views:	1 Size:	232.8 KB ID:	122293Click image for larger version  Name:	IMG_1131 (800x600).jpg Views:	1 Size:	234.2 KB ID:	122294

                          (looks like a robot holding a plate to me!!!!)


                          Here it is on the model, similar view to the actual one above, by comparison the navigation periscope base is a simple aluminium tube with wire handrails.

                          Click image for larger version  Name:	IMG_1132 (800x600).jpg Views:	1 Size:	288.0 KB ID:	122295Click image for larger version  Name:	IMG_1133 (800x600).jpg Views:	2 Size:	294.5 KB ID:	122297

                          I had to cheat in one or two places to keep it strong, and with over forty parts it took three nights work to make, but it is very strong which is important for a working model.

                          The Boattrainman
                          Last edited by The Boattrainman; 07-19-2017, 07:44 AM.
                          ''We're after men, and I wish to God I was with them........!''

                          Comment

                          • The Boattrainman
                            Commander
                            • Mar 2016
                            • 443

                            #14
                            The final pieces of tower equipment other than the gun are the UZO with the top mount for the binoculars.

                            Click image for larger version  Name:	IMG_1134 (800x600).jpg Views:	1 Size:	212.3 KB ID:	122314


                            Complete with the hatch and scopes, still more small details to add around the tower before it's finished.

                            Click image for larger version  Name:	IMG_1136 (800x600).jpg Views:	1 Size:	304.2 KB ID:	122315Click image for larger version  Name:	IMG_1137 (800x600).jpg Views:	1 Size:	303.9 KB ID:	122316


                            The Boattrainman

                            ''We're after men, and I wish to God I was with them........!''

                            Comment

                            • The Boattrainman
                              Commander
                              • Mar 2016
                              • 443

                              #15
                              The Wintergarden seats require bases, these are made from 0.5mm wire.

                              Click image for larger version  Name:	IMG_1139 (800x600).jpg Views:	1 Size:	264.9 KB ID:	122340


                              There's a small cleat either side of the tower between the L-shaped handles, again brass wire is used.

                              Click image for larger version  Name:	IMG_1141 (800x600).jpg Views:	1 Size:	260.9 KB ID:	122341


                              The final large item is the 2cm AA Gun, the supplied barrel and base is used, all other parts are discarded.


                              mg301


                              The base is cut down and gets a new floor from a washer and round styrene as bolts.

                              Click image for larger version  Name:	IMG_1142 (800x600).jpg Views:	1 Size:	236.9 KB ID:	122342


                              Lots of small parts in plastic and brass are added to give the gun some detail, thin masking tape is wrapped around the barrel for ribs.

                              Click image for larger version  Name:	IMG_1143 (800x600).jpg Views:	1 Size:	249.7 KB ID:	122343Click image for larger version  Name:	IMG_1144 (800x600).jpg Views:	1 Size:	215.5 KB ID:	122344


                              Finally the gun fixing tripod is made from brass.

                              Click image for larger version  Name:	IMG_1146 (800x600).jpg Views:	1 Size:	290.7 KB ID:	122345


                              The Boattrainman
                              Last edited by The Boattrainman; 07-27-2017, 04:50 PM.
                              ''We're after men, and I wish to God I was with them........!''

                              Comment

                              Working...