

In the early 60�s America built three diesel boats with ALBACORE hulls. These sleek attack boats represented the end of the diesel-electric combatant submarine. And end of an era for US submariners: further combat submarines would employ an auxiliary diesel engine for emergency power, ventilation, reactor start-up and emergency propulsion only. Fossil fuel gave way to enriched Uranium.
Diesel Boats Forever. Not to be. I was there at the end (for this country, anyway): I qualified on a diesel boat. I re-qualified on a nuke. I�m one of the few who knew both worlds.
Was it wise to abandon internal combustion propulsion and go exclusively with the noisier nuclear power plants as the main prime-mover for our submarines?
Today, with AIP matured and demonstrated, maybe we should have kept our options open in that department. But, that�s another story...
� This story is about assembling a model kit representing a boat that was to be one of the last diesel-electric combatant submarines to serve in the United States Navy, a member of the three-boat BARBEL class: the USS BLUEBACK (SS 581).
David Manley, under the banner Small World Models (SWM), introduced his line of 1/96 submarine kits in the 90�s. The kits featuring glass reinforced plastic (GRP) AKA fiberglass hull halves; cast resin sail, tail-cone, and appendages; and cast metal detail parts. His BLUEBACK and his other 1/96 scale submarine kits were all suitable for display and r/c use.
David�s kits filled a vacuum in the United States. At that time the only mass-produced, medium sized r/c submarine kits were offered by 32nd Parallel, their 1/32 Typ-23; and SubTech�s 1/60 ALBACORE and 1/35 MARLIN. Though these were OK products, the hulls and sails were formed from flimsy vacuformed ABS or polystyrene � nowhere near as robust as GRP. And there was no detail on those parts as they were typically formed over plugs or drawn into simple tools.
SWM changed all that with stout, thin-walled, and richly detailed hull and sail parts.

Decades later SWM sold the submarine line and I got the job of surveying the masters and tools to determine the best means of use for the new owner, the Caswell Company. So, assisted by my glass-guy and good friend, Kevin Rimrodt, we popped out GRP hull, and resin appendage parts from the tooling and reported our findings and recommendations to Mr. Caswell.
Where David used massive blocks of RTV rubber for his slit type resin casting tools (the hard rubber he used permitted him to dispense with strongbacks and rubber-bands), I would have preferred more complicated, but easier to use multi-part type RTV tools.
To be fair, his techniques, revealed as I studied his tooling, taught this old dog a few neat tricks. For example, I never thought of using packing tape to form a parting plane between tool segments -- now I know how to achieve rubber tools that will produce complicated, delicate parts (such as the KILO quad-DF-antenna) without damaging them during extraction. And the amount of engraved detail he was able to impart to the GRP hull pieces, using hard-shell tools -- and to do so without damage to parts or tools upon extraction -- gave me new respect for what can be achieved with stiff tooling. All good stuff! Five minutes after I opened the package of tooling I knew I was examining the work of a fellow Master modeler. Further, in some respects, that son-of-a-gun was taking me back to school. Slightly humbled, I pressed on with the task.
Once Mr. Caswell had our report and recommendation to continue the SWM submarine line, I was tasked with the job of getting these kits back into the hands of the general public. I started in with Dave�s bester seller: his BLUEBACK. This article, in no small part, chronicles my upgrade to the kits tooling. Changes to improve production efficiency (time is money), increase detail, and to make the kit more user-friendly for those wishing to adapt it to r/c use.
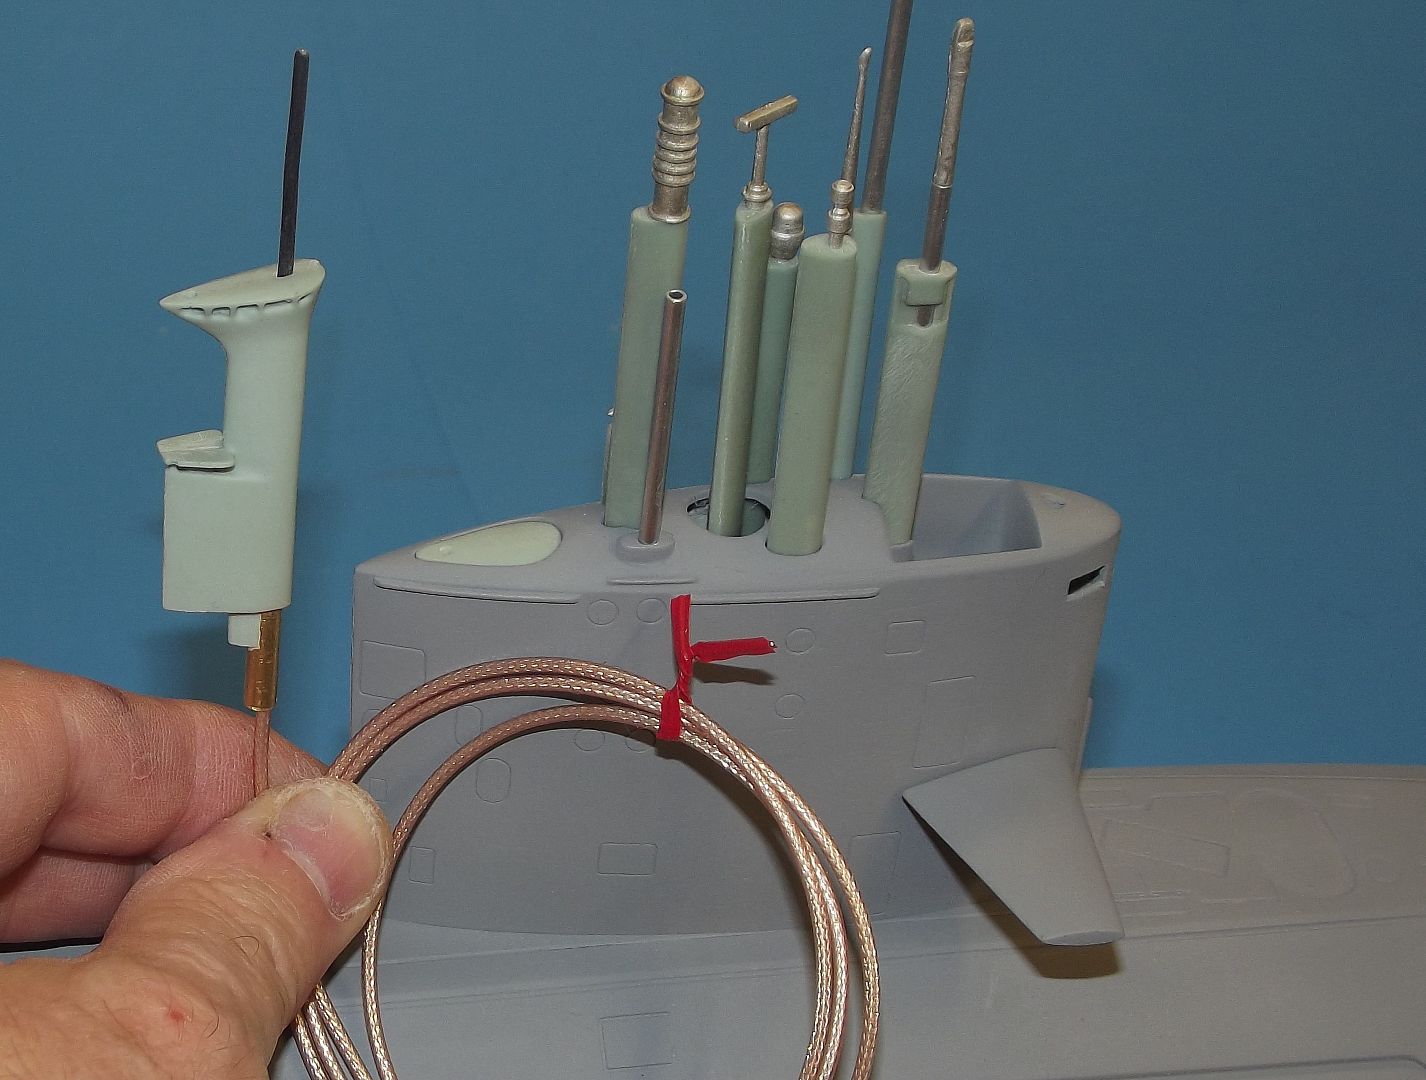
I made three significant changes to David�s room temperature vulcanizing (RTV) rubber tool masters: I combined the two outboard vertical stabilizers to the tail-cone, three formerly discrete items become one; improved the mast foundation within the sail; and produced brand new scope heads and antennas that go atop the many �retractable� fairings. As to the rubber tooling itself: I created a new set of rubber tools for casting of the resin parts; and created a disc type rubber tool from which white metal detail parts would be centrifugally cast.
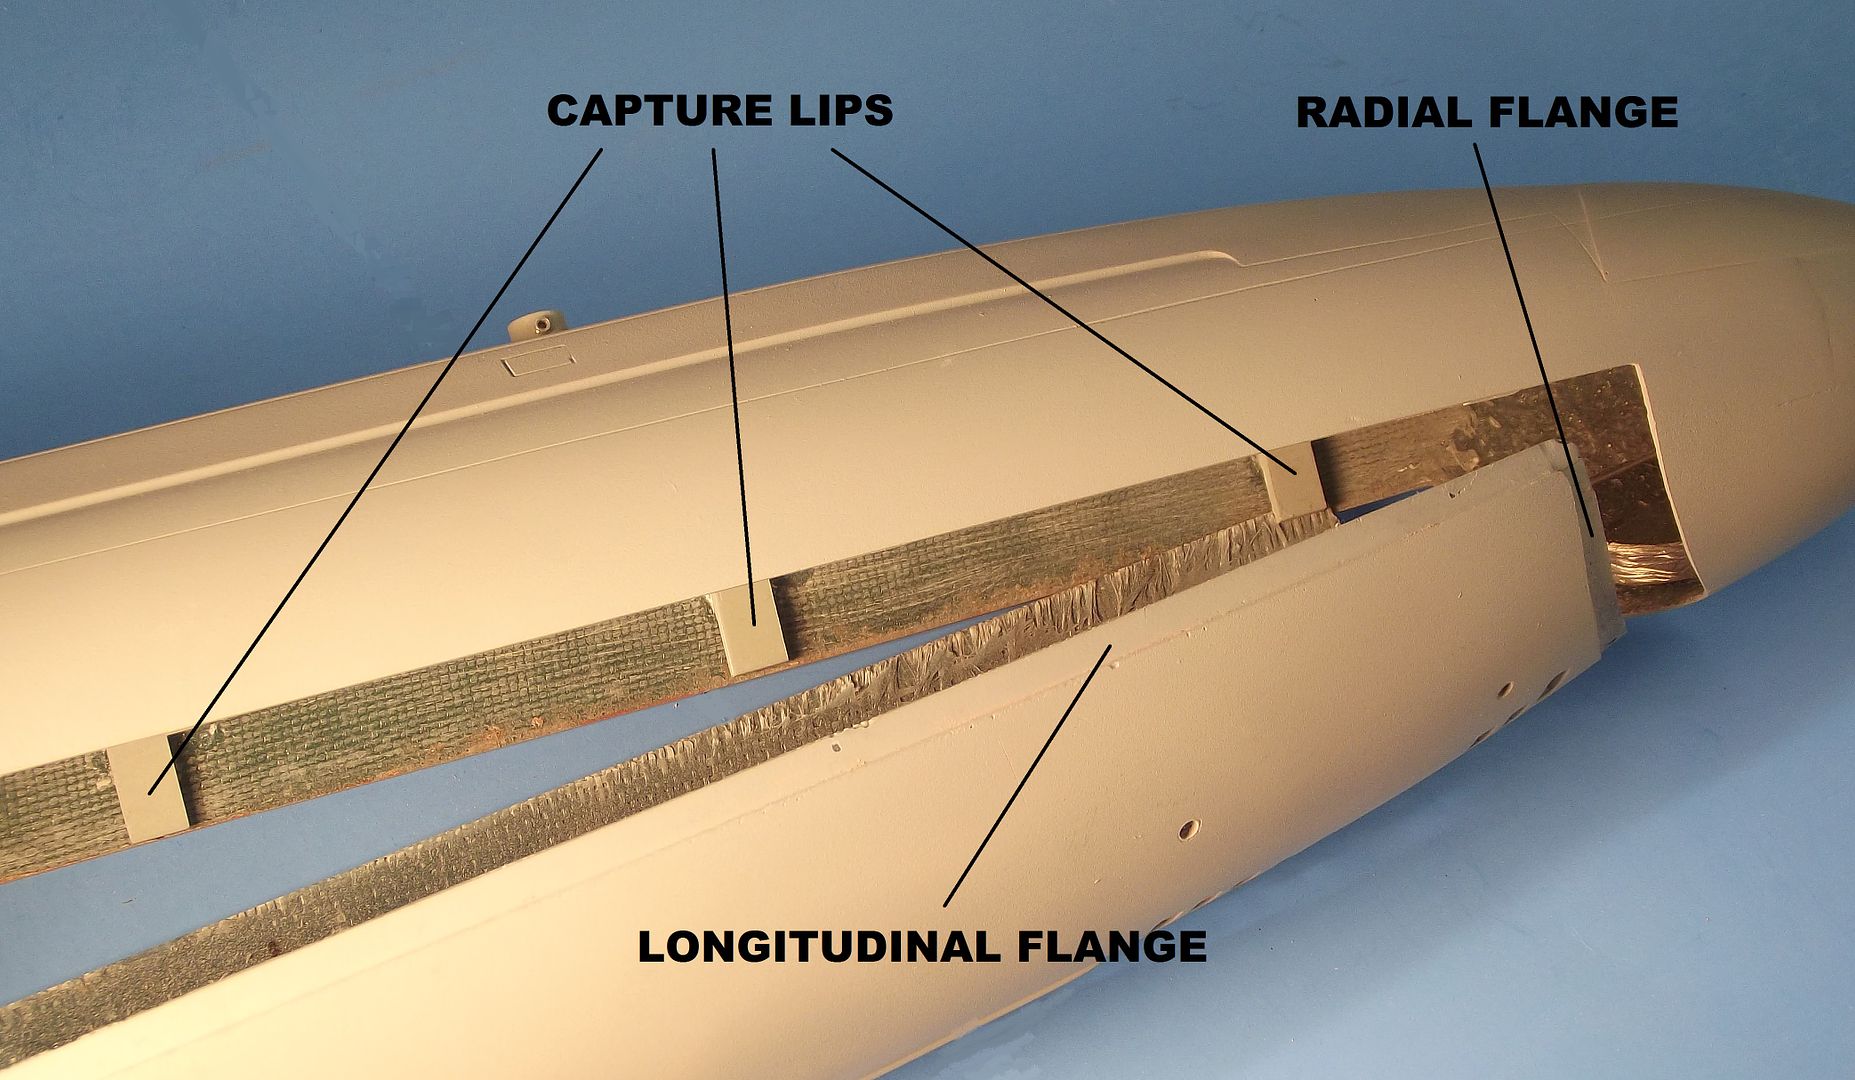
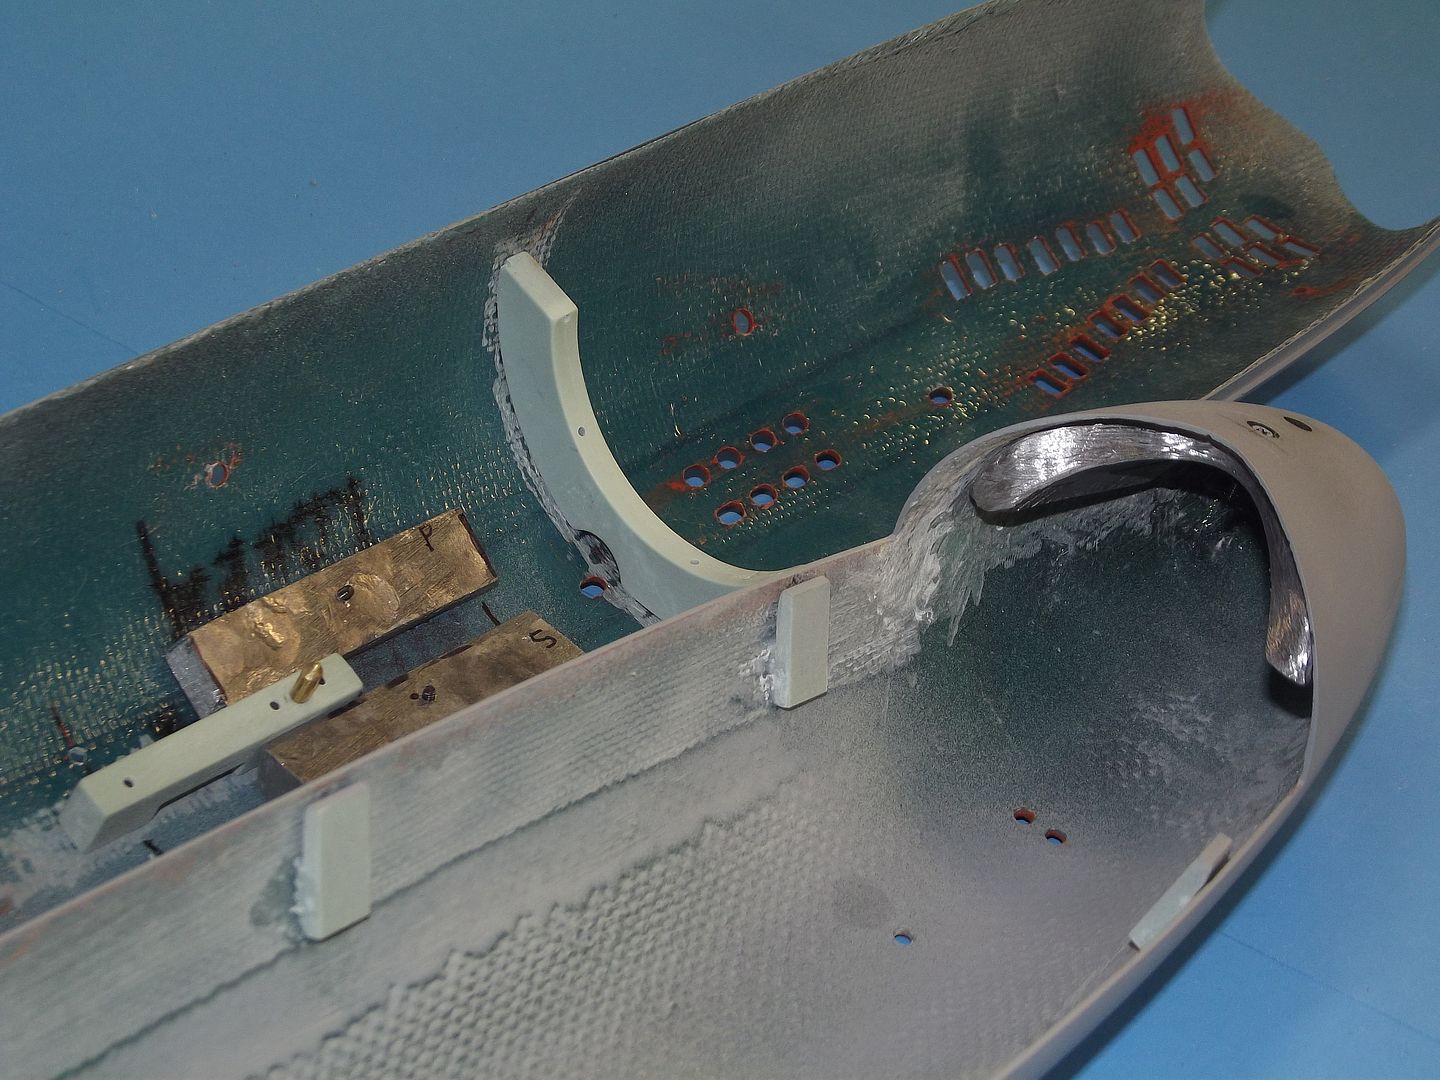
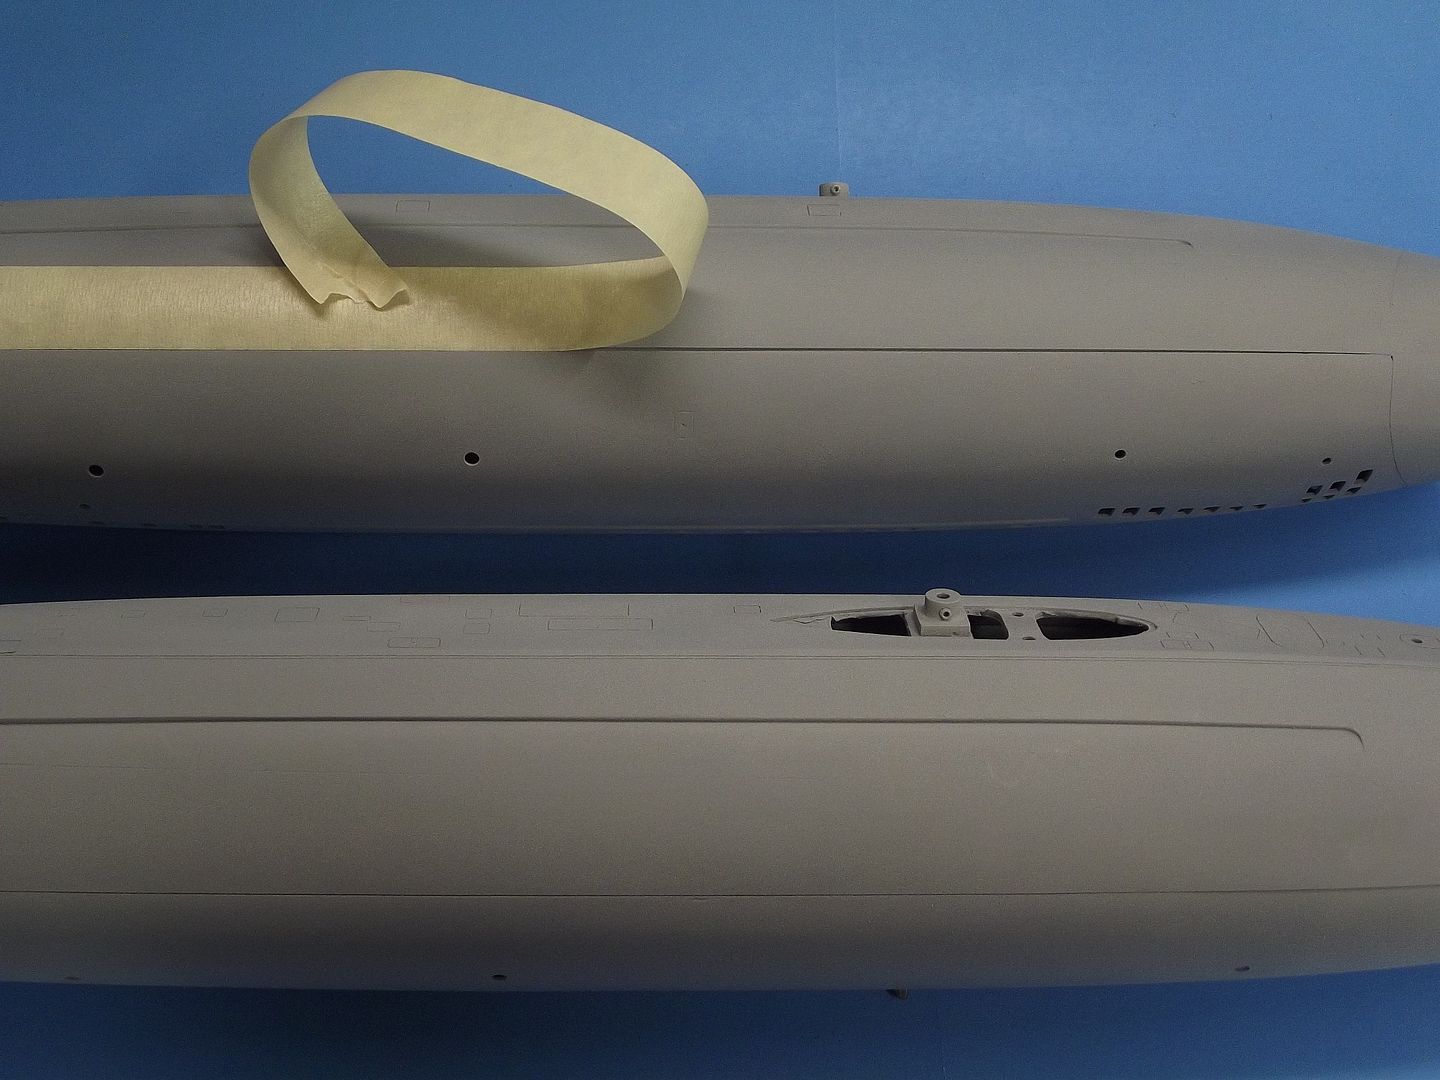
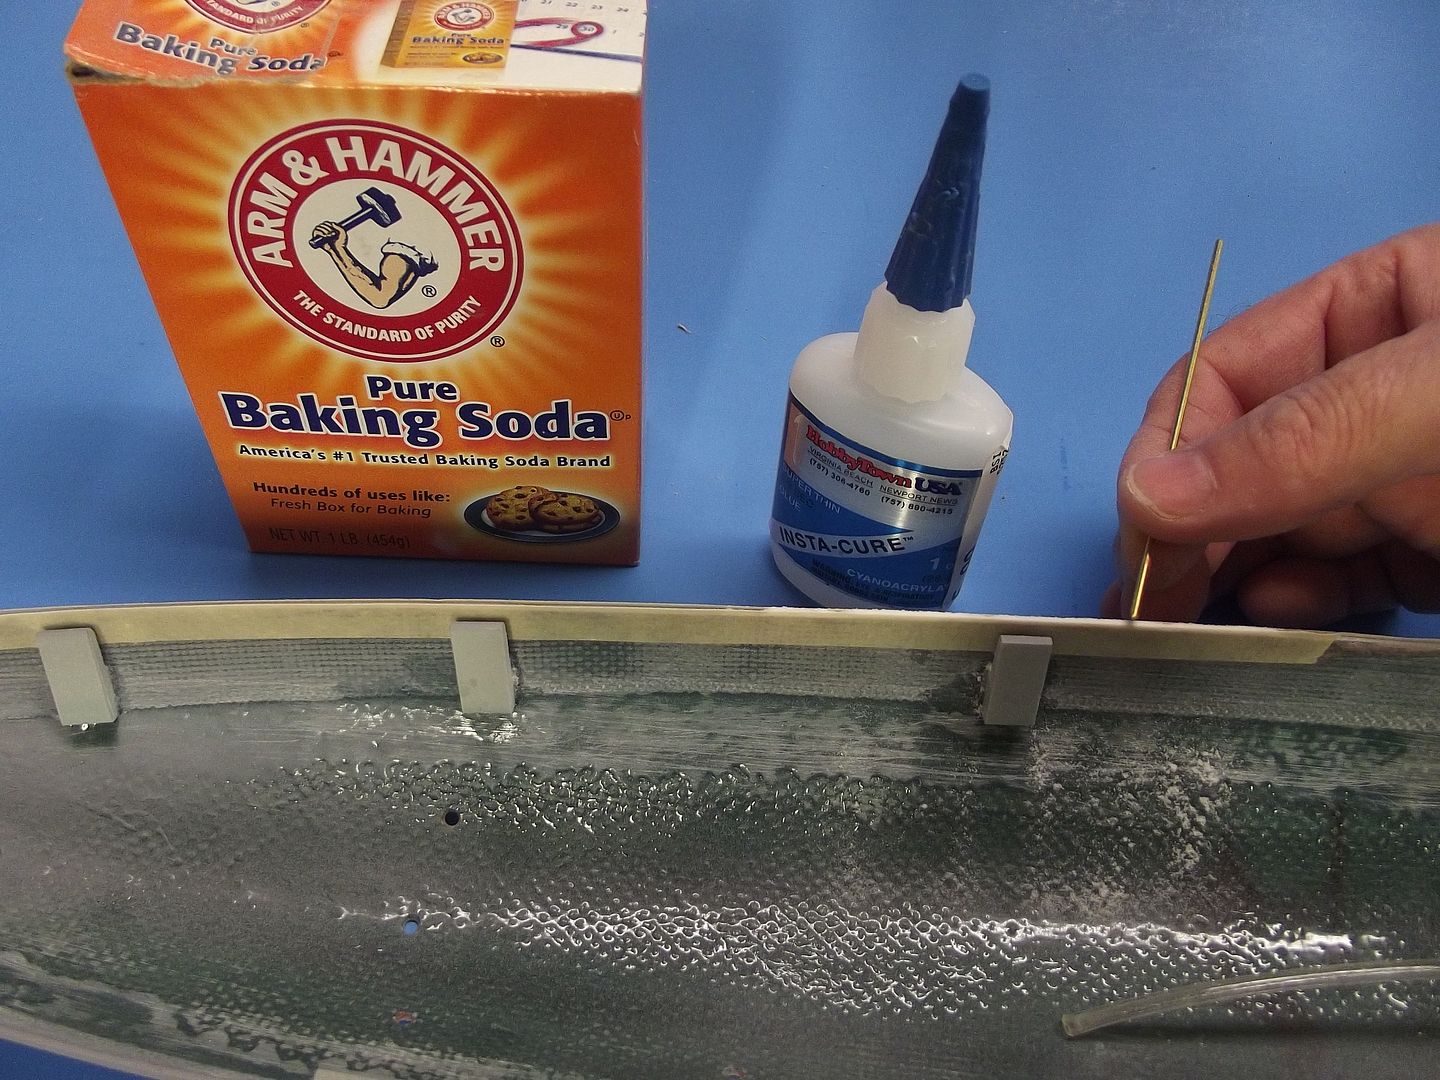
I added cast metal yokes that connected the opposed rudders and stern planes, magnetic bell-crank for the sail-plane operating shaft, zincs, towing padeye, cleats, and capstans; cast resin Velcro strap and indexing pin foundation, snorkel head-valve blank (representing a retracted snorkel mast), and a set of hull closure capture lips (to hold the assembled hull half longitudinal edges in close alignment.

Most of my documentation was secured during my navy diving days. I hold plan, profile, and detail drawings of the BARBEL in the form of an old copy of the BARBEL class piping Training Aid Book (TAB).
These small, flip-page TAB�s used by crew members qualifying or re-qualify on systems unique to a class of boat. I got this copy while using it to validate red-tagging of hull penetrations prior to a security swim on one of these boats. I had the forethought to tuck it away for �safe keeping�. It is, of course, an unclassified document.
I used TAB�s early in my navy career, initially when I transferred off a diesel boat to an SSBN where I re-qualify � the 616 class piping TAB, a coat-hanger and flashlight were my friends during that two-patrol process. The first few pages of any class piping TAB features accurate, detailed plan and profile drawings of the class as well as specific units of the class (such was the case of the WEBSTER, the only boat of the class to be outfitted with experimental bow planes� which drove the Sonar guys nuts near the surface in rough seas).
Thirty-five years later I found a use for that BARBEL class TAB. The plan and profile drawings were enlarged to 1/96 scale and became primary source as I enhanced the kits production tooling.

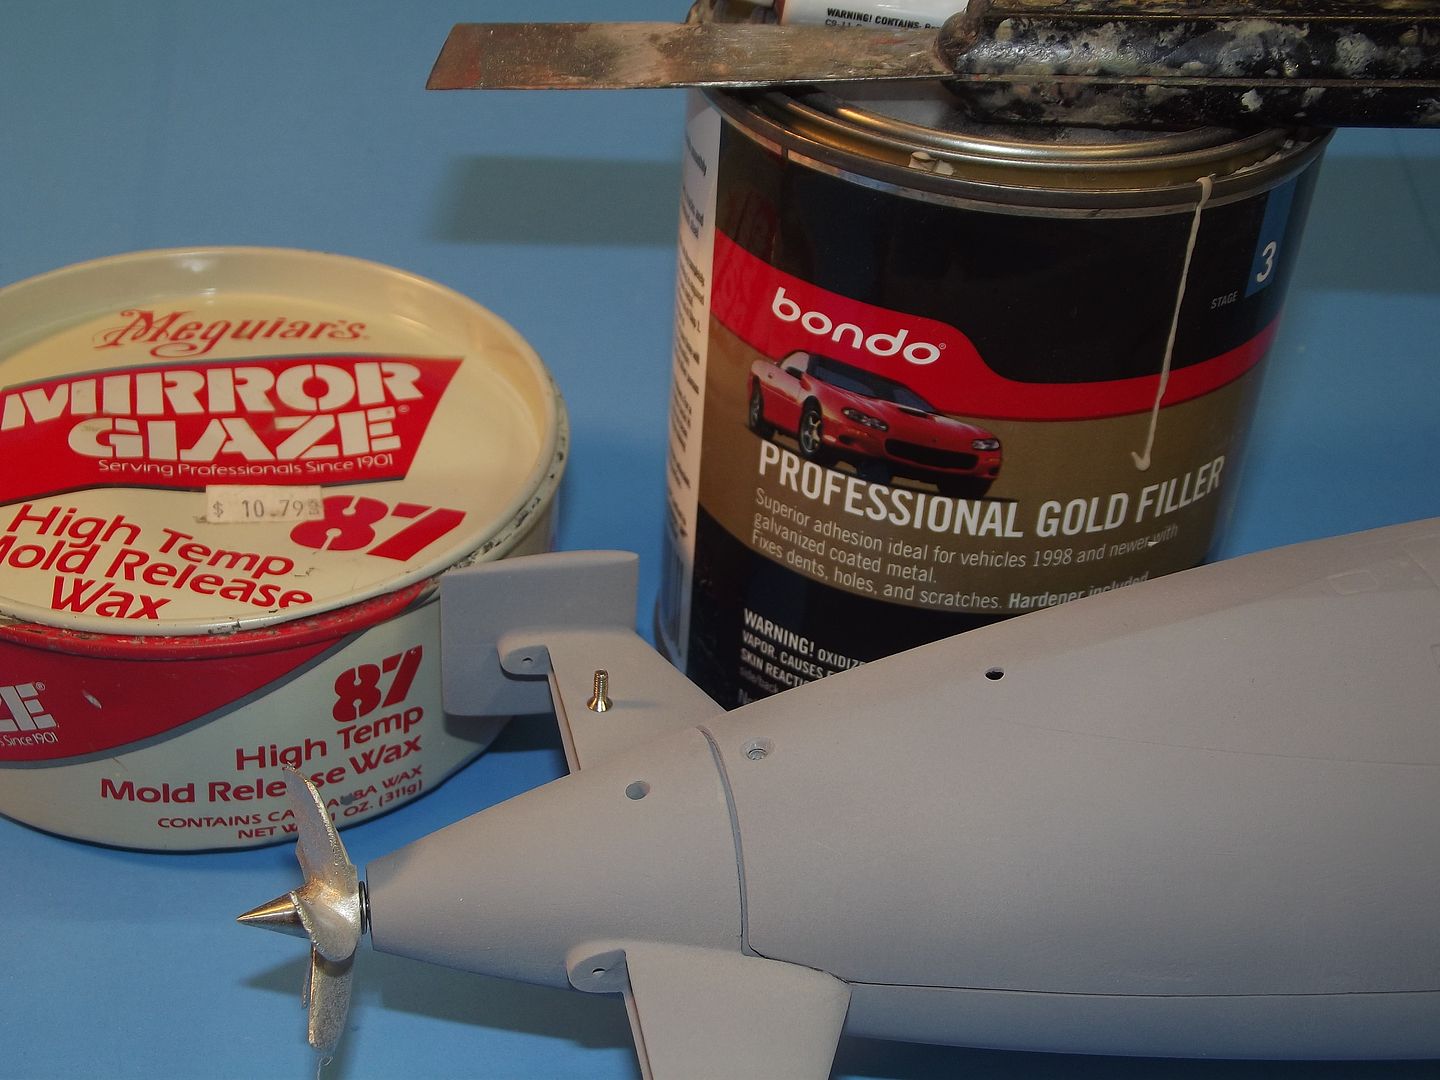
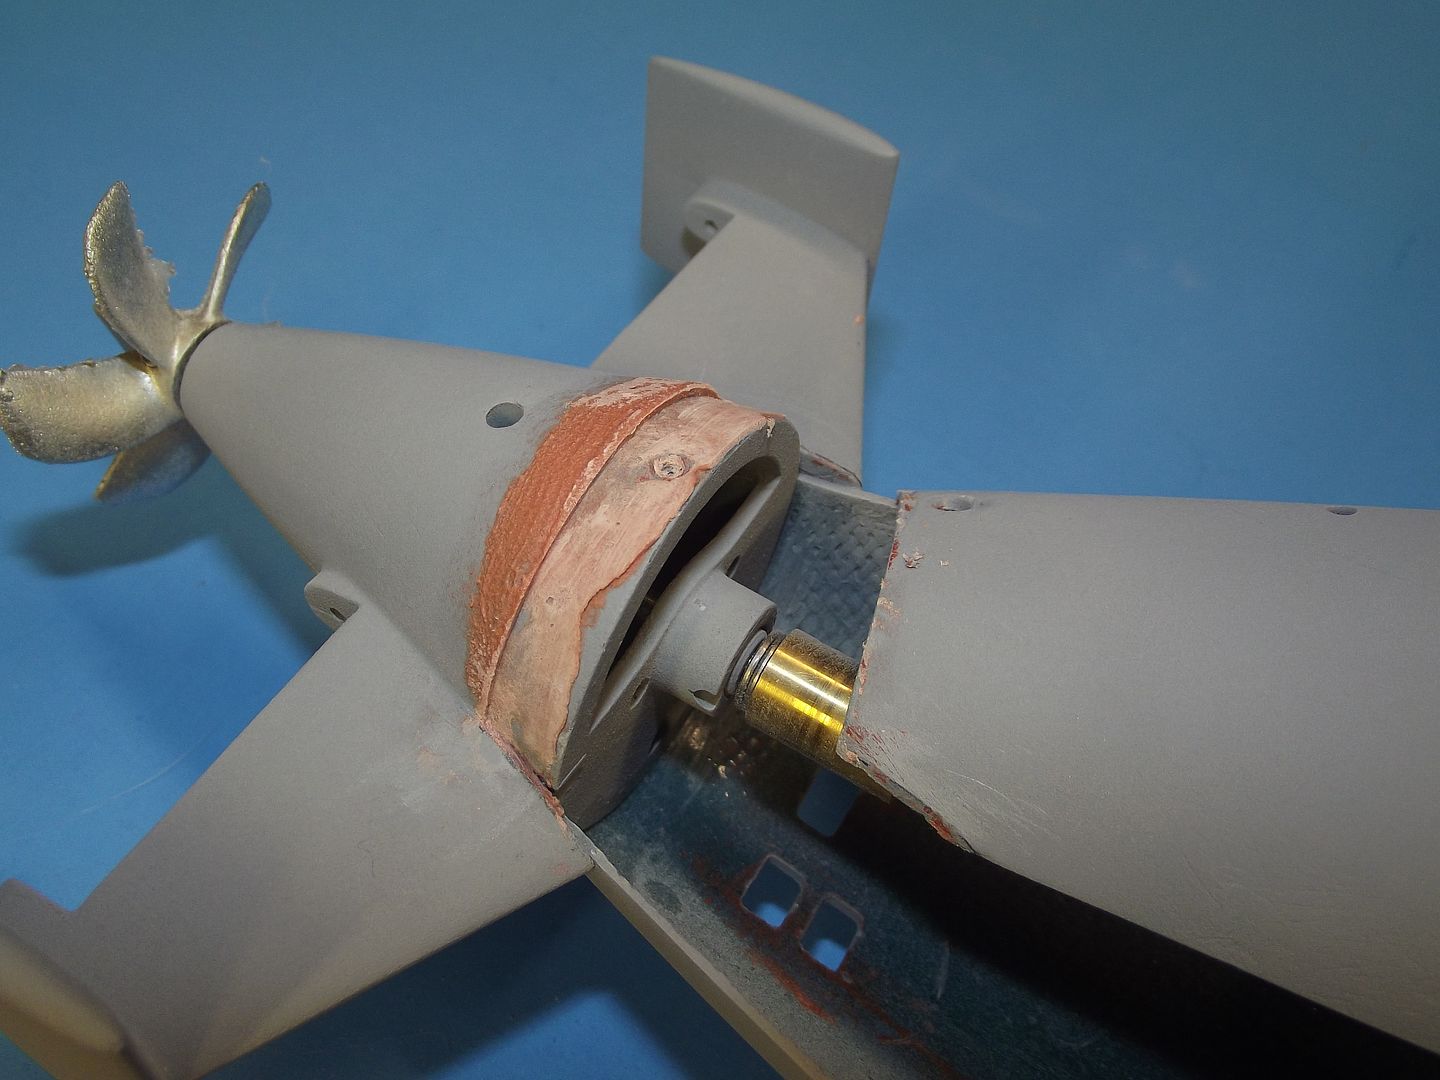
The hull tooling, consisting of an upper and lower hull GRP tool was not changed a bit. However, new tooling for the resin and metal items started anew with reworked original and original masters. Above is a promotional picture showing the Caswell version of the SWM 1/96 BLUEBACK r/c submarine kit. The much improved tail-cone with attached vertical stabilizers, control surface yokes, and forward bearing foundation -- which also served as the radial flange that interfaced the tail-cone to the hull; and an improved sail mast foundation and antenna-scope array.

Layup of the two hull halves went like this: Two highly buffed layers of mold-release wax; two spray coats of polyvinyl alcohol (PVC); a brushed thick gel-coat to fill all the deep voids and high relief items (engraved lines, bottom �bottom skids�, radial and longitudinal indexing flanges, and break between hull and superstructure); one laminate of four-ounce fiberglass cloth; and two laminates of ten-ounce cloth. The resin employed is West System 201 laminating epoxy.
The home-made gel coat was a mixture of resin and phenolic micro-balloons. As is my practice, the laminating resin was tinted blue.

A useful and time saving feature of the upper hull half tool is the removable portion which permits creation of an entire lower bow section -- all in one lay-up cycle. Being removable, this �bottom� portion of the tool, that gives form to the entire bow, permits easy extraction of the laid up GRP part by simply removing the fasteners that secure the tool sections at the flange separation plane.

GRP part removal from the tool is greatly aided by simply grasping the two longitudinal flanges of the tool and flexing the tool till the GRP part breaks free from the very slight bond between GRP resin and the PVA-wax release agent � the hull part literally �pops� out of the tool. The lower bow portion of the tool has been removed to facilitate part removal.

Though this shot presents the trimming of David�s KILO hull, the operation is the same for the BLUEBACK. It�s a simple matter of following the flange line imparted by the tool and cutting away the excess GRP. Use of a Carbide cut-off wheel is the tool of choice when cutting GRP. Glass will dull your carbon-steel tools in a minute, so where you can, cut the stuff with abrasives. Once you commit your box-store file to GRP, forever cosign it to such grunt work � it�s of little use for anything else.
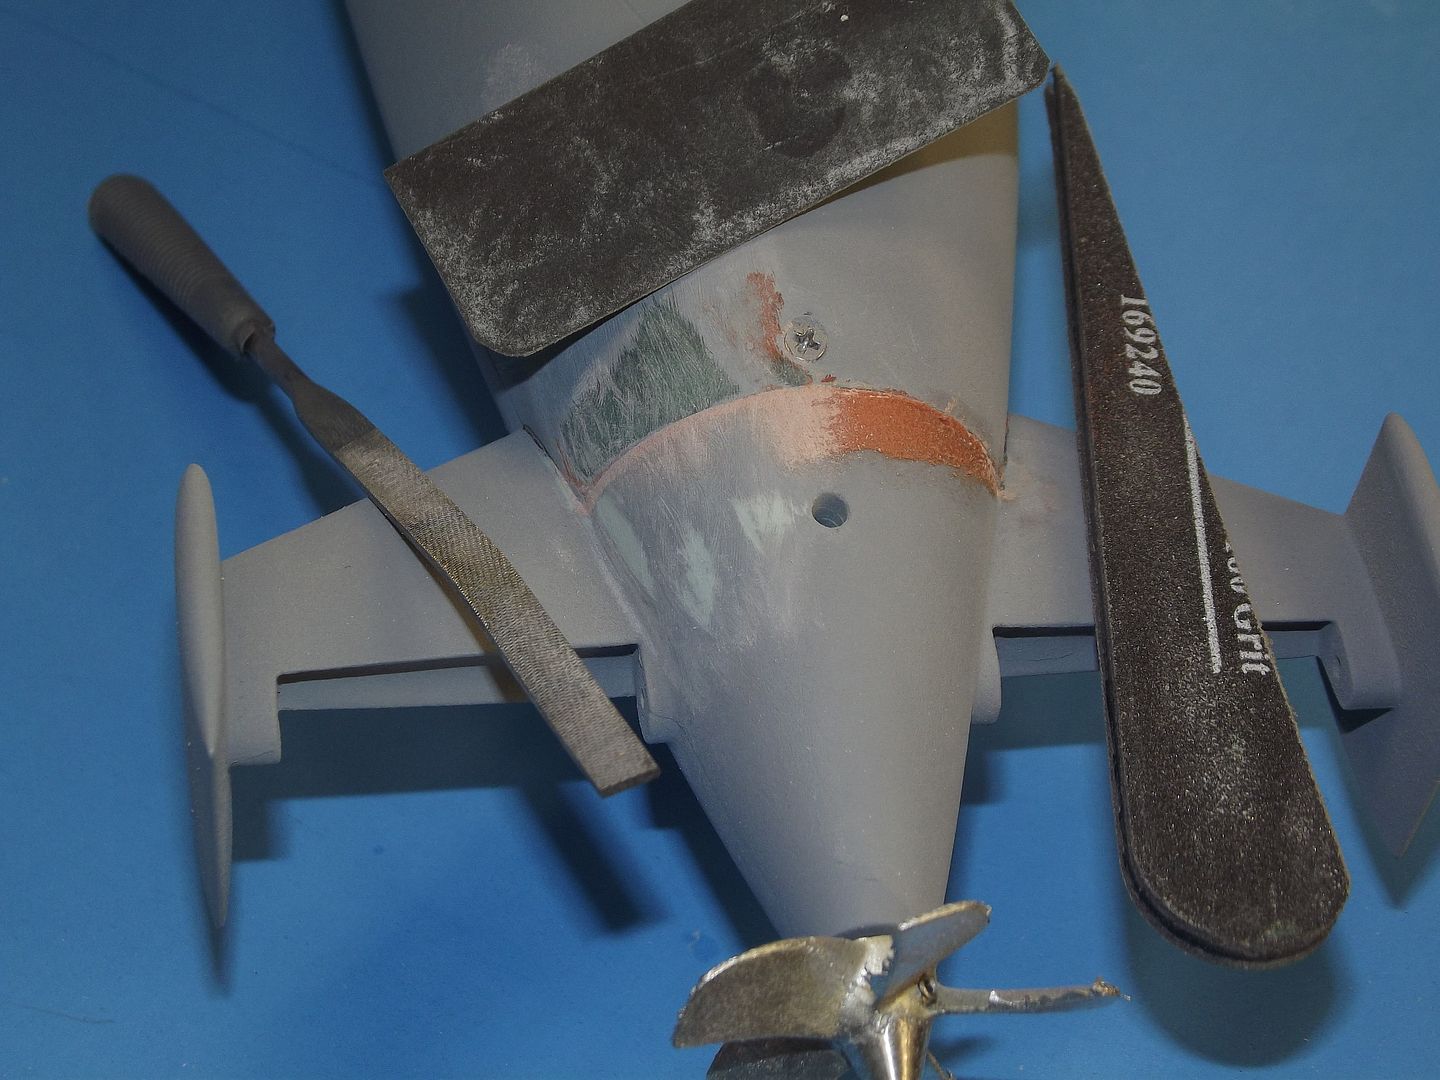
Note the use of eye-protection and respirator -- nasty but necessary work. Final trimming to the line is done with sanding blocks.

When sanding flat the longitudinal edges of the upper and lower hulls Iuse a �super� sanding block. Simply a large piece of shelving board with two whole sheets of #100 grit sandpaper contact cemented to it. The work is pushed back and forth over the sandpaper. For the tight areas like the bow of the upper hull I revert to files, sanding sticks and small hand-held sanding blocks.


Comment