Everything was done by the machine this time Scott....I only assembled the parts, made them fit.
The sail will be cast with the holes......louvers will be after fitted.....hatches and doors you must do yourself.
My idea behind it is that you can chose if you want certain pieces in open or in closed position......radar, periscopes,.....
Grtz,
Bart
-
-
Outstanding! How did you make the louvers? AND, did you cut the holes ans slots or cast them - I can't tell.Leave a comment:
-
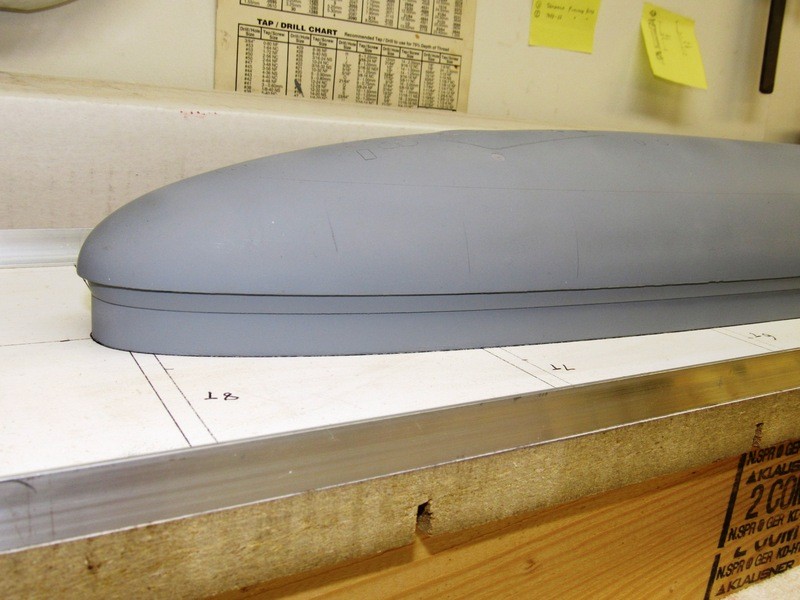
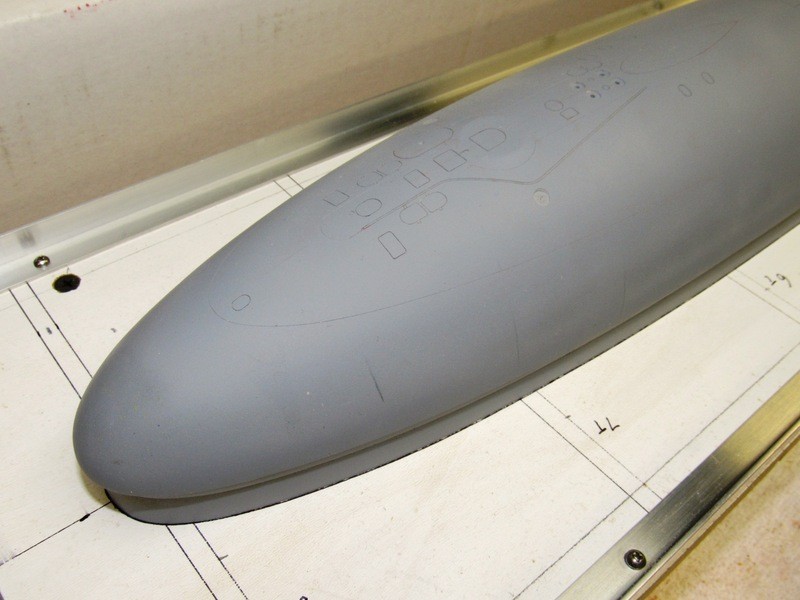
Concentrating on the sail now. Test-fitting the SOKS and making the louvres fit.
Grtz,
Bart
Leave a comment:
-
When I say high detail, I actually mean HIGH DETAIL.
One of the SOKS censors (yes I went over the top, yes I�m crazy)
Pictures were taken with the macro setting of the camera, dimensions are in mm.
All credits to "the machine"
Grtz,
Bart
Last edited by bwi 971; 11-05-2018, 02:45 PM.Leave a comment:
-
-
Easy for him: difficult for us. Look out Bart. I sense a challenge coming on.Leave a comment:
-
Horse-****! It's easy: indent the lip 3/32" to the hull master (the ideal wall thickness of r/c submarine hulls) and when you eventually lay up your other hull half in its tool you either grind the inside to a wall thickness of 3/32" or lay up the required strips of glass to achieve the desired wall thickness. With practice you quickly determine the weight and number of laminates to achieve that wall thickness.
No sweat, Bart.
Man! That VICTOR-3 is shaping up, pal.
DavidLeave a comment:
-
Thks David.......I need A LOT more experience before I have a go at this........you have to know exactly what you are doing regarding the thickness of the gelcoat, resin, and laminates that will be applied on the other non-lip part of the hull. Then and only then you can you can determine the offset of the thin indexing board.
I should have known there is no hocus-pocus way to do this���just practice.
(and there he goes, back to his basement, humbly shaking his head, mumbling �when I grow up��.� )
Gtrz, Bart
Leave a comment:
-
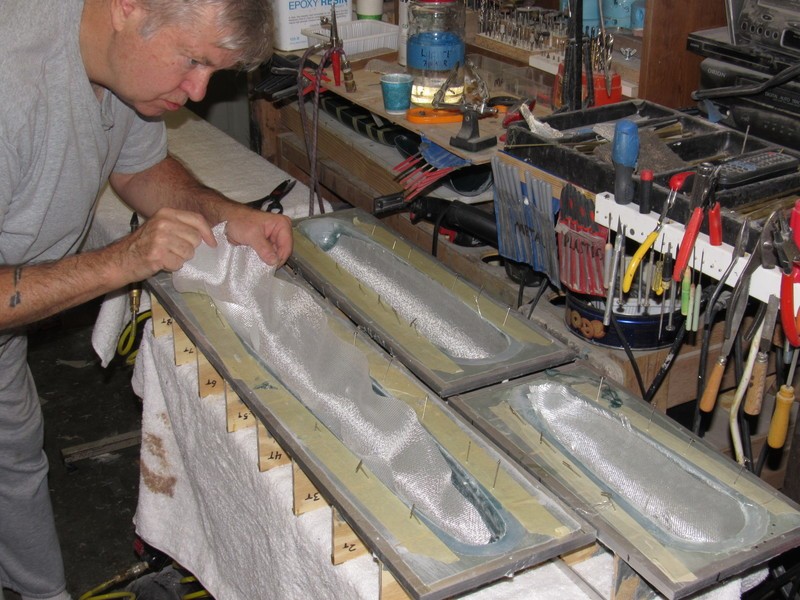
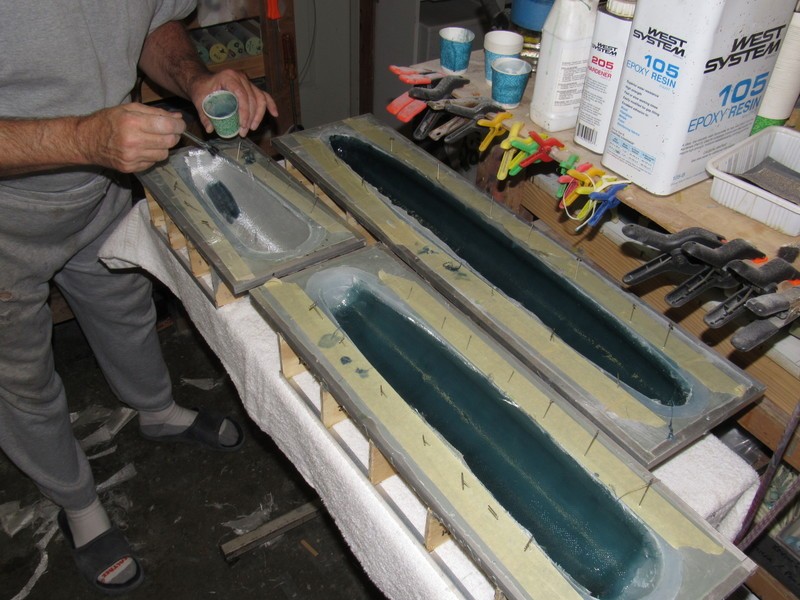
The indexing lip is homogeneous with the rest of the rubber glove-mold used to give form to the hull half. The hull half master with the lip is formed from three-pieces: The hull half master itself, then attached to it the thin indexing board, and to that the stand-off board. The work goes down on a mold-board and the rubber glove-mold built up over the three-element master, followed by the hard-shell mother-mold.
Normal GRP layup is done in the assembled mother-mold and glove-mold tool. And that's it.
A heavily filled gel-coat is applied to the tool where the lip will be formed -- this to radius the right-angle faces between hull edge and face of the indexing lip. Once the sharp edges have been radiused smooth I proceed with a normal gel-coat followed by laminates of glass in the normal manner.


David
Last edited by He Who Shall Not Be Named; 10-29-2018, 04:01 PM.Leave a comment:
-
I saw the D&E video a few times now.....I have a question.......how you integrate the index lip into the hull like the picture below?
it looks like a gelcoat is also applied in the index lips....can't figure it out.
thks, grtz,
Bart
Leave a comment:
-

Leave a comment: