-
If you can cut, drill, saw, hit things and swear a lot, you're well on the way to building a working model sub. -
I found your build. This is kind of like a treasure hunt. So what you are saying is the front of the rectangular opening is 3/16 from datum and rear of that opening is 5/8 aft of front? And rear of the slotted opening is 1" aft of rear of rectangular opening? It looks much closer to the photo in the instructions. THANKS!Comment
-
Yes and you are welcome!
If you can cut, drill, saw, hit things and swear a lot, you're well on the way to building a working model sub.Comment
-
I must acknowledge Tom's good work in finding my errors here and stating the correct locations of those holes. He's helped a lot of folk out in such ways over the years.
DavidWho is John Galt?Comment
-
Tom, when you cut out the above mentioned openings did you use the coping saw? I was considering the small Dremel saw. I need to experiment.
Earlier we had discussed getting the various major hull pieces to fit together satisfactorily, Mine have considerable dimensional variences. I suspect when it is all pulled together, cut and glued it may come out OK.
I looked like you made the major hull cuts with the coping saw also? I have been looking for some thick tape like material to fasten to the cut line to use as a guide. There is some 3M double sided tape that is maybe 1/16 thick I may try.Comment
-
Yes, I did use a coping saw. However, small Dremel would work o.k. too!
On the openings, it was a deep throat saw, I cut a distance away from the edge and used files to finish them. I may have used a spiral saw blade. It is a blade made for cutting wax and can go what ever way you want (or not if you are not careful).If you can cut, drill, saw, hit things and swear a lot, you're well on the way to building a working model sub.Comment
-
I decided to open up the bottom drains a little differently and leave the center bar while removing the side to side gratings.
Last edited by Greevesman; 01-23-2017, 11:36 PM.Comment
-
Cool, you made your build yours! Well done.If you can cut, drill, saw, hit things and swear a lot, you're well on the way to building a working model sub.Comment
-
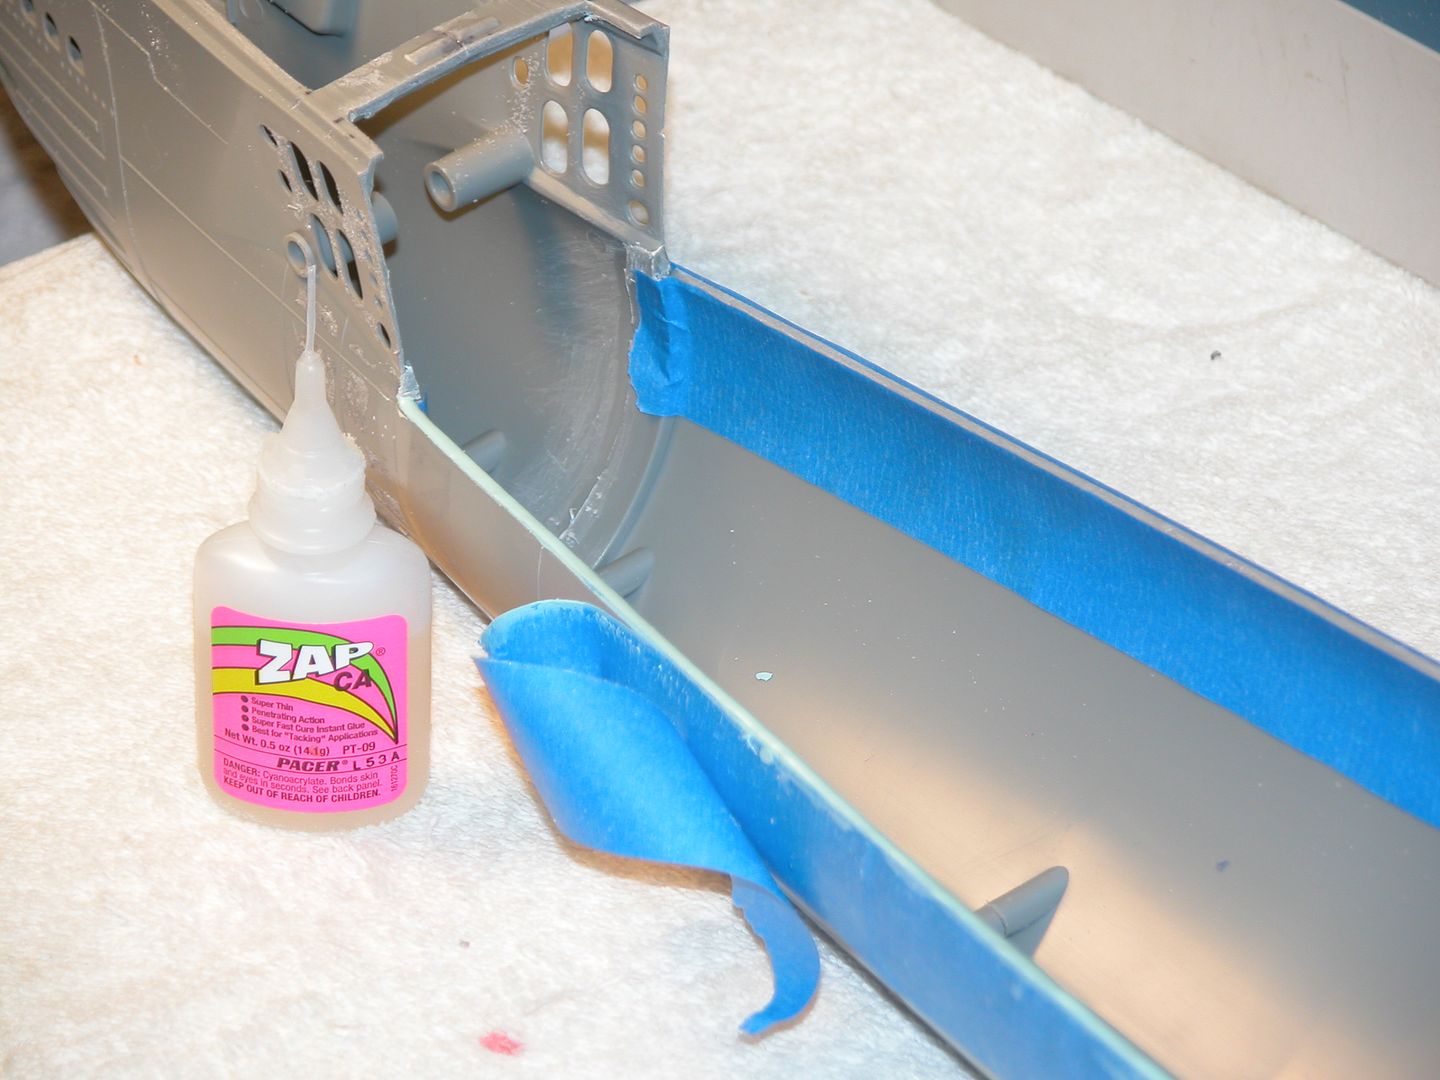
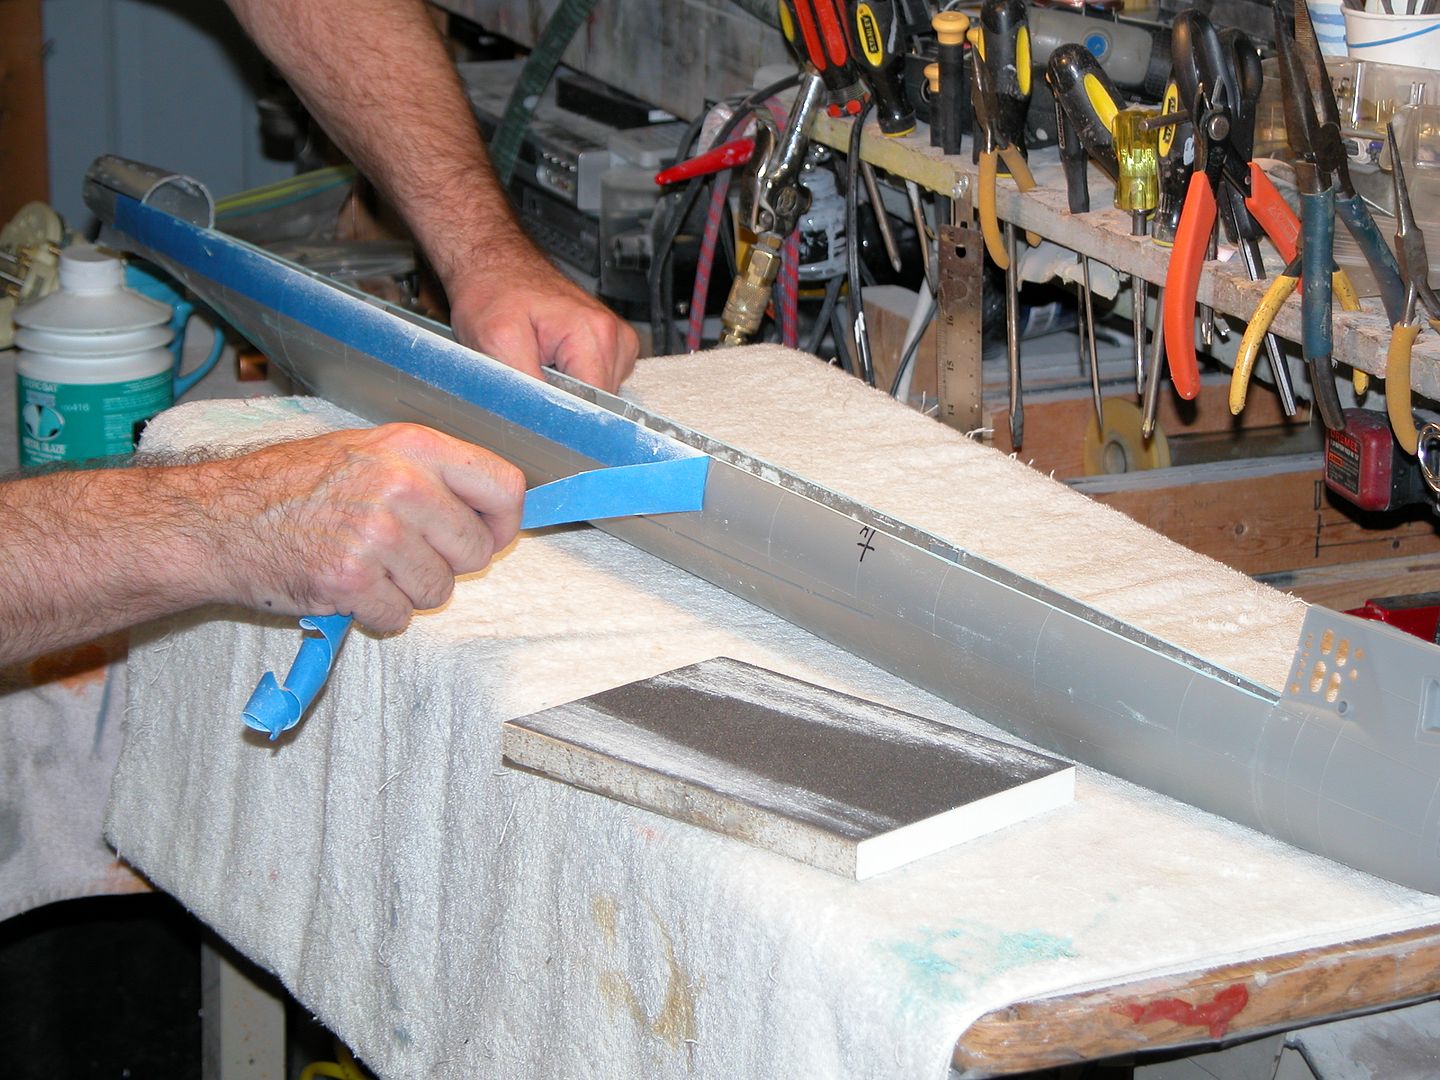
GLUEING THE BOTTOM HALVES. I set up the two bottom halves on top of my table saw. Clamping a piece of wood to make a fence on one side and pulled the saw fence into the other side in order to preload the forward half into the aft. The wood piece was set up so there would be a slight taper. I put a bag of shot on top to force both halves down on to the table. I like to use tape at joints to keep me from smearing glue around. Let it sit for 24 hours. It came out very well. Now for the top pieces
Comment
-
TOP HALF. I mated the top halves per David's manual. Only instead of using rubber bands, I used lots of masking tape, as well as the small tabs of waxed paper. Let it sit 24 hours. It came out very well. When I received the kit and looked at David's instructions I was really concerned by the forward halves being bowed out. One of my earlier posts outlined how I was going to heat the hull and make it fit up. David said I was over thinking the problem and he was correct. The attached photos show both sides of the center joint. I think when I make the after top cut everything will fit pretty well. It seems like one of the Skipjack threads had a mention of using magnets in the locating pins. Has anyone tried that?
Comment
-
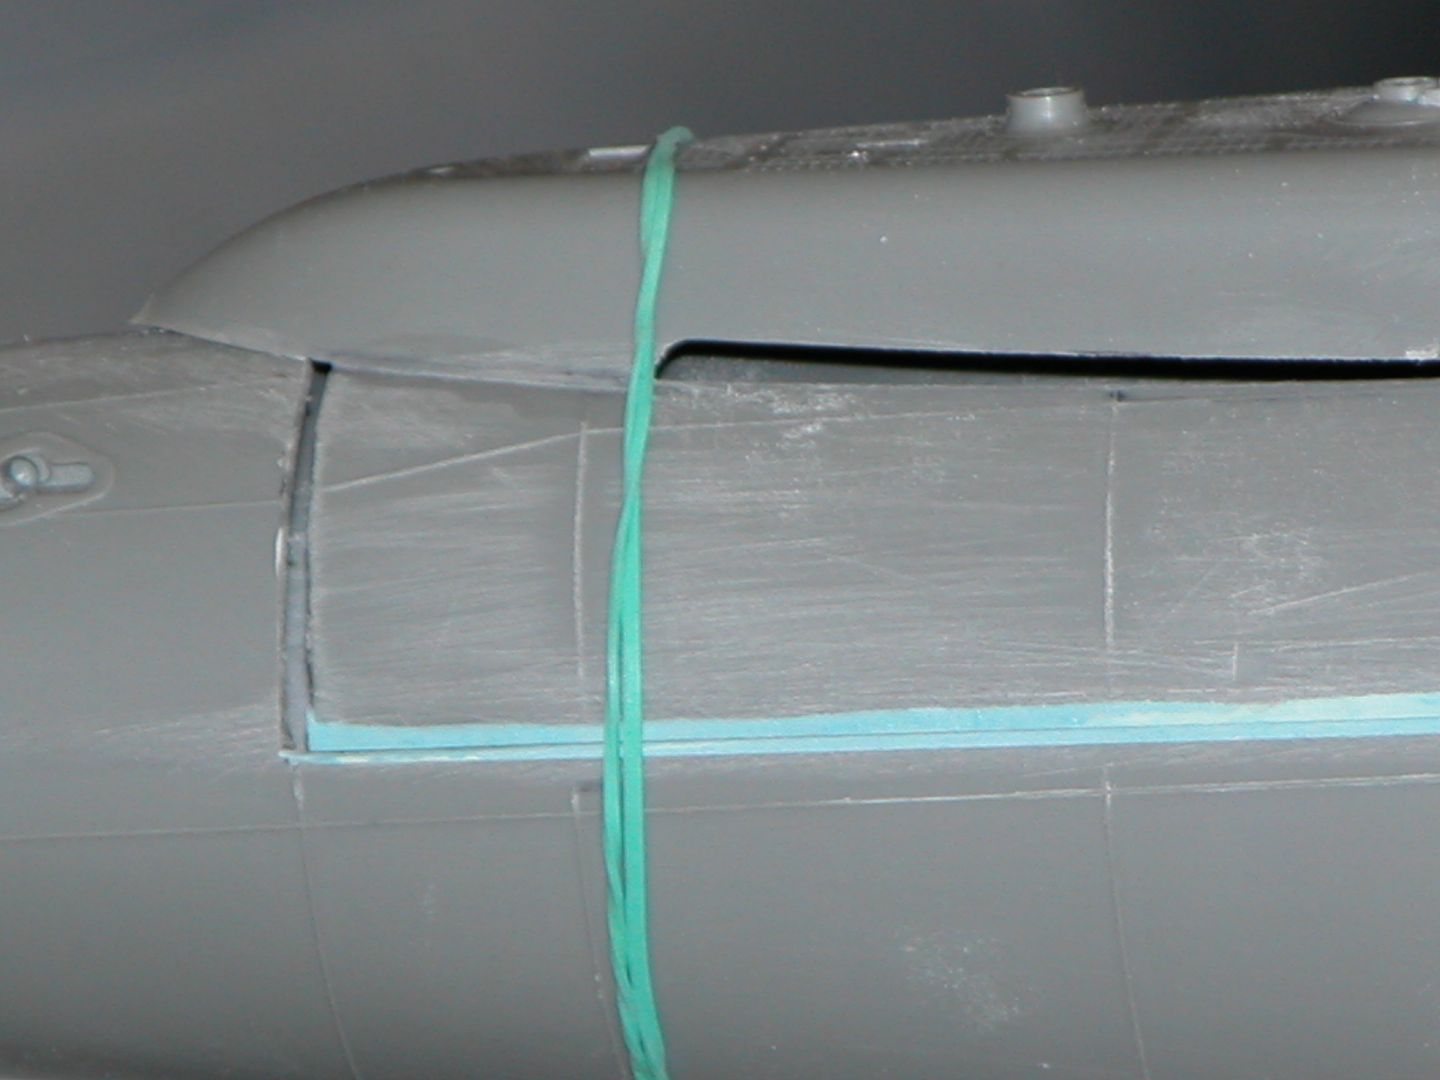
I made the cuts. The forward one came out the best. Two pieces of yellow masking tape, one on each side of the black line gave me a very nice line to cut to. Installed the radial flanges. When assembling it was a little tough to get the two halves to mate so I rounded the tops of the locating pins a bit and beveled the edge of each socket. that helped a lot. Snaps right together now. I still have a bit of a gap on the port rear seam. Maybe .020". Not sure what to do about that. Is shows most at where the gap in the tongue and groove is. Maybe a piece of plastic card inside to hide the gap? Now fairing the hull.
I was reading Matt Thors Permit manual which says after priming "re scribe the details" . Has anyone had to do this? How would it be done? I can see loosing some of the lines as some primers are intended to build up.Comment
-
For the gaps between assembled halves: Assemble the parts; on the outside to the half you wish to build up its edge, lay down masking tape, its edge where you want the eventual built-up edge to be. Take the assembly apart; lay another length of tape on the inside of the part, it's edge even with the edge of the first strip of tape. Mix up and lay in some filler and let cure (screed it down level with the edge of the tape strips before it cures). Remove the masking tape and soak the cured filler with thin formula CA to toughen it up. Sand and check for a tight fit between the assembled parts. Go forth and sin no more!
DavidLast edited by He Who Shall Not Be Named; 02-08-2017, 04:55 PM.Who is John Galt?Comment
-
Thank you Father. I can do that!
What about re scribing the details after priming? Or do I only get one question?
BruceComment
-
Uh oh. Mobius skipjack is a tongue and groove joint. tongue is on the bottom. Gaps are not vey big of very long. Maybe some very slow curing putty and saran wrap on top. Do small areas?Comment
-
LOL. My fault, you did ask that too. Not to worry.
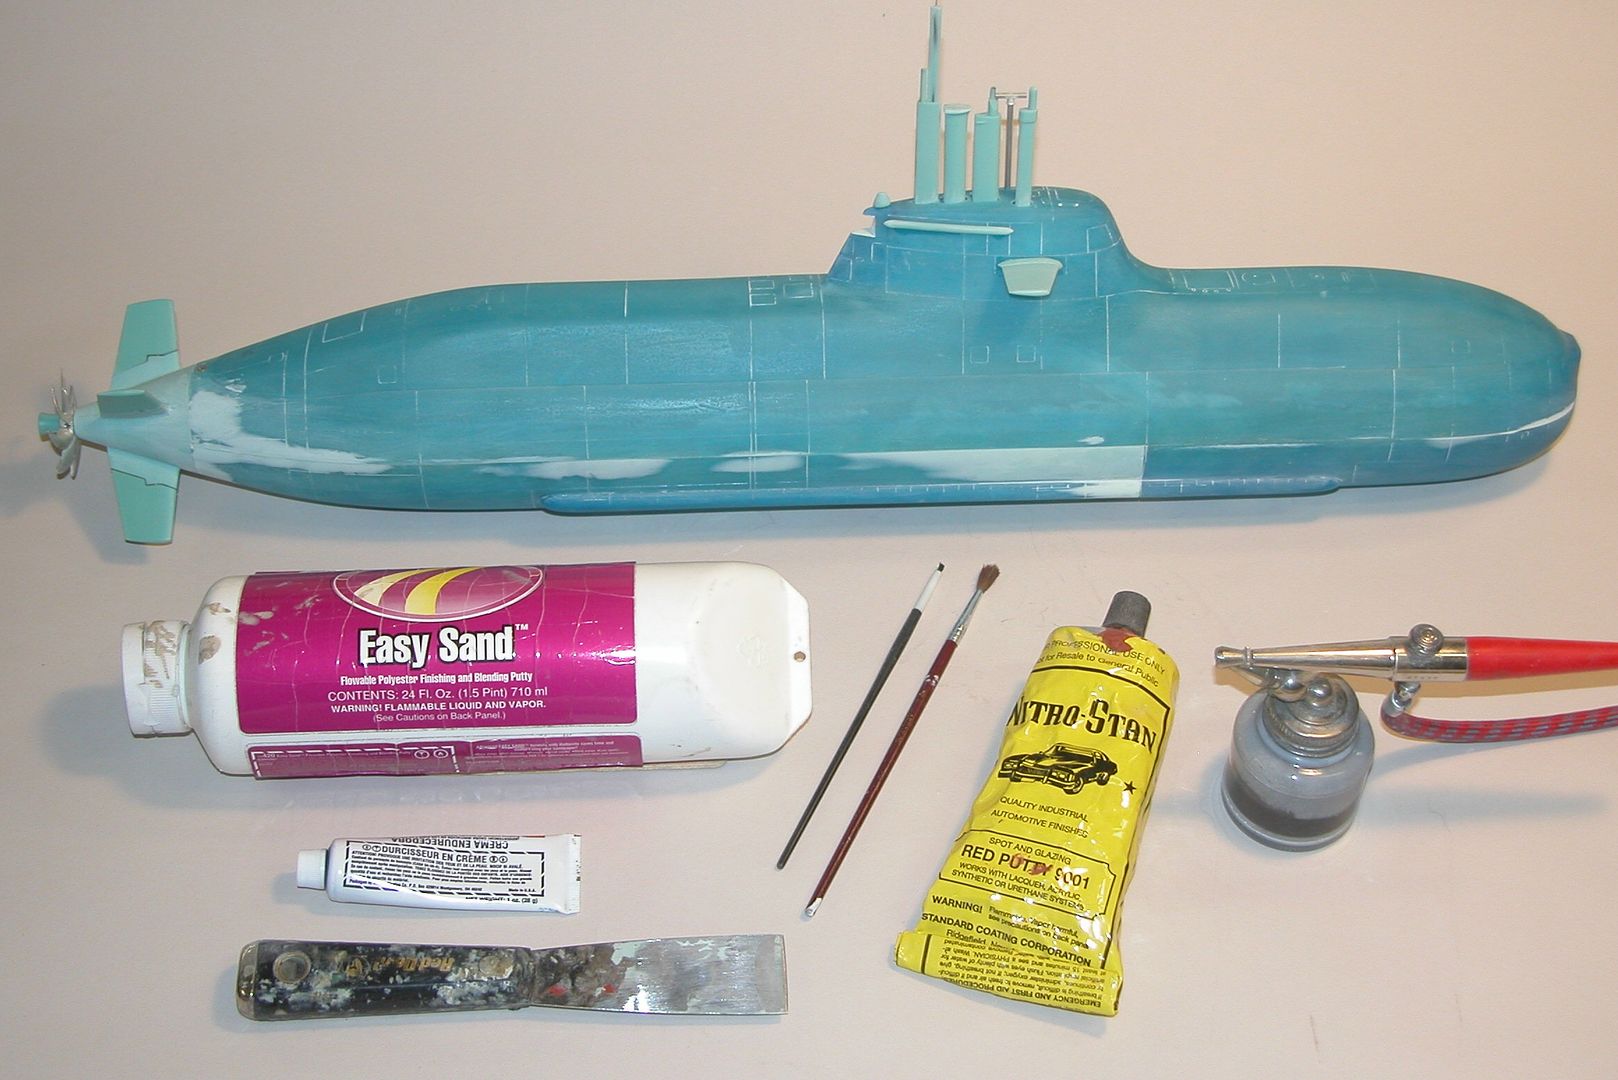
The engraved lines on this kit are already way in excess of scale, so the slight fill by primer, paint, and clear-coat matter little. Only re-scribe if you clobber some such detail with filler or putty. And if you do obliterate some engraving with filler or putty, chase the goo out with a scribe before it hardens.
Example of this are the engraved torpedo tube shutter door engraved lines temporarily covered by putty as I addressed a lot of little pin-holes on the bow of this 1/72 FOXTROT model. I smeared on the filler (air-dry touch-up putty in this case) and quickly came back with a scribe to chase out the putty from the engraved lines while the putty was still wet.

David
Who is John Galt?Comment

 Tweet
Tweet


Comment