1/96 Romeo - Wherefor art thou?

Collapse
X
 
  • Time
  • Show
Clear All
new posts

  • HardRock
    replied
    How did you do the hull drain holes in your Romeos?

    Leave a comment:


  • HardRock
    replied
    Pesky damn Rurrians with their holes in EVERYTHING! I like that Foxtrot a lot.

    Leave a comment:


  • He Who Shall Not Be Named
    replied

    I'm with you. I had the same sad task when I inlayed all the acid-etched limber holes onto the 1/72 FOXTROT model:


    David

    Leave a comment:


  • HardRock
    replied
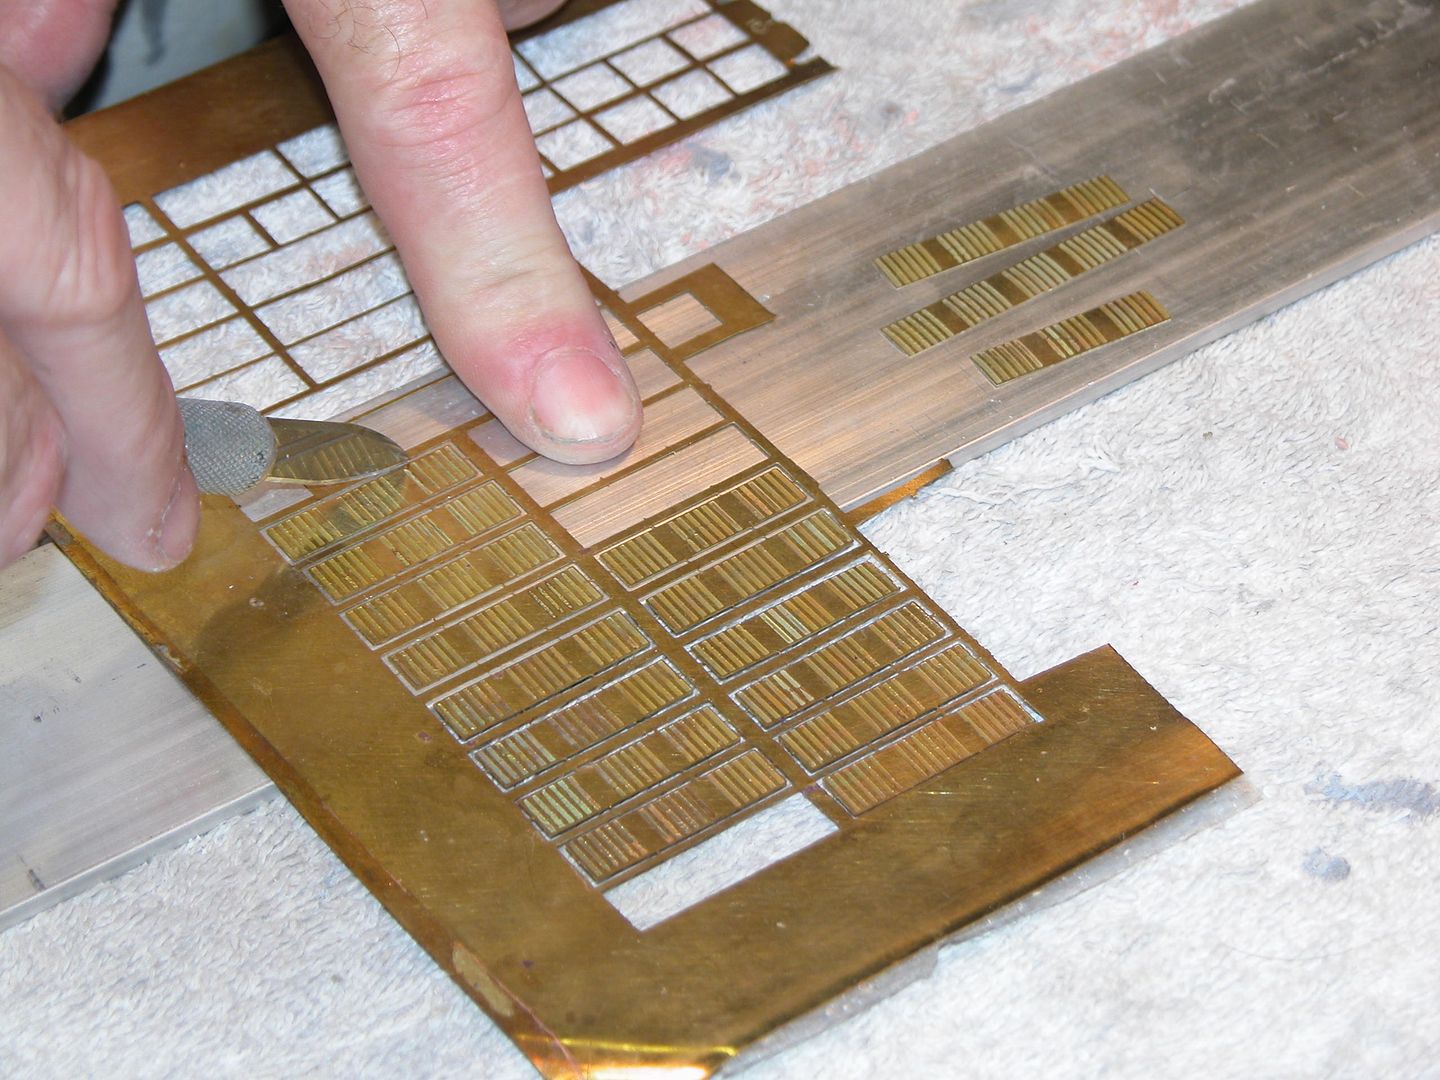
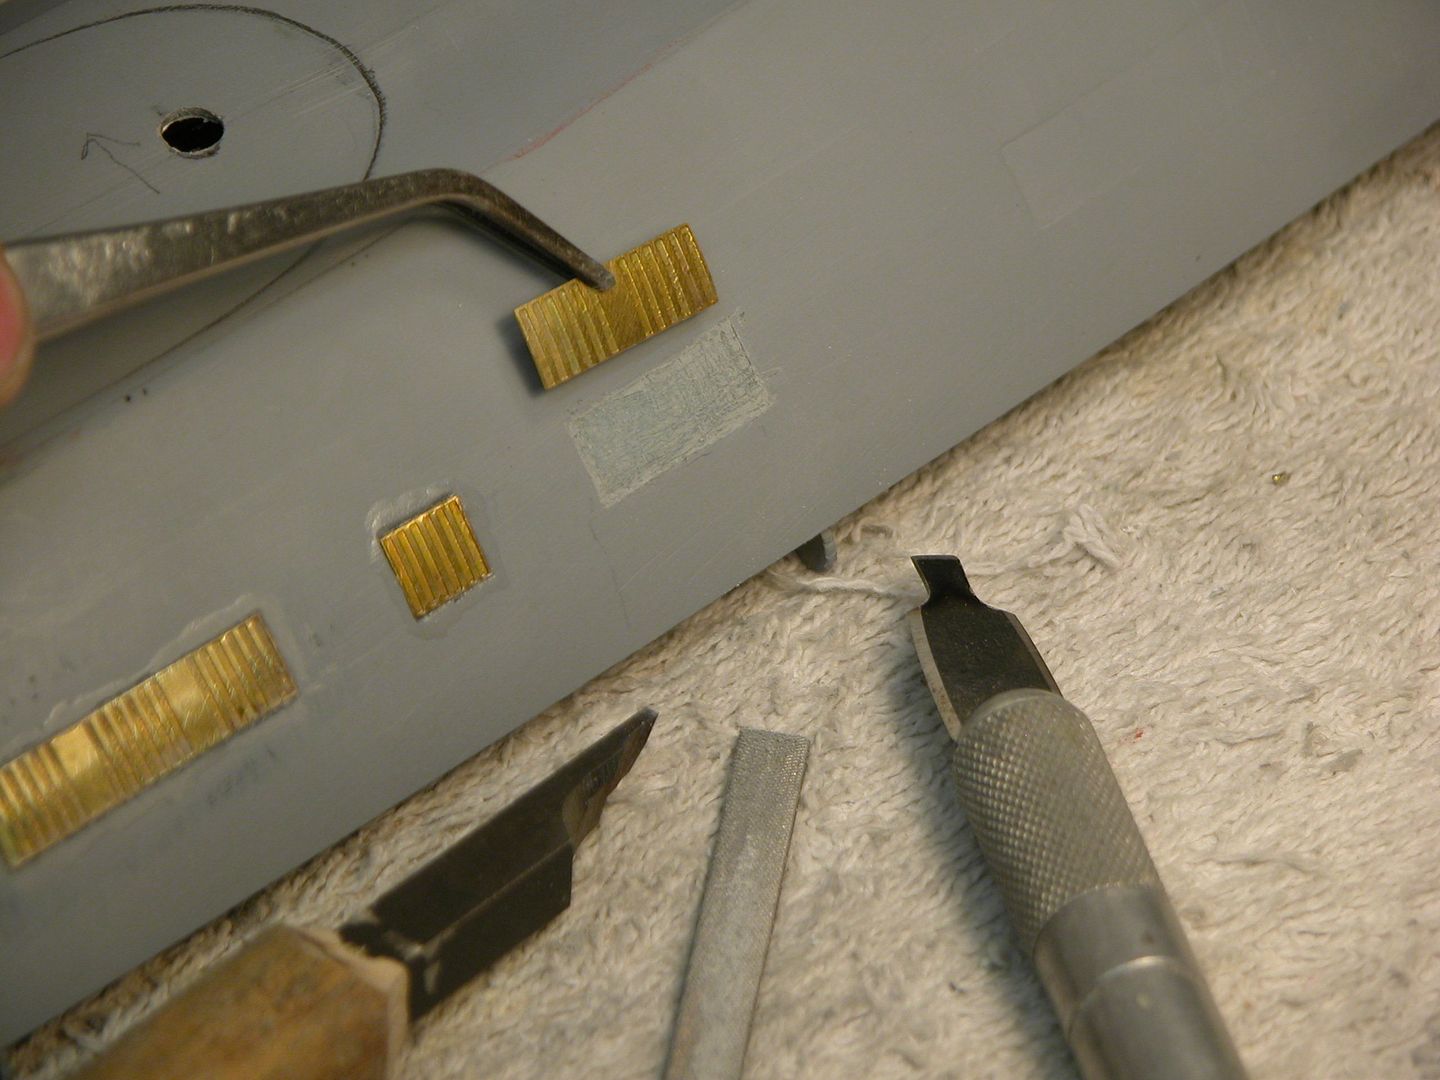
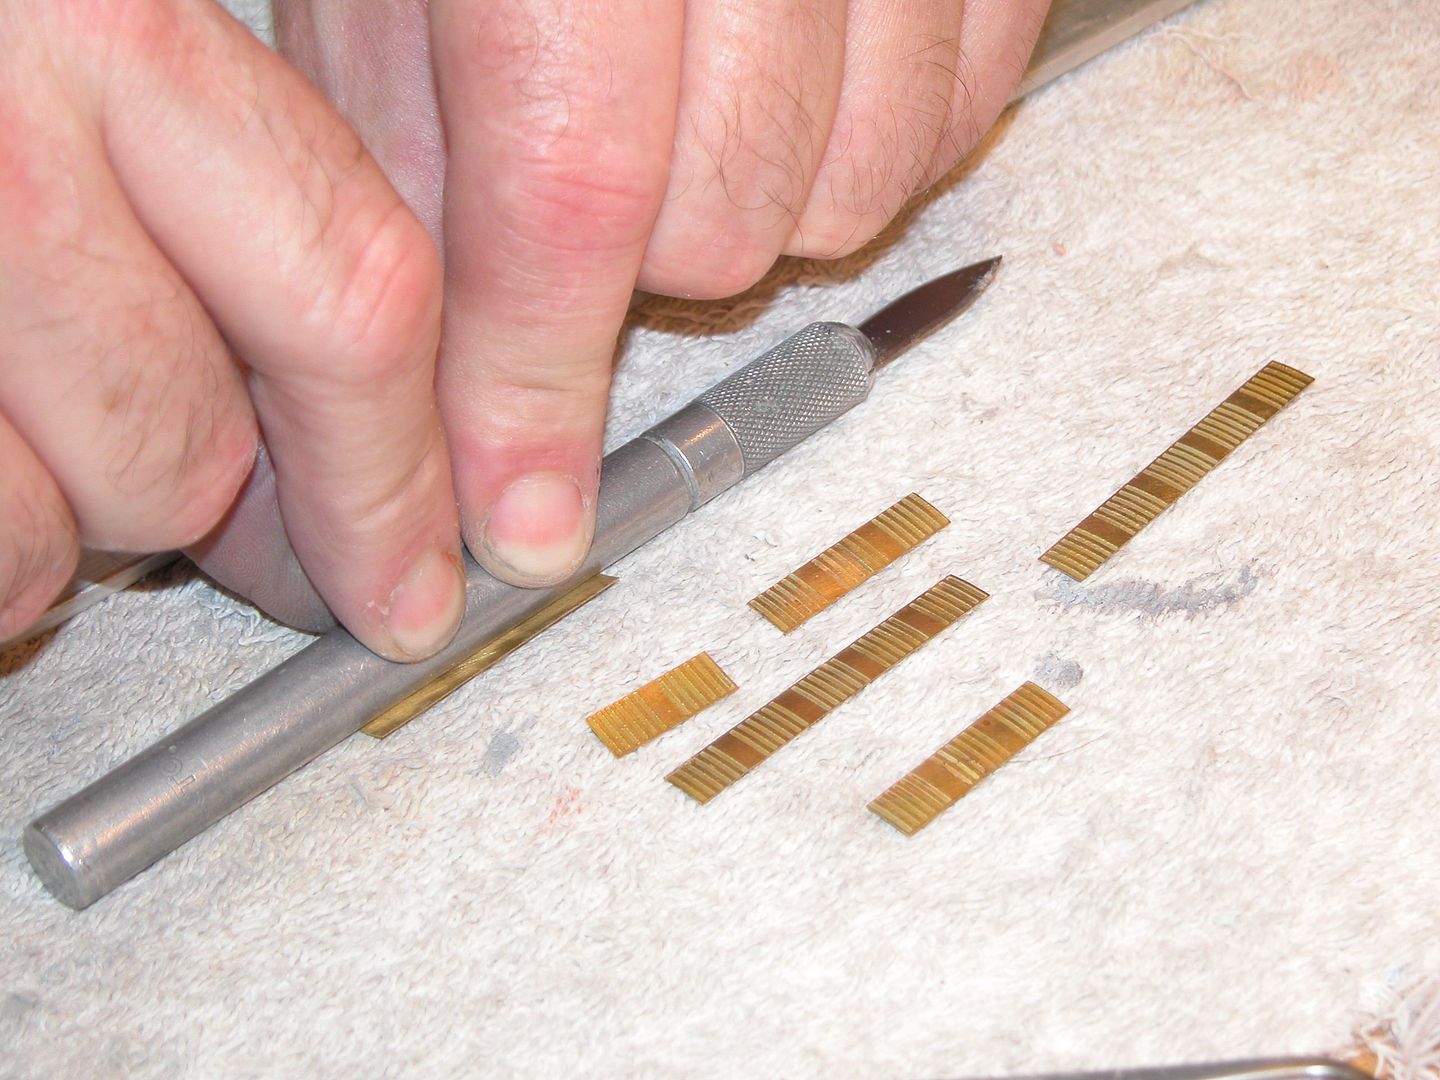
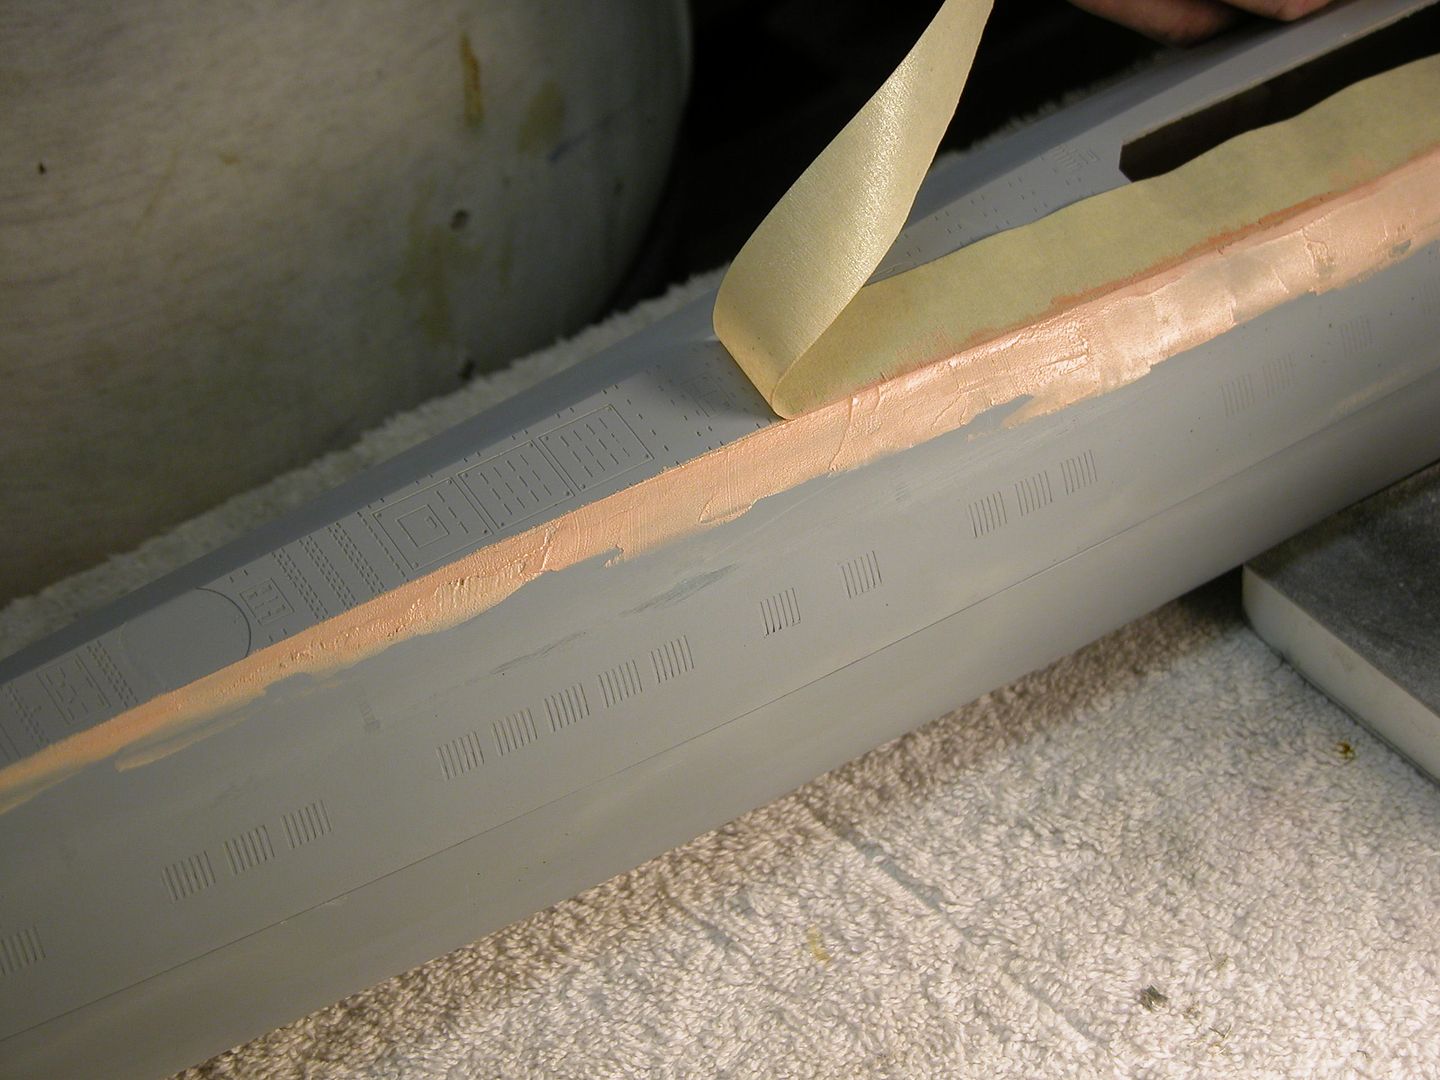
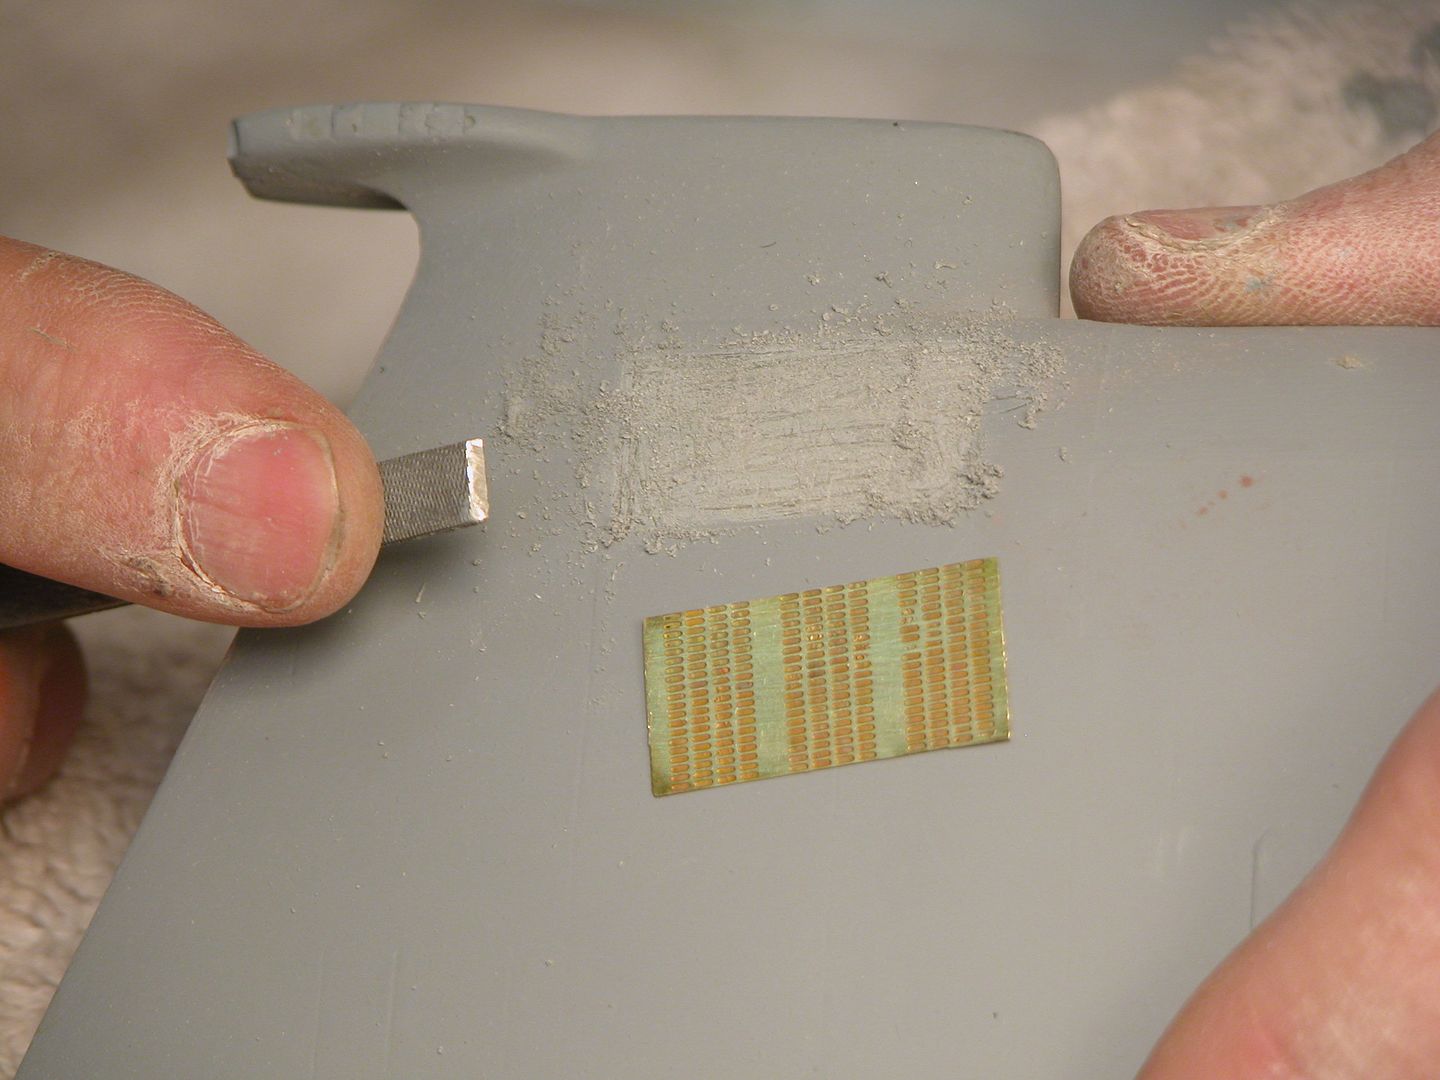
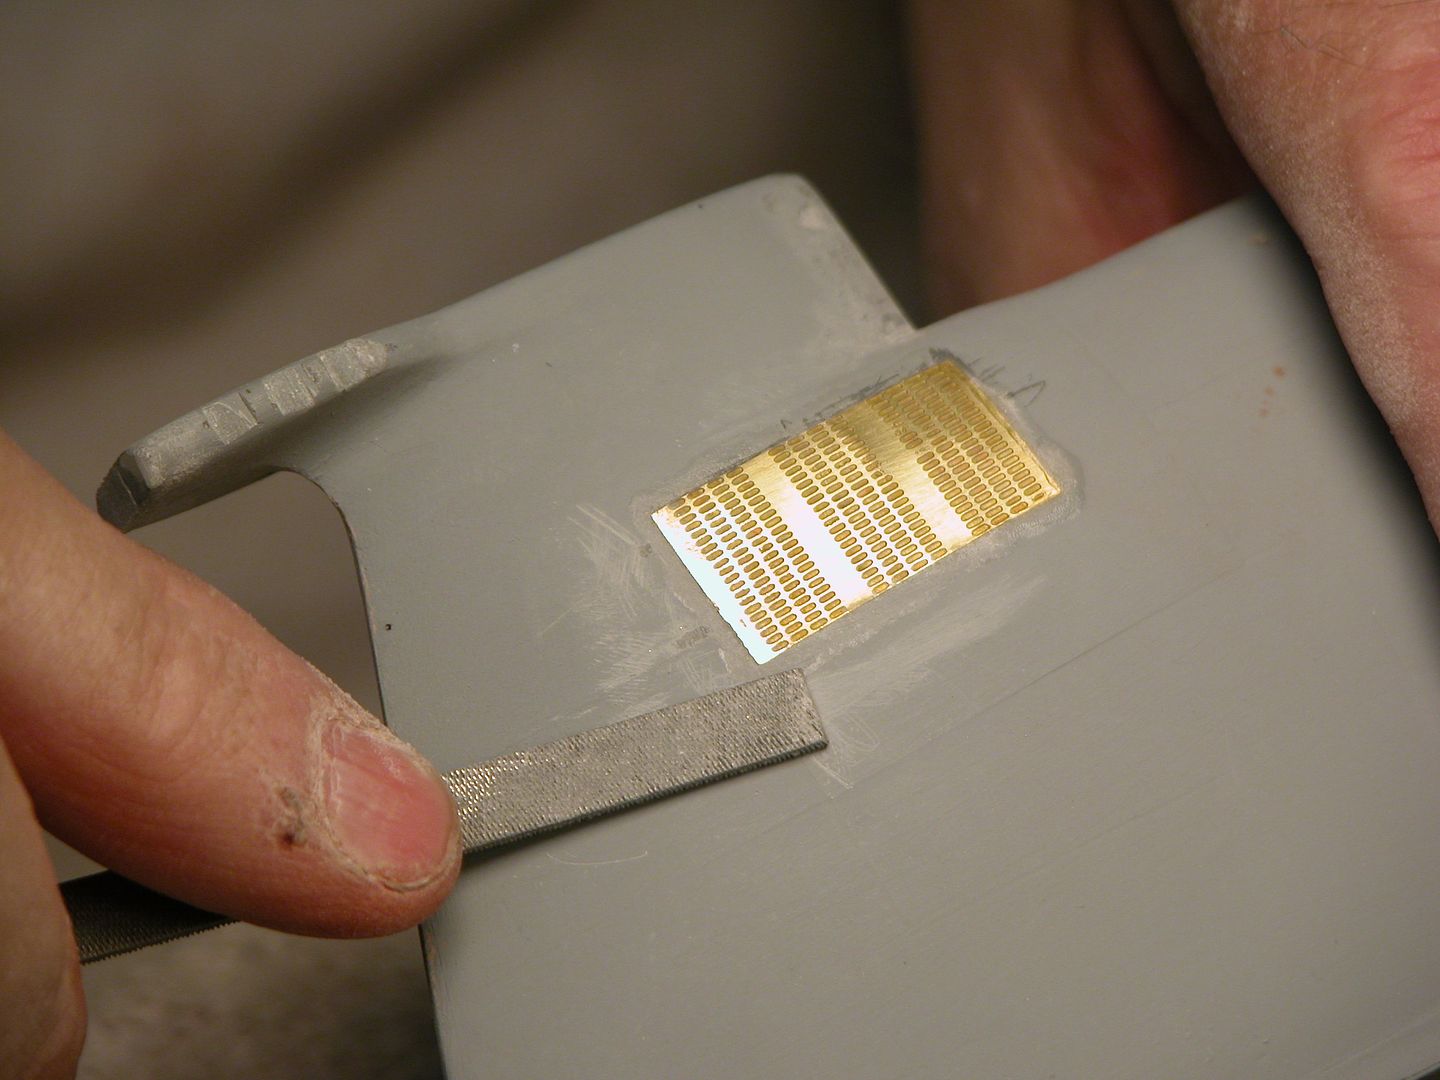
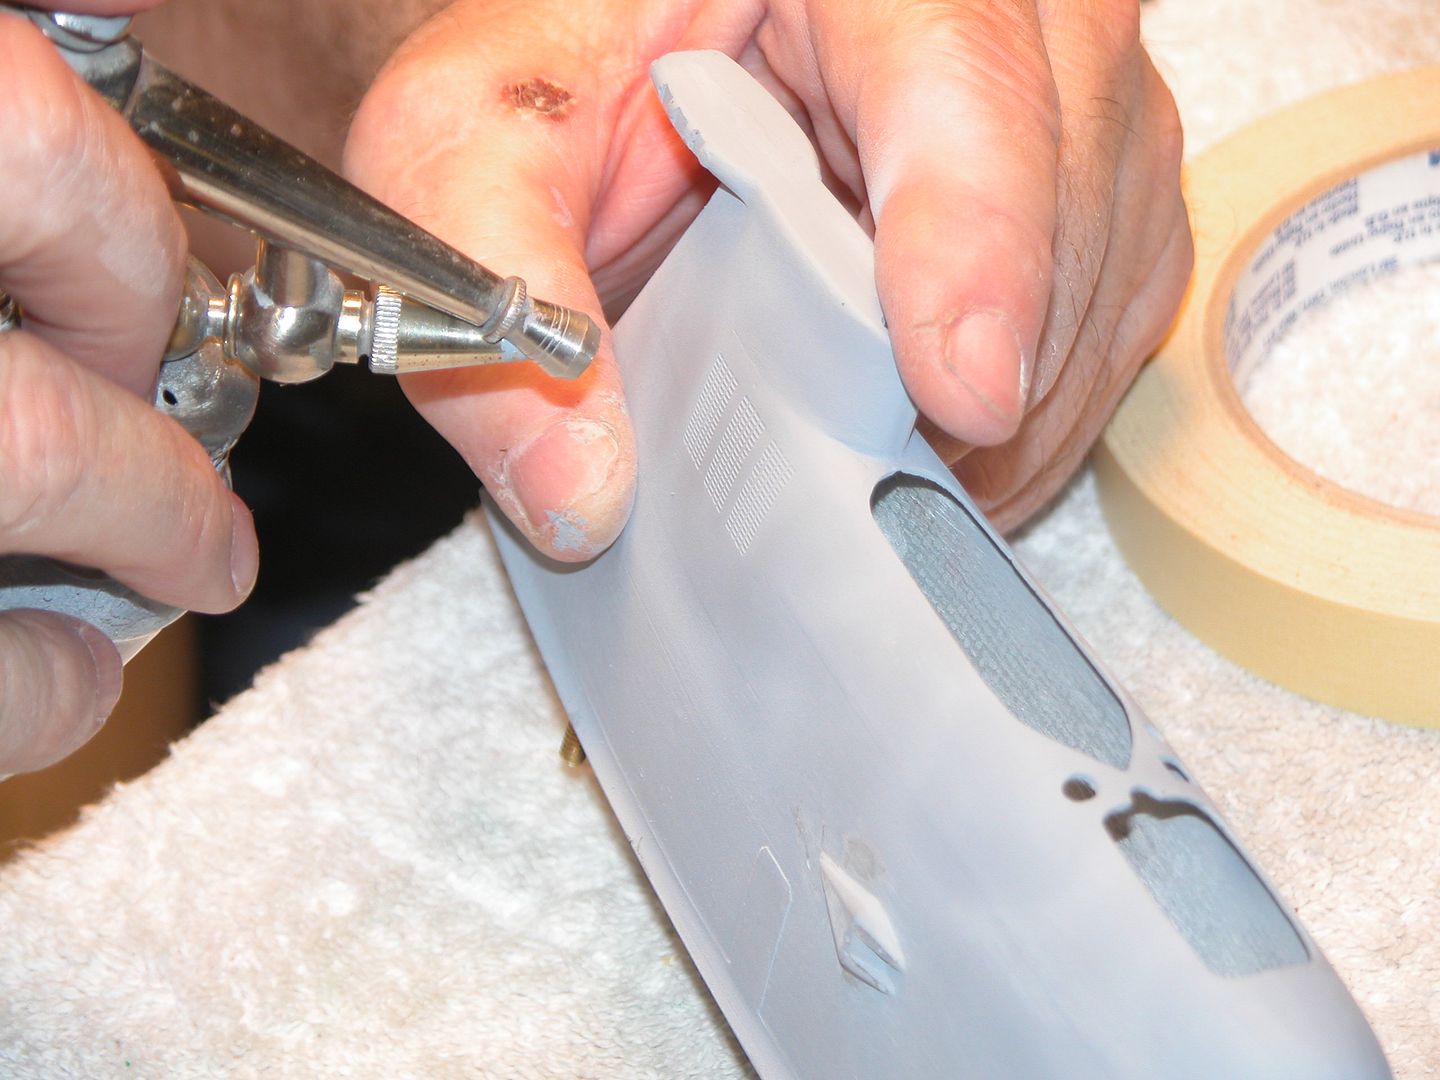
    Time to stick the photo etched brass into the recesses along the hull. Easier said than done. The idea here was that it would be easier to photo etch some brass strips rather than just scribe three hundred small holes. In hindsight the scribing would have been easier. Lessons learned.

    Click image for larger version

Name:	IMG_1049.jpg
Views:	139
Size:	37.1 KB
ID:	118649
    Click image for larger version

Name:	IMG_1044.jpg
Views:	137
Size:	26.0 KB
ID:	118651
    Attached Files

    Leave a comment:


  • HardRock
    replied
    Click image for larger version

Name:	IMG_1037.jpg
Views:	159
Size:	14.2 KB
ID:	118621 
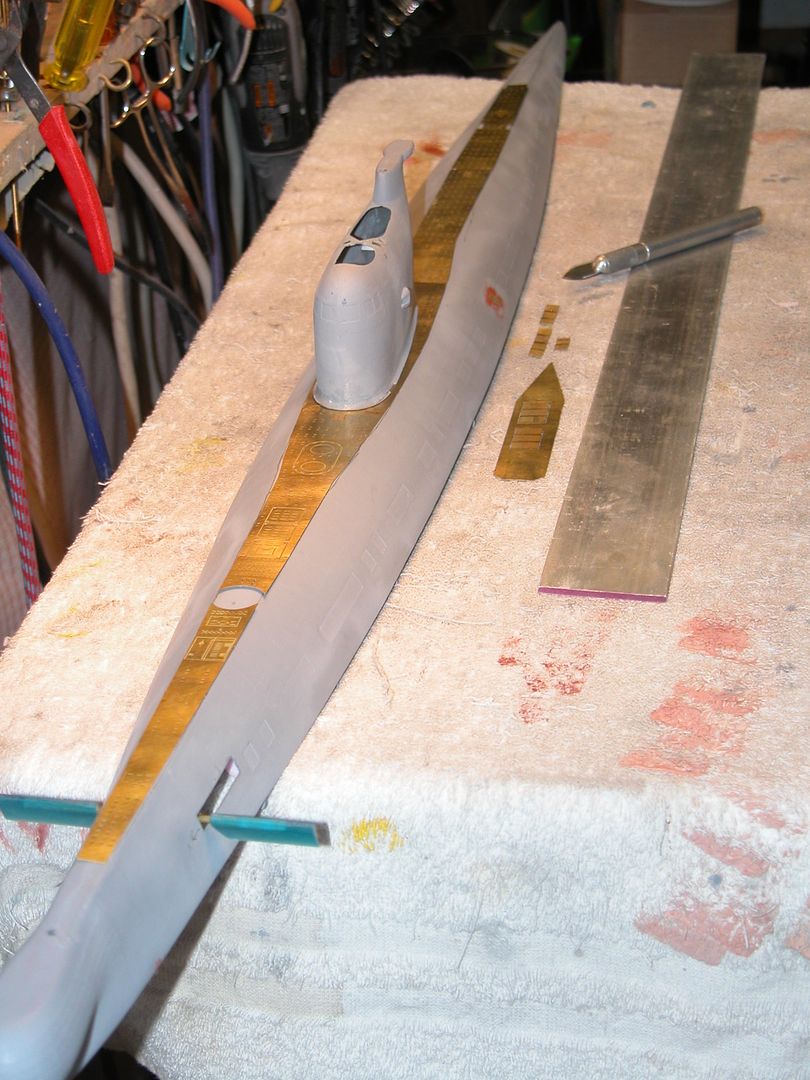
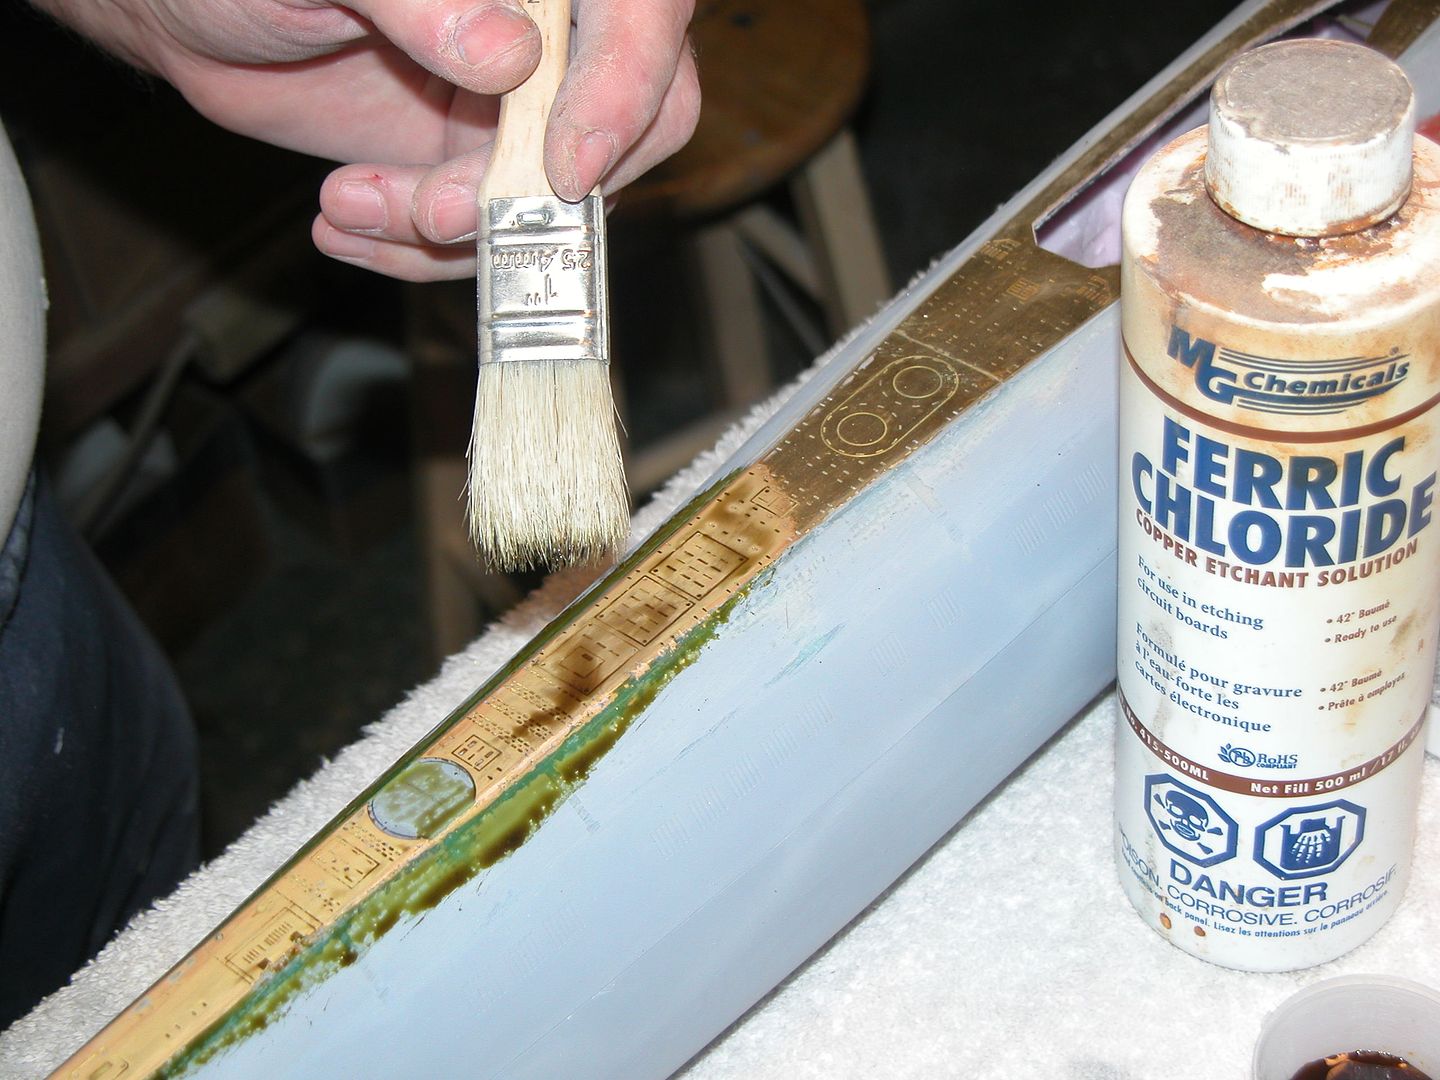
The last week has been spent learing some of the joys of photoetching - a dark and mysterious thing, practiced by the photoetchesti, or as we call them, "those with talents greater than ours". This is seriously frustrating stuff; however, after many failures I have produced a photoetched deck and some vent holes. Hurrah!


    Click image for larger version

Name:	IMG_1038.jpg
Views:	138
Size:	13.6 KB
ID:	118620

    Also managed to fit the rear torpedo tube openings.
    Click image for larger version

Name:	IMG_1040.jpg
Views:	194
Size:	37.2 KB
ID:	118622

    The tube sticking out the back is a temporaty thing that allows me to mount the boat on a turntable and scribe accurate lines etc. Its gets cut out at the last safe moment before moulding. Photoetched deck in place atop (that's one of HWSNBN's words - I just love it) the upper arse end (that's one of my words!).
    Attached Files

    Leave a comment:


  • HardRock
    replied
    Today's effort. A few lines and locations marked. Its too bloody hot in the shed today to do much more.

    Click image for larger version

Name:	IMG_3397.jpg
Views:	143
Size:	126.5 KB
ID:	118450

    Leave a comment:


  • HardRock
    replied
    The offer is always there. Although you'd probably talk yourself to death with me ex-Navy farm manager before I could get a word in edgewise. "Old Fish Heads never die - they simply smell that way."

    Leave a comment:


  • He Who Shall Not Be Named
    replied
    Originally posted by HardRock
    Yep. The pen is a smooth fit. The two holes that it goes through are slightly misaligned so that a light pinch occurs. Squeeze the arms together and the pen floats free; let go and it stays in place. By the way, its called a klunk-o-meter because it goes "klunk" if you throw it from one side of the workshop to the other when its not behaving itself. I also have a boing-o-meter, slap-o-meter, bounce-o-meter and a plop-o-meter around here somewhere.
    LOL. You know ... if we ever hooked up we would never find the time to do any actual work.

    David

    Leave a comment:


  • HardRock
    replied
    Yep. The pen is a smooth fit. The two holes that it goes through are slightly misaligned so that a light pinch occurs. Squeeze the arms together and the pen floats free; let go and it stays in place. By the way, its called a klunk-o-meter because it goes "klunk" if you throw it from one side of the workshop to the other when its not behaving itself. I also have a boing-o-meter, slap-o-meter, bounce-o-meter and a plop-o-meter around here somewhere.

    Leave a comment:


  • He Who Shall Not Be Named
    replied
    Originally posted by HardRock
    Time to lay out some vent locations and such....and so its time to break out the old 4 x 3 rotisserie and the KLUNK-O-METER!
    Click image for larger version

Name:	IMG_1034.jpg
Views:	133
Size:	17.7 KB
ID:	118443 The end plate on this thing is perspex so I can see that its all streight - or, more to the point, so that I can see that it isn't streight and then fix it!

    Click image for larger version

Name:	IMG_1035.jpg
Views:	200
Size:	22.9 KB
ID:	118444
    And this amazing device is the klunk-o-meter. Fully adjustable and with a mind of its own, it sometimes allows me to draw a streight line on a curved boat. So far it looks like everything is square, symetrical and generally in the right place. Thank goodness for Gantu's accurate plans and cross sections. What a difference it makes to have that resource at hand.
    And it looks like your klunk-o-meter features a pen that 'floats' in and out ("the 'ole in and out") so you can rotate the hull and lay down radial lines as well. Smart! I'll steal that idea for sure on a future project. Good stuff!

    David

    Leave a comment:


  • HardRock
    replied
    Time to lay out some vent locations and such....and so its time to break out the old 4 x 3 rotisserie and the KLUNK-O-METER!
    Click image for larger version

Name:	IMG_1034.jpg
Views:	133
Size:	17.7 KB
ID:	118443 The end plate on this thing is perspex so I can see that its all streight - or, more to the point, so that I can see that it isn't streight and then fix it!

    Click image for larger version

Name:	IMG_1035.jpg
Views:	200
Size:	22.9 KB
ID:	118444
    And this amazing device is the klunk-o-meter. Fully adjustable and with a mind of its own, it sometimes allows me to draw a streight line on a curved boat. So far it looks like everything is square, symetrical and generally in the right place. Thank goodness for Gantu's accurate plans and cross sections. What a difference it makes to have that resource at hand.
    Attached Files

    Leave a comment:


  • HardRock
    replied
    Making the emergency beacons.
    Click image for larger version

Name:	IMG_1025.jpg
Views:	139
Size:	19.8 KB
ID:	118429

    The busioness end!
    Click image for larger version

Name:	IMG_1031.jpg
Views:	158
Size:	56.4 KB
ID:	118430

    Leave a comment:


  • Davidh
    replied
    Click image for larger version

Name:	image_33754.jpg
Views:	129
Size:	15.6 KB
ID:	118416Click image for larger version  Name:	image_33759.jpg Views:	1 Size:	7.5 KB ID:	118415
    Click image for larger version  Name:	image_33758.jpg Views:	1 Size:	11.8 KB ID:	118414
    Click image for larger version  Name:	image_33756.jpg Views:	1 Size:	9.4 KB ID:	118412
    Click image for larger version  Name:	image_33754.jpg Views:	1 Size:	15.6 KB ID:	118410
    Click image for larger version  Name:	image_33757.jpg Views:	1 Size:	14.3 KB ID:	118413
    This Boats a cracker...

    I swung by Scott's this afternoon to pick up Resolution after the 'Antipodean weathering Meister' had had his way with her. She now looks like she's been in the Atlantic. Romeo is looking superb, symmetrical neat and just a nice boat. Can't wait to see her in the water. Took Dolgoruki down again to get some comparison shots.

    David H
    Attached Files
    Last edited by Davidh; 12-28-2016, 03:24 AM.

    Leave a comment:


  • HardRock
    replied
    This is the fix for the shaft exit problem. I extended the prop shaft outer tube a bit and made a gland to cover the hull penetration. Also moved the prop housing inboard a few mils to bring the prop shafts closer to centre line. The rear planes are fixed with stainless steel pins.
    Click image for larger version

Name:	IMG_1019.jpg
Views:	193
Size:	47.7 KB
ID:	118407


    Click image for larger version

Name:	IMG_1023.jpg
Views:	152
Size:	44.4 KB
ID:	118408

    Leave a comment:


  • HardRock
    replied
    I have a set of drawings that Gantu sent to me. Very detailed drawings and complete with a full set of sections. I'm pretty sure that the hull curvature is correct because there is a template rigth at the middle of the rear planes and another at about the point that the sharfts enter the hull. I might have just not got the shape of the rear planes right. I'll go back to the drawing and check that before I do anythimng else.

    Leave a comment:

Working...