
 Tweet
Tweet
Thank you Mark for the photos, I so enjoy this sub being built. I knew of the valve, it was in a old plan, but I did not know the free access were the only ones open all he time. So, I just cut them all open.
-
If you can cut, drill, saw, hit things and swear a lot, you're well on the way to building a working model sub. -
Dave, can you tell me how you turn the linear action of the servo into a rotary action needed to deploy the bow planes. I have not seen any info on it in the videos. ThanksIT TAKES GREAT INTELLIGENCE TO FAKE SUCH STUPIDITY!Comment
-
I found it. Its not on the videos but it is in the W.I.P. part 31 Thats pretty cool. I never would have thought of that.IT TAKES GREAT INTELLIGENCE TO FAKE SUCH STUPIDITY!Comment
-
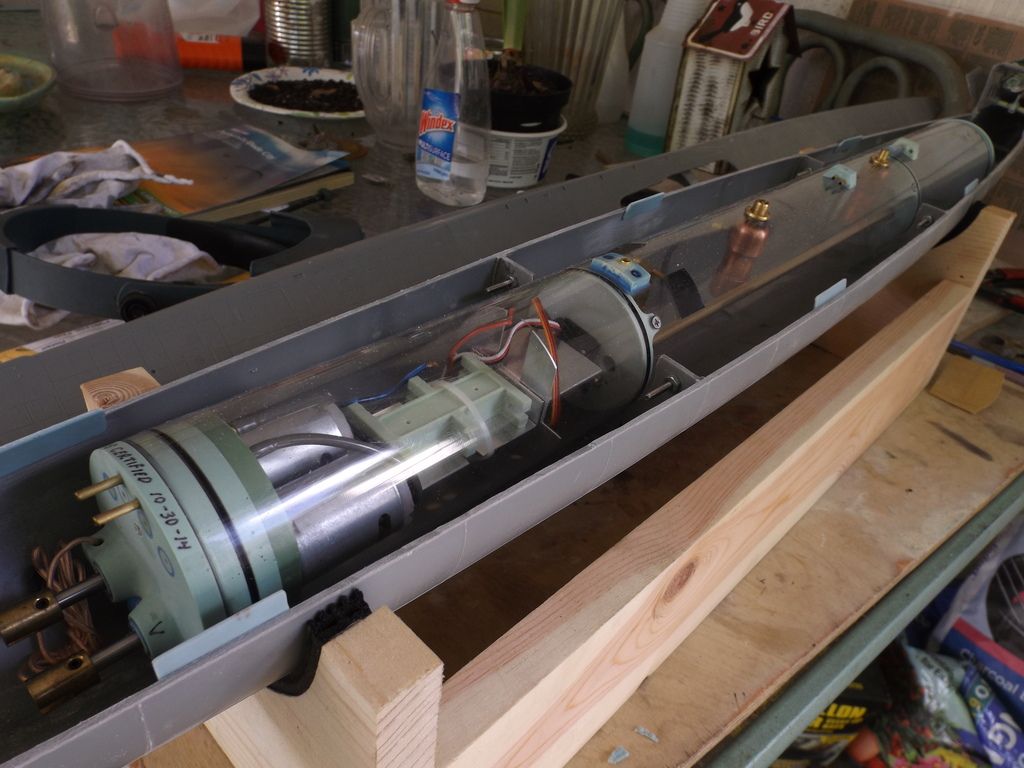
I located the Subdrivers ballast tank center 1" ahead of the measured center of the boat. At that point I installed the holding pin that secures the subdriver. The forward SAS hose connection hits right on the upper part of the forward bulkhead that saddles the Subdriver to such a point that youd have to cut it in two to get clearance. So I added some reinforcing up higher before I cut almost thru to achieve clearance. My Evercoat metal glaze did not react well to Lacquer thinner to thin it down. As it was ,it was practically too thick to use. So I discarded it. Almost ordered more but there is a real problem of getting fresh product. Evercoat says it should be discarded after a year. The last tube I bought was 5 years old when I received it. No wonder Ive been having all kinds of problems with my fill jobs.
So I went down to the auto parts store and bought some Bondo. It was nice and fresh and I can already see the difference. So I spent some time filling and sanding. Caswell has received the photo etch kits for my Gato and are sending them out to me right away.Last edited by greenman407; 04-25-2016, 05:40 PM.IT TAKES GREAT INTELLIGENCE TO FAKE SUCH STUPIDITY!Comment
-
I must say that after watching four out of the five DVDs about the Gato construction, I wished I had watched them about 5 or 6 years ago. The quantity of tips and tricks David shows you in the construction of Mikes Gato is worth literally Hundreds of dollars. They would have saved me much work and many head aches. Even If you are not building a Gato, I recommend that you buy them and watch them. They are More than worth the money and the time. Also very entertaining,.
If you are building a Gato or will build one I recommend that you watch them all the way thru before starting on your model. It will save you some mis-steps. Also at the same time, print out the W.I.P.(work in progress)articles from the Caswell website and use them together with the videos for a smooth and trouble free build. Listen to the voice of experience. Wink WinkLast edited by greenman407; 04-25-2016, 05:49 PM.IT TAKES GREAT INTELLIGENCE TO FAKE SUCH STUPIDITY!Comment
-
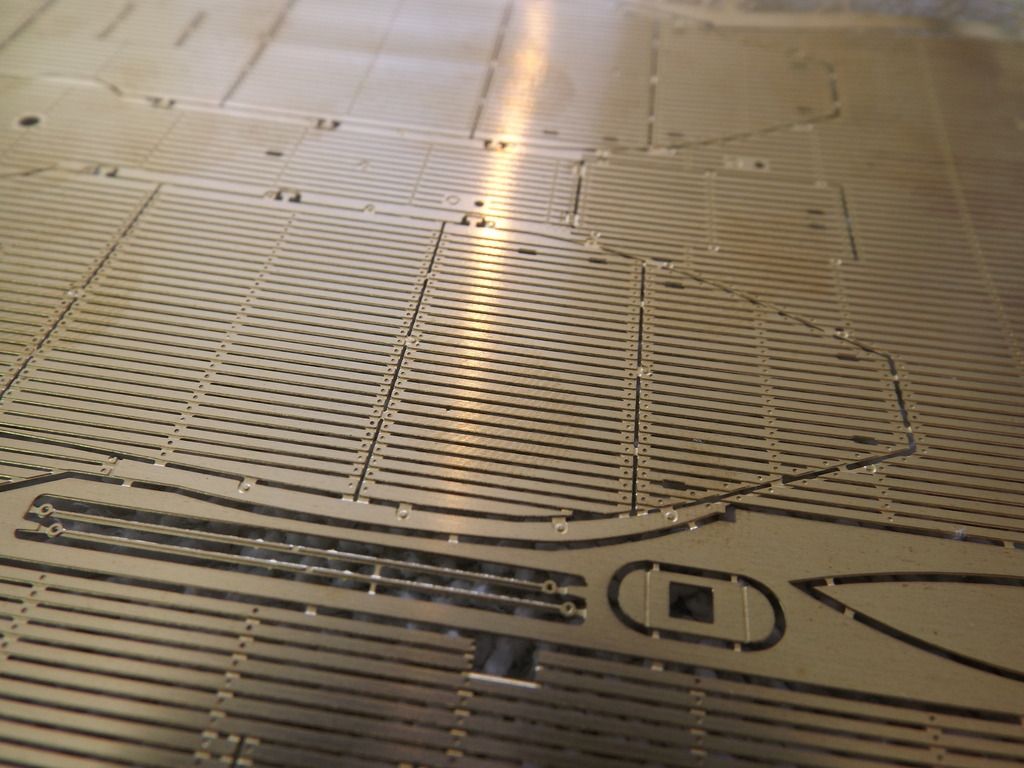
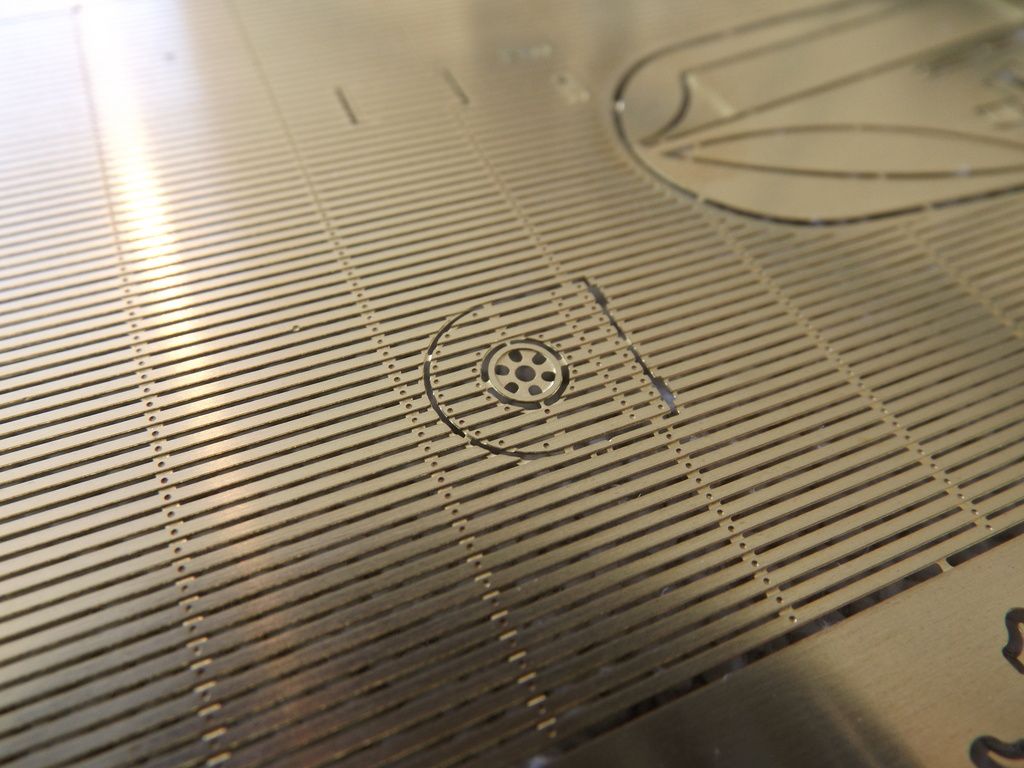
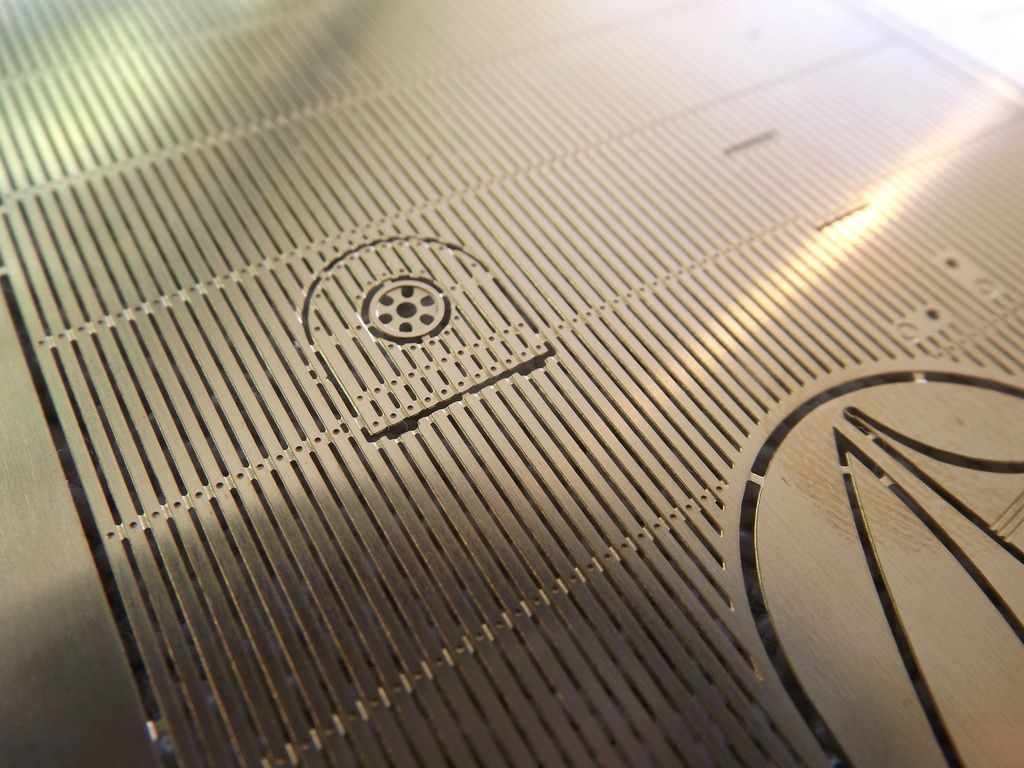
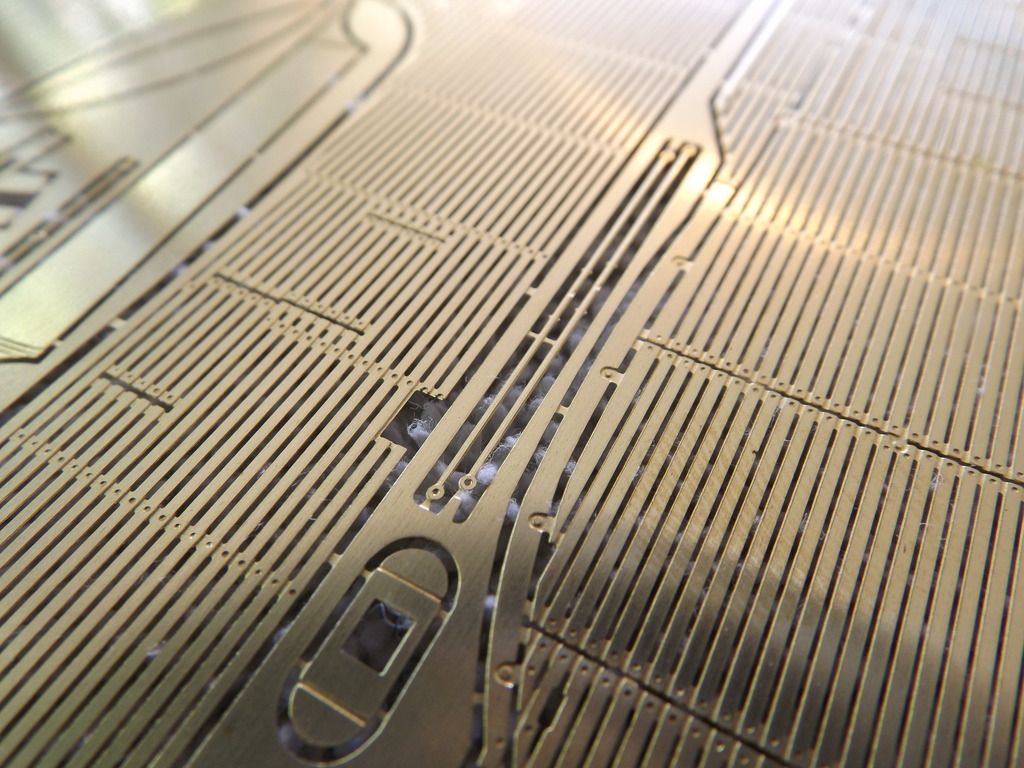
After receiving the photo-etch kits that I ordered from Caswell for the deck, middle ,bow and stern, I was so impressed that I wanted to show you some of the detail. Crisp, Clean and perfect detail. They are .008(8 thousandth) in thickness. Hardly noticeable. So my plans are to carefully, carefully...........did I say carefully..............CA them to the deck. But that will be down the road a bit. But first I will need to cut down all the protruding details on the existing Revell deck so it will sit flush. Also, today I installed these little tabs that come in the type 23 fittings kit. They are a perfect radius for the Gato. I only needed six of them to give the hull good deflection support. I am now engaged in body filler application and sanding offending areas and will be filling the seems between upper and lower cut.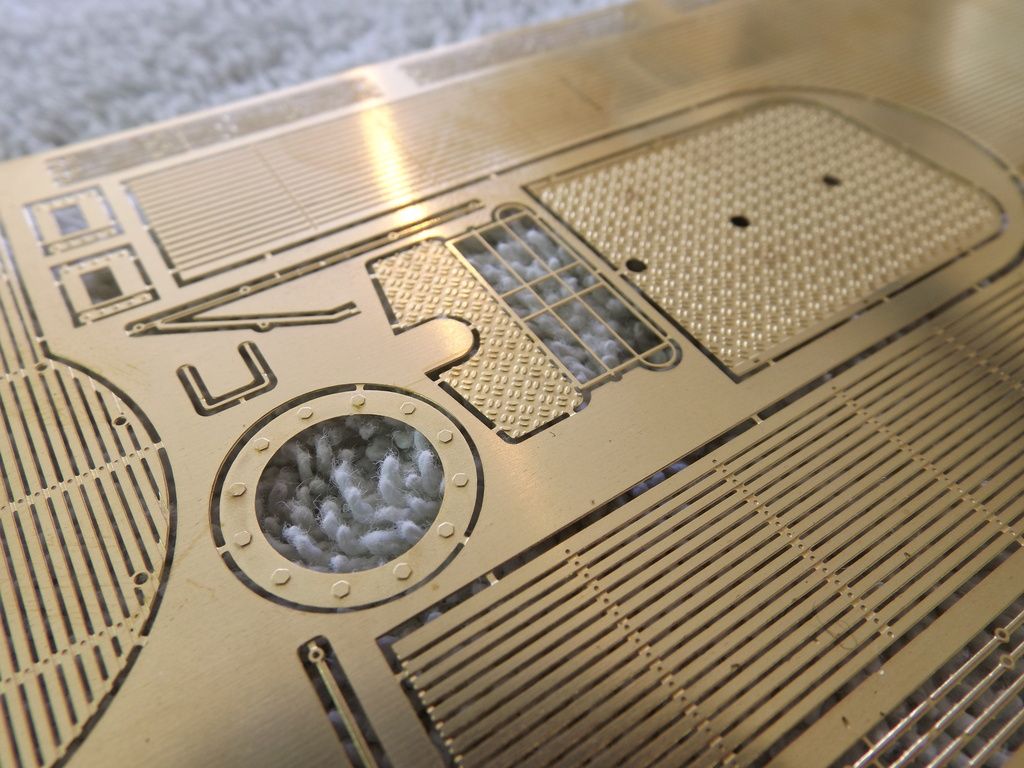
 Last edited by greenman407; 05-02-2016, 04:15 PM.IT TAKES GREAT INTELLIGENCE TO FAKE SUCH STUPIDITY!
Comment

Comment