It has an interesting motor bulkhead that has the gear reduction internal. Also, you can see the SAS hookups for the front and rear compartments. The Ballast tank is huge. It measures 11&3/4" O-ring to O-ring. The front end cap has a few holes drilled into it, I assume for hooking up servos to things like bow planes and torpedo tubes.
ME TOO 1/72 GATO
Collapse
X
-
-
I received my conning Tower from East Coast Armory/Iron Bottom Sound. Its something to start with. Its by NO means in the same class as Davids sails thats for sure. Daves sails are ready for primer and install. These sails need work......but the basic shape and stuff is there. The cast in rivets are nice, but by the time its body filled and sanded down to fill depressions and faulty form work, they will be gone. Such is life. Pictures to come.IT TAKES GREAT INTELLIGENCE TO FAKE SUCH STUPIDITY!Comment
-
Mark,
I do not know if it is East Coast Armory or not, but one of the vendors makes their sails very heavy and this. Is this one like that?If you can cut, drill, saw, hit things and swear a lot, you're well on the way to building a working model sub.Comment
-
Yes it is. At least half of it is solid. Same as last time I'll have to spend some time hollowing it outIT TAKES GREAT INTELLIGENCE TO FAKE SUCH STUPIDITY!Comment
-
Here we go with some pictures. As I said, its something to start with. It comes with quite a few pieces not shown here.
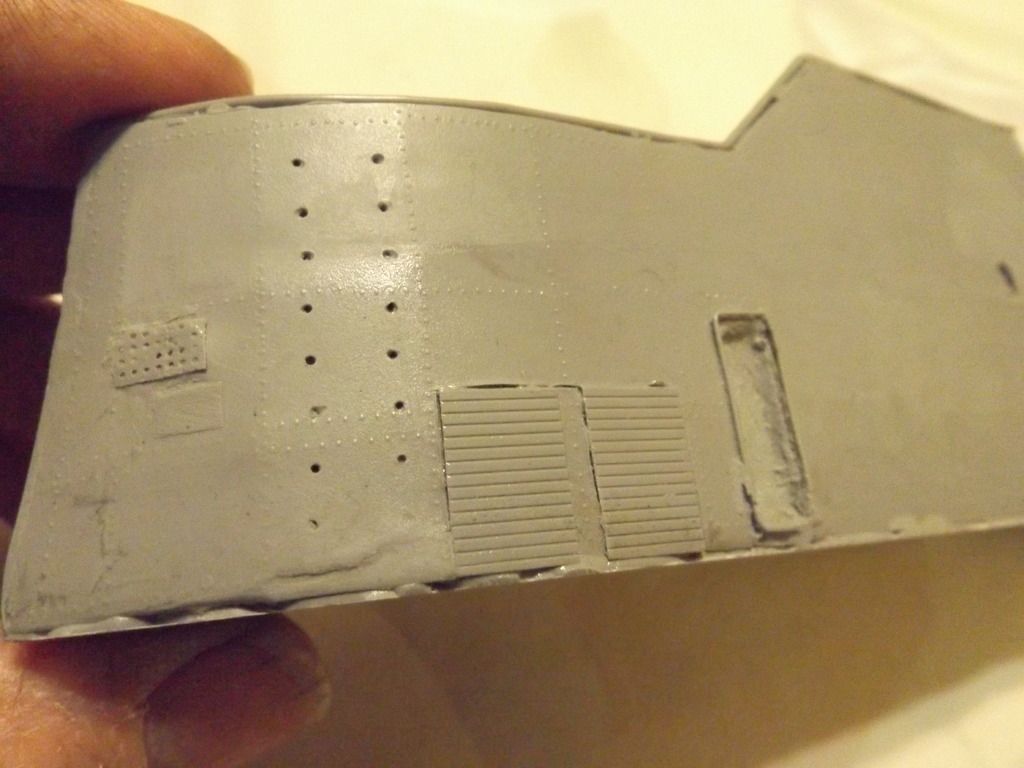
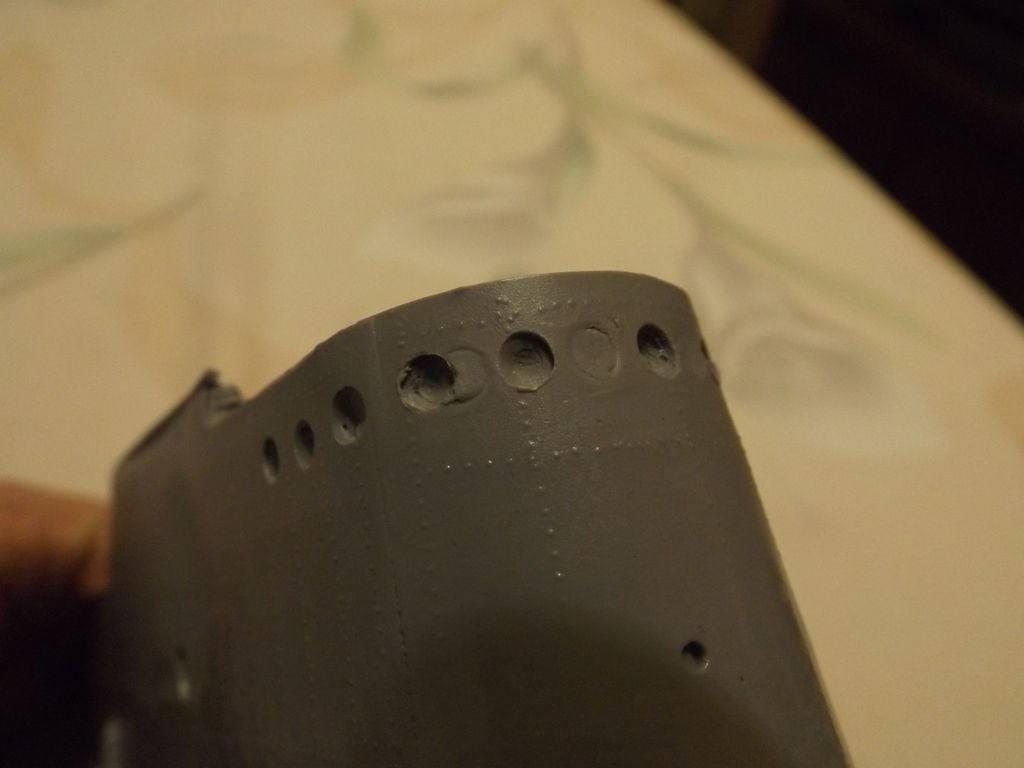
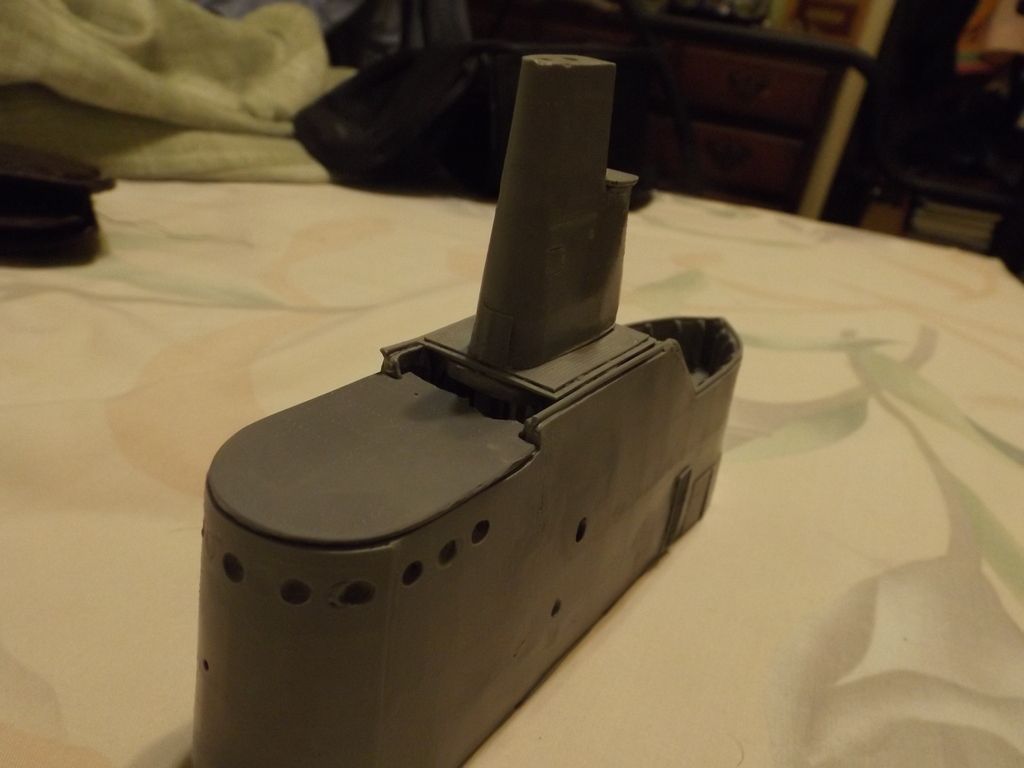 IT TAKES GREAT INTELLIGENCE TO FAKE SUCH STUPIDITY!👍 1
Comment
-
Thanks The sail comes with plastic or resin masts. They will be light enough me thinksIT TAKES GREAT INTELLIGENCE TO FAKE SUCH STUPIDITY!Comment
-
Just a little mini update. I placed an order with Caswell for the instructional DVDs, as well as the pre-made ballast weights, the templates for the drain holes, and the photo-etch set and the fittings kit. As far as the conning tower goes I started hollowing out the interior from the bottom to reduce weight as it comes solid and feels like a brick. Once that is done I will true up the bottom surface with a long sanding board, then on to sanding it down to true it up and then on goes the Evercoat to fill in the depressions. The portholes on the front face of the conning tower are a mess! They will have to be filled in , properly located and marked and then drilled out. If I fill them in with body filler, then they will be more difficult to drill. So Ill fill them in with a gel epoxyLast edited by greenman407; 01-21-2016, 09:13 PM.IT TAKES GREAT INTELLIGENCE TO FAKE SUCH STUPIDITY!Comment
-
Today I continued on with the conning tower rebuild. I finished hollowing out the main body using a cutting tip on my Dremel with a flexible wand. The dust created by the cutting operation is chocking and is such a mess. Im glad thats over. I then took a sanding block to the sides to straighten up and true the supposed to be flat surfaces. Now I can see the areas that need some body filler. Im confidant that we will have a Silk Purse out of this Sows ear when Im done. It is now noticeably lighter in weight. I think thats important.IT TAKES GREAT INTELLIGENCE TO FAKE SUCH STUPIDITY!Comment
-
Just received word that everything is shipping today from Caswell except the photo etch deck which will take a couple of weeks. OH GOODY GOODY GUM DROPS! I love to get new stuff! I will show you everythingIT TAKES GREAT INTELLIGENCE TO FAKE SUCH STUPIDITY!Comment
-
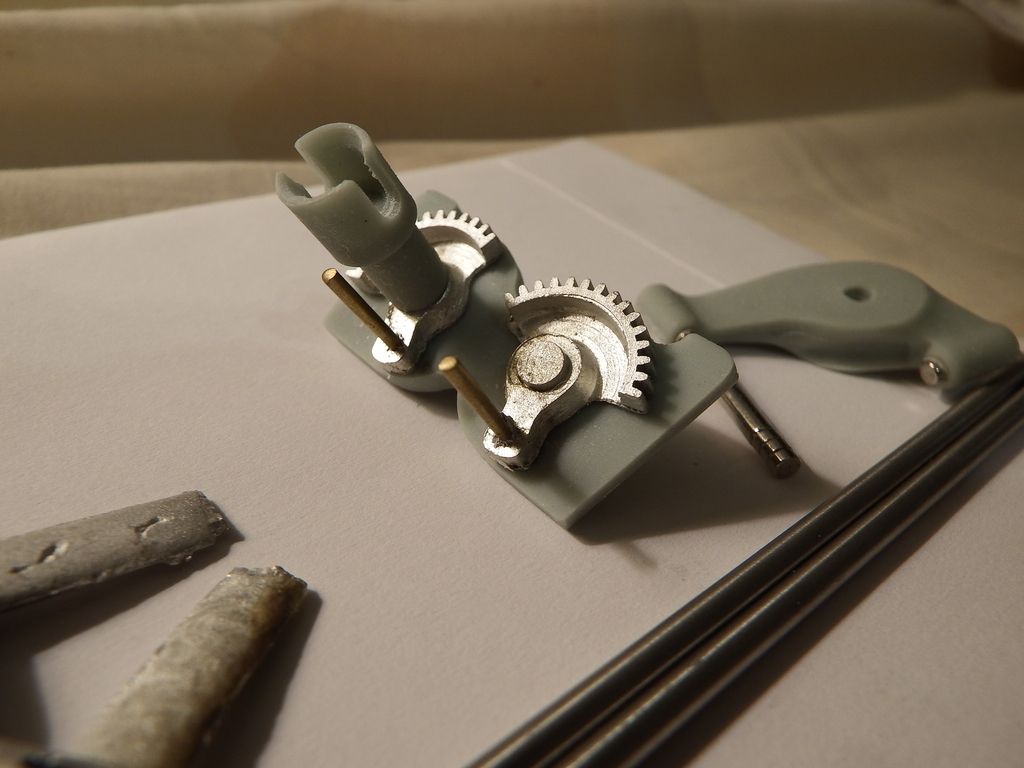
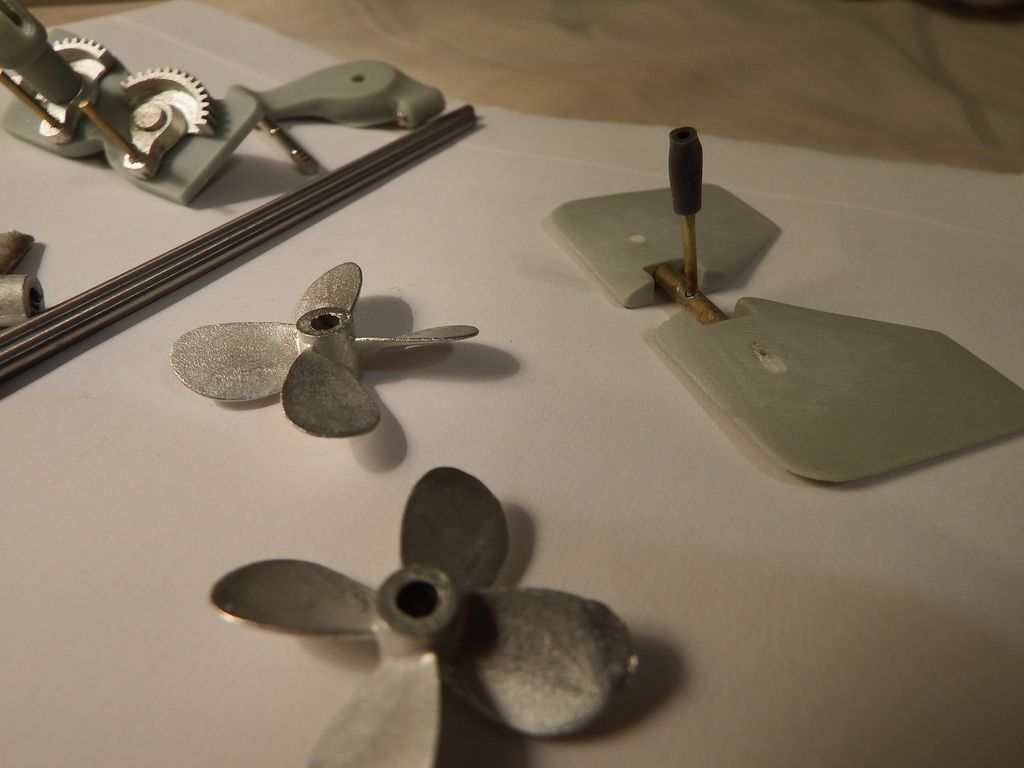
I received all my goodys except for the photo etch deck....which is in process. I took some pictures of some of the impressive pieces found in the fittings kit. The excellent quality is evident in these photos. I shudder to think how much time and effort it would take for me to make these pieces. In fact, a piece like the bow planes drive mechanism pictured in the upper center would be beyond me, and thats a fact. So the successful completion of this project will be due to a great extent to Dave and Mikes excellent range of products.
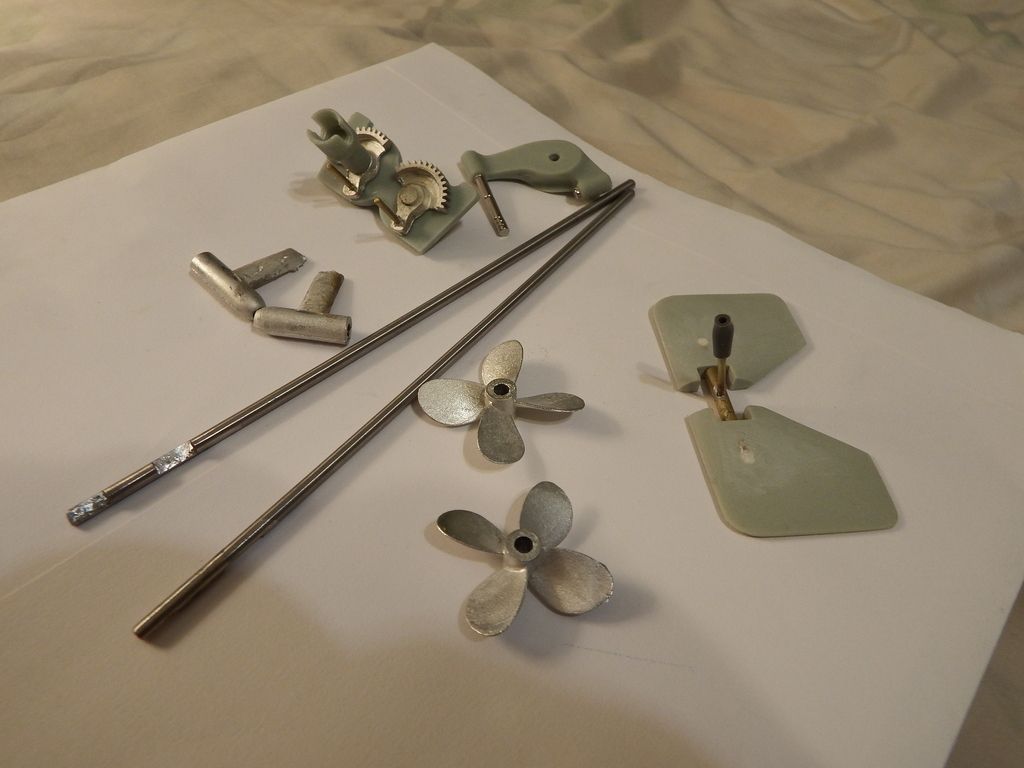
 IT TAKES GREAT INTELLIGENCE TO FAKE SUCH STUPIDITY!
Comment
-
I was watching the first of the five DVD series of instructions on putting this thing together. I have watched them before, but that was eons ago. I suddenly, inexplicably, became motivated to get started. So I pulled out the two main hull halves and following the suggestions in the video, I plastic welded the two halves together. I then reduced the parts off of the trees and got rid of that great big box. Believe it or not I put up some additional shelves in my room to make room for this one and some others that I have been storing out in the shed. It gives my room a more.................Hobby look. And that is as it should be in a single mans home. If I had a wife........then Im sure it would not be allowed.............Unless...............I had a Hobby wife. I think I will advertise for one.IT TAKES GREAT INTELLIGENCE TO FAKE SUCH STUPIDITY!Comment
-
I was watching the first of the five DVD series of instructions on putting this thing together. I have watched them before, but that was eons ago. I suddenly, inexplicably, became motivated to get started. So I pulled out the two main hull halves and following the suggestions in the video, I plastic welded the two halves together. I then reduced the parts off of the trees and got rid of that great big box. Believe it or not I put up some additional shelves in my room to make room for this one and some others that I have been storing out in the shed. It gives my room a more.................Hobby look. And that is as it should be in a single mans home. If I had a wife........then Im sure it would not be allowed.............Unless...............I had a Hobby wife. I think I will advertise for one.
Start with the Phillipines!
I scored big time.
MWho is John Galt?Comment


Comment