Walter type XVIIb scale 1:30

Collapse
X
 
  • Time
  • Show
Clear All
new posts
  • MFR1964
    Detail Nut of the First Order
    • Sep 2010
    • 1304

    #31
    I started with making the 'wooden' plancking, just like the type VIIC i used styrene strips, i've bought pre cutted strips, made the floor at first and started building on the side panels.
    I took me three evenings to get the complete set together, most of the time dryfitting and tinkering with the size, i even made the start for the final interieur.
    Pictures,


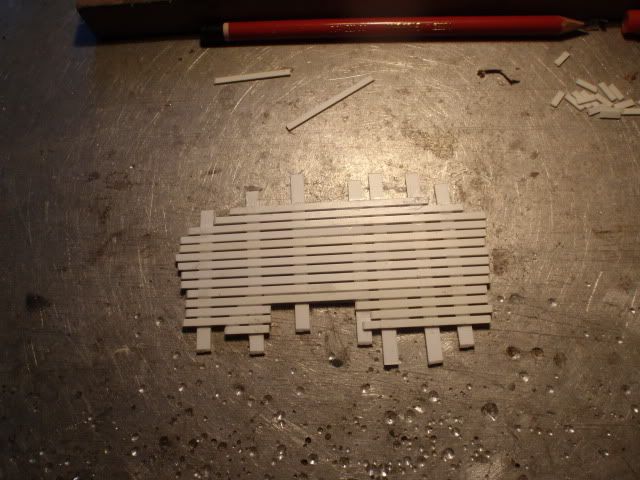
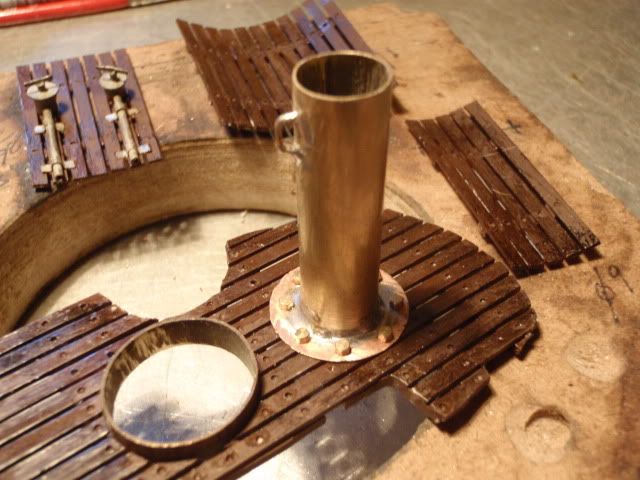
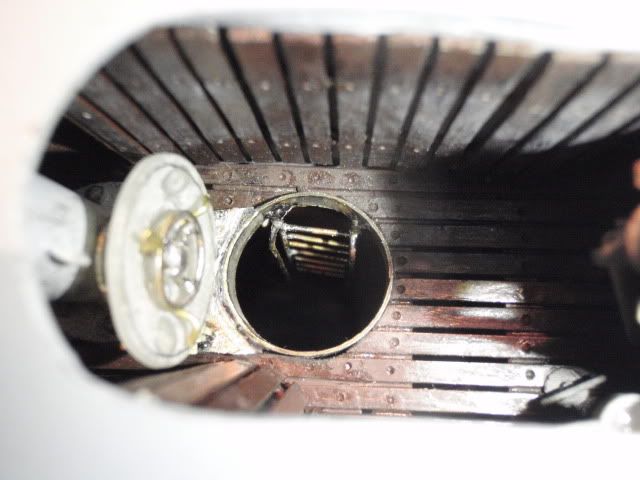
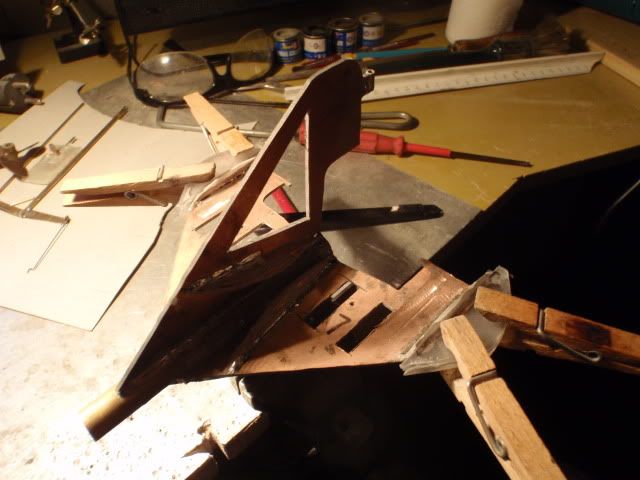
    The general layout of the floor, made a frame from styrene, and cladded it with the pre cut strips.


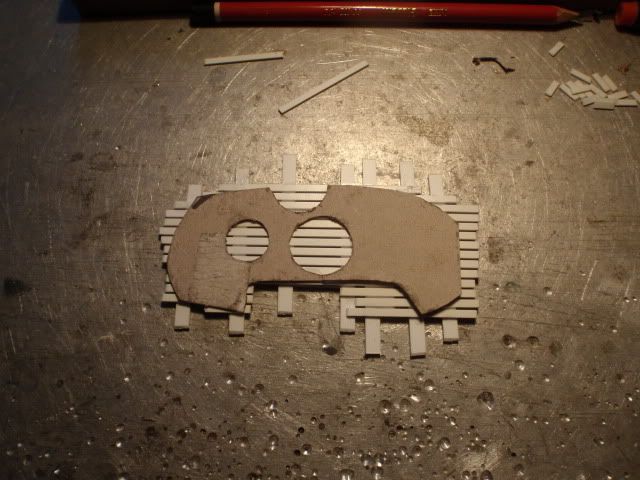
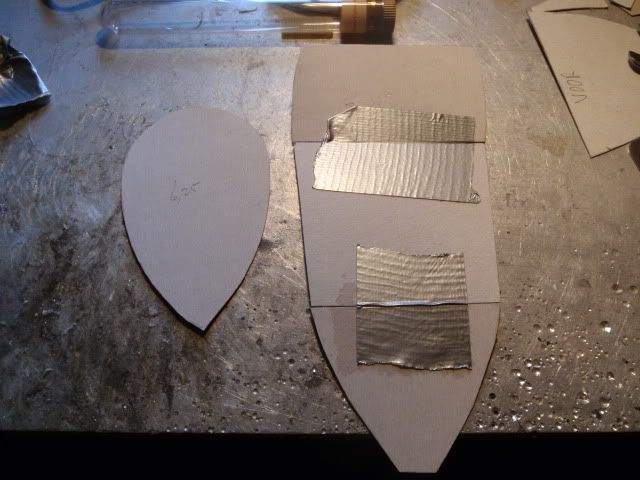
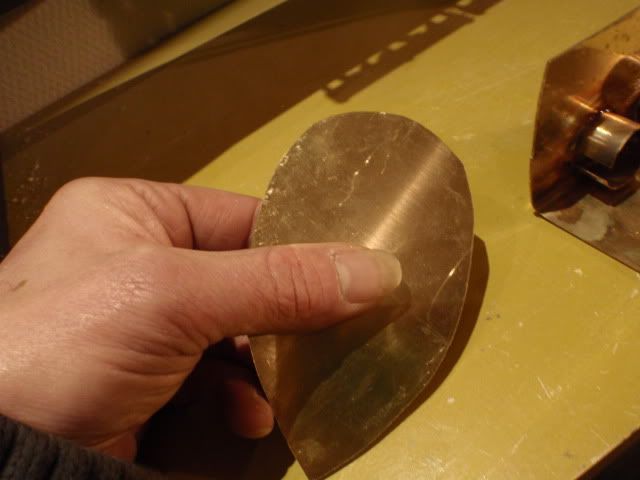
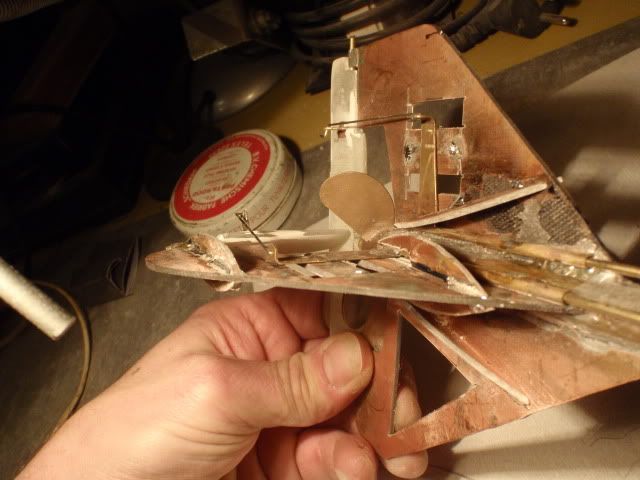
    Used a template from the inside of the conningtower and scribed down the contours.


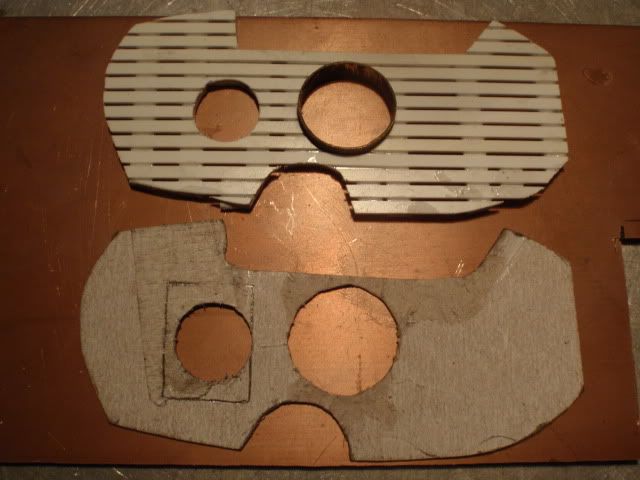
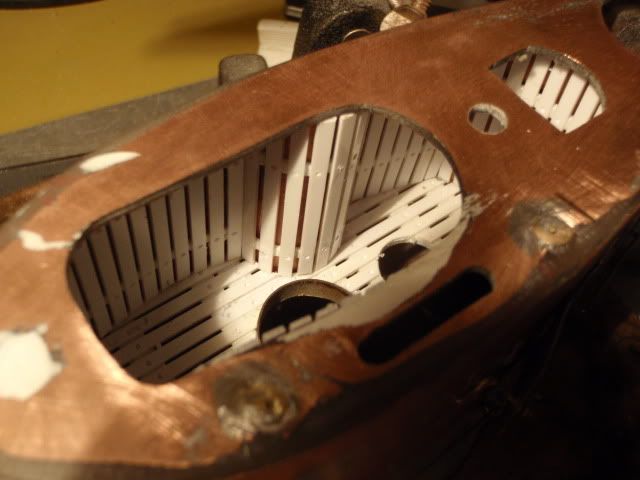
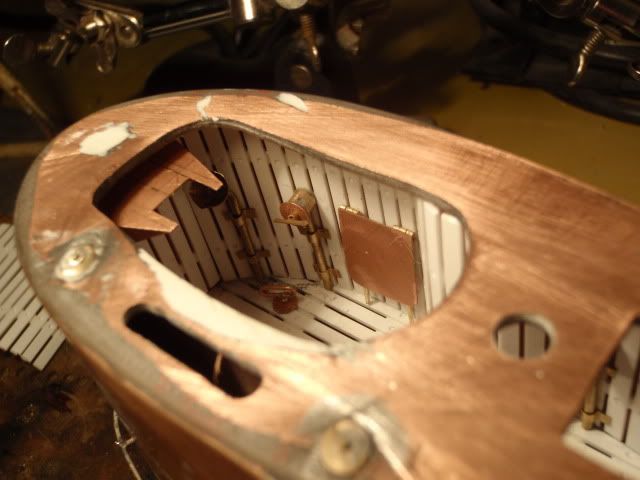
    The result after cutting the contours.


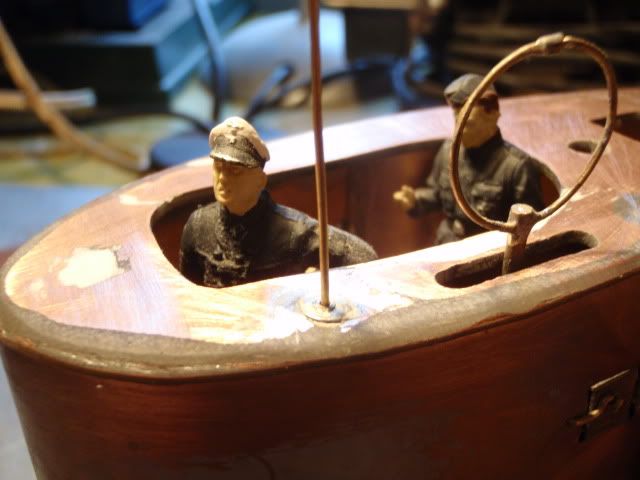
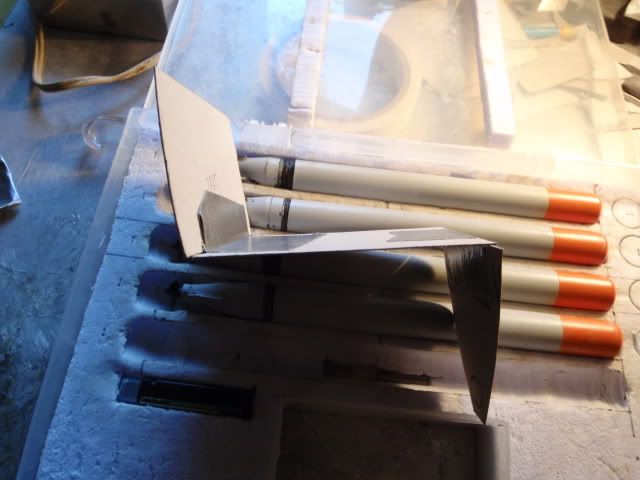
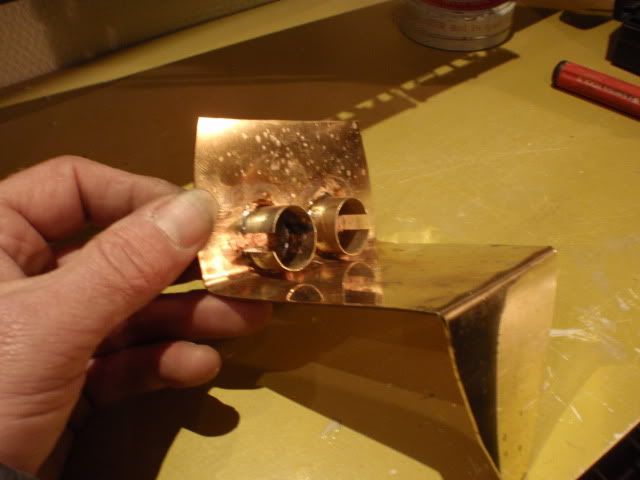
    Used the captain and CO from the type VII to determen the right height for placing the floor, this way i could measure the needed height for the panels on the sides.


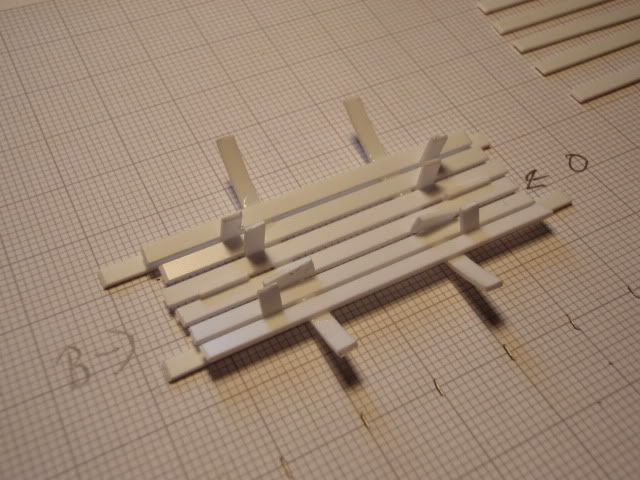
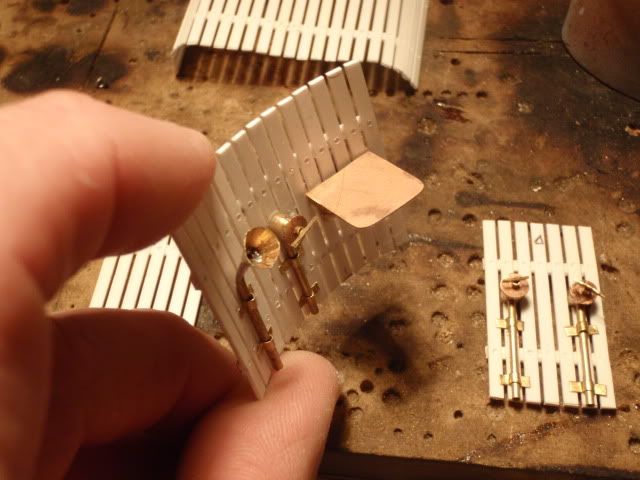
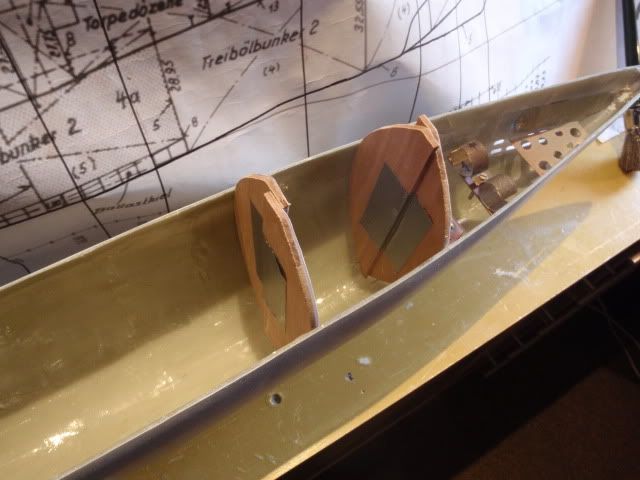
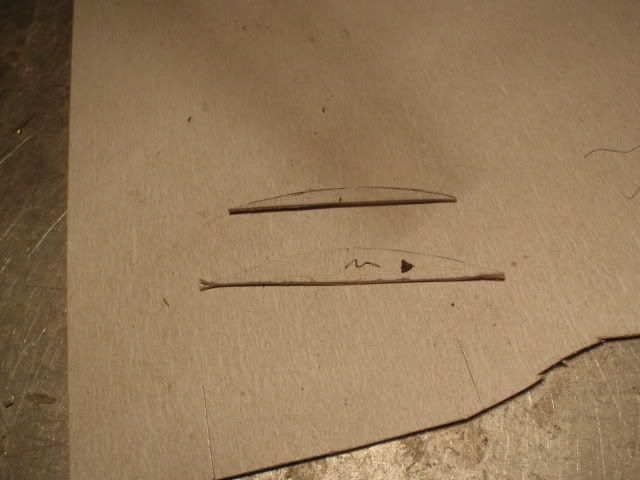
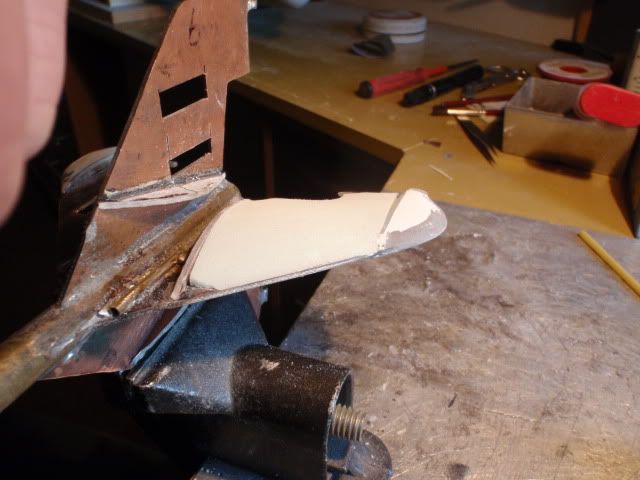
    Builded each panel the same way, bit by bit.


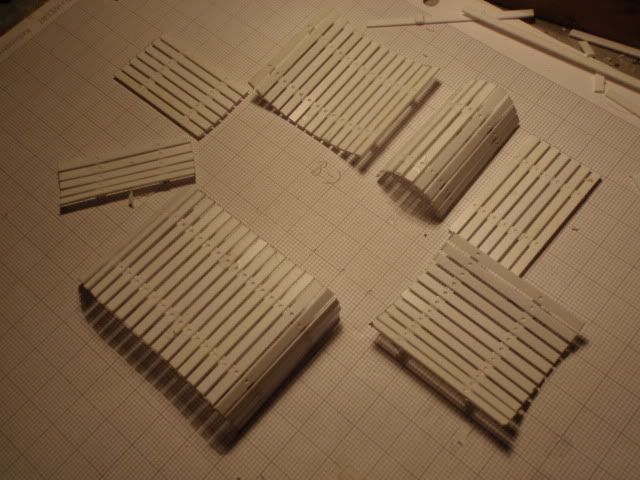
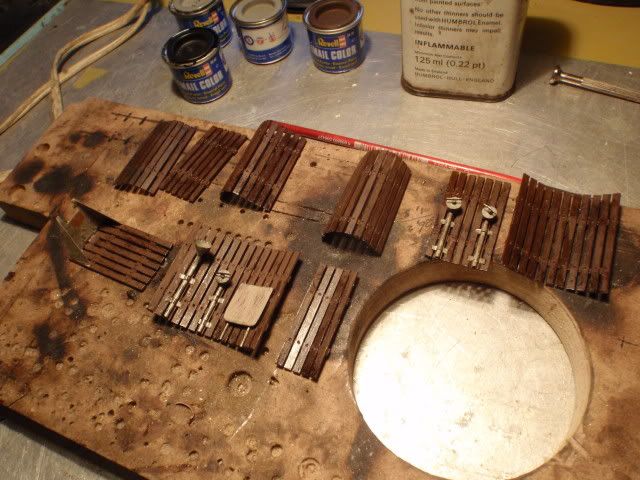
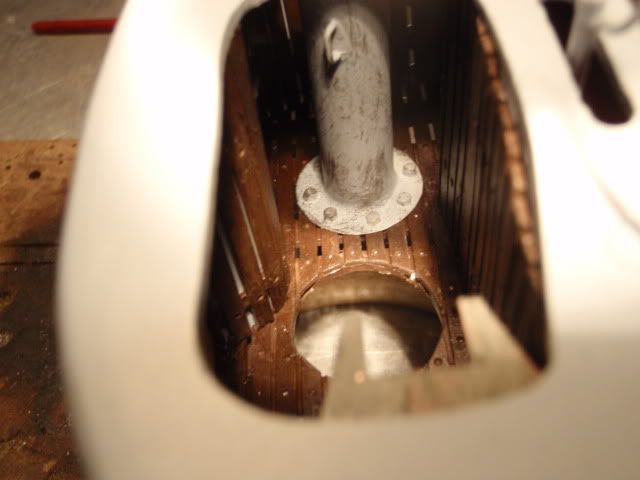
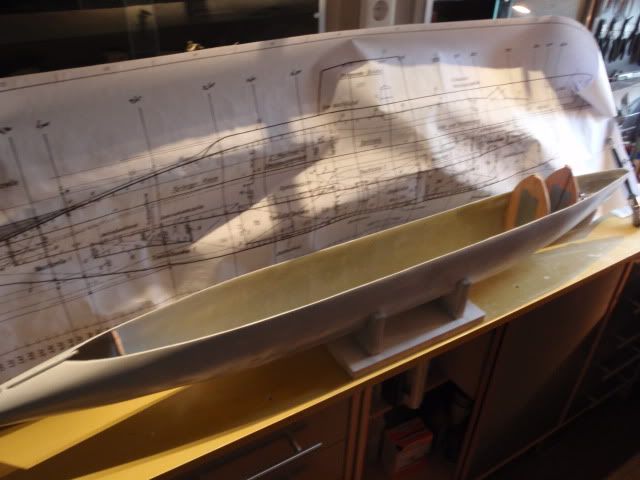
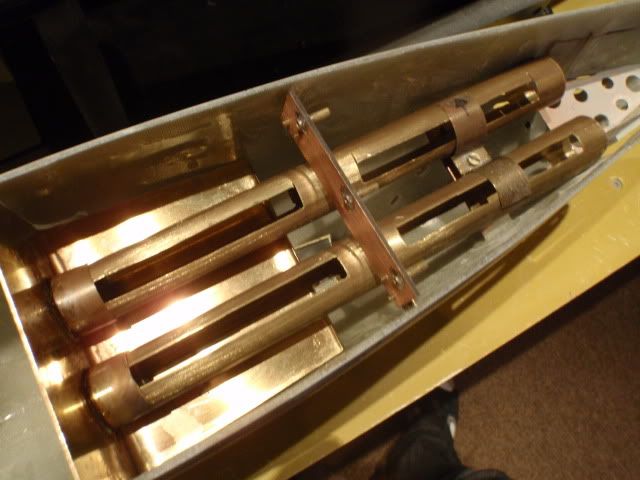
    The total amount of panels which i have made, to get the curved one's i pre-heated the styrene and cooled it down at it's position inside the conningtower.


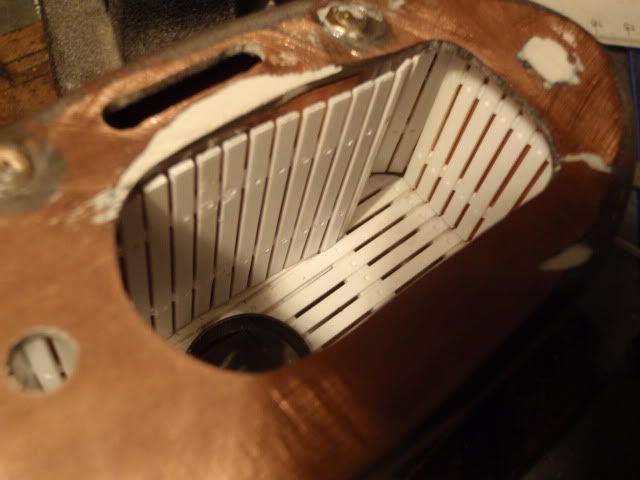
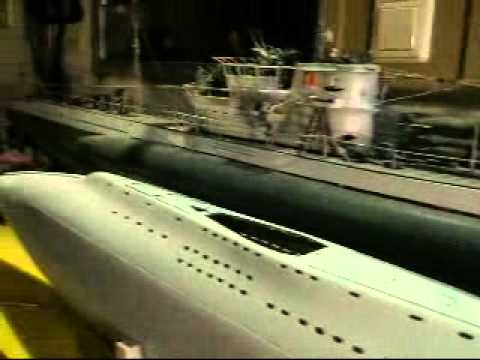
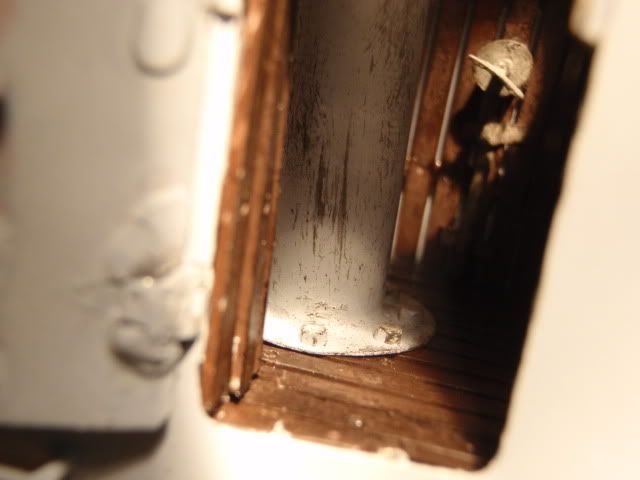
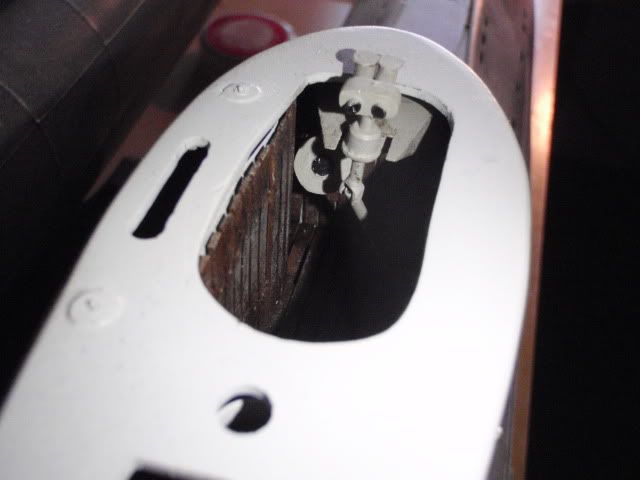
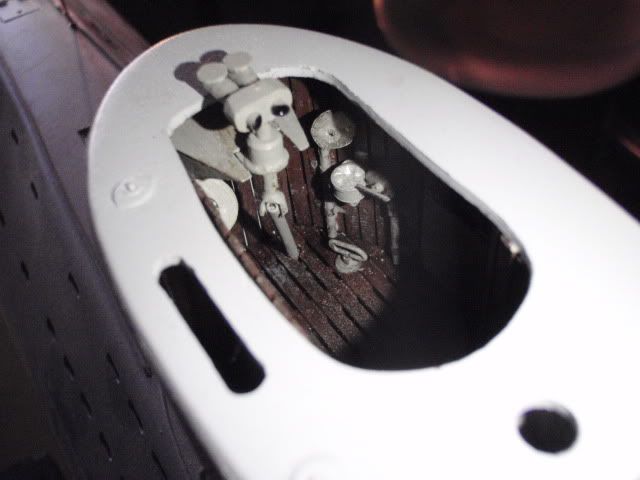
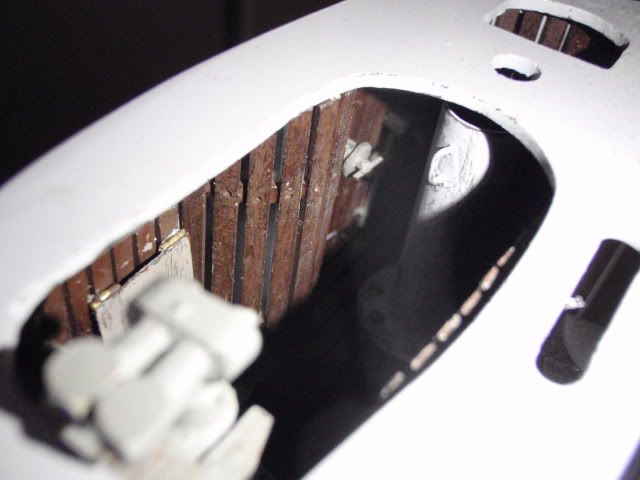
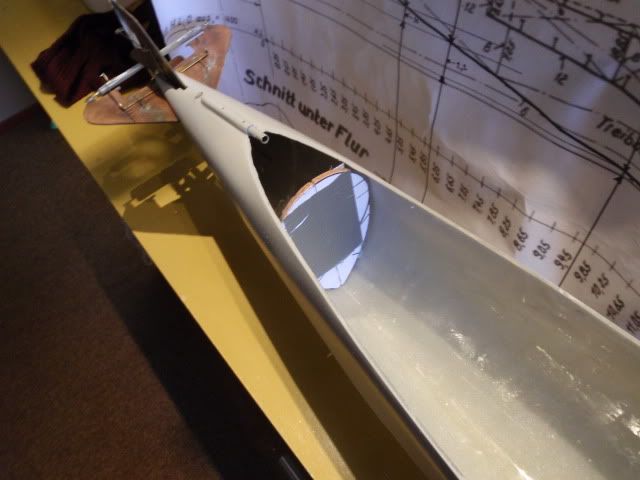
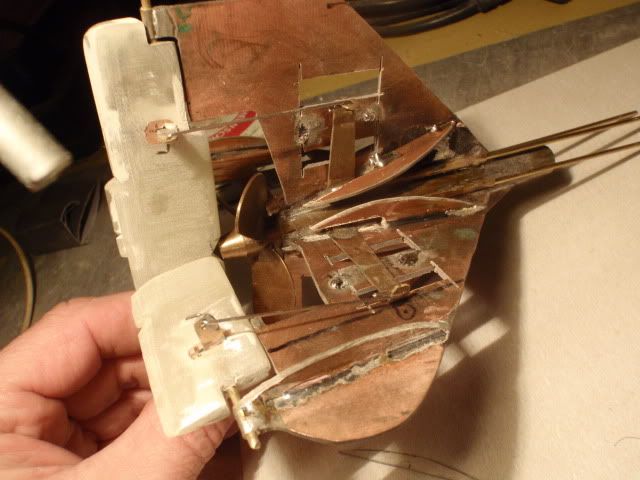
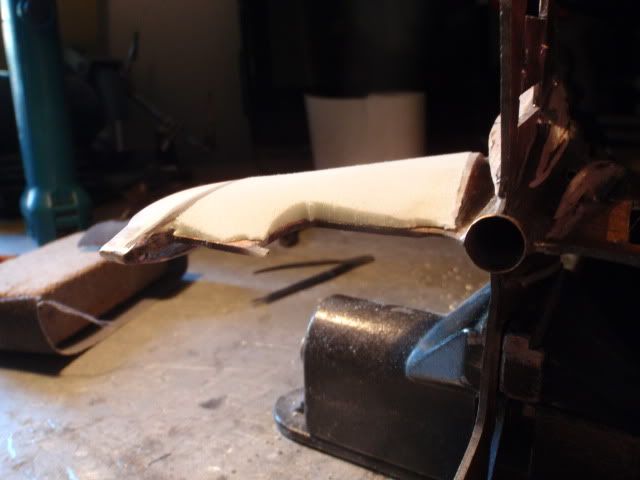
    Again and again dryfitting, but from this point of view i knew what the result is going to be.


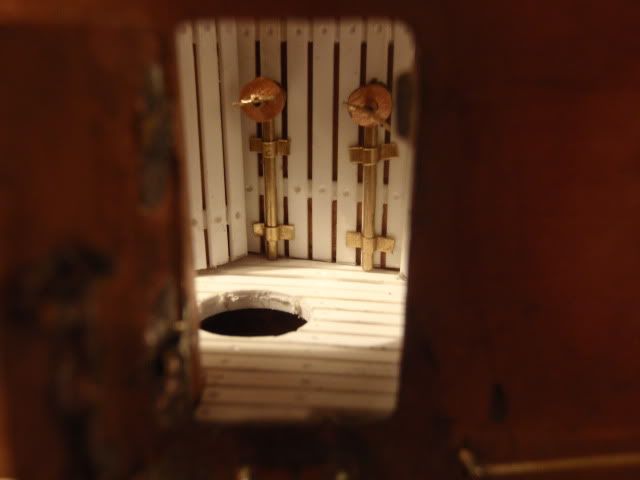
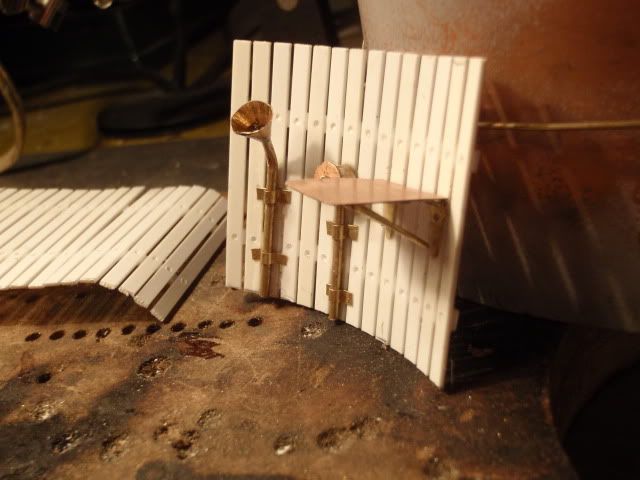
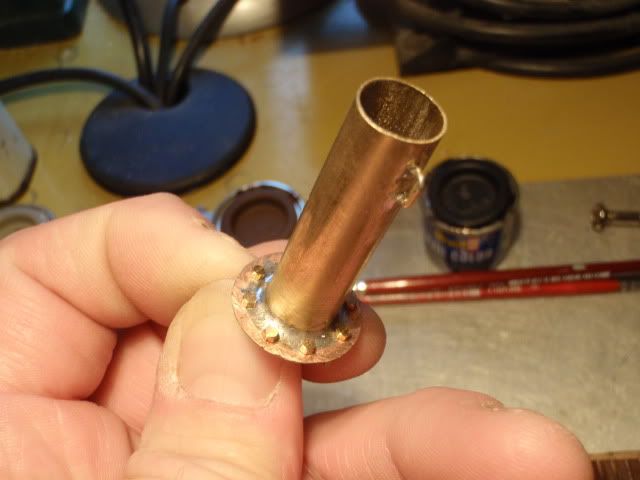
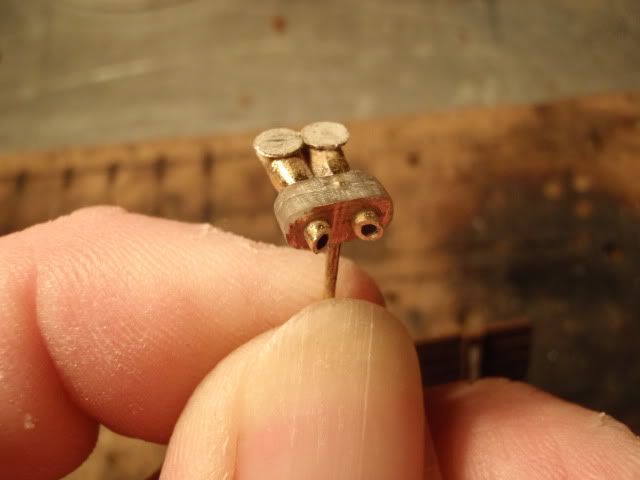
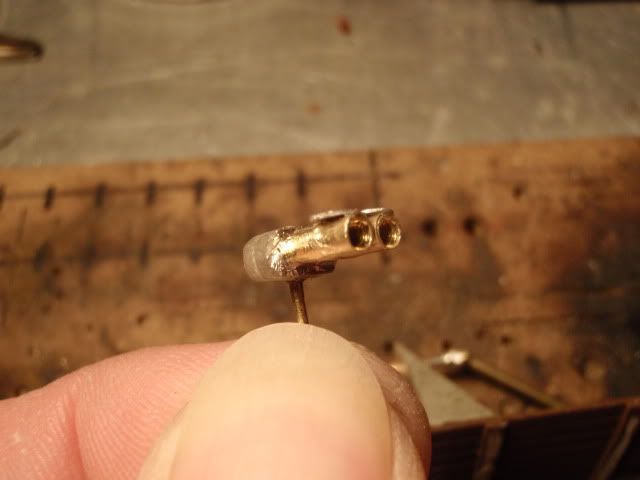
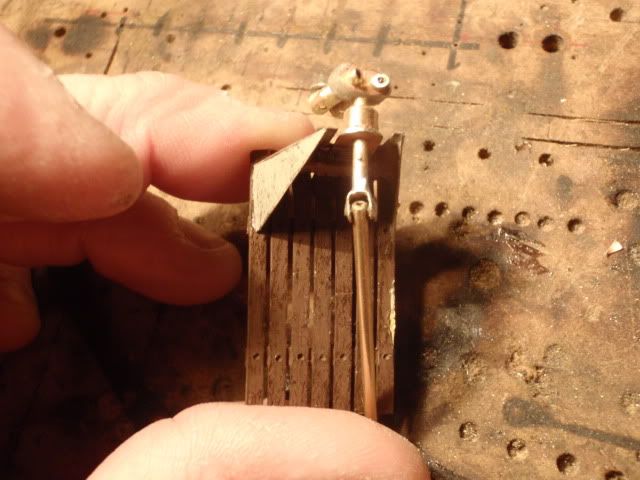
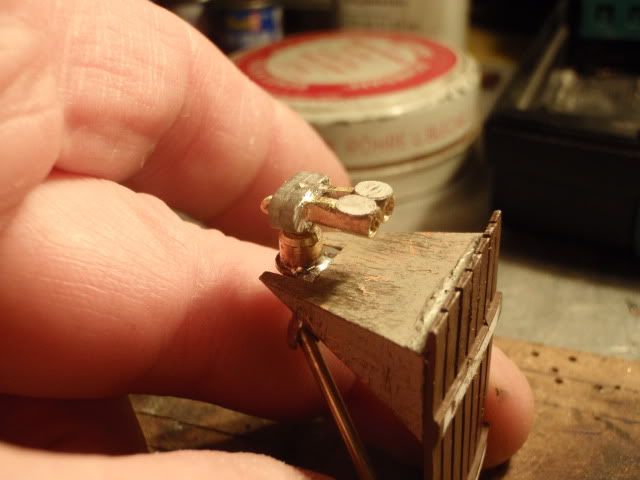
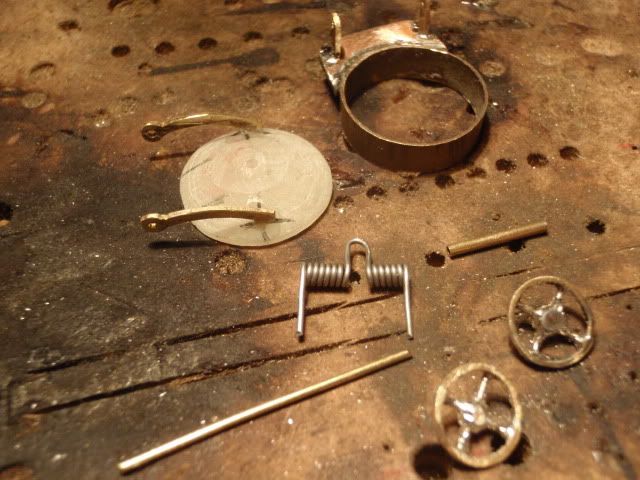
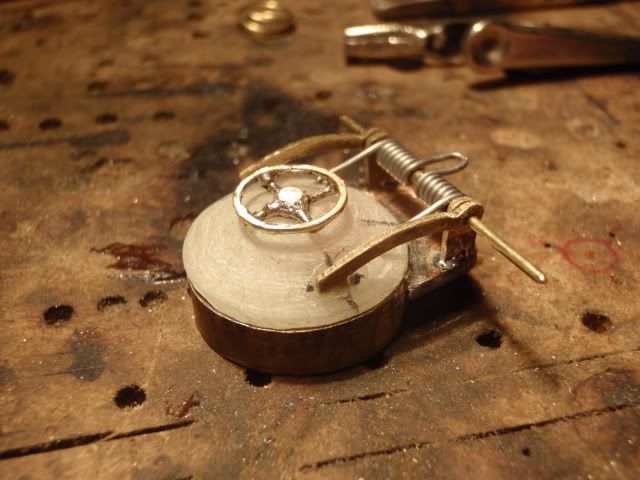
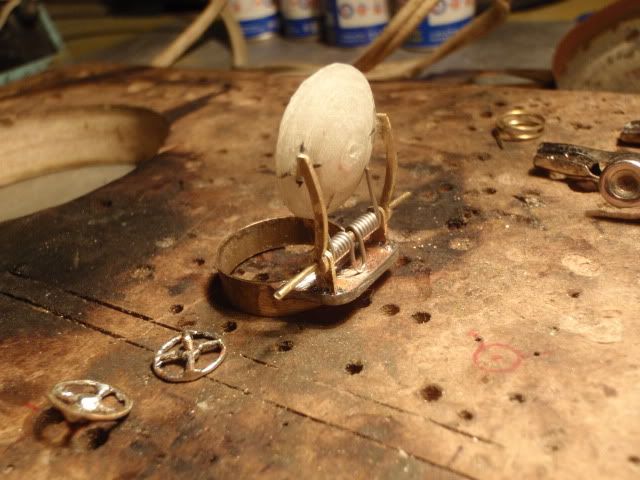
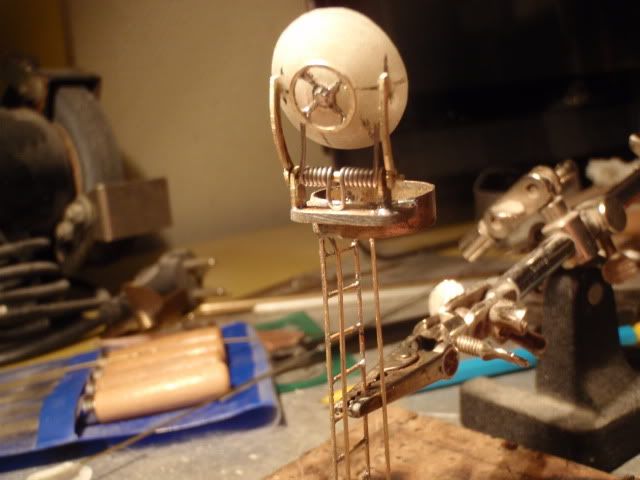
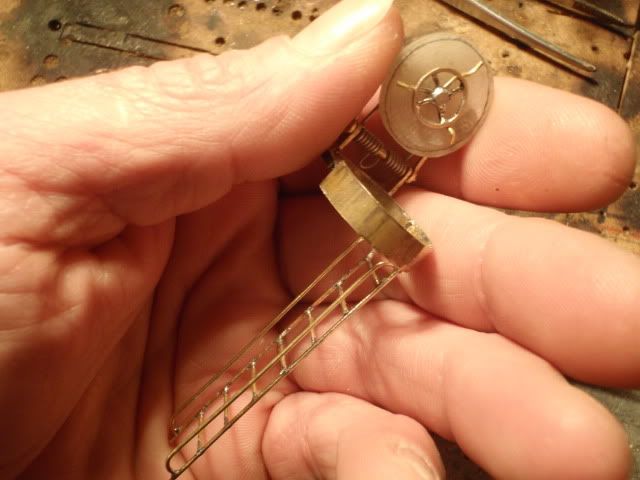
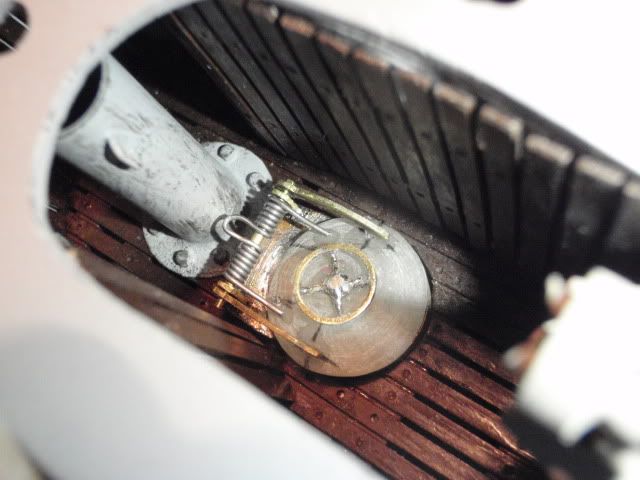
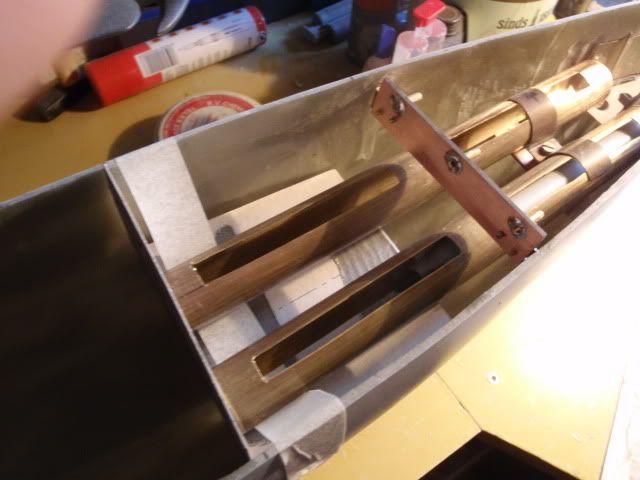
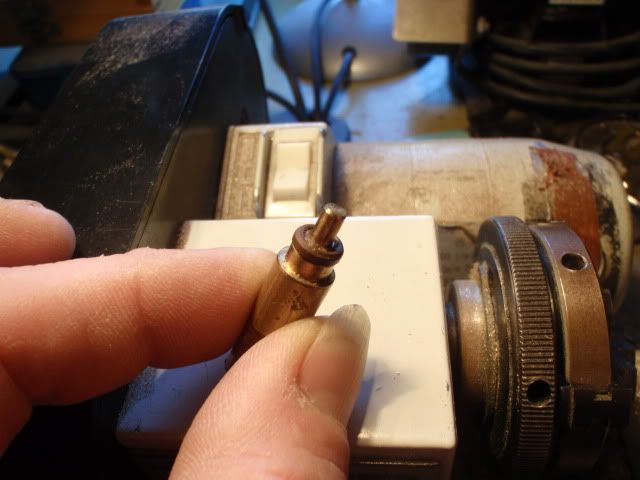
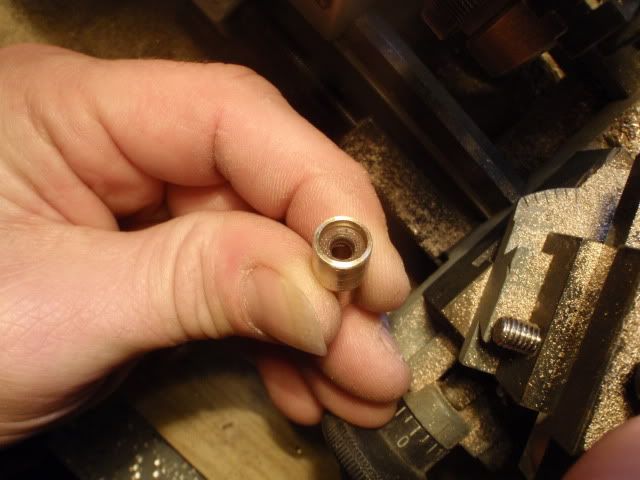
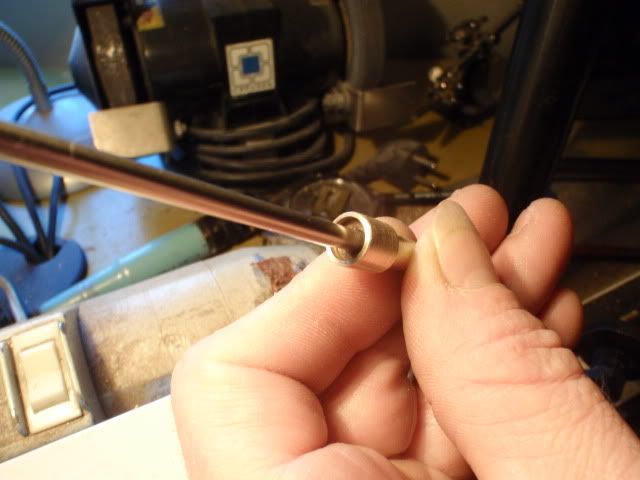
    Last picture is a sneak pre-view of one of the details which i'm building at this moment, those things on the wall are watertight electrical sockets, hope to finish up the rest of the details this weekend, to be continued.


    Greetings Manfred.
    I went underground

    Comment

    • MFR1964
      Detail Nut of the First Order
      • Sep 2010
      • 1304

      #32
      Made some more progress on detailing the inside,


      All panels together, the basis things are there, still have some items which i have to make on the lathe.


      On one of my drawings i discovered a moving sea card table and made some effort to make it functional.


      The total view of yet another dryfitt inside the conningtower, this way you get the impression how it will be at the end.


      The vid about the progress in general.

      Greetings Manfred.
      I went underground

      Comment

      • MFR1964
        Detail Nut of the First Order
        • Sep 2010
        • 1304

        #33
        Some more progress on the wooden planking, glued most parts inside the tower and gave it a layer of paint and made it looking used, still have to do a lot of work on building the UZO and the hatch.
        Pictures,


        The total set of parts, all painted and weathered, i decided to split the biggest part into three parts, more easy to handle when glueing.


        Also made the peroscope protector, finished it with bolts on the flange, two are functional the others purely cosmetic.


        Placed on the deck, still have to make me a hatch, that will be done later.


        All panels are glued in, only the front panel with the structure for the UZO i can take out, so building a complete UZO will be the next stage.


        Greetings Manfred.
        I went underground

        Comment

        • He Who Shall Not Be Named
          Moderator
          • Aug 2008
          • 12288

          #34
          Amazing work, Manfred. You are taking me back to school.

          David
          Who is John Galt?

          Comment

          • trout
            Admiral
            • Jul 2011
            • 3547

            #35
            Manfred,
            Would you share with me how you painted the periscope protector? I like the light weathering you did on that.
            Peace,
            tom
            If you can cut, drill, saw, hit things and swear a lot, you're well on the way to building a working model sub.

            Comment

            • MFR1964
              Detail Nut of the First Order
              • Sep 2010
              • 1304

              #36
              Thanks David, she's becoming more complete every time, first want to finish up all the details before starting with the rear end, that will be a challence of it's one.

              Tom,

              What i've done is called a drybrush technique.
              You first paint the object into it's basic colour and let it dry, next step is, take some flat black, dip the brush into the paint and make it almost dry with a cloth, then you start brushing the object yently, if done allright you will get some residue from the brush on to the object, the trick is not to overdue it, most subs are not a rustbuckett, just weathered by the use.

              Greetings Manfred.
              I went underground

              Comment

              • trout
                Admiral
                • Jul 2011
                • 3547

                #37
                Thank you Manfred! It came out so nice!
                If you can cut, drill, saw, hit things and swear a lot, you're well on the way to building a working model sub.

                Comment

                • MFR1964
                  Detail Nut of the First Order
                  • Sep 2010
                  • 1304

                  #38
                  Last few days i was free from the office, so building the UZO went fast, only limitation was the size i had to build it, lot's of tinkering on a small scale, pictures.


                  As you can see, size does matter, by placing a little pin at the bottem i can take it off if needed.


                  The UZO is made from these parts, a base to mount the binocular, the binocular itself and the connection rods for the torpedo aiming device inside the sub.


                  Once build together you get this as the result, the binocular can rotate, fixed the rods in a static position.


                  Also gave it a layer of paint to finish the job on the inside of the conningtower, from this view you can see to the left the sistercompass, unlike the rest the binocular is not wheatered, they took it off before diving by unclipping it from it's base.


                  A view to the rightside, with the speakingtube, rudderindicator, electrical sockets and the rods from the UZO going through the deckfloor, the handle on the floor was used to unlock the towinghook in the nosepart the fast way.


                  Last view to the rear, you barely can see one of the two electrical sockets, but i know they are there, that's good enough for me.
                  Last stage will be building me a hatch from scratch, once finished the inside i can turn my attention to the outside, found some pics of weldinglines.


                  Greetings Manfred.
                  I went underground

                  Comment

                  • trout
                    Admiral
                    • Jul 2011
                    • 3547

                    #39
                    Bravo Manfred! I like seeing what you are working on!
                    If you can cut, drill, saw, hit things and swear a lot, you're well on the way to building a working model sub.

                    Comment

                    • MFR1964
                      Detail Nut of the First Order
                      • Sep 2010
                      • 1304

                      #40
                      Thanks Tom,

                      Working on the conningtower took some more time than estimated, but once you see the details appear it's well spent time, still have to build me a hatch and probably a small ladder, have to check the shipyard drawings first for that.
                      Also from this side of the ocean a happy newyear to all of you guys, see you next year.


                      Greetings Manfred.
                      I went underground

                      Comment

                      • MFR1964
                        Detail Nut of the First Order
                        • Sep 2010
                        • 1304

                        #41
                        Last item i had to build was the hatch, like the V80 i decided to build it with the use of circuitboard, allowing me to make the right size i need.
                        Added a little ladder just for fun, you want to see something looking down the manhole.


                        Made the hatch from different rings, glued them together and used the dremel with cutter to make the final shape.


                        All parts together from which i made the hatch, the spring is made from solderingwire, you can bent it easily, and it will stay in shape.


                        A dryfitt of all the parts together, to see if i have to tinker on some parts.


                        Again i made the effort to make the hatch functional, not that it will be usefull, but if it's possible i want to try.


                        Added the ladder to complete the hatch, i needed to fiddle a lot to get the ladder right, but it's worth the effort.


                        To give you an idea at which size i'm working, you can compare it with my hand.


                        The impression you get once placed inside the conningtower, i still have to give it a layer of paint and glue it tight.
                        Now this part is finished i can turn my attention to the rearpart and the inside of the boat, to be continued.


                        Greetings Manfred.
                        I went underground

                        Comment

                        • MFR1964
                          Detail Nut of the First Order
                          • Sep 2010
                          • 1304

                          #42
                          Got me my copper plate that i've ordered and went at work inside the hull, made a start with the bulkheads.


                          Used my copied drawing to see at which spots the bulkheads should come.


                          By using the old wooden ribs from the plug i could determen it final place and shape.


                          Cutted out the final shape from cardboard, the front bulkhead is a bit different.


                          By bending it into this shape i will gain back some room inside the hull.


                          As you can see this way i can use the unused room underneath the torpedotubes.


                          Took the jewellers saw and cutted out the shapes from copper, the front one is bended into it's final shape, allready soldered the basic fittings for the torpedo tubes.
                          Next week i'll be working on the lathe, making me some watertight connections for the rods, and the drive train for the axcel.


                          Greetings Manfred.
                          I went underground

                          Comment

                          • MFR1964
                            Detail Nut of the First Order
                            • Sep 2010
                            • 1304

                            #43
                            Done a lot this few weeks,

                            First i've boggled my mind about the skin on the rearpart, gave it some tries and left it alone, this is for me normal procedure, if it doesn't work the first few attempts, just leave it alone, the solution will pop up sometime.
                            During the session on the lathe for making the bairings and watertight connections it did.
                            Finished up that work and tried it again.


                            First i made the profiles for the stabilisingwings.


                            Reproduced them in circuitboard and soldered them on to the wings.


                            Next step was to make the tips on the wing, i decided to go for plexiglass, more robust against damage, used the profiles to sand it into the right shape.


                            This was the solution which popped my mind, by using styrodure between the profiles i had a guide to get the right shape, this is a testcase, will do the rearpart all around this spring, the tempartures are way to low to give it a skin from glassfibre and epoxy, it has to wait.
                            I've done a lot on the lathe, will post that later on.
                            I went underground

                            Comment

                            • MFR1964
                              Detail Nut of the First Order
                              • Sep 2010
                              • 1304

                              #44
                              I mentioned some work that i did on the lathe, goal was to make the complete drive train, and holders for my lipseals, which will make my watertight connections with the rods.


                              The complete drivetrain with brass bairings and connection through the watertight bulkhead.


                              Made a special adaptor for the connection with the axcell.
                              A old trusty decaperm marx engine i'll use as my propulsion, these type of motors have a gearbox which you can alter to the needed desire, lowest gearing is 3:1, which is now present inside the gearbox.
                              If it uses to much amp's i can change the gearing up to 4:1, with a max of 6:1.


                              From right to left the stages of making the holders for the other connections through the bulheads, i needed to make 5, 2 for the steering, and 3 for the torp tubes and stabilisingwing.


                              I always use lipseals for sealing off the rods, normal practice when using a ventilated dry hull, they are made from Viton, a synthetic rubber, which won't react with vasiline and UV light.


                              This tool a had made in the past during the major overhaul of the type VIIC, it allows you to press in the lipseals into the holders without much force.


                              Before pressing in i always grease them with vaseline, this way the need less force for pressing in and damaging the lipseal.


                              When the lipseal is placed i can press in the 4 mm stainless rod, this is also slightly greased with vaseline to prefent damaging the lipseal.
                              The trick with using lipseal is, the more pressure from outside the tighter the rod will be sealed, if you want to use them inside a WTC you have to place two, back against back, this way it doesn't matter from which side the will come, downer is, much more friction than using a standard O ring.

                              Greetings Manfred.
                              I went underground

                              Comment

                              • MFR1964
                                Detail Nut of the First Order
                                • Sep 2010
                                • 1304

                                #45
                                Did some more work last week on the bulkheads and steeringrods, even made a short vid to show how the steering of the rearpart is working.
                                Pictures,


                                First i fitted the front bulkhead, just to be sure it will fit allright.


                                Signed off the hole for the axcle, drilled it through and placed the watertight connection, left it unsoldered just for fitting.


                                Since the prop had little room near the rudder, i turned it down on the lathe, just to give me more clearence.


                                This kind of compressors i usually use, 12 V car tire compressors, it has to be modified to become more compact.


                                The front and rear bulkhead, complete with watertight connections and brackets to place the servo's, everything hard soldered with silversolder.


                                Turned down the stainless steel rods and threated them to get the connection on, those funny things are the connectors which will be placed on the steeringrods of the rearpart.


                                Some pics during the mock up build up, for me it's normal procedure, first test it, then place it inside, this way it will reveale the mistakes.
                                For me it revealed that i never could tighten the screws once placed inside the boat, to less room to reach it from above, i have to make me a little hatch underneath the boat to reach in, only drawback is, i have to turn the system upside down.

                                A short vid to show that it's working, you need at least three hands to move everything.

                                Store your photos and videos online with secure storage from Photobucket. Available on iOS, Android and desktop. Securely backup your memories and sign up today!


                                Greetings Manfred.
                                I went underground

                                Comment

                                Working...