Hello Manfred,
Cleat (singular) or Cleats (plural) is the word you are looking for. Your work is the work of a fine Jewler!!
Regards,
Myron
-
Thanks Alec,
Tweezers, a steady hand and a sharp eye are needed, once you get the hang of it, it becomes less difficult.
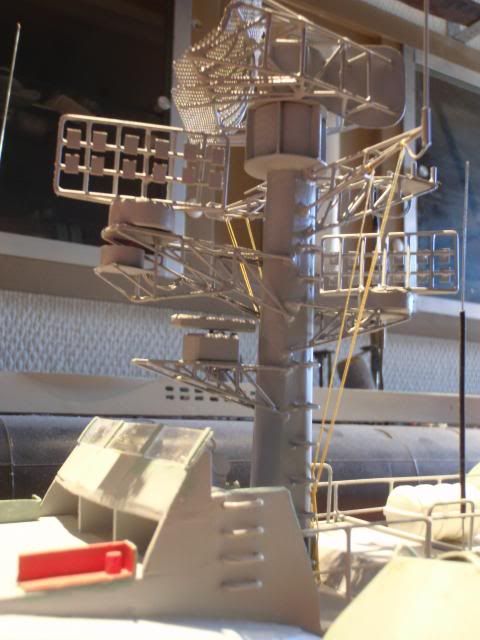
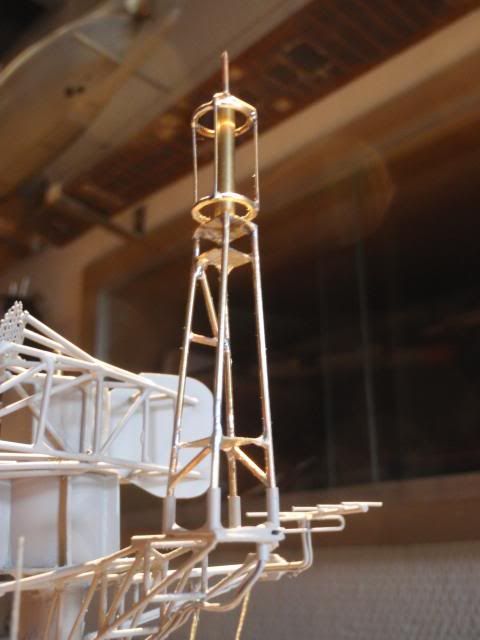
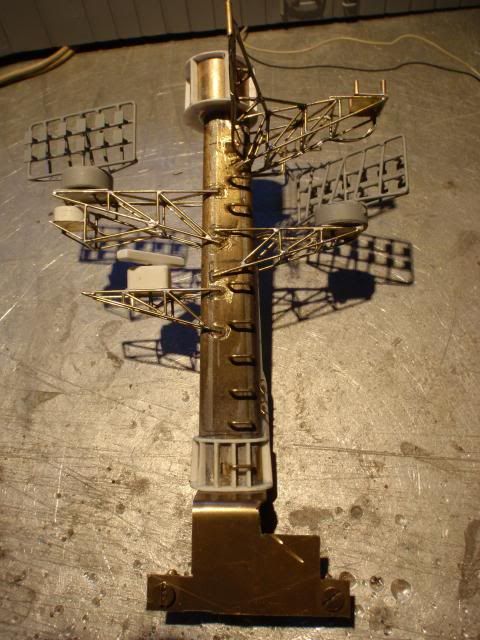
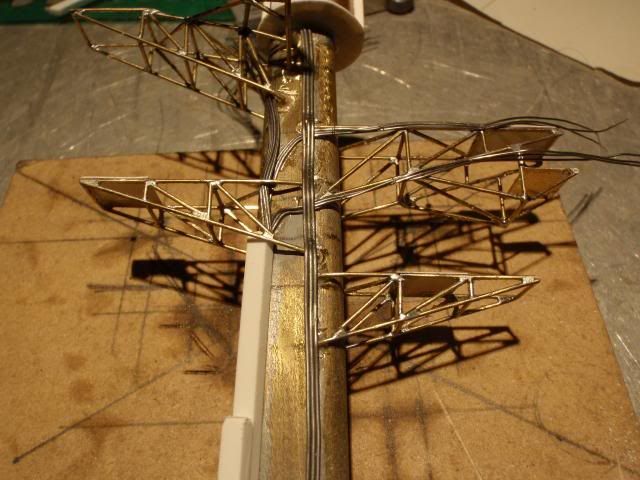
Sprayed some paint on the mast and added the wires, still have to change some colours of certain items on the mast, it has become too much of a grey mass.
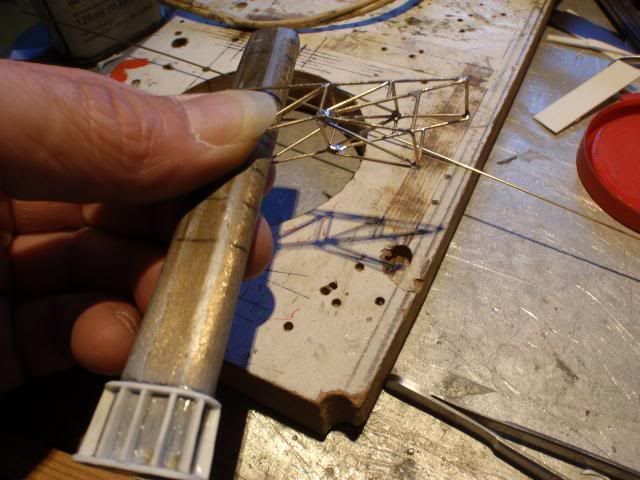
Fastening those wires to the mast was a bit tricky, yet again the tweezers brought the solution, secured them with CA, how do you guys call those things on which the cables are wrapped?
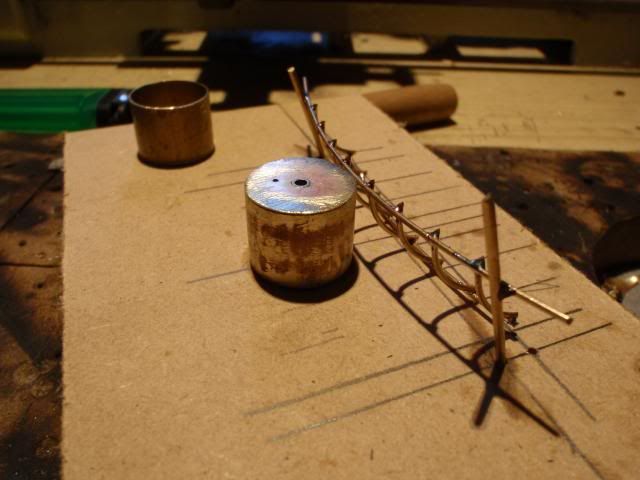
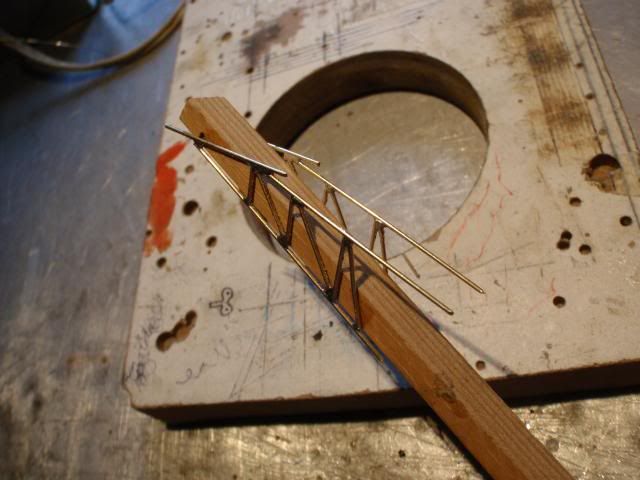
Most pictures i have are too hazy or too far away, so i made this form in general, it looks almost the same, those caged antenna's took two attempts, the left one was the first, too high and the wrong diameter, second one was more the same as to the pictures.

Dryfitting all loose parts, still have to make a kind of hood on top of this mast, have to start up the lathe for this, the failure caged antenna can be recycled as part of this hood, i always keep my failures inside the spare draw, you never know when you can use them again.
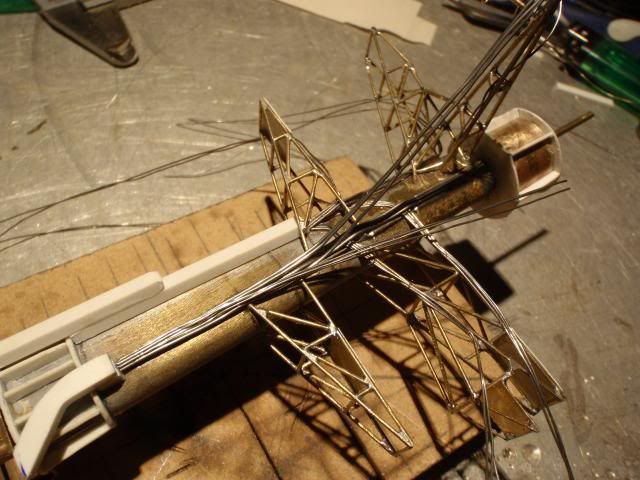
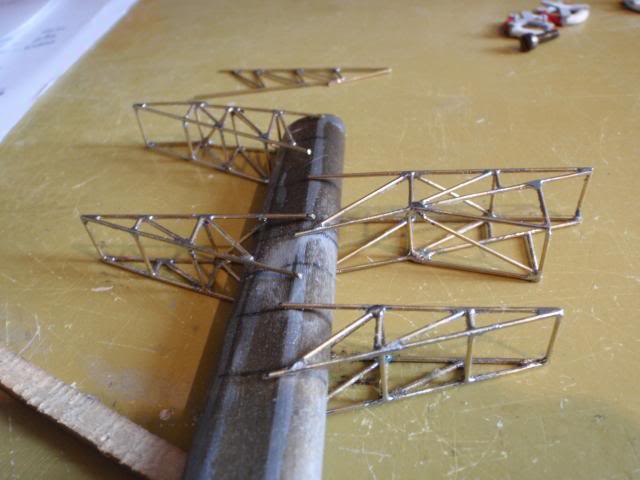
Last but not least, dryfitting this construction on the mast, it should fit fine, since i drilled the holes all the way through the wooden jigg, to my releave that was the case, it will stay a part which you can take off during transport.
Manfred.Leave a comment:
-
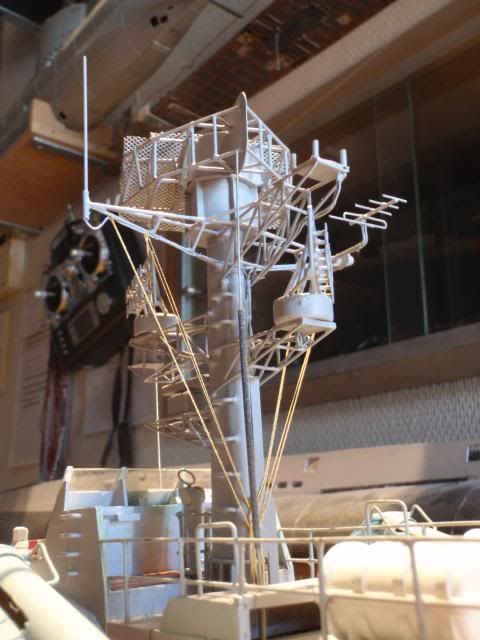
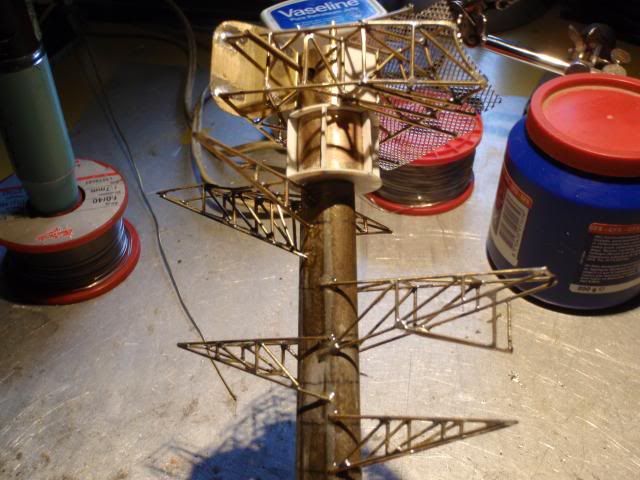
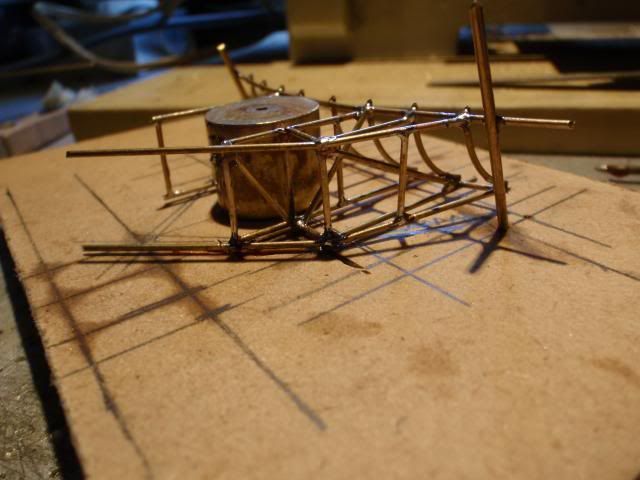
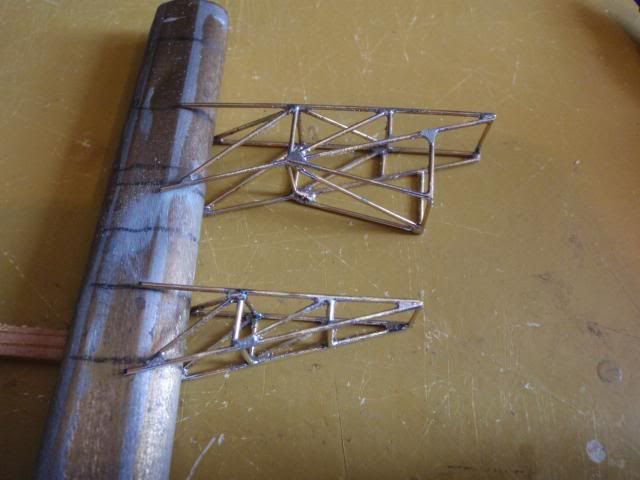
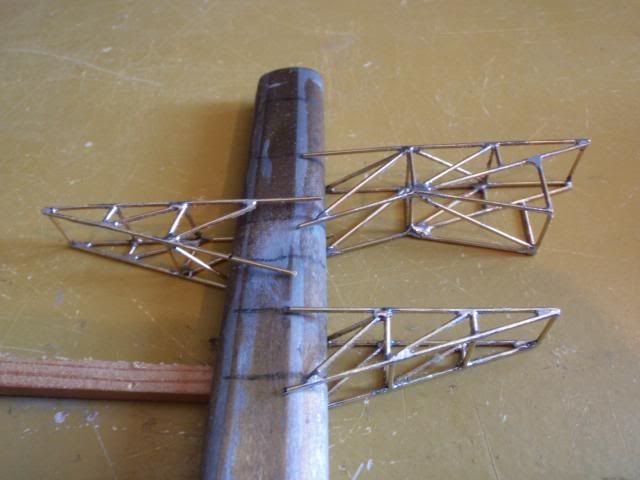
Finished up the radarmast as far as possible, still have to make that strange contraption behind the main radar,
Making the Fumo like antenna's was a bit of a task, compared to the type VII Fumo they are smaller, placing those pesty small rectangles enriched my language.
Making those clamps from sheetcopper presented a little problem, i shifted to aluminum tape, which worked out fine, secured everything with CA.
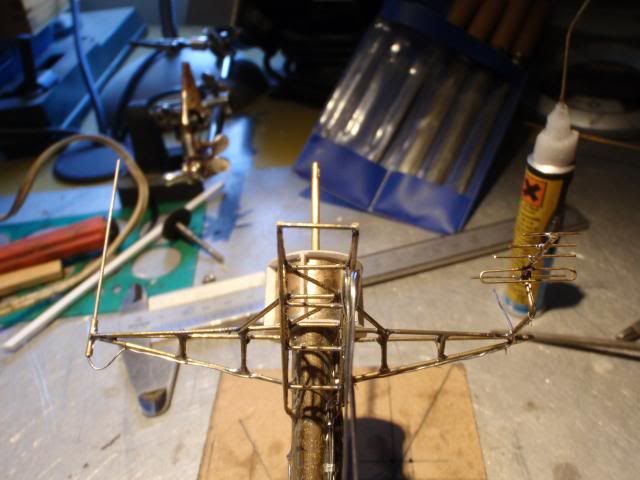
Made the antenna's on the top sidebars, a straight one and a Yagi type one, the array of antenna's is different by boat, simply took the one's i liked.
Added all those extra radars and glued down some steps to climb the mast for maintenance or modification, she's nearly ready to give her a spray of paint.
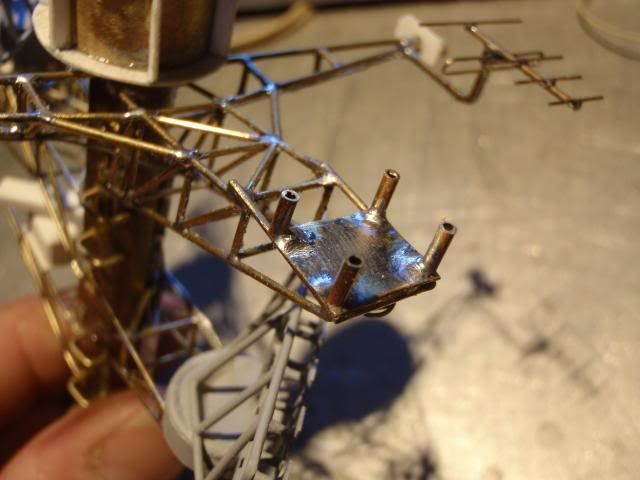
That strange contraption near the main radar sticks out, i want to build this in such way that i can take it off during transport, the base has the same measurement as my jigg, on which i'll build this thing seperate.
Manfred.Leave a comment:
-
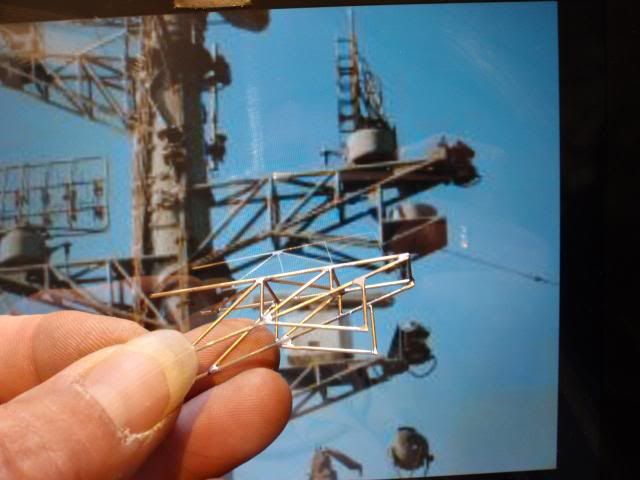
Some pics of the real thing which i'm building now, it's a task, but i have good hope it will turn out nice,
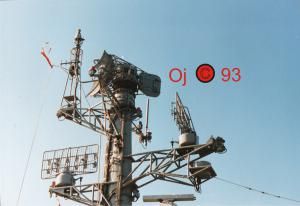
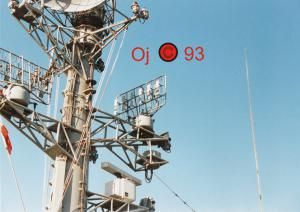
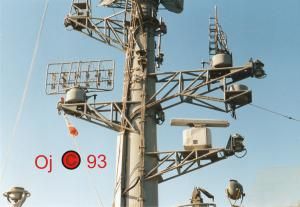
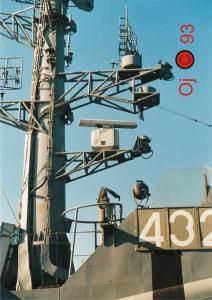
As you can see lot's of stuff to add, those rectangular radars look the same like my Fumo radar on the type VII, at least builded that once before, some modern radar and a gps system, you can also see those cable protectors at the beginning of the mast.
That strange thing pointing up behind the big radar, no idea for it's function, looking at the construction it will give me some grey hairs and some burned fingers, you gotta love your hobby.
Manfred.Leave a comment:
-
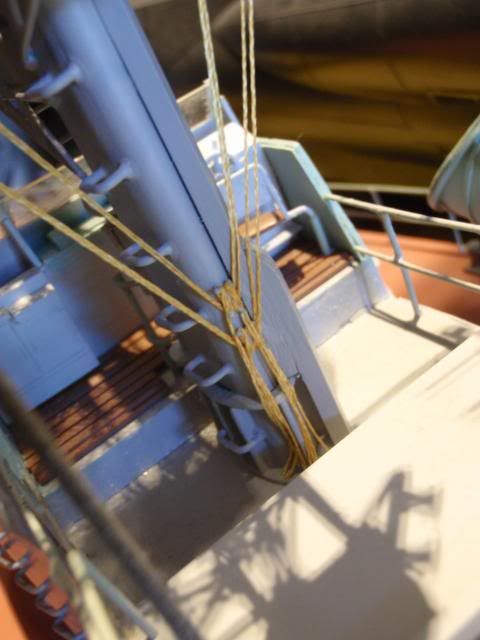
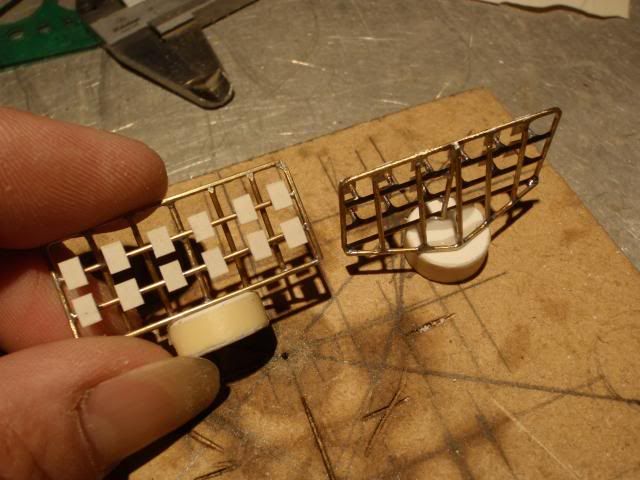
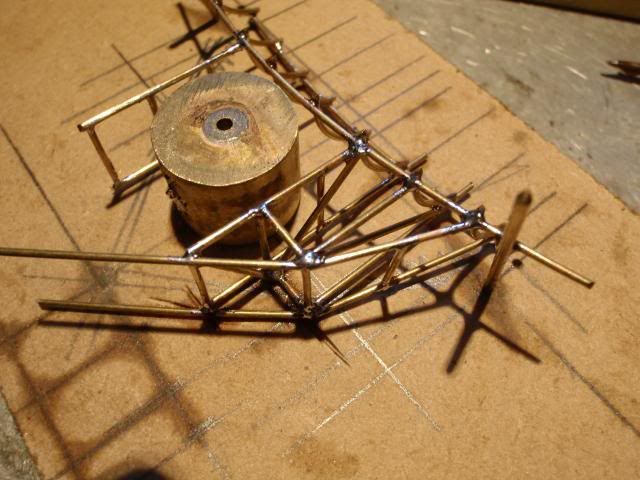
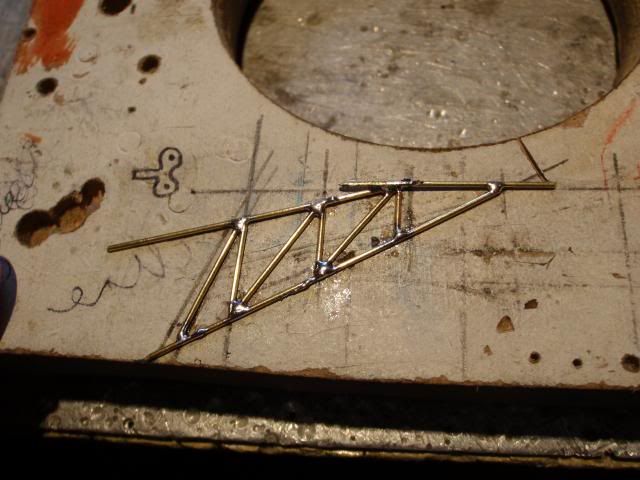
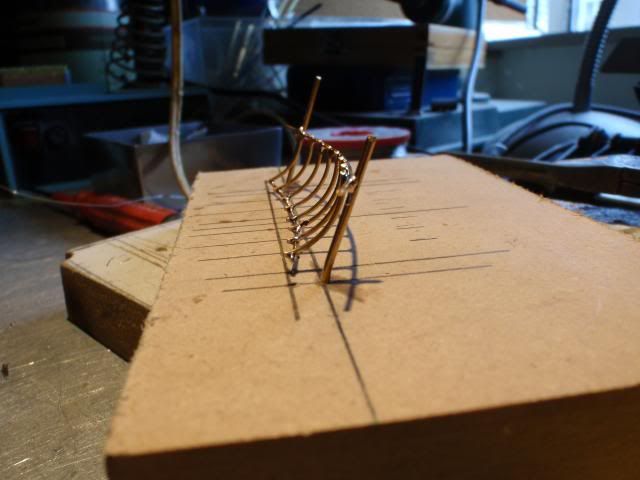
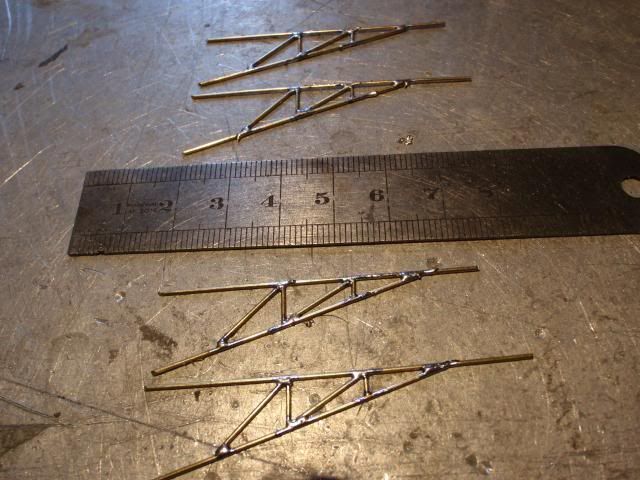
Yeah, cable-time, those Russians bolted and secured all those cables on the outside of the mast, making this scale accurate is foolish, the best try is good enough, i maybe a detailnut, but i'm not barking mad.
This was the first layer i had to make, i discovered on the pic a kind of cable protector just in the beginning of the mast, the rest is clamped down.
Since i'm using CA for glueing, i could start with the second layer, all those cables placed at the brackets/holders are done with small gauge wire and a pair of tweezers.
For now there are cutted to the right length and i can start making some clamps to secure those cables, at least it will look like their are secured by the clamps, the cables itself are solderingwire in different sizes, i've got big and small in stock.
Manfred.Leave a comment:
-
Finally my work is paying off, the basic form of the radar is ready, started to build up the mast itself,
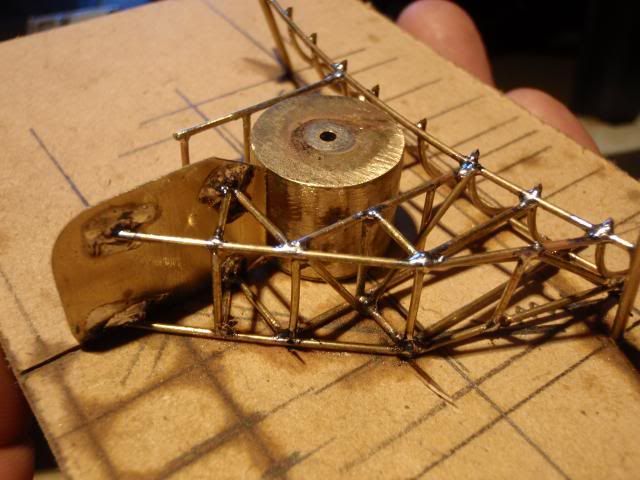
By adding that strange vane i could complete one side of the radar.
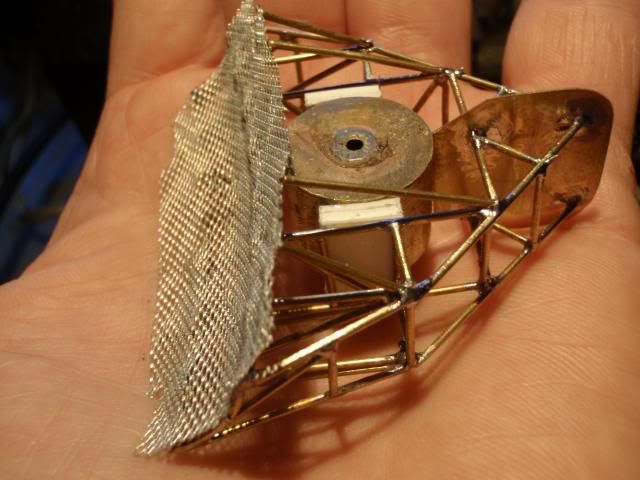
The other side went twice as fast, the first side learned me to do the trick, added some anti spatter screen mesh to form the radar itself.

Made the second drum on the lathe, i think it's the e motor for driving the antenna around, frames are made from thin styrene.
Added all brackets and glued them tight with 2K glue, also dryfitting the radar antenna, just to see if it's comparing to the pics i have.
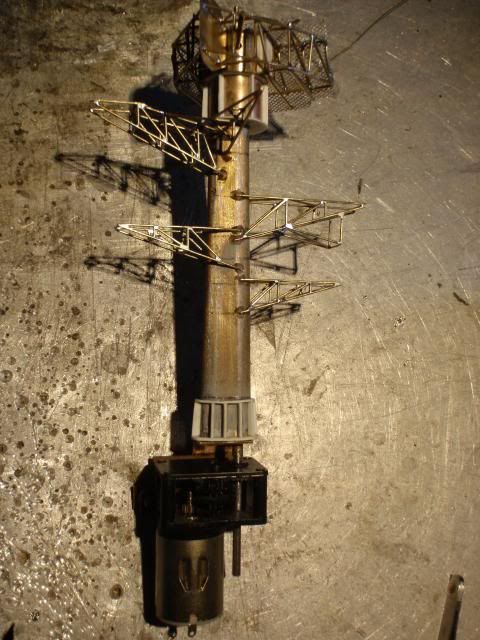
The main radar will be turning, got a geared motor from the spare department, made the mount for this motor a few years ago when this build halted.
Now i'm starting with the nice stuff, have to add loads of cables, those russians are not really ethic guys, it has to be functional, this on the other hand gives me a oppertunity to add some cable details.
Manfred.Leave a comment:
-
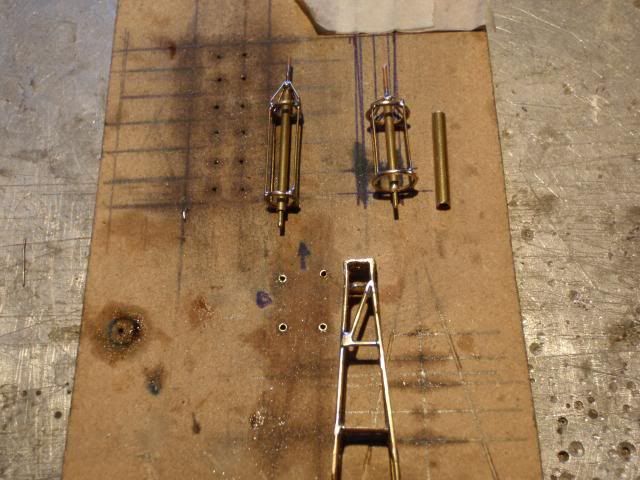
Made the drum with the help of the lathe, just turned some tube to it's desired length and soldered some lids onto it, it has to be hollow because of the weight, most prominent on those radars is, the web of reiinforcement tubes, simply to support the antenna itself.
This is the hollow drum, placed it on a pin to keep it at the same position during soldering.

First i placed the inner tubes, i decided that it was the best way to work my myself inside out.
Luckely i have some experience with the soldering iron, but even for me this is a big challence.
Biggest problem are, those diagonal tubes, first i have to make them to the right lenght, and keep them at their place with a pair of tweezers, using some solderingpaste eases the job to get a quick flow of the solder, and this will prefent the other parts to become unsoldered, Boy i love this Russian stuff!!!!
Manfred.Leave a comment:
-
Last video from the past, and some more work on the radarmast, also made a start with the radar itself,
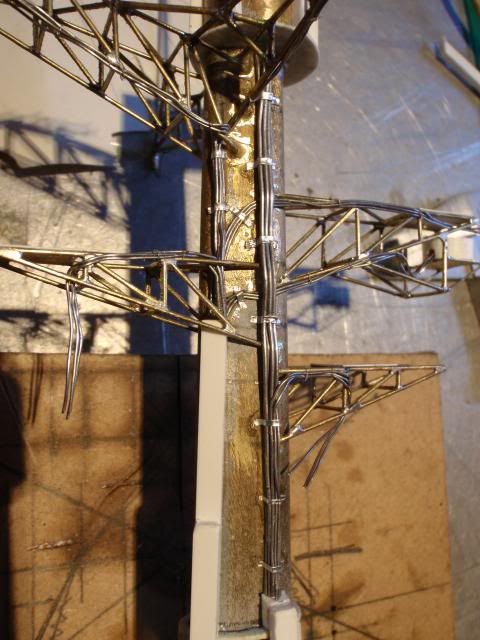
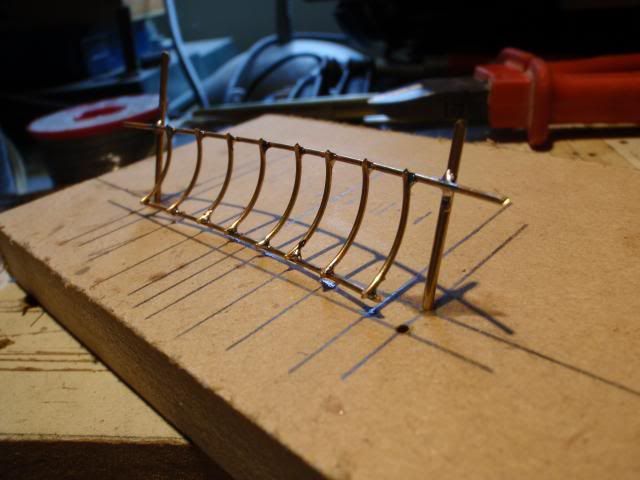
Rebuilded the launchtubes for giving me a better trajectory, still needed some tinkering on the hatch on one of the tubes.
The last holder was a bit tricky due to the angles, needed three tries to ge me a symmetrical pair.
Builded the other holders the same way, the width of this piece of wood is the same as the diameter of the mast, the pieces are glued down with CA, so be carefull during soldering, CA fumes are not healty.
All four pieces together on the mast, next step will be clipping them to the right size and glueing them tight.
For building the radar i made a new jigg, the tricky part is, getting the right shape in both directions, i needed also to get a upright angle on the radar itself, by gently bending both rods backwards i managed to get the right angle.
Manfred.Leave a comment:
-
I've been playing around with the soldering iron, but first i'll show a old vid, just to get the complete story on the track.
Firing live rockets can be fun, but when they have a unpredictable trajectory it becomes dangerous, my intial design failed, which i've shown on the vid, so it was back to the drawingboard to find a new solution.
First, there is a kind of reinforcement at the base of the mast, used some styrene to copy that.
Sanded down the reinforcement at the base, marked down the different heights at the mast and dryfitted the first copper creation.
I'll stop moaning about that hated productionwork, because somebody has to do it, there is only one man present at the Skunkworks, yep, that's me.
The reward of my productionwork, it seems to be much work, but it took me 4 hours to build this, i have to say, those are the least complicated one's, still one to go before i can start with the radar itself.
Manfred.Leave a comment:
-
Last few days we enjoyed some heavy rainshowers, this took the temparture down, a nice oppertunity to spray some primer,
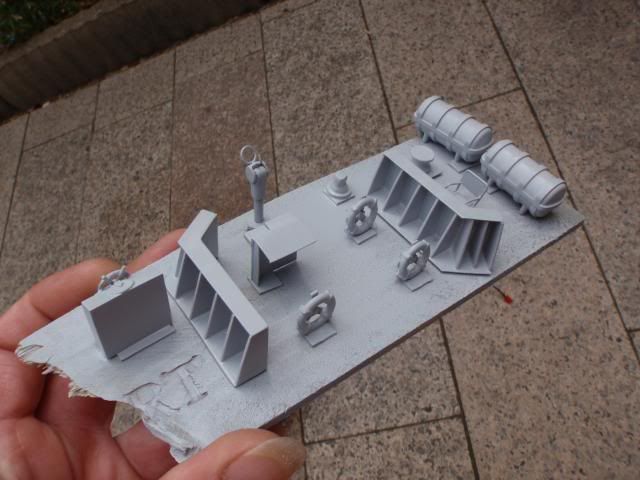
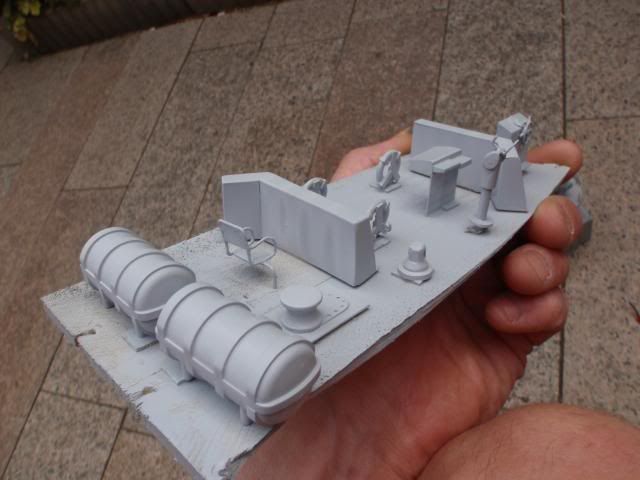
Placed on a piece of scrapwood all builded items from last year, they turned out much better with some primer.
Some more things placed at the upperstructure ready for some paint.
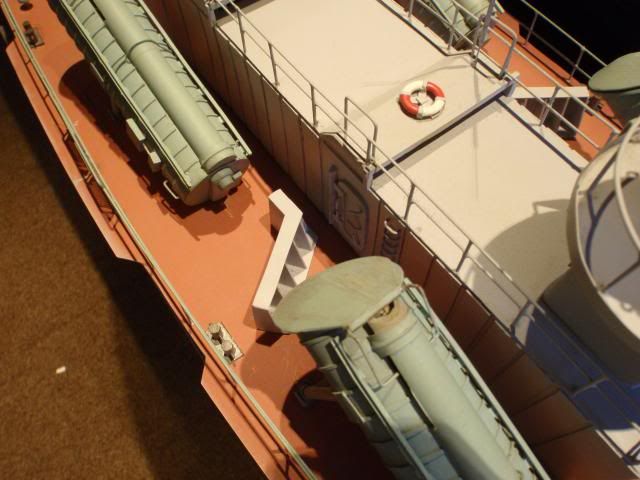
Placing/glueing the thrustdeflectors behind the front launchtubes, the rear launchtubes simply blowed it down the aft deck.
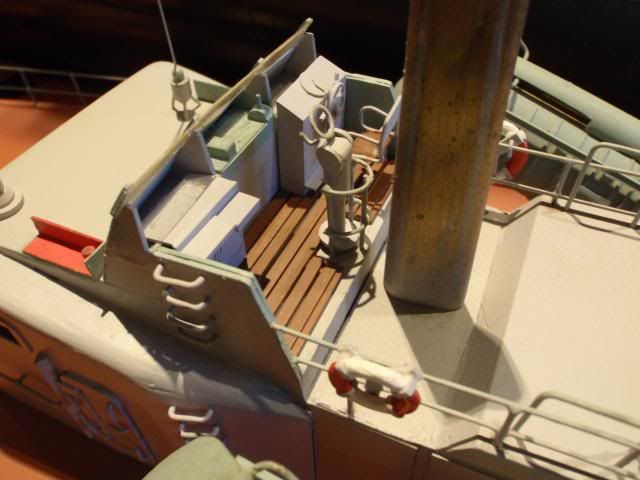
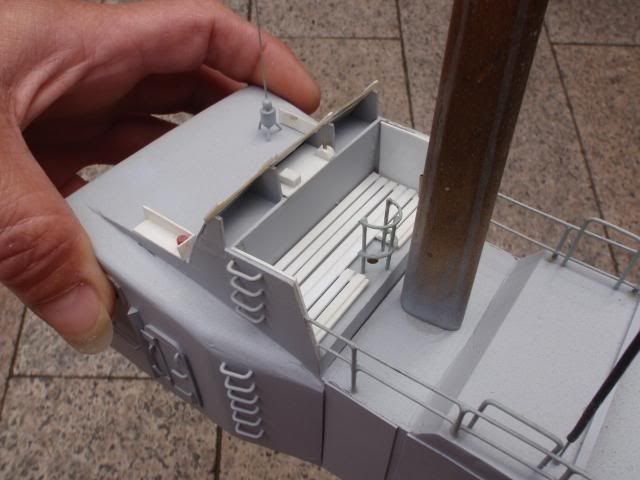
Painted the wooden planks and nav lights, resque bouys painted white and red and so on, so many little things done, she is finally starting to look like the real stuff.
Next little big project will be, the radarmast, like i've shown before with my tease picture, i allready started to solder the simple stuff, biggest challence will be the radar itself, i've got loads of pictures about that radar, Boy, i hate those Russians, so much complexity with a maze of tubes.
Manfred.Leave a comment:
-
Just one last teaser for this evening,
I've delayed this job much too long, not that there was not enough info/pictures about this subject, so i bit the bullet and started building.
Manfred.Leave a comment:
-
Thanks Tom, i know it's a lot of work, progress will always be slow on this project, simply because i build on her only during the summertime
Still have to post more, untill we end on the point what i'm building right now.
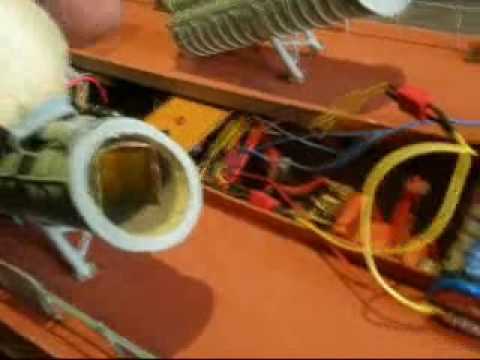
I sadly can only post one vid at the time, so here's the next one, a little demonstration to show how all things work with connected glowplugs and safety system, from this point on i was ready to fire some live ammo.
Manfred.Leave a comment:
-
That is amazing, Manfred. Inspirational for me to see the progress and work that went into the OSA.Leave a comment:
-
Thanks Chuck,
It was a awfull lot of work to get that far, LOL, moving covers!!!!, i got at least inspirated to get some more work done.
Driving this beast is another story, most annoying that high speed!
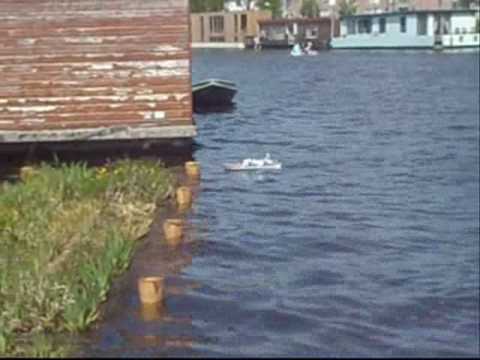
Enjoy the old maiden vid, still unarmed, what a shame with all those targets around me.
Manfred.Leave a comment:

Leave a comment: