Today's building

Collapse
X
 
  • Time
  • Show
Clear All
new posts

  • Albacore 569
    replied
    Had a surprise last night as I routinely continue to do more 'research searches' of the modeling subject. The Dolphin 2's still continue to not fail to surprise me.

    The Dolphin 2's and the new Dolphin 3 at present are the largest subs bult by HDW. Howaldtswerke Deutsche Werft AG since World War 2.

    Rumors in one questionable website on the Dolphin 2s had an illustration of a Dolphin 2 with possible vertical launch tubes midships. I logically compare the Dolphin 1's and the Dolphin 2's with an AIP system to generate electricity using oxygen hydrogen stored separately aboard the boat. Same as the 212A submarines also designed and built by HDW. I speculated the hull extension was just for the AIP system. The vertical launch system was only suspected but not confirmed publicly.

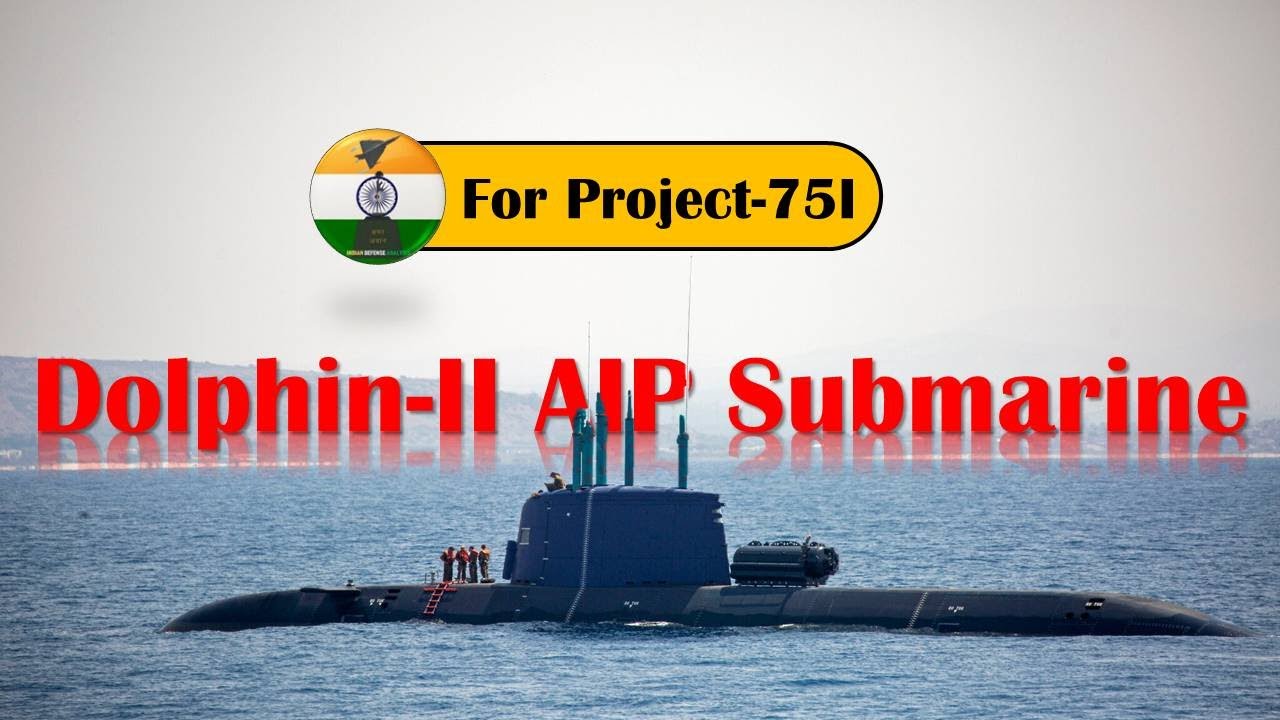
    Enter the Indian Navy you tube video considering purchasing the Dolphin 2's for their Navy. The video spills the beans the Dolphin 2's indeed have an interchangeable Module or container (as usual - remarkable German engineering) for vertical launch tubes and much more!

    Extra fuel, UUV,s (Underwater unmanned vehicles), UAV's (unmanned aerial vehicles, Mines, or a large swimmer lock out chamber. Wow. This gives these boats remarkable versatility equal to the present varied Naval missions/challenges around the world.

    Its size I suspect is the same or similar to the Virginia SSN vertical launch tubes. This new independent video seems to confirm. Here at bottom is a freeze frame of the system allegedly n the Dolphin 2's. I will scribe in the new door on the casing today off set to starboard midships at the longitudinal balance point.


    Click image for larger version  Name:	pOrCWCZ.jpg Views:	0 Size:	87.0 KB ID:	178062
    Last edited by Albacore 569; 02-07-2024, 07:11 PM.

    Leave a comment:


  • RCSubGuy
    replied
    Looking great, Steve! Great work.

    Leave a comment:


  • Albacore 569
    replied
    Scribing new TT Shutters. Making countermeasure ejectors. Ejectors made of brass on a brass back sheet. Pits in scribing Shutters puttied over and scribing tool run through wet putty to make clean channel. Then when dry light sanding till perfect.

    Bob Martin made me a scribing template, and it was a pleasure to work with. Works perfectly. He off set the 3d print 'numbers and it wraps snuggly around the bow exterior.


    Click image for larger version  Name:	cz0zEl0.jpg Views:	0 Size:	92.9 KB ID:	178015


    Click image for larger version  Name:	PgmRYGT.jpg Views:	0 Size:	56.0 KB ID:	178016


    Click image for larger version  Name:	5825vIf.jpg Views:	0 Size:	96.8 KB ID:	178017

    Click image for larger version

Name:	UO5ueqk.jpg
Views:	178
Size:	89.7 KB
ID:	178090
    Last edited by Albacore 569; 02-08-2024, 02:07 PM.

    Leave a comment:


  • Albacore 569
    replied
    New Scribing stencil 3 d printed arrived last night. Prescribing the Torpedo Tube shutters.

    Click image for larger version  Name:	7GJrnZH.jpg Views:	0 Size:	58.2 KB ID:	178001


    Click image for larger version  Name:	xJtj01C.jpg Views:	0 Size:	58.0 KB ID:	178002

    Click image for larger version  Name:	fF38KFW.jpg Views:	0 Size:	57.8 KB ID:	178003

    Click image for larger version  Name:	iKfiqCd.jpg Views:	0 Size:	91.2 KB ID:	178004


    Click image for larger version

Name:	gwCeYwA.jpg
Views:	224
Size:	79.3 KB
ID:	178006
    Last edited by Albacore 569; 02-03-2024, 06:16 PM.

    Leave a comment:


  • rwtdiver
    replied
    Steven,

    Thank you very much for taking the time to explain your process! I have two subs with masts that I have not completed and I will try the masking process on them.
    Than you again for the great information.!

    Rob
    "Firemen can stand the heat."

    Leave a comment:


  • Albacore 569
    replied
    Click image for larger version  Name:	O1NBXiP.jpg Views:	0 Size:	51.6 KB ID:	177969


    Thank you, Rob. I tried for my own curiosity three different ways masking and painting. The colors here are a 2 in 1 primer Relleno Gris Transtar 4603 auto Body primer. This I purchased down at the excellent local auto body supply shop. The salesman recommended the one for plastics. I said I was building a RC submarine. He said he has built 'some 3000 model airplanes' . Quoting his words Ask for the plastic version, he said it had better penetration into plastic for a smoother hard finish. Or so he said.

    The other two colors used in the photo for this particular building subject are:

    Rust-oleum Painters Touch 2X Ultra Cover Vintage Teal in a satin finish.
    Rust-oleum Painters Touch 2X Ultra Cover Midnight Blue in a satin finish.


    On Masts #'s 2, 5, & 6 I used the rubber base liquid mask. I mentioned its name in one of the posts above in this thread. But any brand hobby shop liquid mast should do. Just lay it on thick, for easier lift off later.

    On these masts they were first painted the gray primer overall. Then the liquid mask splotches are painted on in loose flowing blobs, the thicker the better. After drying in the cold garage over night, I then sprayed over all a light single coat of the Vintage teal.

    Once completely dried, I used a wooden toothpick and my fingernail to lift and pull off the masks. I then washed the masts with some hand soap and warm water. Then I masked the mast tops horizontals surfaces for the Midnight Blue. When this was accomplished, and if all seemed good, I over sprayed the whole mast with a Testors clear flat or Testor dull coat to flatten down the translucency and even things out.

    Mast #1 was painted in the same order (gray primer base) but instead used loosely cut masking tape and stuck on. Then I painted the Vintage Teal after overall. This tape method was a little easier to see and remove. But of the two ways, the liquid mask looked a little better to me. But at the pond, unless they read this post I doubt anyone could tell the difference but me.

    Mast $3 (the slim attack periscope) I did a third way. Painting the mast the Vintage Teal over all FIRST. Then just hand painting gray splotches using a small hand brush. Straight forward simple.

    Over all the results are all generally the same comparing next to each other. I think the Mask is the best-looking splotches because the gray spots are not a top layer, the green surrounding is the top layer. But it's so damn minute, it will all be forgotten when the sub is on the lake. The hand painting the splotches is the quickest way.

    Then all masts are sprayed with a Clear Flat or Dull Coat in final step..

    If your masts are a 3 D printed plastic part. (parts #2 & 6 in the photo) I think the liquid mast is good. With the other masts, the K&S 3/8 - Inch foil shape tubing is aluminum, extra care is needed (definitely use a wooden toothpick or good old fingernail to remove the masks so the aluminum doesn't appear underneath. If this happens dab on a little gray and that fixes easy.

    If I had to do a again, I would use a slightly darker primer gray for the splotches. Color photos of the real masts seem to indicate being a tint slightly darker, but my gray used is very close.


    The vintage Teal color in this project appears only on the masts, so it will not be needed again except for repair touch up.
    Last edited by Albacore 569; 02-01-2024, 03:07 AM.

    Leave a comment:


  • rwtdiver
    replied
    Originally posted by Albacore 569
    More today, finished last mast. Scribing tool arriving tomorrow. After that should start to really move.

    Click image for larger version Name:	gqsbLLA.jpg Views:	0 Size:	68.9 KB ID:	177966
    Really nice detail work on the sail and masts Steven!

    I have never used the liquid mask before. So you lay down your base color, then the masking, and then the final color? Then what do you use to remove the masking? Am I right to assume you can then apply your clear coat?

    Rob
    "Firemen can stand the heat."

    Leave a comment:


  • Albacore 569
    replied
    More today, finished last mast. Scribing tool arriving tomorrow. After that should start to really move.

    Click image for larger version  Name:	gqsbLLA.jpg Views:	0 Size:	68.9 KB ID:	177966

    Leave a comment:


  • Albacore 569
    replied
    More today.


    .Click image for larger version

Name:	fbMGghX.jpg
Views:	299
Size:	68.7 KB
ID:	177912


    Click image for larger version

Name:	vOjFAZk.jpg
Views:	279
Size:	61.8 KB
ID:	177913


    Click image for larger version

Name:	WNfRJRj.jpg
Views:	283
Size:	54.4 KB
ID:	177914

    Leave a comment:


  • Albacore 569
    replied
    Another day another mast.


    Click image for larger version

Name:	Ezr6SLY.jpg
Views:	181
Size:	65.9 KB
ID:	177890

    Click image for larger version

Name:	NnSJxXB.jpg
Views:	166
Size:	59.5 KB
ID:	177891


    Click image for larger version

Name:	Ffrqsfp.jpg
Views:	164
Size:	64.1 KB
ID:	177892


    Click image for larger version

Name:	HMjOnzt.jpg
Views:	167
Size:	66.7 KB
ID:	177893

    Click image for larger version

Name:	oIz1nhe.jpg
Views:	161
Size:	60.1 KB
ID:	177894


    I will keep the three mast components separate for painting as the top of the streamlined fairing will be a dark blue. Ones all primmed sanded painted will complete this ECM mat aft. What looks like a mast light will be added forward. The aft small mast is offset to starboard.

    Leave a comment:


  • Albacore 569
    replied
    The liquid Mask used is called 'SPAZ STIX' Shaking my head about the name. lol.. It was bought years ago and was only one available locally at the time. It works, 'suitably blobby'. Cutting individual shaped tape masks would work as well. I have Vallejo paints and they are good.

    Last edited by Albacore 569; 01-24-2024, 01:51 AM.

    Leave a comment:


  • DrSchmidt
    replied
    Good job, Did you use Vallejo masking fluid? I think I recognize the color...

    Leave a comment:


  • Albacore 569
    replied
    More today.

    Click image for larger version  Name:	ILU2RBh.jpg Views:	0 Size:	43.8 KB ID:	177838

    The now dry Bondo neck taper sanded down. later primed sanded again and painted.


    Click image for larger version  Name:	HAgNoYn.jpg Views:	0 Size:	47.2 KB ID:	177839


    Sprayed with a rattle can Rust-Oleum 'Vintage Teal' over the thick liquid mask. If you go this way, be sure you layer on 2 coats minimum. so, it might be easier to peel off later.

    I plan to paint the attack periscope the reverse motion. I.E. Paint teal over all first and add the spots in gray after. I want to experiment & compare.

    Rubbing off the mask is a bit of work. It int a worry if te masts are plastic. You can't really scratch away the gray undercoat. If te masts are brass and aluminum, then yes you may have a problem. The use a toothpick and pry it up and rub with your fingers and fingernail. I then wash off the mats in soap and water. When dry, I paint the lens and the top of the streamline foil in a Rust-Oleum 'Midnight Blue' spraying into the cap and use as a on the spot pallet and with a tiny hand brush paint these by hand.

    I also masked and sprayed the tear drop mast top of the snorkel head in Midnight Blue also.

    Then I used a Testors clear flat overall and te look is remarkable (to me anyway).

    Click image for larger version

Name:	n3eXAbz.jpg
Views:	176
Size:	44.6 KB
ID:	177863


    Below is the comparing Reality check...lol. Interesting to note the absence. of much of the antennas on the forward mast in the top photo below. Either it was censored, or based on the crew on the bridge, the photo may have been taken on HDW sea trails in the Baltic prior to sailing to Israel. There doesn't seem to be an pixilation distortion that would have revealed it being censored. I guess one small bonus from my training doing photo analysis as a UFO investigator and spotting fake photos. My guess it's a HDW source and taken on sea trials.


    Click image for larger version  Name:	UgM9pYs.jpg Views:	0 Size:	58.0 KB ID:	177841
    Last edited by Albacore 569; 01-23-2024, 06:07 PM.

    Leave a comment:


  • Albacore 569
    replied
    Applying liquid mask to finished masts for painting. Making the attack scope. More masts to come.

    Click image for larger version

Name:	KzLGM6X.jpg
Views:	227
Size:	42.0 KB
ID:	177813


    Click image for larger version

Name:	6R4y7uS.jpg
Views:	215
Size:	43.4 KB
ID:	177814


    Click image for larger version

Name:	4O7D8fa.jpg
Views:	217
Size:	44.4 KB
ID:	177815


    Click image for larger version

Name:	gKj3f1D.jpg
Views:	214
Size:	47.3 KB
ID:	177816

    Leave a comment:


  • Albacore 569
    replied
    Starting on the attack scope next. 1/8-inch brass rod.


    Click image for larger version  Name:	gDqbHVf.jpg Views:	0 Size:	45.9 KB ID:	177770


    Click image for larger version  Name:	0l3H3BV.jpg Views:	0 Size:	38.2 KB ID:	177771
    A lot more shaping ot get the flat fairing smaller.


    Click image for larger version  Name:	vzVNyf8.jpg Views:	0 Size:	45.9 KB ID:	177772

    Click image for larger version  Name:	cNL9Zkr.jpg Views:	0 Size:	45.1 KB ID:	177773

    Starting to make some sense.

    Watching the weight of my brass aluminum masts. It I sense too much top weight (like the top top ) I'll use as master's and mold up resin copies if they arent too brittle for action in the field (pond). (Collisions with skimmers).
    Last edited by Albacore 569; 01-19-2024, 09:06 PM.

    Leave a comment:

Working...