today's work

Collapse
X
 
  • Time
  • Show
Clear All
new posts
  • goshawk823
    Lieutenant Commander
    • Oct 2010
    • 210

    Hmmm… well, ****, I hope I didn’t step in it! I’ve just never seen anyone do a plug/master/hull XXI in that small a scale. I/72, 1/48 and 1/32, yeah.
    Apologies in advance if I started a **** storm! ::). (Ducking as I type…)

    Comment

    • Das Boot
      Rear Admiral
      • Dec 2019
      • 1149

      Originally posted by goshawk823
      wow…very nice looking xxi, david. Is that from a 3d file print?
      Incoming!!!!!!
      Of the 40,000 men who served on German submarines, 30,000 never returned.”

      Comment

      • Das Boot
        Rear Admiral
        • Dec 2019
        • 1149

        Originally posted by goshawk823
        Wow…very nice looking XXI, David. Is that from a 3D file print?
        Incoming!!!!!!
        Of the 40,000 men who served on German submarines, 30,000 never returned.”

        Comment

        • redboat219
          Admiral
          • Dec 2008
          • 2735

          GRP? 2-2.5" Subdriver?
          Make it simple, make strong, make it work!

          Comment

          • He Who Shall Not Be Named
            Moderator
            • Aug 2008
            • 12253

            Originally posted by goshawk823
            Hmmm… well, ****, I hope I didn’t step in it! I’ve just never seen anyone do a plug/master/hull XXI in that small a scale. I/72, 1/48 and 1/32, yeah.
            Apologies in advance if I started a **** storm! ::). (Ducking as I type…)
            Yeah, it's a 3D print.

            WE SHALL NEVER SPEAK OF THIS AGAIN... EVER!

            David
            Who is John Galt?

            Comment

            • SubDude
              Captain
              • Dec 2019
              • 803

              Originally posted by He Who Shall Not Be Named

              Yeah, it's a 3D print.

              WE SHALL NEVER SPEAK OF THIS AGAIN... EVER!

              David
              I LOVE IT! Queue up "The Stars and Stripes Forever"!!!

              Comment

              • redboat219
                Admiral
                • Dec 2008
                • 2735

                Originally posted by He Who Shall Not Be Named
                Are you ready for THIS?!!...

                A 1/96 Type-21

                Click image for larger version

Name:	IMG_5810.JPG
Views:	411
Size:	59.1 KB
ID:	156232Click image for larger version

Name:	IMG_5809.JPG
Views:	397
Size:	53.3 KB
ID:	156231Click image for larger version

Name:	IMG_5806.JPG
Views:	436
Size:	53.9 KB
ID:	156230
                31 inches long
                3.2 inches wide
                Make it simple, make strong, make it work!

                Comment

                • He Who Shall Not Be Named
                  Moderator
                  • Aug 2008
                  • 12253


                  This coming fall the North Carolina Model Boat Club will again host the annual 'Fleet-Run'. An all 1/96 scale r/c boat (and submarine) group run at City Lake in the city of Rocky Mount. I've attended one of these events and it's a wonderful three days of running at one of the best boating venues on the East coast. Currently I'm just about the only guy who operates r/c submarines over there. However, next year I will be joined by J. Hoffman who will operate a German Type-21 U-boat. This guy is renowned for his very well crafted, scratch-built model warships, and its a pleasant and instructive task to study his work in and out of the water.

                  I'm a submarine guy. Mr. Hoffman want's to be a submarine guy. So, we agreed to a collaborative effort: he wanted a German Type-21 submarine to add to his 1/96 fleet, and I agreed to help him equip it with the gear needed to make it a fully functional r/c submarine.

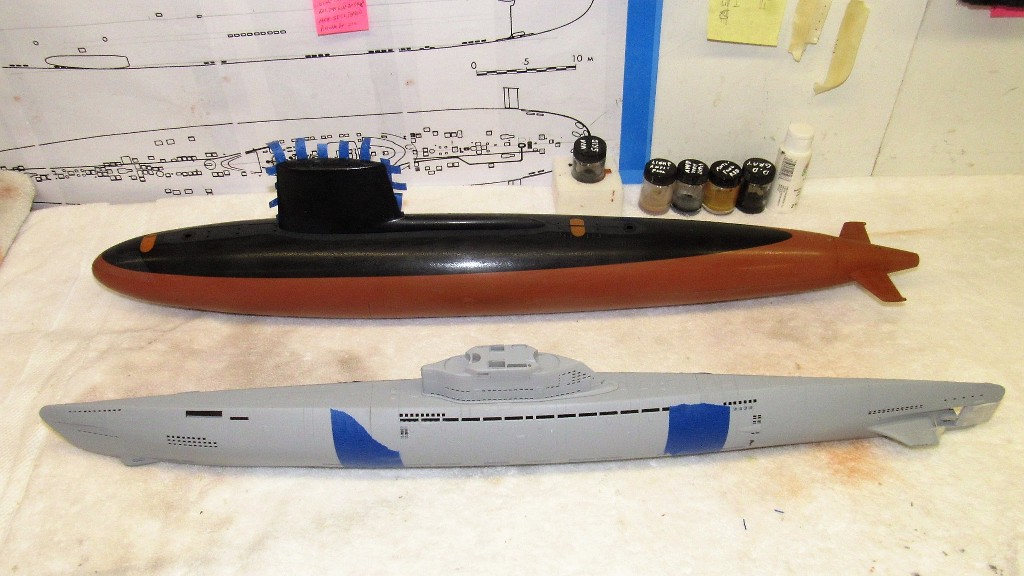
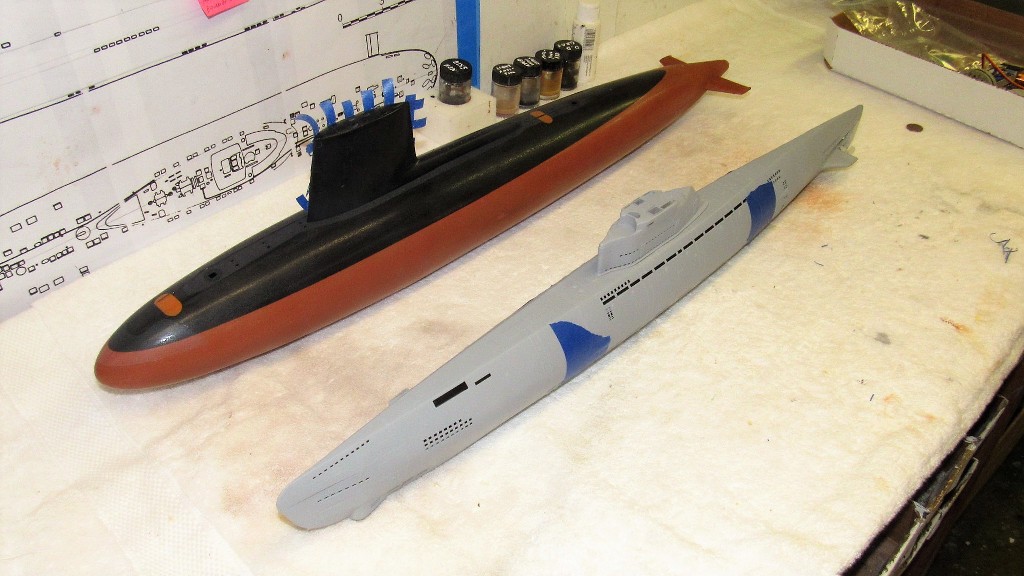
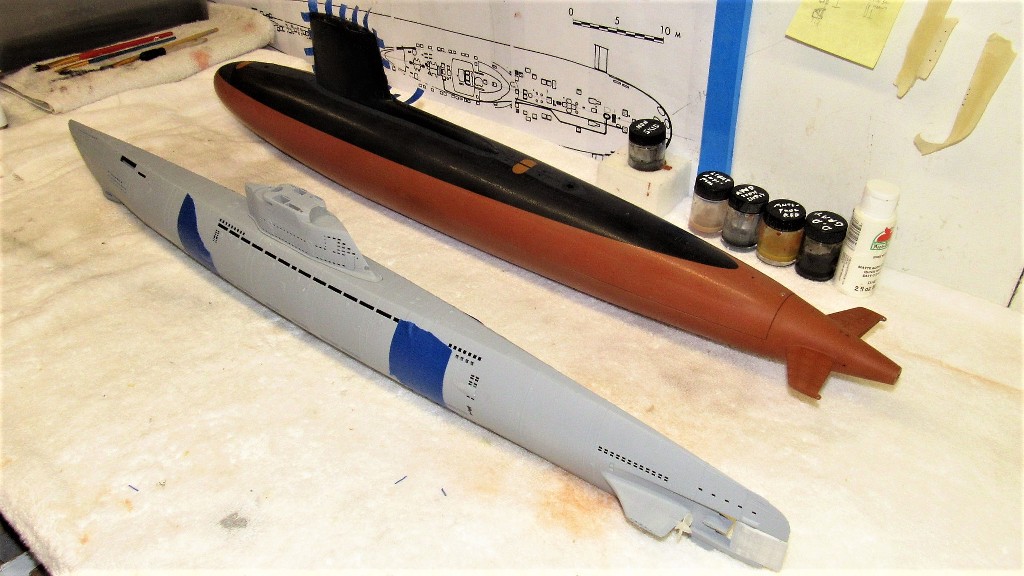
                  And here it is, in foreground, next to my still in-work 1/96 SKIPJACK. Remarkably, they are both just about the same length.


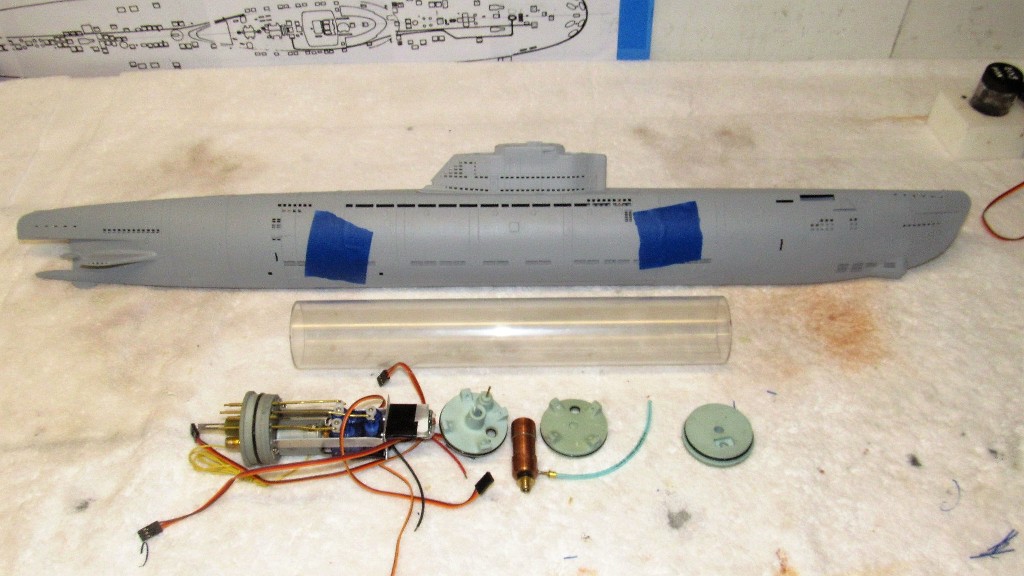
                  The entire model kit was fabricated in a printer, I don't know at this time if it was a filament or resin type printer. You see that blue tape on the sides? That's to hold the three pieces of hull together for these shots. I assume it was printed this way owing to the machines maximum height build-up ability. Anyway, I will eventually glue the three hull pieces into one, then, at the waterline, I'll split most of the upper hull from the lower hull. This will give us access to the interior for installation of the water tight cylinder (WTC) that will contain the control, ballast, and propulsion sub-systems needed to animate the model.


                  Though only some 31" long, the hull has room for a 2" diameter WTC with all the gizmos needed to permit control of the propulsion, stern planes, rudder, bow planes, and ballast sub-systems. I've yet to determine how much water the ballast tank has to hold, so I'm deferring assembling the WTC till I have that number in hand, which will drive the length of the WTC's centrally located ballast tank.


                  Most Allied nations, after the war, conducted evaluation of the surviving 21's. Those submarines, the most advanced production submarine of the war became the grand-daddies of the first post-war designs to join the cold-war. Quit a legacy! There's a little 21 DNA in the SKIPJACK's. Both true underwater fighters.


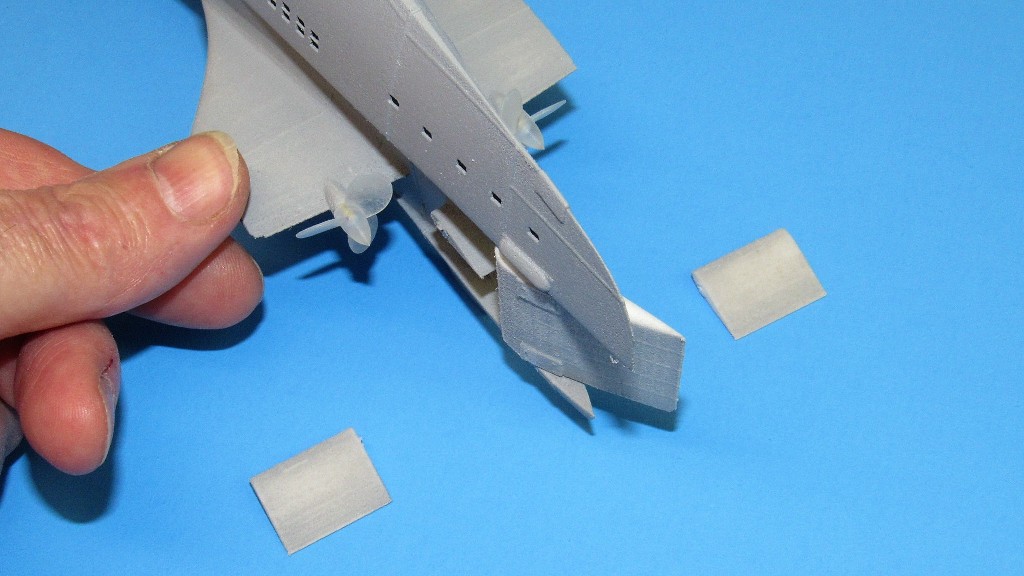
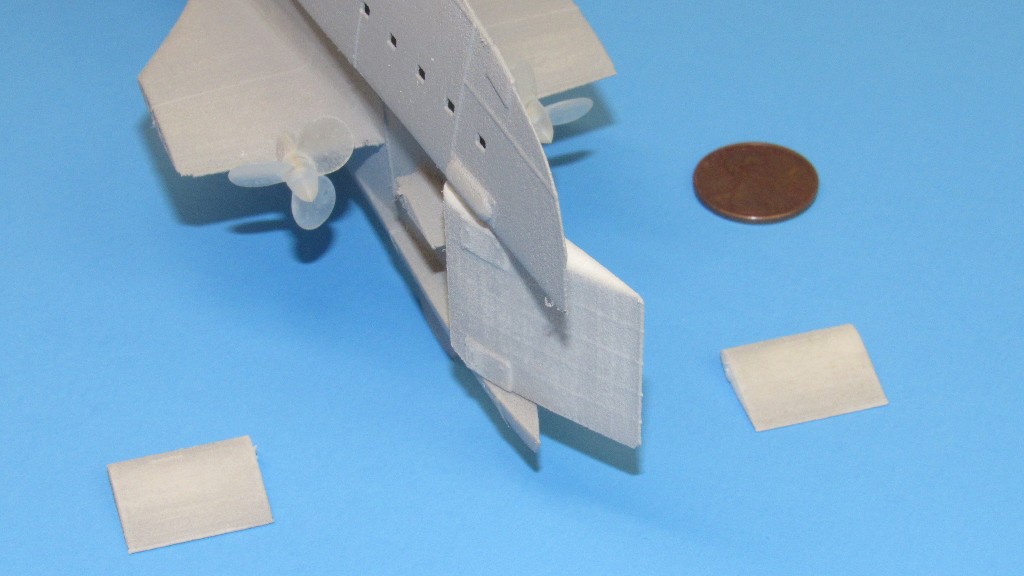
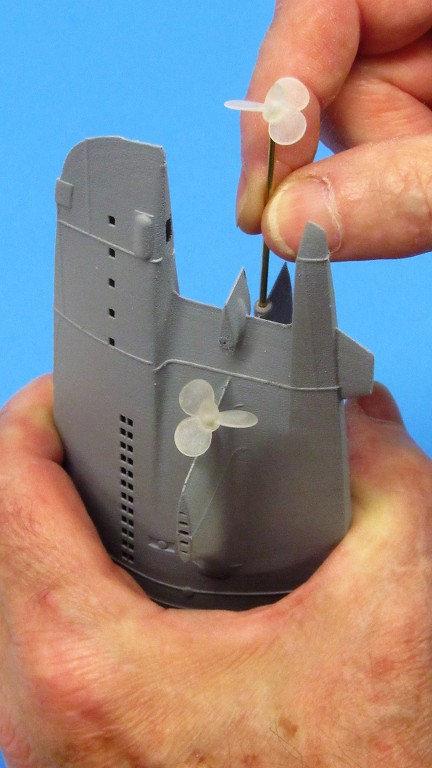
                  To make things easy I elected to work out the propulsion shafting and bearings; rudder operating shaft and control horn; and stern plane operating shaft and control horn with the after section of the hull removed from the rest of the hull. In this shot I've already made up the propellers -- I was surprised and delighted at the strength of these and the other thin cross-section printed parts -- to 1/16" diameter brass propeller shafts, and installed them into the stern tubes embedded at the trailing edges of the horizontal stabilizers.


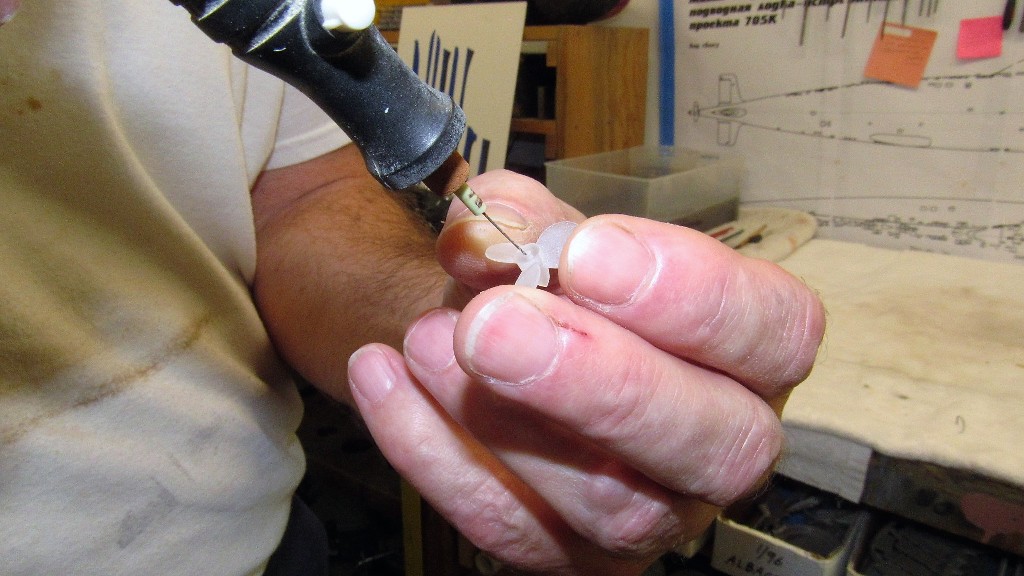
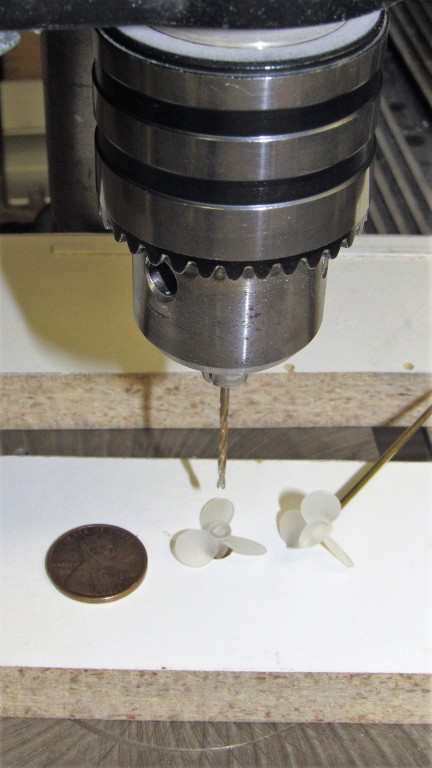
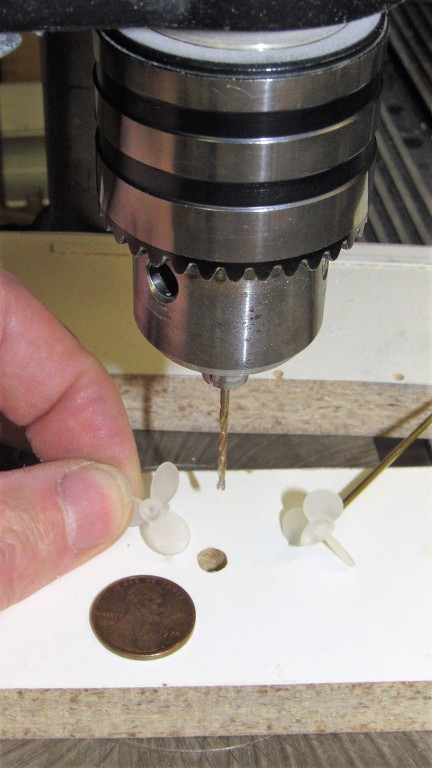
                  There were no bore holes in the propeller hubs, and that meant some careful work starting and finishing off interference-fit bores for the 1/16" diameter brass rod propeller shafts. The bores started life as a punch-mark, then a shallow plunge with a #80 bit, followed by a reaming with a hand-twisted #53. At that point the bore was only 1/32" deep, a good enough pilot-hole to let me use the big gun with an assurance that the bit would not wander off-center.


                  On the drill press, with the hub tip residing in a hole drilled into a scrap piece of shelving board laid atop the machines bed. This way the three blades of the propeller rest atop the board and in so doing presented the hubs base at a right-angle to the drill-presses 1/16" bit. Then -- with very light, shallow stabs of the bit into the work -- I deepened the hub bore hole. Sweat-pumps to Fast!


                  Damn! I didn't break anything. Notify the Media! Wrench-wrist Dave pulls another one out of the hat!


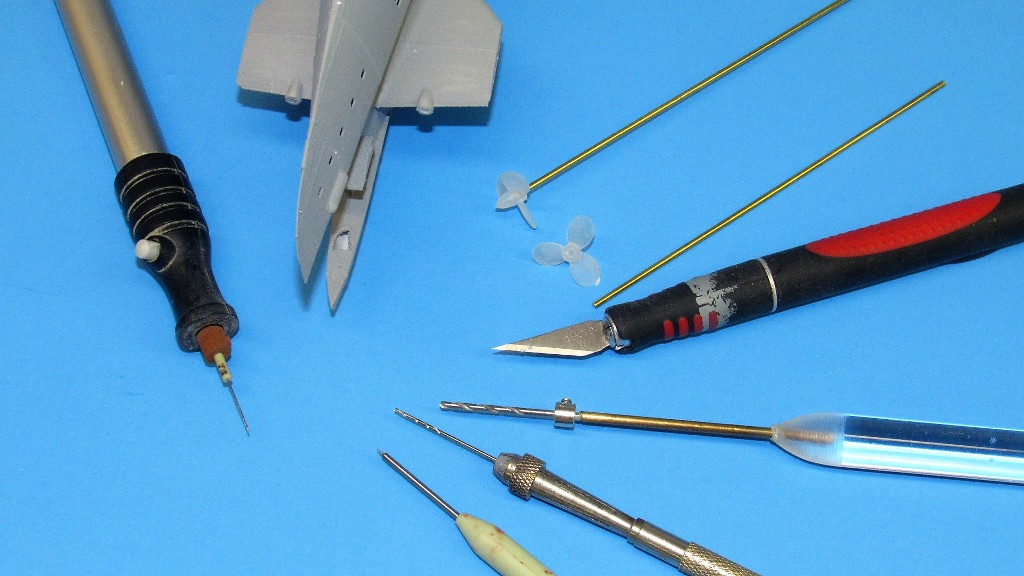
                  Just some of the tools used to hand-bore the pilot-holes into the propeller hubs. The same tools were used to bore out the propeller shaft stern tube bores -- I was glad to find that even the horizontal stabilizers were hollow, and of very thin section, which made that job a cinch.


                  A nasty characteristic of the 21's was that differential use of the screws to aid in the turn was backwards from most vessels. This is because the thrust line of these toed-in shafts intersects the crafts longitudinal center a bit aft of the vessels center of mass. But, since this model will have these two propellers spinning at identical RPM, in counter-rotation to one another, that's not an issue for this model. Here I'm sliding a propeller shaft into its stern tube.


                  Now, to work out the rudder and stern plane linkages. God help me!

                  David

                  Who is John Galt?

                  Comment

                  • redboat219
                    Admiral
                    • Dec 2008
                    • 2735

                    Can't wait to see how you'll tackle the linkages specially for the rear dive planes.

                    Can you use the SD for the 1/72 Type VII or is it too long?
                    Last edited by redboat219; 11-28-2021, 03:53 AM.
                    Make it simple, make strong, make it work!

                    Comment

                    • He Who Shall Not Be Named
                      Moderator
                      • Aug 2008
                      • 12253

                      Originally posted by redboat219
                      Can't wait to see how you'll tackle the linkages specially for the rear dive planes.

                      Can you use the SD for the 1/72 Type VII or is it too long?
                      Two motors is too much power. I'm using one motor with a gear-splitter. As to the rudder and stern plane linkages. I'll try to keep them internal, but may whoose out and run the pushrods and horns external. Those 'blisters' each side of the stern, just over the rudder provided for the rudder operating shaft bell-crank on the real thing. And, on this 3D printed model they are hollow, so I might be able to do it as the prototype did. We'll see. A Watch-makers delight to be sure.

                      David
                      Who is John Galt?

                      Comment

                      • Monahan Steam Models
                        Captain
                        • Apr 2020
                        • 755

                        Watch-makers challenge for sure! Looking forward to seeing more of this build. Really nice sized model that you can carry in one hand.

                        Hard to tell from the photos, but it almost looks like it might have been built on a resin printer? Would be interesting to know more about how the hull was made and who’s files were used.

                        Comment

                        • goshawk823
                          Lieutenant Commander
                          • Oct 2010
                          • 210

                          looks fantastic David. I've always loved the Type XXI. definitely a challenging build in that scale.

                          Comment

                          • He Who Shall Not Be Named
                            Moderator
                            • Aug 2008
                            • 12253

                            Originally posted by Monahan Steam Models
                            Watch-makers challenge for sure! Looking forward to seeing more of this build. Really nice sized model that you can carry in one hand.

                            Hard to tell from the photos, but it almost looks like it might have been built on a resin printer? Would be interesting to know more about how the hull was made and who’s files were used.
                            I think you're right, very, very light striations.

                            David
                            Who is John Galt?

                            Comment

                            • redboat219
                              Admiral
                              • Dec 2008
                              • 2735

                              Originally posted by Monahan Steam Models
                              Watch-makers challenge for sure!
                              Found these photos of an RC conversion being done on a 1/35 Bronco Seehund in a French RC forum. Click image for larger version

Name:	20180321.jpg
Views:	371
Size:	49.7 KB
ID:	156278Click image for larger version

Name:	20180316.jpg
Views:	356
Size:	85.7 KB
ID:	156279Click image for larger version

Name:	20180320.jpg
Views:	335
Size:	87.0 KB
ID:	156280Click image for larger version

Name:	20180317.jpg
Views:	342
Size:	87.3 KB
ID:	156281

                              Make it simple, make strong, make it work!

                              Comment

                              • He Who Shall Not Be Named
                                Moderator
                                • Aug 2008
                                • 12253

                                Originally posted by redboat219

                                Found these photos of an RC conversion being done on a 1/35 Bronco Seehund in a French RC forum. Click image for larger version

Name:	20180321.jpg
Views:	371
Size:	49.7 KB
ID:	156278Click image for larger version

Name:	20180316.jpg
Views:	356
Size:	85.7 KB
ID:	156279Click image for larger version

Name:	20180320.jpg
Views:	335
Size:	87.0 KB
ID:	156280Click image for larger version

Name:	20180317.jpg
Views:	342
Size:	87.3 KB
ID:	156281
                                External linkage elements I wish to avoid.

                                David
                                Who is John Galt?

                                Comment

                                Working...