-
John Slater
Sydney Australia
You would not steal a wallet so don't steal people's livelihood.
Think of that before your buy "cheap" pirated goods or download others work protected by copyright. Theft is theft.
sigpic -
Build thread coming Mike - pictures etc there-, just flat out at work by day, assembling kids bikes and wot nots at night for Christmas.
JJohn Slater
Sydney Australia
You would not steal a wallet so don't steal people's livelihood.
Think of that before your buy "cheap" pirated goods or download others work protected by copyright. Theft is theft.
sigpicComment
-
Who are you buying the Astute from?IT TAKES GREAT INTELLIGENCE TO FAKE SUCH STUPIDITY!Comment
-
-
A quick update on this project.
It's A good day for HMK... after many dollars and hours expended (not to mention massive frustration), the R&D experimental hull molds can finally be called a true success. It's also family picture day for all the Seawolf parts down in the dungeon. I also set up a proper light tent in the shop for taking pictures of the groups of parts broken down into sub-systems. Basically, the light tent disperses light kind of like what an overcast sky does to the light of the sun so that shadows can be drastically minimized. Speaking of which, the lighting in my dungeon might not be sufficient to capture the detailing of the hull and sail. I might have to wait for a cloudy day to redo the parts' pics.
Comment
-
Preparation for Trimming
It's been one heck of a long time since I've posted anything on the Seawolf so I thought I would share a few words and pictures involving the preparation and trimming of my personal Seawolf for submerged and surfaced operations.
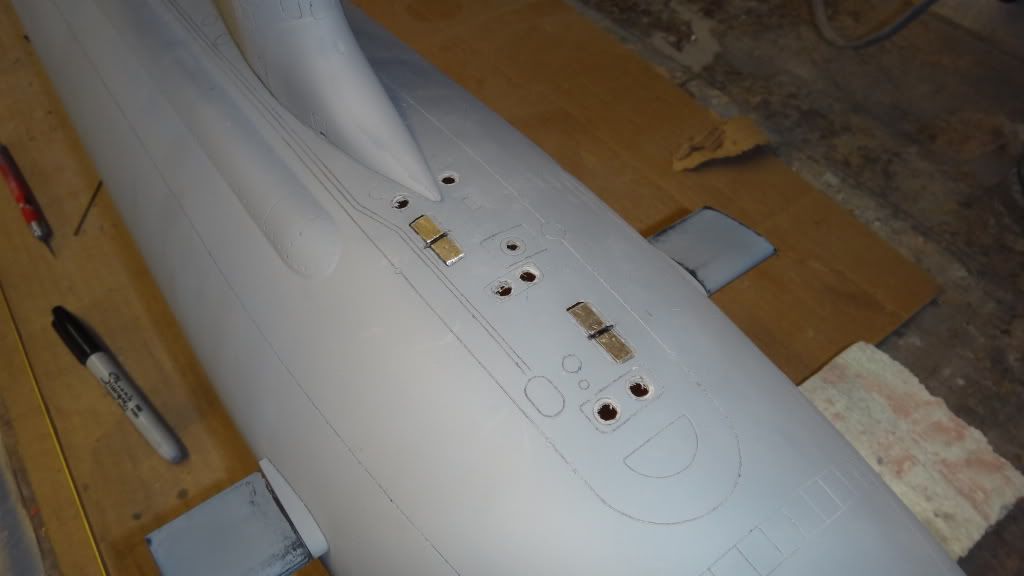
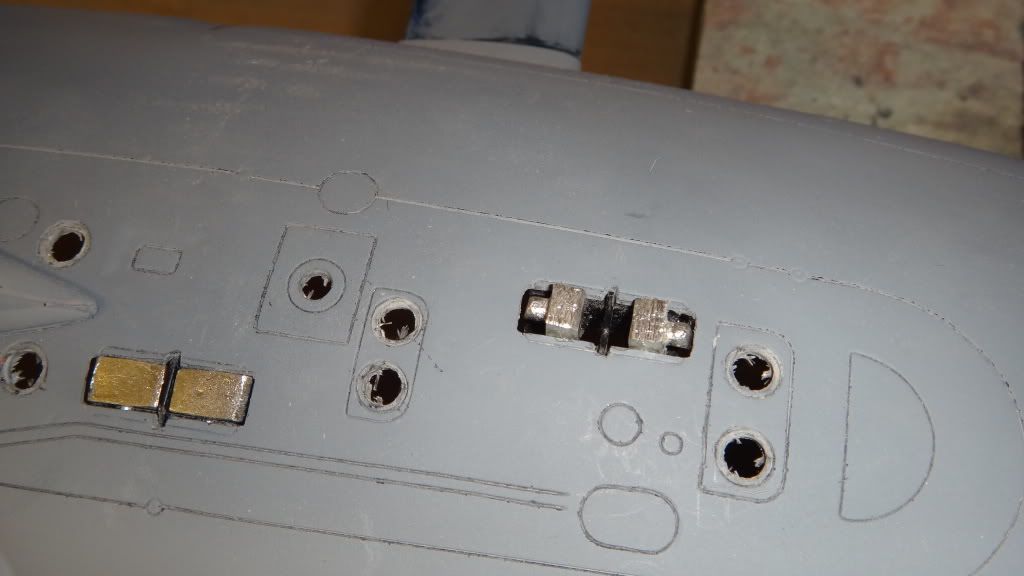
To start with, all the major filling and body work is complete at this point. The hull is left in a primer grey state for the trimming and test run stages to prevent damage to a final paint job. One sad note in passing is the demise of all auto body products that don't conform to the 2.1 VOC emissions rule here in Canada. That means R.I.P. Dupont Nason ful-fil primer (best primer for visibility and easy sanding) and hello Evercoat Durabuild and its' ultra expensive no-VOC reducer. It's not as good but it's the next best alternative that I can find
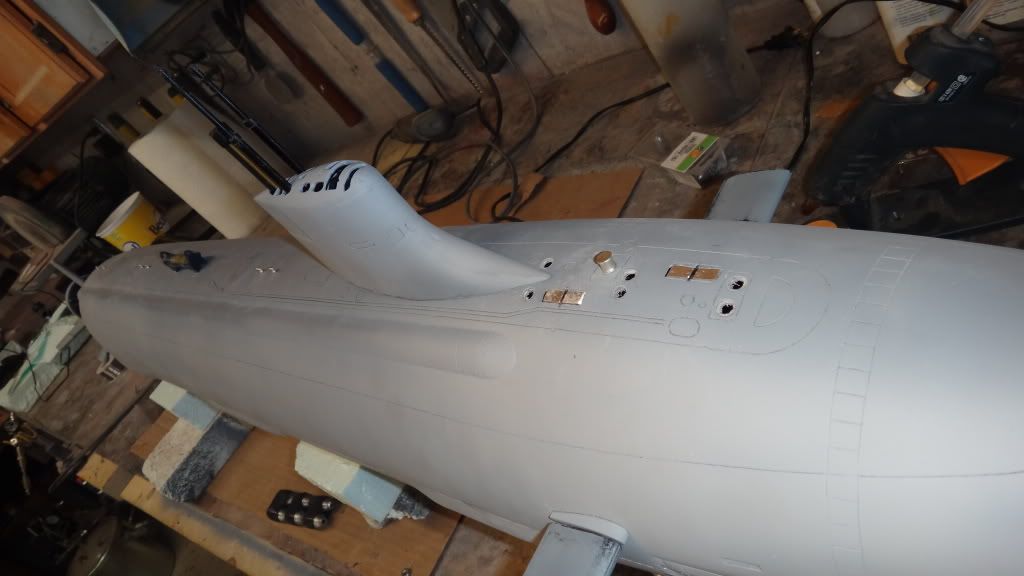
Everything that will be installed on my boat for normal lake running has to be installed for trimming. This includes all those heavy metal topside fittings like cleats and capstans. The rest of the stuff that include with the metal kit like flag masts etc... are for display only and are removable.
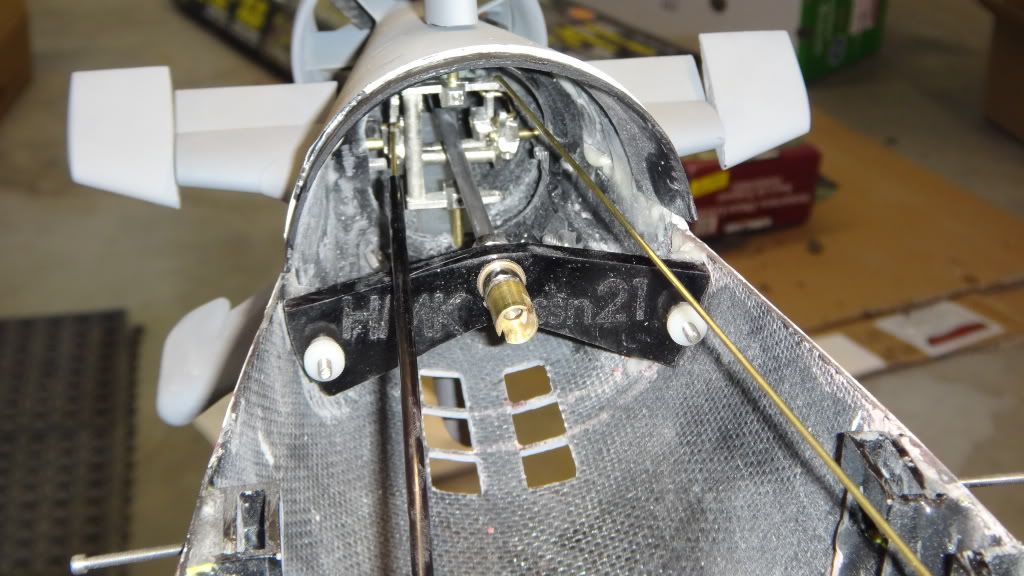


This is the functioning snorkel. To get it to function in conjunction with the Caswell Snort system I open the induction holes in the mast-head by drilling from the back. A filed 7/32" tube is fit into its hole in the mast head. A couple blows into the tube ensures a clear passage way for induction air to flow. The mast is held in place in my sail by attaching a chunk of 1/4" fuel line over the tube. From there, 1/8" is plugged into the large fuel line and back to the D&E suction/discharge manifold on the top of my Subdriver.

Comment
-
-
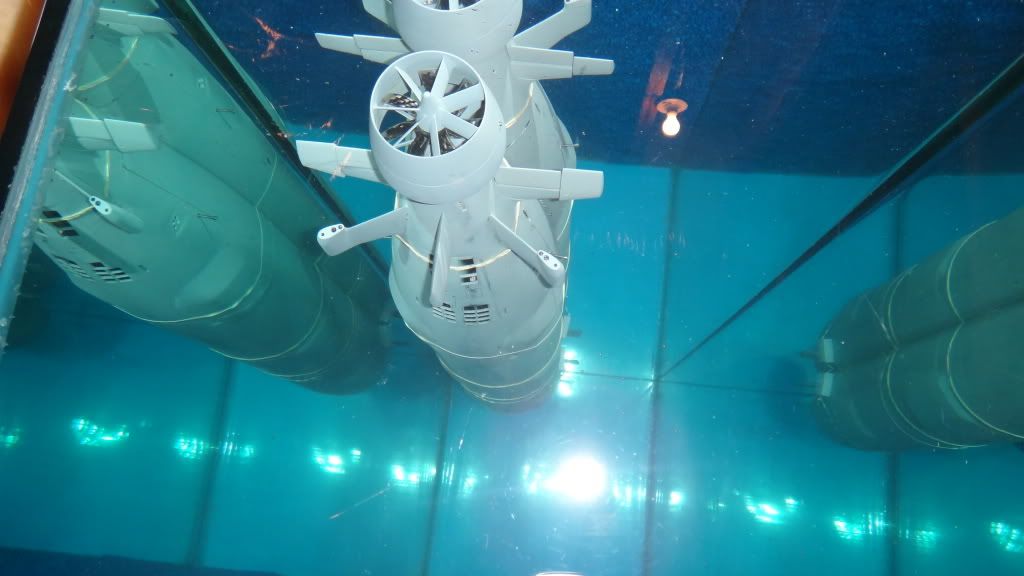
Trimming
Ok, now for some theory here behind trimming this big 1/72 Seawolf. In normal cases for sub trimming the assembler usually is given a purpose sized wtc designed specifically for that particular model or can modify the ballast tank size to what is needed. The latter is accomplished by filling the ballast tank, then adding weight to the boat until it sinks to a proper submerged level. The ballast tank size can then be determined by adding enough foam below the surfaced water line so that the sub surfaces properly to that line....the volume of the ballast tank needed is the volume of the foam used. Now, seeing as my Seawolf is a brand new boat about to hit the market, the ballast tank volume is an unknown commodity. Because of this, David has supplied me with a purposely over-sized ballast tanked Subdriver (9" x 3.25" id) so we can sink and float this baby.
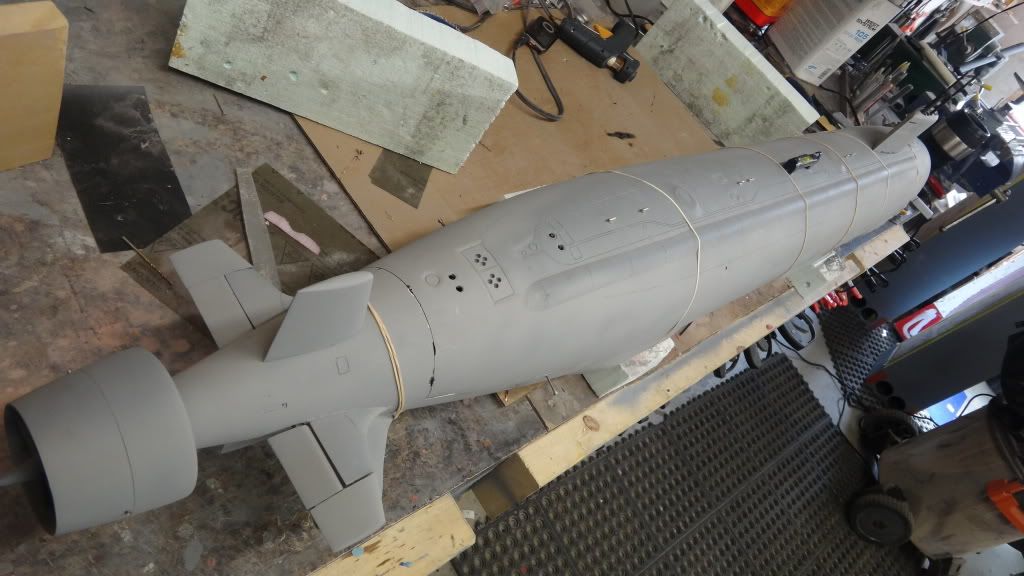
So, the first dunk without foam or weights added and an empty ballast tank showed a very heavy stern and very light bow - full ballast tank sank the boat to the bottom like a rock. This tells me that the ballast tank is more than sufficient for surfacing. This also tells me there isn't enough buoyancy supplied by the permanent dry spaces to lift the boat to a proper submerged condition. This means foam will have to added above surfaced water line
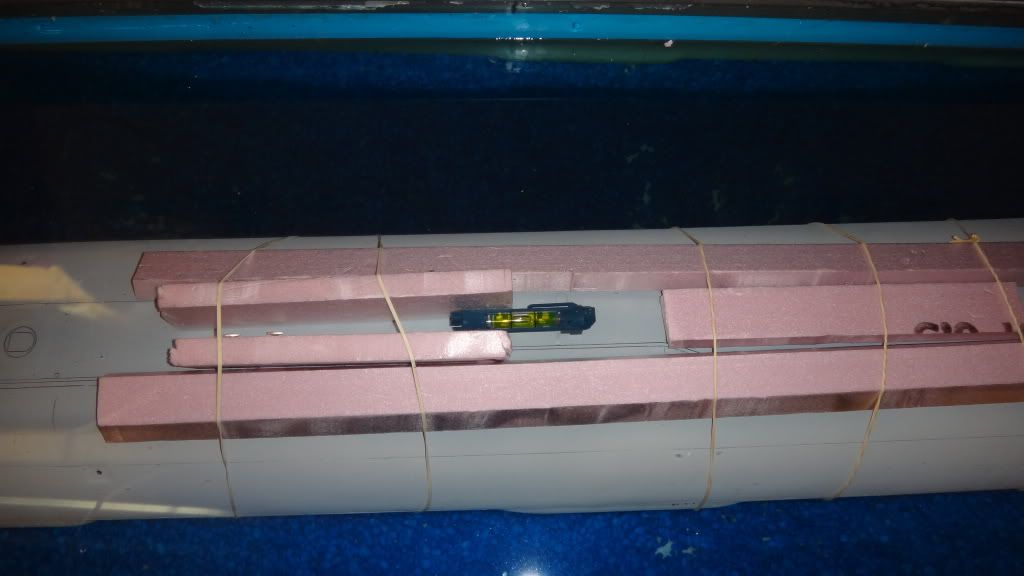
For stability, 16 oz of fishing sinkers were hot-melted to the bottom of the hull...12 oz directly under the ballast tank and 4 right in the bow to balance that heavy rear end. A fair amount of foam was placed where convenient in the stern to provide some lift.
Another dunk showing my stern to have a little too much foam
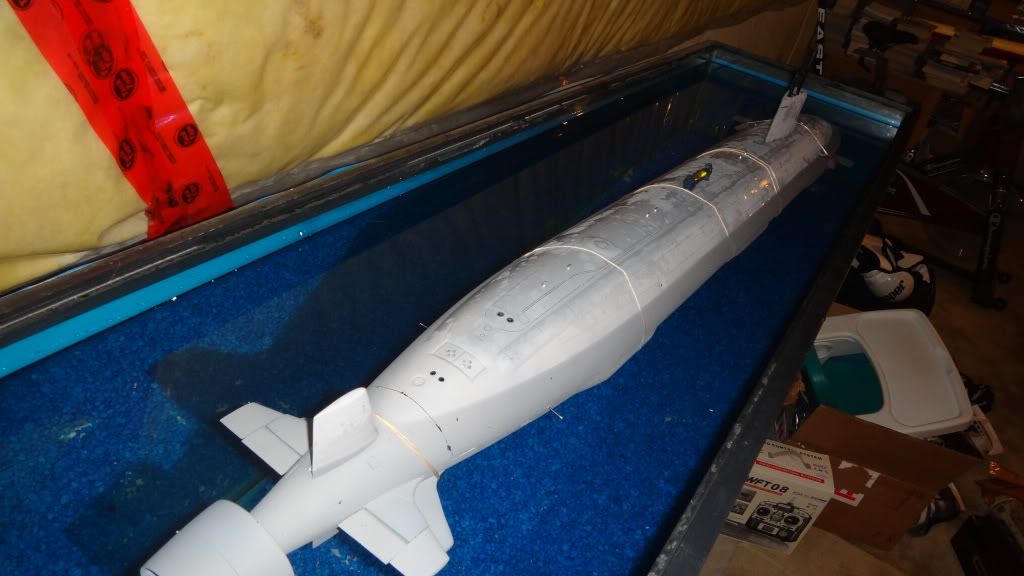
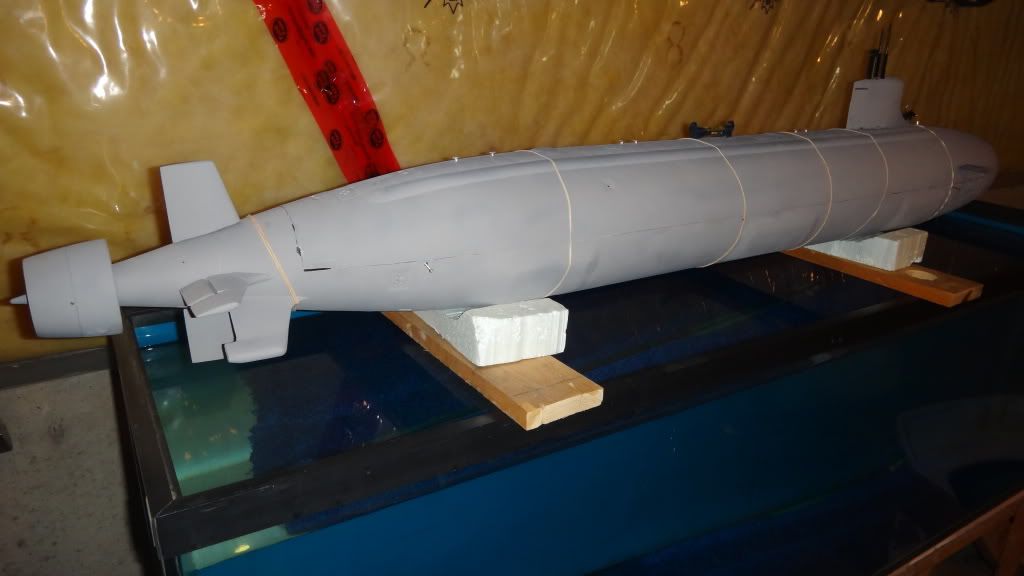
Once proper surface level is achieved (backwards methodology I know) I added bunch of foam to the top of the deck and removed small pieces enough to the get the boat to submerge to its proper level. The foam is shifted slightly from one side to another to achieve a zero bubble. This would be to have the top cap of the sail stick out out the water and have the boat sit level under the water.


With this trim achieved, I can go install all that foam and dunk the boat again for some further fine tuning. For those interested I posted a ton more pictures on the HMK Facebook site (check my signature). Any questions and comments are welcome too, as I'm sure I left a lot out here...
P.S. Thanks John for doing most of the initial heavy lifting on your boat!
Regards,
JoelComment
-
WOW!!!!! Great job Joel!!!!Comment
-
-
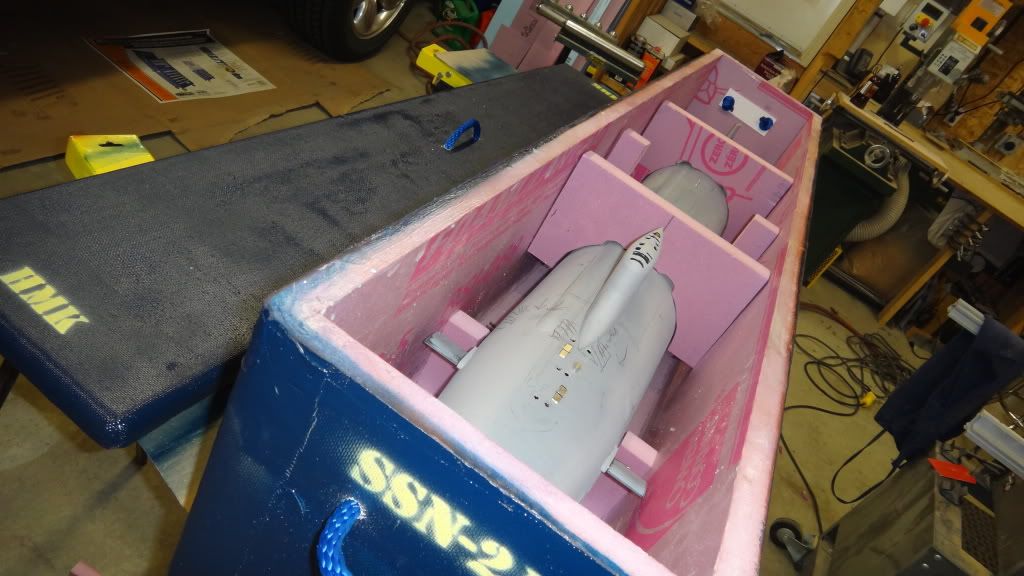
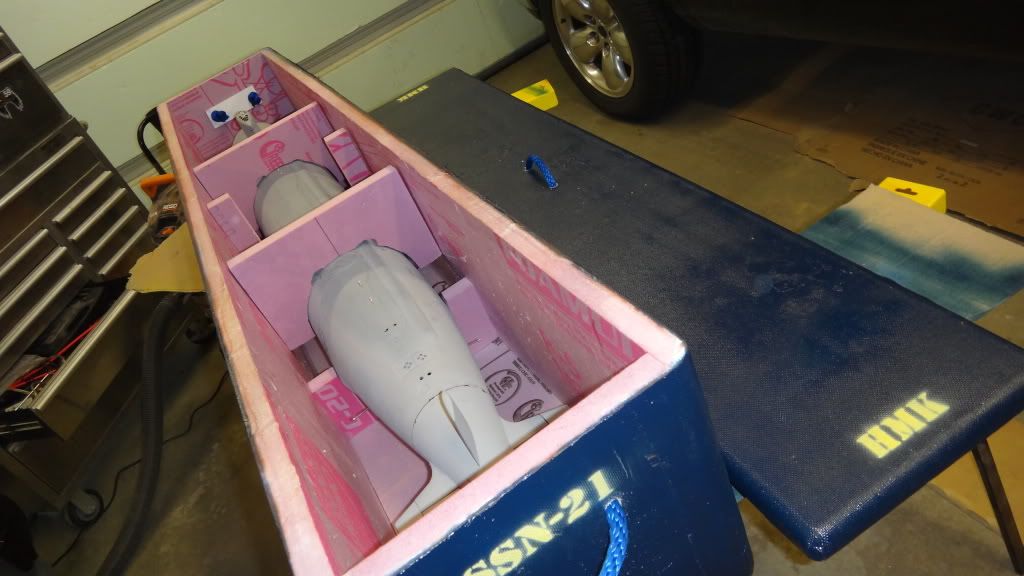
A few more pics. I made a Military Transport Container to get my monstrosity back and forth to the lake. Its built from 1" pink foam glued with epoxy. All the rounded edges are done using a round-over bit in my router. Once all the glue dried I applied a layer of 10 oz epoxy fiberglass. It's painted in navy blue with sunburst yellow for the numbering and lettering. Stencils for those numbers and letter were made with Microsoft word, printed off and cut out using a scalpel.

I'll get some results up for Alpha testing for this boat soon. Other than that, its time to get on building other things :)
JoelComment


Comment