Another Gato for the pacific fleet

Collapse
X
 
  • Time
  • Show
Clear All
new posts
  • He Who Shall Not Be Named
    Moderator
    • Aug 2008
    • 12318

    #16
    It's a joy to watch guys like Alec, Tom, Myron, Manfred, Kevin and a few others who have taken our product and made something of it. So, so many buy our stuff and they're never heard from again.

    Poor Alec, one of his first buys from Caswell was a SEAVIEW SD that went to him with the motors running counter-clockwise. My screw-up. For a time Alec thought it was him as, out there in the water, one of his motors is going ahead, while the other is going astern. WTF!!! However, even after throwing him that curve, Alec worked out the cause of the problem, re-wired the two motors so they both turned in the same direction, and fixed things at his end.

    It pleases me and Mr. Caswell no end to see our products used, improved, and out there in the water. Thanks, guys.

    M
    Who is John Galt?

    Comment

    • alad61
      Commander
      • Jan 2012
      • 476

      #17
      Thank you David and Gary.

      Well I may have got the seaview motors running but that boat was cursed!!! Between the motors a bad esc that went bang causing a short that surged back to the lipo pack which then gassed and over pressurised the sd resulting in poping the forward battery bulk head enough to let water in which shorted said battery pack resulting in an overheated cable that burned and put a hairline crack it the lexane cyclinder!!! All of which I repaired/replaced but some valuable lessons were learned, one being always run a fuse between the battery and the power plant and two do more research on choosing your first RC sub and get one that is easier to drive. It is an iconoic boat for sure but it is a flaming awful thing to drive and actually enjoy because of the inverted exaggerated shovel nose. I did have a few good runs but if I can't enjoy playing with something then its going going and gone. I will say that whilst assembling, converting was fun. Fixing and running it was more a chore but it only drove my need to do more of the rc subs. So all was not a total loss. But I digress....

      Back to the threads main subject....There is movement at the station for the word had passed around...

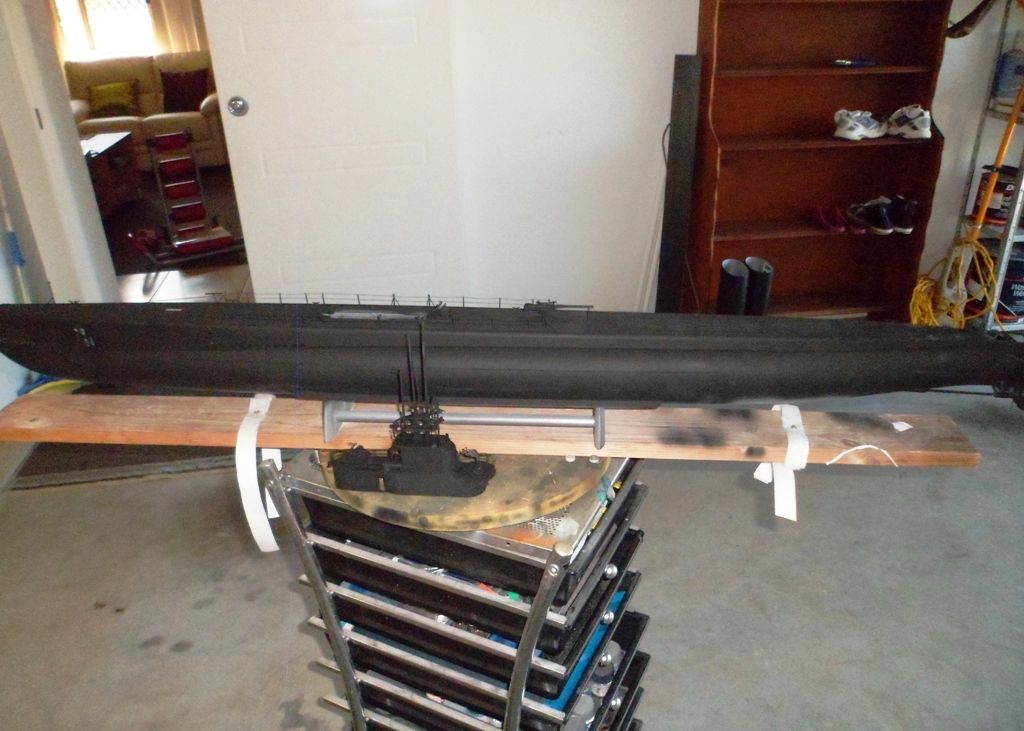
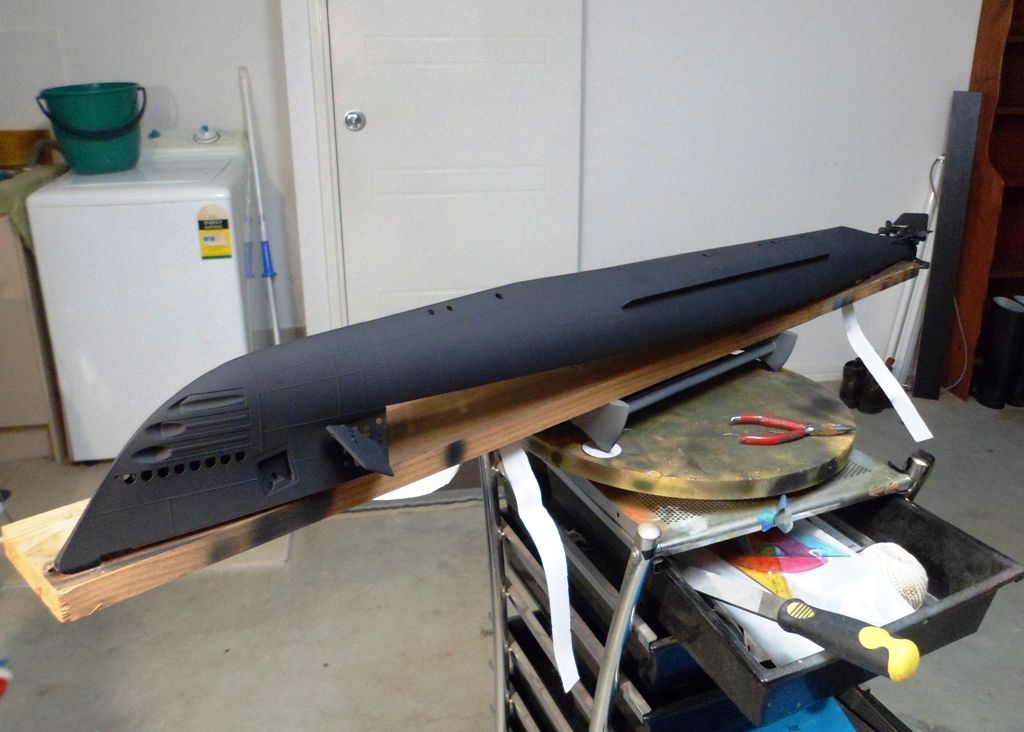
      The last ten days has been a mixed bag with a good half of those being rainy and overly humid, neither being an advocate of airbrushing, however it does help marginally with using pastels. As I last mentioned I had primed the boat and then applied a complete first base coat of black during and after some additional filling.

      When that had cured I gave it a quick coat of dull coat to help with the application of the pastels and also for handling. Which I tried to keep to a minimum to prevent any oils and skin residue from my hands contaminating the paint.Once the paint had dried I began weathering the bottom hull. I have never been able to master the tooth past effect that David does so I use my own tried and trusted method of old fashioned hand and brush. I have an old 1 inch house brush that I use to stipple and dry brush the hulls with. Picture Krammers (from Seinfeld) head as a paint brush and you get the idea of what it looks like. I pur some paint onto the palet in this case I start with a mid grey and then add white. I softly stab the paint so just the tips have paint. I then gently work it on a lint free cloth in circular and criss-cross motions to remove the wet bulk of the paint before I begin to stipple the hull with the brush conentrating on the waterline, bow and rudder areas. Those are the places that have the most water flow and or surface bleaching. I try not to be rhythmic with this but instead let my hand be random and spasmodic. Try to imagine how your hand would be if you had to paint a stick of dynamite with a burning fuse and you'll get the idea of how my hand works. If the stiple gets a bit thick and heavy or looks to symmetrical it gets fixed with the airbrush. For that stage I used german grey straight from the bottle and through a smaller needle on the airbrush so I got a more solid splattery look rather than a smoother misty cover of paint. The latter I saved as the next blended coat of a lighter shade misted over the whole hull. Once that was done I painted the sides of the deck plates and skirts in a mid grey before adding the final light grey on the forward sections and the light ghost grey on the rear section

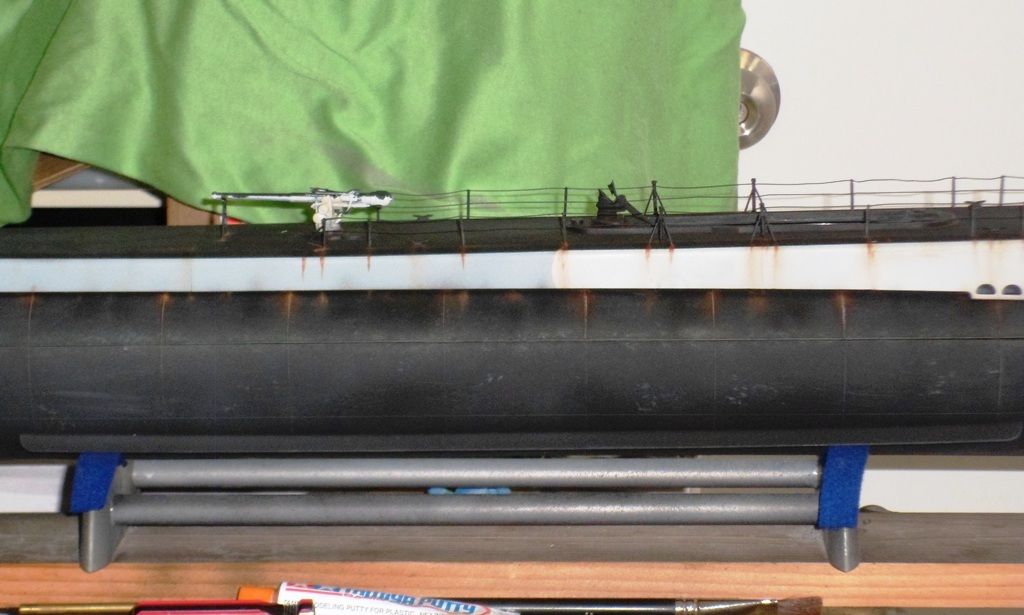
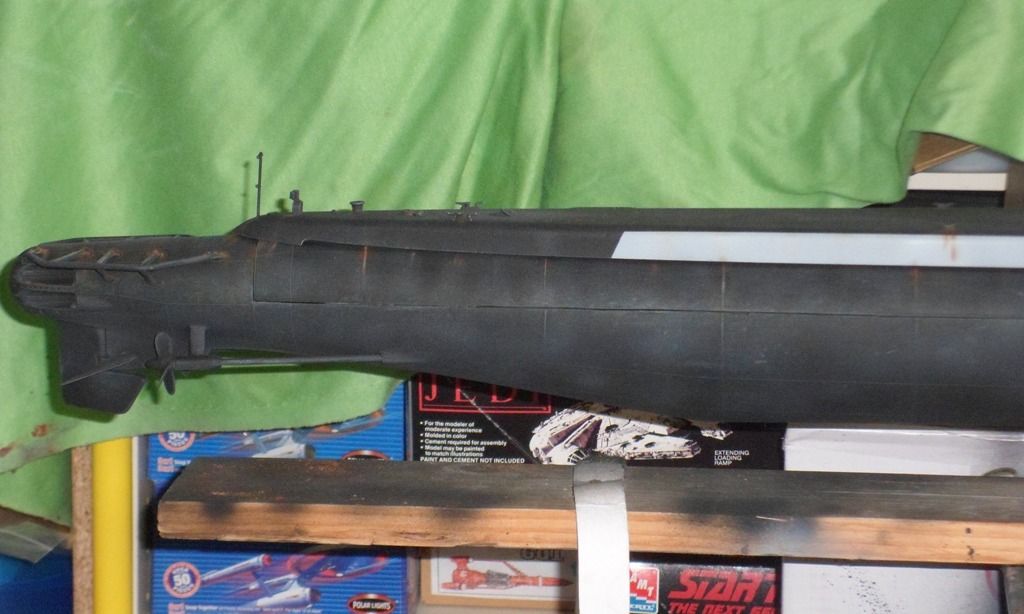
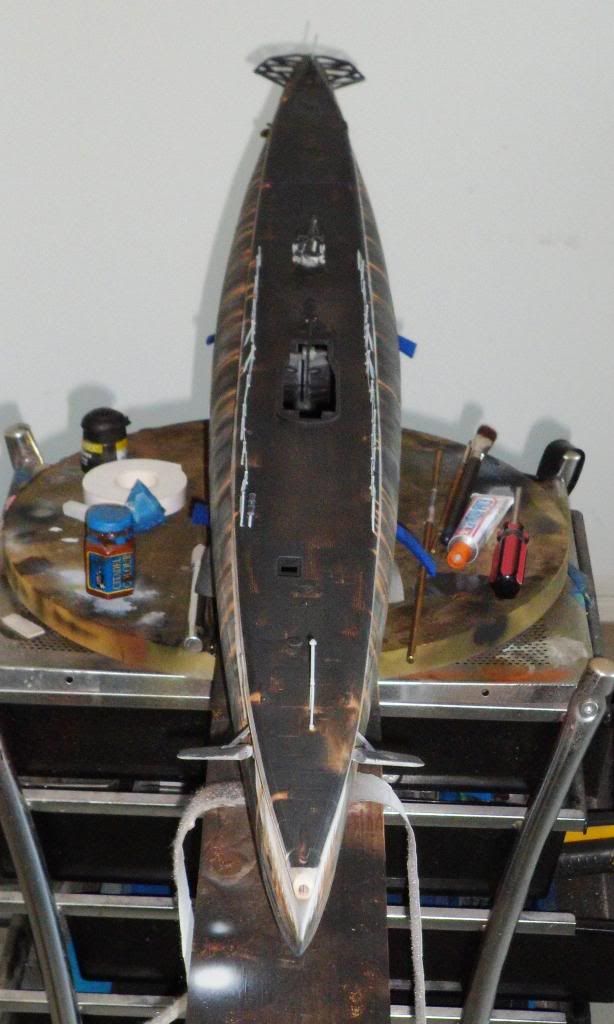
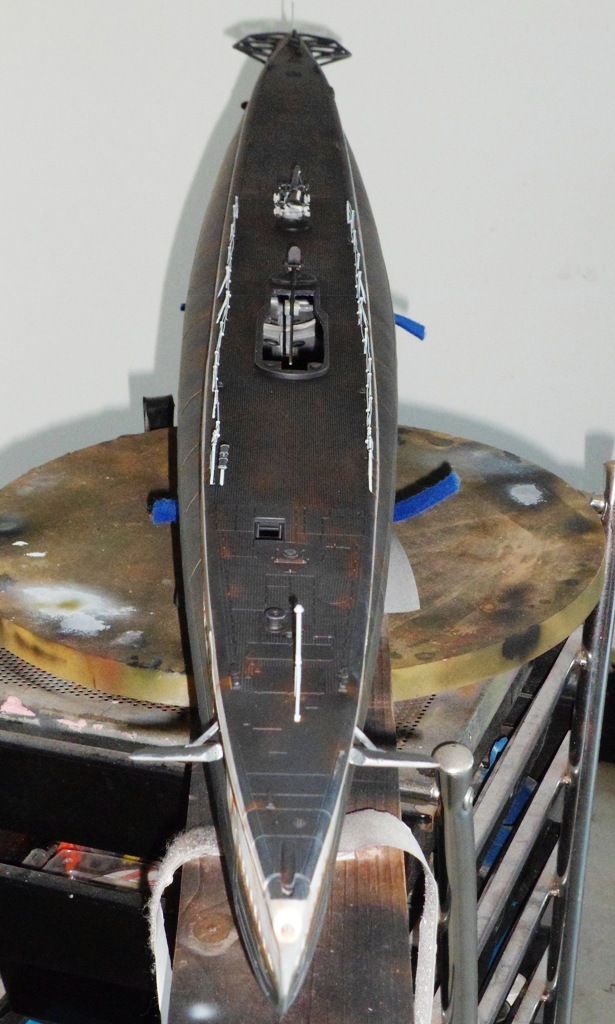
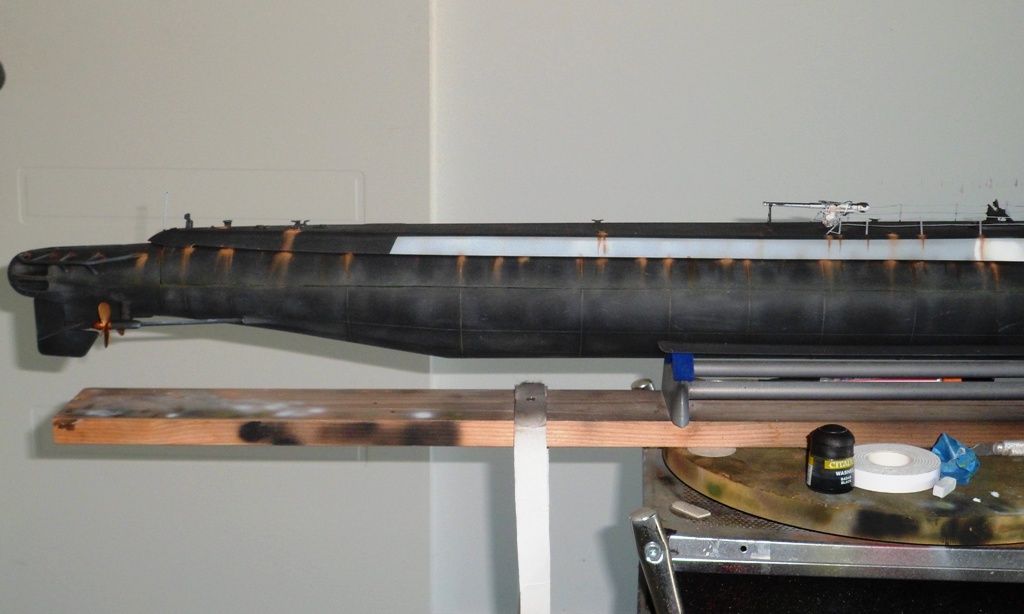
      After that came the first run of pastels mixed form various shades of brown to orange till I was happy with the colour. I then used at least four different artist brushes to apply the rust colour I made. The other thing with pastels is that you get a stronger stain with a wet brush. I didn't apply any of the pastels below the water line. My thinking there is that even though the lower most hull is immersed in sea water most of the rusting would occur above the water line as salt water and air worked together where I thought water splashed and pooled and rusted said areas. The areas I concentrated on the most was thr weld lines for starters followed by the deck fittings such as the bollards, capstains, drain holes, top deck plating and the hand rail stauchens. I then randomly dusted and smeared areas under the front limber holes and then along the deck plating as well as the prop guards and limber/drain holes on the bow around the planes. When I was happy with the result I gave it a light overspray with flat to blend them in and stop them from being smudged during handling.

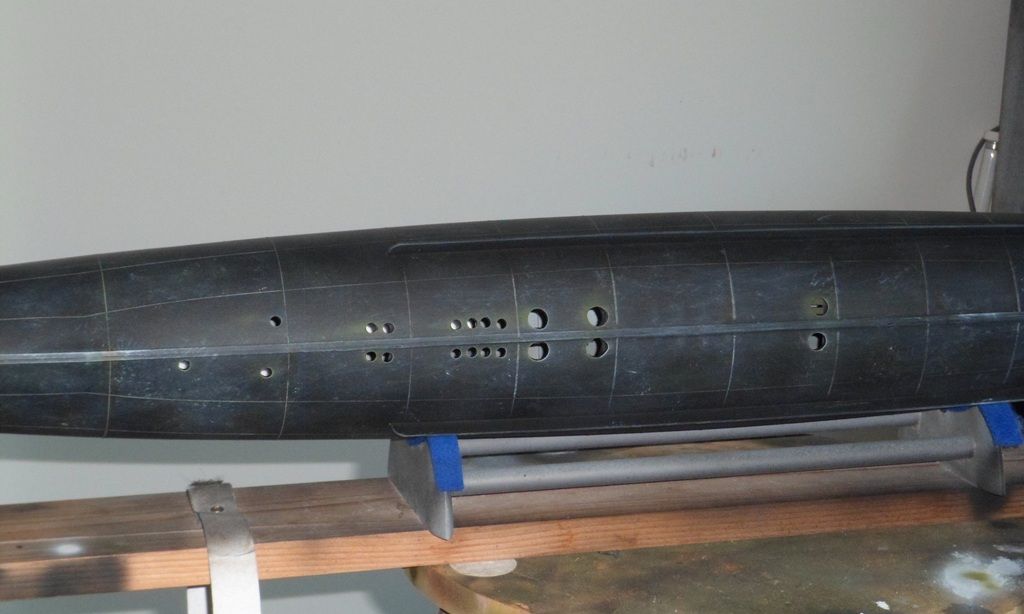
      It was then on to stage two. This involved mostly dry brushing a soft white over the whole boat to soften the blacks and add to a bleached look. I also misted more of the German grey on the deck to add depth and fading. Below is how it looked during the middle stages of weathering...


      Between the stages of weathering and because of the rain I was able to get the front dive plane mechanism working and tweeted some of my push rods and connectors.

      Stay tuned more to come....
      Cheers,
      Alec.


      Reality is but a dream...
      But to dream is a reality

      Comment

      • trout
        Admiral
        • Jul 2011
        • 3547

        #18
        Great work there Alec. I like the way you explain things and the work you do!
        If you can cut, drill, saw, hit things and swear a lot, you're well on the way to building a working model sub.

        Comment

        • greenman407
          Admiral
          • Feb 2009
          • 7530

          #19
          Alec, in the above pictures I saw your Gato upside down and for just a moment I thought.....OH COOL!!! A NEW SCI FI SUB!!!!!.........................oh, and then it hit me that its an upside down gato. Oh well, its looking mighty good. Sorry about your Seaview. Ive had model boats over the years that just gave me fits. So, Id put it on the shelf for a year or so and pull it back out again.........and again....... until I finally WHOOPED IT!http://forum.sub-driver.com/showthre...71-AC-3-5-mono It took 3 or four years after construction was completed to get this thing figured out. Hardware placement issues and the wrong tuned pipe caused me to lose all my hair and the creation of some brand new words. However, after I got it figured out, it remains my fastest and most exciting mono hull boat.........In the immortal words of Peter Nesmith(Galaxy Quest)...."Never give up......Never surrender!!!"
          IT TAKES GREAT INTELLIGENCE TO FAKE SUCH STUPIDITY!

          Comment

          • crazygary
            Captain
            • Sep 2012
            • 610

            #20
            Nice weathering, Alec!!
            Subtle but very convincing!!

            Really like the rust applications!! Way cool!!

            CG

            Comment

            • alad61
              Commander
              • Jan 2012
              • 476

              #21
              Thanks guys. Tom unlike you I chickened out with adding lights and Mark I see what you mean about the sci- to look. I didn't give up on the Seaview per sas in the end I just found it to be more work than fun driving it.

              Gary that is the weathering at the second stages. What you find with pastels is that when you apply a clear coat or wash they tend to become quite subdued. Which is why I tend to do them in stages with light coats of clears or washes sprayed over them. It helps with film builds and also adds a bit of realism to the look.

              What I can say is that the only thing left to do on the model now is add the anchor and running lights on the now painted and clear coated conning tower. I will post up pictures and more narrative tomorrow.
              Cheers,
              Alec.


              Reality is but a dream...
              But to dream is a reality

              Comment

              • crazygary
                Captain
                • Sep 2012
                • 610

                #22
                Appreciate the weathering info, Alec!!

                CG

                Comment

                • alad61
                  Commander
                  • Jan 2012
                  • 476

                  #23
                  As I mentioned to Gary the last images of the boat were at the second or rather middle stages of weathering. My techniques my not be orthodox or even standard but they work for me.

                  after I had the rusting down I did another dry brush of very light grey, almost white, over the hull. This was to bring out the raised areas such as the weld lines and such. I then went over the bottom hull and using a sepia wash firstly on all the weld lines and then in the areas between the weld lines leaving about 6 to 10mm. This was followed with a thin black wash. I wasn't trying to get the oil can look I just wanted to add some definition to the broad hull. Also something I did with this Gato was to add a faint green scum line on the waterline areas and around the flood/drain holes as well as doing various and random passes or mist coats of the green on the lower hull.

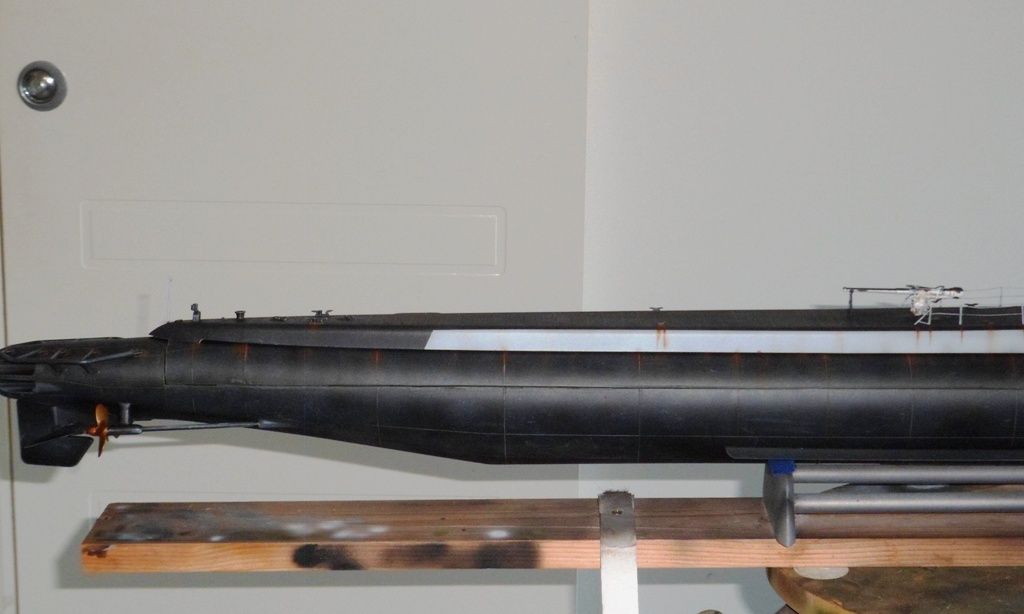
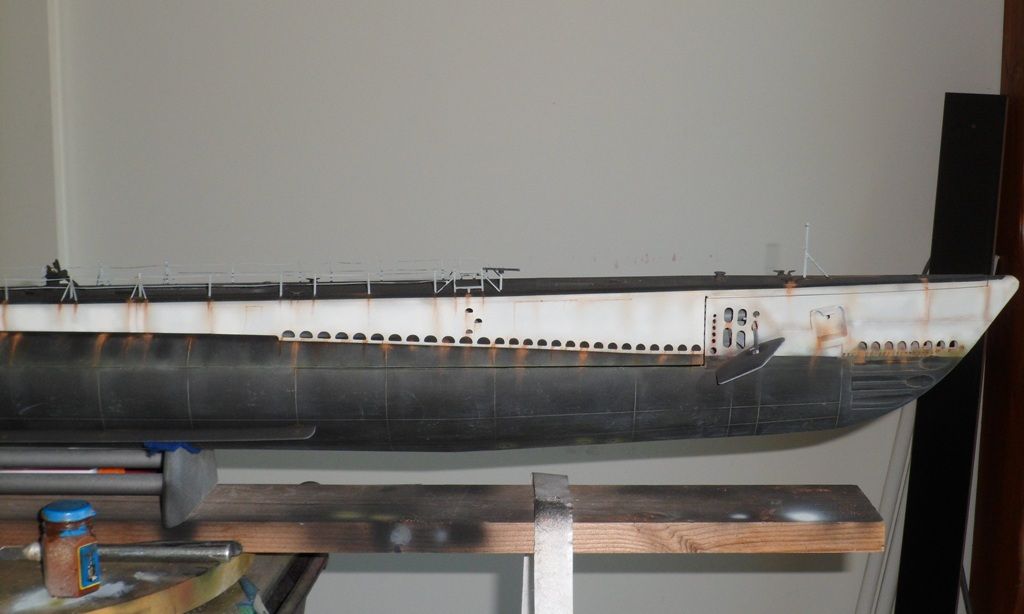
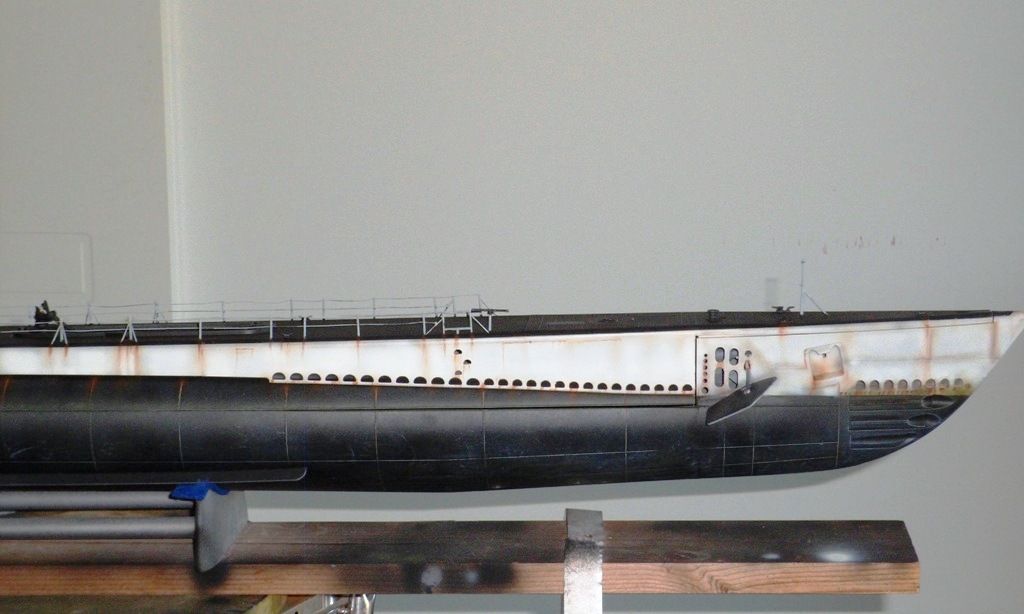
                  Myself I just can't see them looking like some of the modern boats that have a quite pronounced water line but I may have that wrong. Anyway to achieve that I used some Tamiya olive green thinned down and put through a finer tip on my airbrush but a added some extra psi to reduce the splattering that can happen with paints like acrylics that have more solids in them. I did the cut on my model pretty much on the waterline so that is what I followed with the airbrush. I also didn't tape off above or below the line because the water around the hull of a boat laps, so I wanted an uneven almost wavy look to it and I concentrated a little more on the bow and stern areas as well. When that was dry I then used a light grey pastel stick and a piece of 3m green scourer to dust the pastel directly to the model a couple of inches at a time. I found that the scourer works better that a file or sand paper as the dust fall through but yet it hold it as well so a little tap and you can drop more dust where and when you need it. This dust was then worked in with an old paint brush. My reason for doing it that was for a couple of things, the first being to lighten some of the green and the second to add extra bleaching to the black hull. Finally when that was all done I clear coated it all. The first of the pictures below show the look of the pastels before the clear coat and the second is after the clear coat. Note I had already blended a lot of the earlier pastels with some airbrushed washes in previous stages...


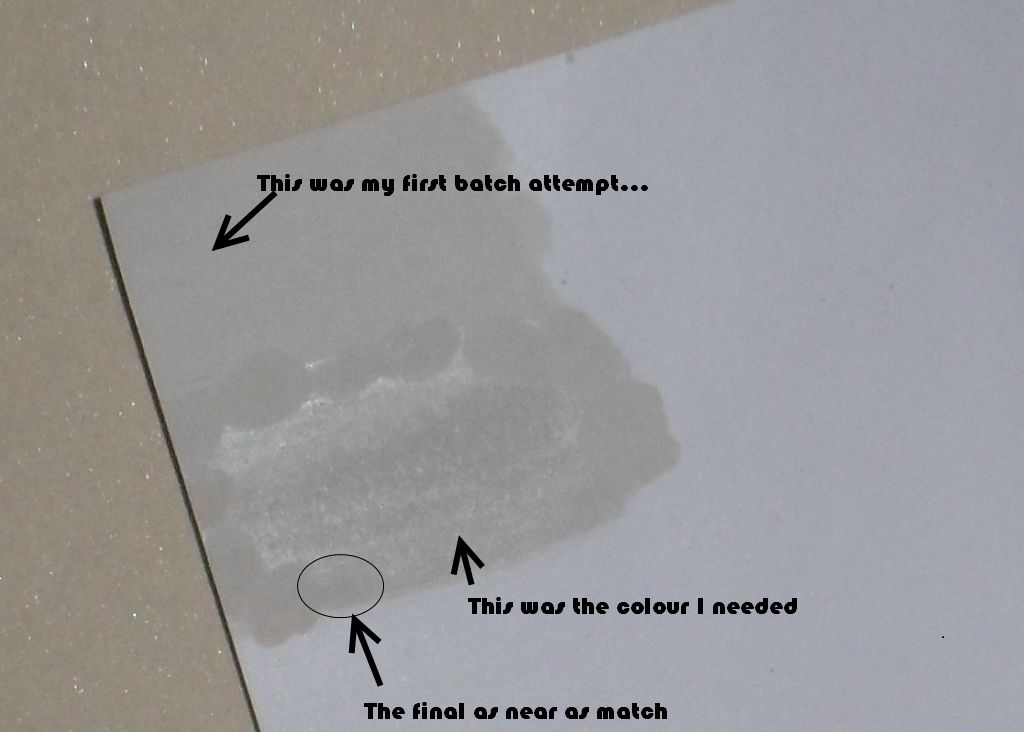
                  After finishing the main hull I got my paints ready to do the conning tower but it was there that I ran into a bit of strife... In my paint draw I thought I had an extra bottle of the light grey for the main colour. WRONG... It turned out to be a near empty bottle!!! Lesson numbeer one grass hopper, always check your supplies before starting and don't assume! No a real problem I though to myself. I would just nick down to my local hobby store and get some more. What do you mean you don't stock that brand any more! Damn that meant a drive across the burbs to the my other haunt. Say what! You don't stock them either. I almost wailed and thrashed in despair. The guy behind the counter explained the reasons but that did little to abate my anguish... He suggested another brand that does the FS colours so I dubiously bought a couple of bottles. Getting hoe I did a small brush out of the small amount of my original colour and beside that a brush out of the new one. Let me not repeat the multitude of curses and swear words that ensued as the two colours both of which claimed to be the same FS code were not even remotely alike!!! Ahh well nothing like a challenge... The new one did show some glimmer as it was similar in tone but no where near the depth or shade it should be So I set to eye-matching the new one down to what I wanted. I mean how hard could it be right? I do this a dozen plus times a week at work on average. Of coarse I use raw tints but how hard could it be? Oh I said that already. Well it was a tad difficult but choosing the right washes and other colours I came pretty damn close, well on the second attempt as my first ended up being to far down in the depth. So I boxed the other untainted bottle I bought with the over shot mixed one add some white and started again.

                  You can see in the picture the sort of process I did. My first attempt was still a little green so that meant adding colours on the other side of the wheel till I got the right tone and then it was getting the shade right. After each drop of coloured undiluted wash was added I put a small dab onto the brush out colour I wanted to match in the end I got so close I knew that if I added any other colour and or wash, no matter the amount I was going to kill it so I took what was left of the colour from which I painted the main hull with and poured(boxed) that in with my home made batch stirred it in dabbed a bit out and held my breath as I dried it down. When it dried and I'd almost passed out from lack of oxygen I saw that the final match was pretty damn good and as the new colour wasn't going up against the old colour and there was still some weathering to be done it would pass even the scrutiniest eye test.


                  With that done I could then move to the conning tower.
                  Cheers,
                  Alec.


                  Reality is but a dream...
                  But to dream is a reality

                  Comment

                  • alad61
                    Commander
                    • Jan 2012
                    • 476

                    #24
                    And now the conning tower.

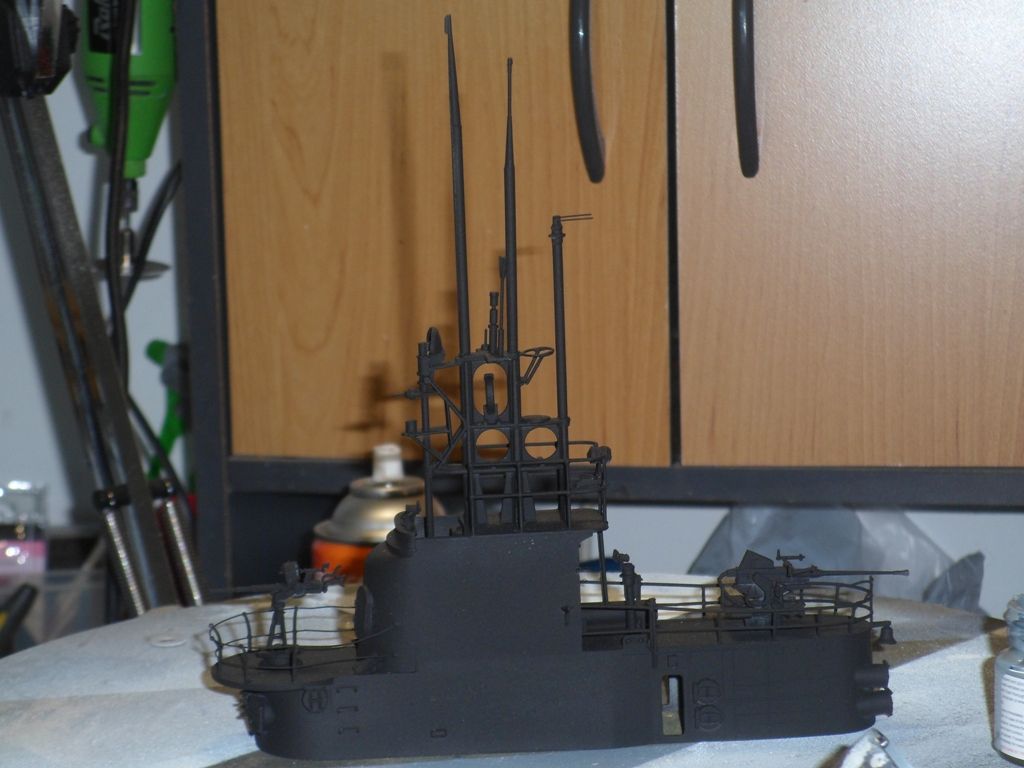
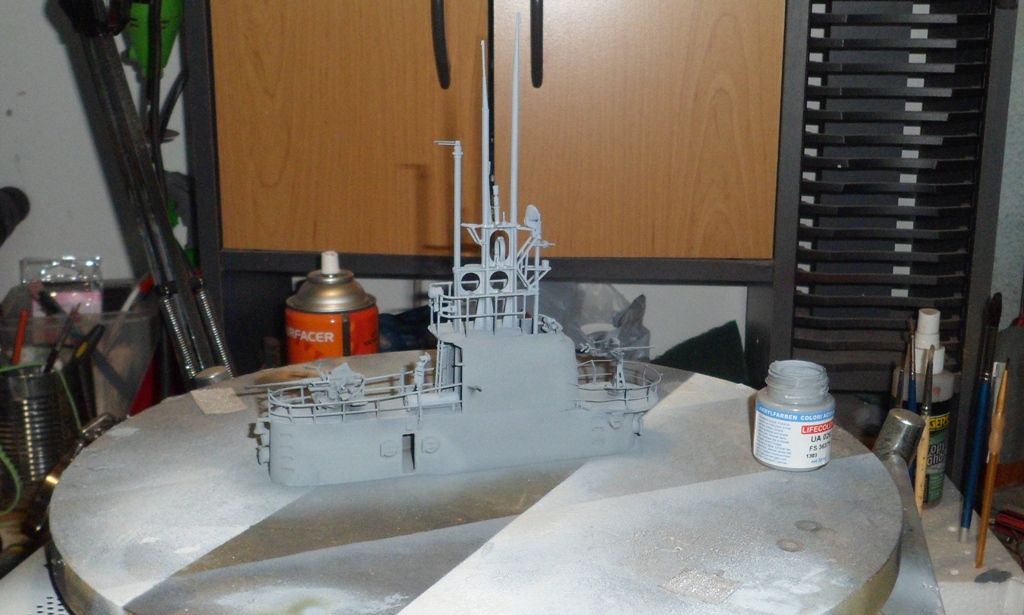
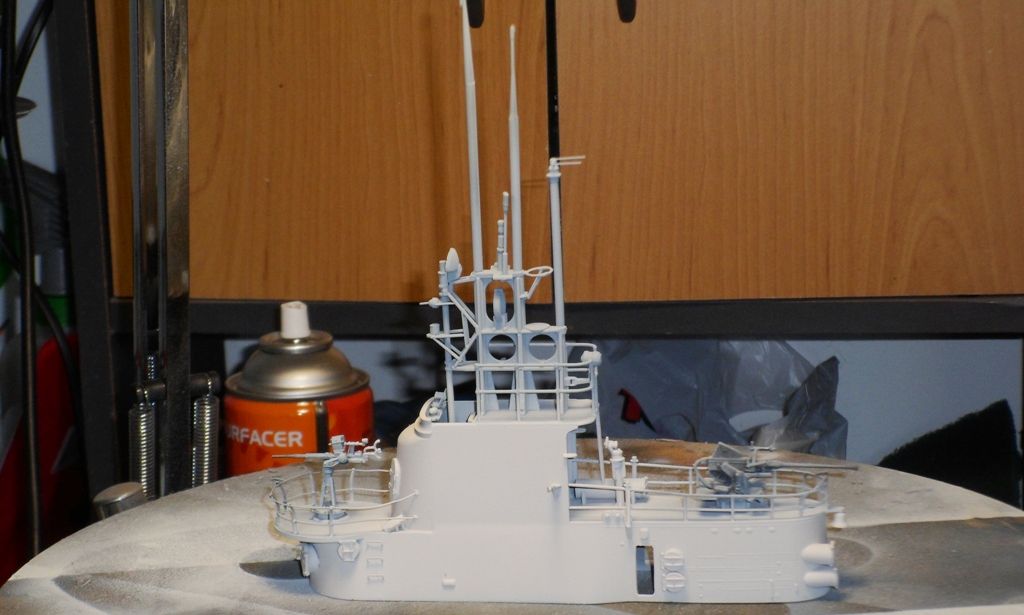
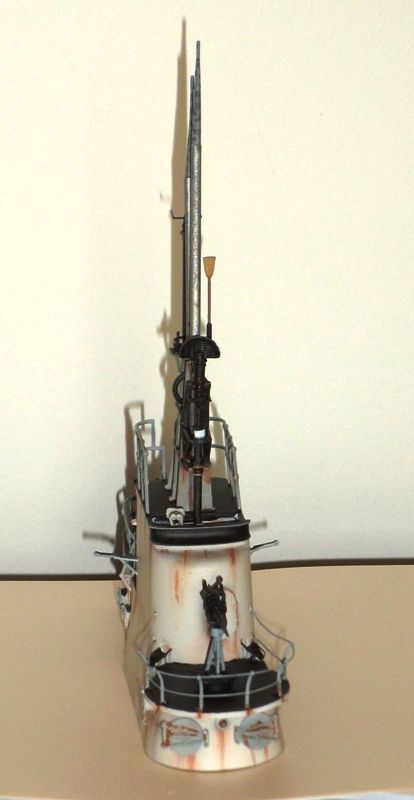
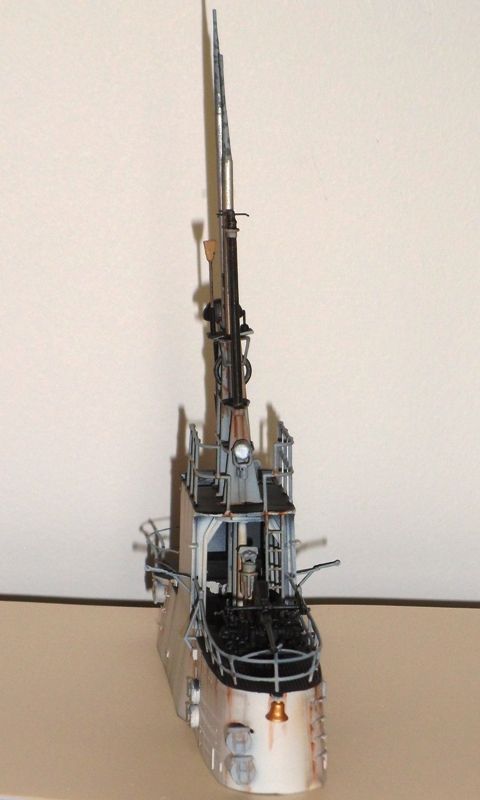
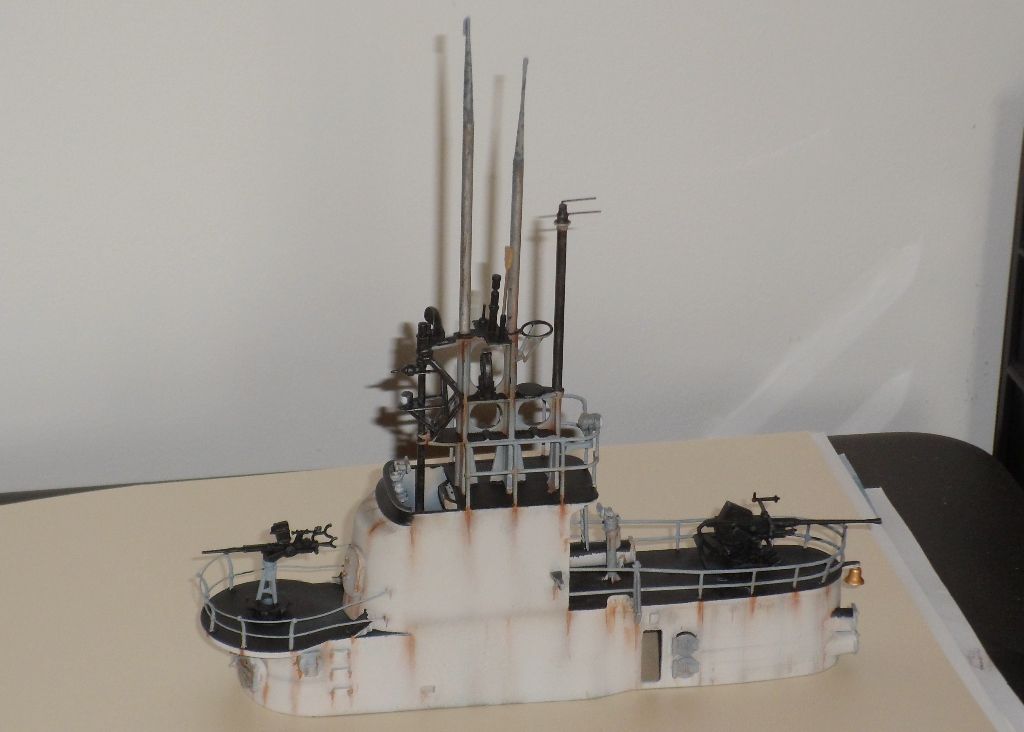
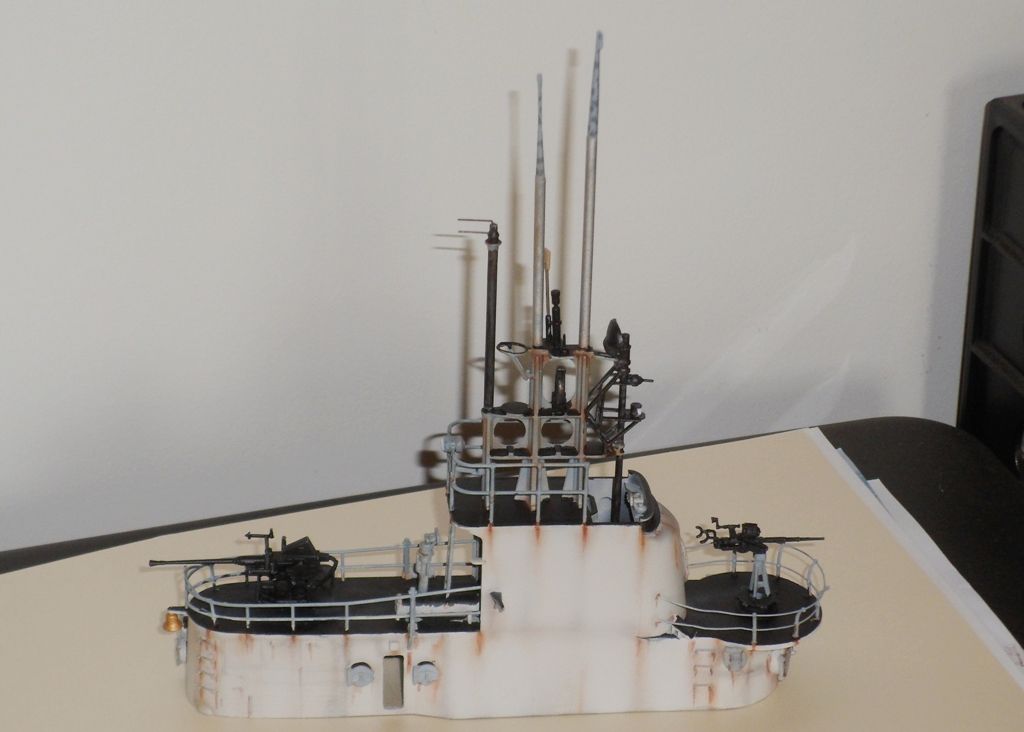
                    There wasn't much that I had done that was different with the conning tower to that I didn't do on the main hull. Base coats and colors, secondary and primary colours then the first pass at weathering. Then the items required to be finished in the light ghost grey such as hand rails and scope tower. Then the blacks for the guns and decks. Followed by a second weathering pass blended with washes and light over sprays of the main colours before the final weathering followed by the clear coat.
                    Black base coat

                    Followed by the second base colour light ghost grey. This also hepled with all the areas and items that where needed to be this colour...

                    And the final main hull colour...


                    And the almost finished result after the weathering and clear coat. I say almost as I need to add the running lights on the port & starboard. All I need is some crew on watch and manning the guns... LOL


                    Here is a link I found when doing some extra researching for colours and schemes etc. I just tweeked some of it for scale and some artistic license...

                    Just as a side note I will often use colours from a dark blue to a mid grey when I dry-brush or highlight a black object as they are much easier to tone down than a white or very light grey with any black washes. Now that the main boat is finished I will do the anchor and instal it was it is much easier to detail the anchor well first.
                    Cheers,
                    Alec.


                    Reality is but a dream...
                    But to dream is a reality

                    Comment

                    • He Who Shall Not Be Named
                      Moderator
                      • Aug 2008
                      • 12318

                      #25
                      Your before-and-after clear-coat shots is the best demonstration of the 'toning down' effect of the clear-coat over ground chaulk. Excellent presentation, Alec. You're taking me back to school: I may reconsider using chalks more often. Very good stuff on weathering here.

                      M
                      Who is John Galt?

                      Comment

                      • crazygary
                        Captain
                        • Sep 2012
                        • 610

                        #26
                        "Unorthodox" or not, the ends justify the means!!

                        Your "justification" is spot on, Alec!!

                        Thanks for the "tutorial"!! Extremely well executed, my friend!!

                        Your rust areas are great!! Not overstated, but contrast well, and tend to
                        draw the eye where desired!! Nice!!!!

                        CG

                        Comment

                        • alad61
                          Commander
                          • Jan 2012
                          • 476

                          #27
                          Thanks again for the compliments...

                          I reckon weathering any model is one of the most nerve wrenching and gut churning parts of the process. A lot like playing poker really... As Kenny says(sings) Know when to holdem and Know when to fold em. What I reckon is that some of the best ideas and examples aren't always images from books and the web which can suffer from poor or over saturated colour, bad reproduction and even bad camera angle/s, but rather what we see around us. In Brisbane there is a dry-docked retired naval vessel on display near the river. It is well maintained with the help of many ex service and interested people and by limited government funding. Yet I am always amazed at where the rust and stains come through. Or look at a beat up rust bucket driving down the highway beside you and look how the stains from pollution and rust streak, smear and collate on its panels and trims. Only the other day we followed a big twin hulled cabin cruiser being towed some where. All the time I was driving near or beside it I was taking in mental notes on the way the hull was stained and bleached from being in the water. Even high rise building give great examples of how water, dirt and uv turn things. Of coarse the neatest balancing act then is to get the scale of it all done right to suit your subject...

                          Uh-mm, I'm sorry, I didn't meant to lecture.
                          Cheers,
                          Alec.


                          Reality is but a dream...
                          But to dream is a reality

                          Comment

                          • matthewnimmo
                            Commander
                            • Dec 2011
                            • 271

                            #28
                            Personally, i dont believe there is a perfect way to weather. Just like you hinted within your last message sometimes weathering just happens. If you look at some old trucks there are times that im like "how the hell did it rust like that?" Rust/weathering works in mysterious ways sometimes
                            ... a computer once beat me at chess, but it was no match for me with kickboxing!!

                            Comment

                            • alad61
                              Commander
                              • Jan 2012
                              • 476

                              #29
                              To true Mathew.

                              Well it's been a busy week or so but I am pretty much packed for the big road trip to the Canberra regatta. All of the four subs I am taking are packed. The Gato required a bit more for its journey. My other boats are all around the 40 -45inches so they have there own large box that when packed and padded carries them easily. With the Gato being 52 inches long I needed a new box. So I toddled off to Bunnings with my measurements chose the sheet got the bloke there to cut it down for me as I have no serious tools to do such. Then spent a couple of hours gluing, nailing, screwing and painting. How ever it occurred to me that it has been some time since my boats have been wet so today I spent the better part doing a full series of dry dock ( I would have preferred to wet test them but time was not my friend...) tests and checks such as lubing bearings, re tightening and checking grub screws and various cranks and a good thing too as I found a couple of small grips in things. The worst being a servo that decided to burn out in the Gato testing. The one controlling the forward planes torque rod. As I was checking wires and testing the other servos it started to make a dull humming/buzzing sound and then with a soft fzzt it went quiet and then I got a wiff of that smell. Downing tools I had a look at the servo and it looked fine. to be sure I wasn't imagining things I tested all the servos but only the bow planes retract servo failed to respond. removing it from its cradle revealed that the there was definitely some deformity in the plastic case and not even pliers could get the servo cogs to move. So it was a one and a half hour return trip to the closest store that had micro servos. Once back home it was installed with a little extra servo tape to fit more snuggly in its cradle but now at least everything works that should. I finished backing the tool box with transmitter, spare batteries, tools, glues, cameras etc. So now all I need do tomorrow is pack the car hit the sack early, set the alarm for some ungodly hour between midnight and dawn then get up and head south with the radio fired up with about four days of recorded music to while away the hours between rest stops. Plus the wife will be calling about every two hours I reckon checking up on me...
                              Cheers,
                              Alec.


                              Reality is but a dream...
                              But to dream is a reality

                              Comment

                              • crazygary
                                Captain
                                • Sep 2012
                                • 610

                                #30
                                Great work there, Alec!!
                                Hope you enjoy the regatta, and many thanks for posting that link
                                regarding the Gato paint scheme!! Most appreciated!

                                CG

                                Comment

                                Working...