Another Gato for the pacific fleet

Collapse
X
 
  • Time
  • Show
Clear All
new posts
  • alad61
    Commander
    • Jan 2012
    • 476

    Another Gato for the pacific fleet

    Been a bit slow to post a note on my new Revel Gato I finally started a week or so back after completing my diversionary projects. My plan is to have it ready for the Canberra sub-regatta at Easter, which gives me just nine short weeks...

    At this stage I won,t bore people with another run of pictures showing various parts of the model carved up. I can however say that I'm at the stage where most of the hard yards are done with the main lower hull assembled and trimmed of excess plastic fat, the deck pieces all assembled. The next phase is some filler work then glueing the deck down ready for the dreaded hull split.

    this one is with the sas subdriver so glueing the conning tower down isn't really an option. I no longer have that model at hand but fortunately I have the previous ones photos and notes on its assembly to pave the way for this one.
    Last edited by alad61; 02-03-2014, 11:39 PM. Reason: Spelling & typos... Of coarse
    Cheers,
    Alec.


    Reality is but a dream...
    But to dream is a reality

  • matthewnimmo
    Commander
    • Dec 2011
    • 271

    #2
    See that i too am working on the gato im very curious on how one should do the tower since ill be using the sas sd as well. The dvd set i have was from two years ago, so it really doesnt cover that part of the process (including what i need to cut out from the upper part of the hull to gain access to the tower. Also, would be cool if someone had any pointers on what to keep clear for adding any lights or camera if i wanted to do so through the tower
    ... a computer once beat me at chess, but it was no match for me with kickboxing!!

    Comment

    • alad61
      Commander
      • Jan 2012
      • 476

      #3
      Managed to get some hours on the model over the last few days. with this week end being the most productive.

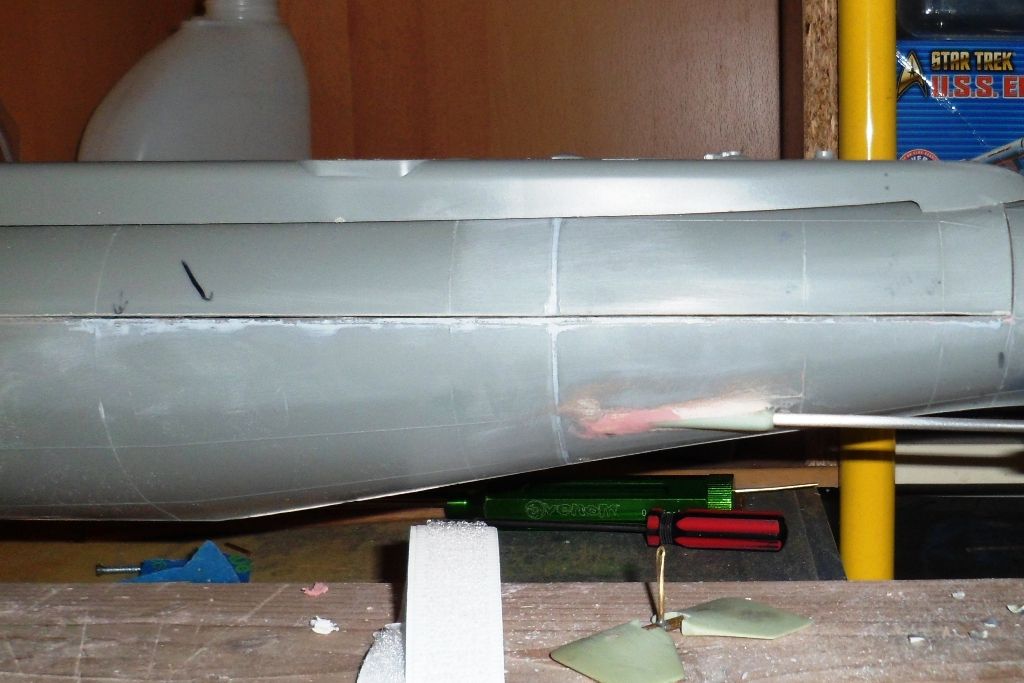
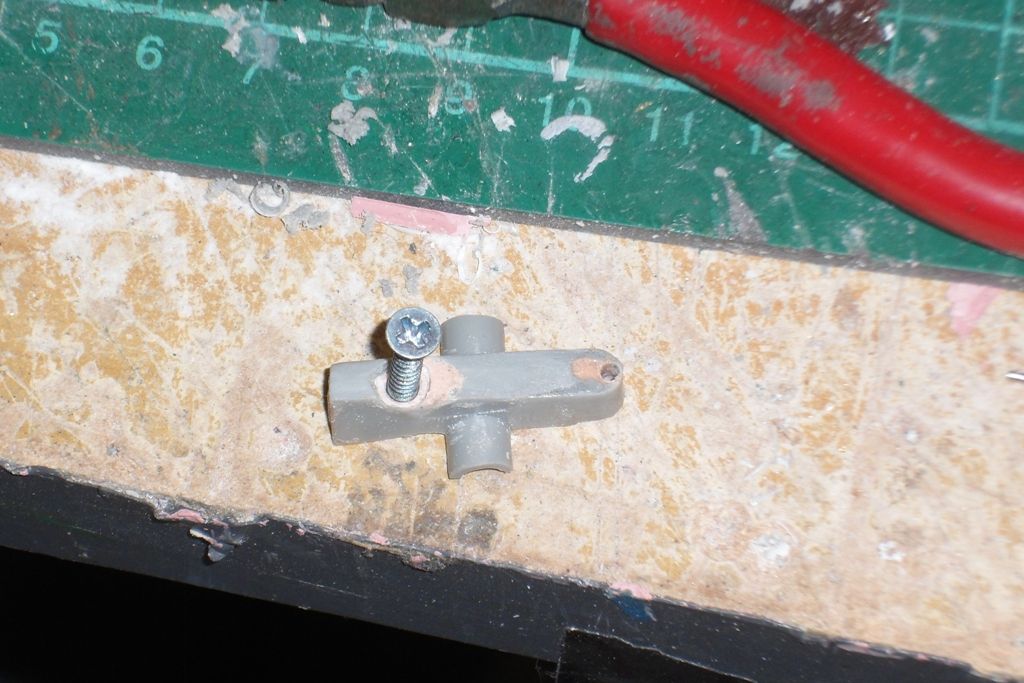
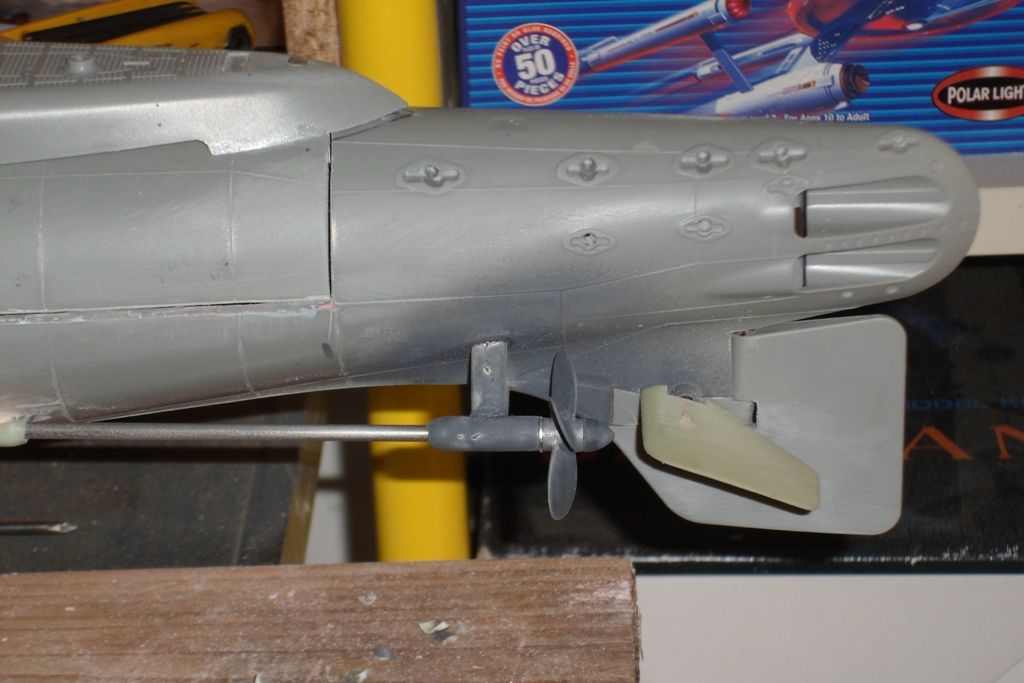
      I have now cut away all the fat, split the model, glued on the assembled deck, installed the prop shaft foundation tubes and bearings.
      Click image for larger version

Name:	2nd Gato...the prop shaft foundations installed.jpg
Views:	1
Size:	87.8 KB
ID:	89905Click image for larger version

Name:	2nd Gato...the prop shaft bearings installed.jpg
Views:	1
Size:	65.8 KB
ID:	89906
      I have also glued and split the skeg piece, added some indexing tabs and attached the rear hull mounting block. I also have all the necessary metal parts soaking in vinegar to etch. Something else I did was fill all the voids that were on the under side of the deck
      Click image for larger version

Name:	2nd Gato...Filling the voids.jpg
Views:	1
Size:	53.7 KB
ID:	89903Click image for larger version

Name:	2nd Gato...Filling the voids.2.jpg
Views:	1
Size:	51.6 KB
ID:	89904
      I know I said in my first post that I would be gluing down the deck before the hull split, yes that is what I wrote and no that wasn't a typo. The biggest thing with this kit is that most of the larger pieces are a little deformed in one way or another which has resulted in some less than desirable joins and finishes and so needs actions a little different to the process. The rear section where the main hull attached to the aft section was abhorred. I was starting to doubt myself a bit but the assembled pieces showed no great improvement over the test fits I had done so it was a case of suck it up and recover.
      Click image for larger version

Name:	2nd Gato...Rear seam.jpg
Views:	1
Size:	67.5 KB
ID:	89899
      The front seam fared no better. Sadly though I made a complete hash of the flood and drain holes. To the point that I am embarrassed to put up a picture. They are there and they will do the job. At least they are on the bottom... I am also left with no doubts that I will be using various methods to redo all the welds that have been lost with sanding... :(

      The keel plate was also a pain as the two halves didn't align all that well with one side sitting higher than the other so that required some extra TLC as simply sanding them flat would have taken away any look that there is a keel plate. One of the tricks I employ is to lay vinyl tap with the masking tap. The vinyl tape is a bit thicker so it helps build up a channel quicker that many layers of masking tape
      Click image for larger version

Name:	2nd Gato...Keel plate preping.jpg
Views:	1
Size:	88.2 KB
ID:	89901Click image for larger version

Name:	2nd Gato...Keel plate bogged up.jpg
Views:	1
Size:	91.6 KB
ID:	89902Click image for larger version

Name:	2nd Gato...Keel plate filling second pass.jpg
Views:	1
Size:	69.2 KB
ID:	89900

      The pistol range ( my new sport) is closed this Tuesday night. Which now gives me another night free. As long as the other half doesn't complain about me disappearing into the cave that is. The next stages will be mounting screws for the front of the deck. I know David supplies clips for this but as I said the kit is not as true as it should be, so some other methods need to be employed. Then it will be the assembly and fit out of the planes and rudder pieces and installing the forward planes operating systems. Then once these are done and only then will I start on the tower and weapons sub assemblies.
      Cheers,
      Alec.


      Reality is but a dream...
      But to dream is a reality

      Comment

      • alad61
        Commander
        • Jan 2012
        • 476

        #4
        So last week saw some definite advancement along with some definite blunders. As stated above the hull on this kit is some what warped and heating, bracing etc didn't really make much of a difference. So I resorted to some other fixes. The most obvious and a little disappointing was filling the rear hull split seam. It means the top hull sits a little differently to what it should but I can live with it.

        Filling the void was a pretty straight forward affair with baking soda, thin CA and masking tape. One of the reasons the split was no bigger was because I used the same method as the last one. Which was basically scribing the plastic along the split line. It does require a steady hand and a measure of patients but the fact I don't loose a lot of plastic to the kerf of a spinning blade and the two cuts pretty much map each other makes up for it to me.

        Something I still persist in and no doubt will continue is to work till the late hours of the night which can and does result in the odd blunder. One such blunder was with the separated skeg piece which through a little fatigue and carelessness I drill out but had to fill with two part bog and start again...

        Also I managed to screw up one of the props when fixing it and the dunce cap to the shaft. Thank goodness M slipped another one in the bits bag and thank goodness I kept the prop shafts from my other model when I had to substitute them (don't ask) I can say that when using CA always keep a bottle of acetone handy and not that perfumed weak crap that the ladies use on their nails either.

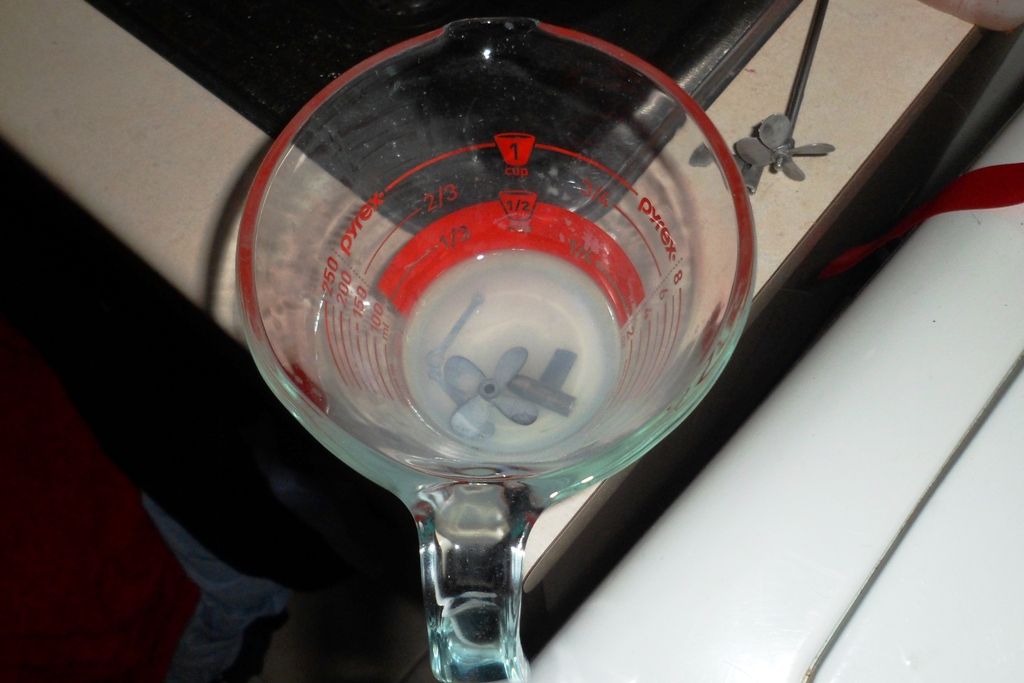
        Ok some positives from the week... All the white metal parts went through two baths of vinegar soak to etch them, you can see the white residue in the bottom of the jug.

        After soaking they are rinsed and cleaned using a green scourer to clean them up ready for the next steps of fitting and priming. Even though I etch them I still like to apply a light etch primer on these parts as well. All the running gear is installed including the bow panes operating gears and it all works!!!

        The only adjustment I needed to make was making the hole for the bow planes retract struts about an 1/8th of an inch longer and I still need to add extra CA and baking soda to make them hold fast. But as is the end result was a 100 plus % improvement over my first Gatos set. Here is a quick video of the working system with the previous models inserted to show the difference.

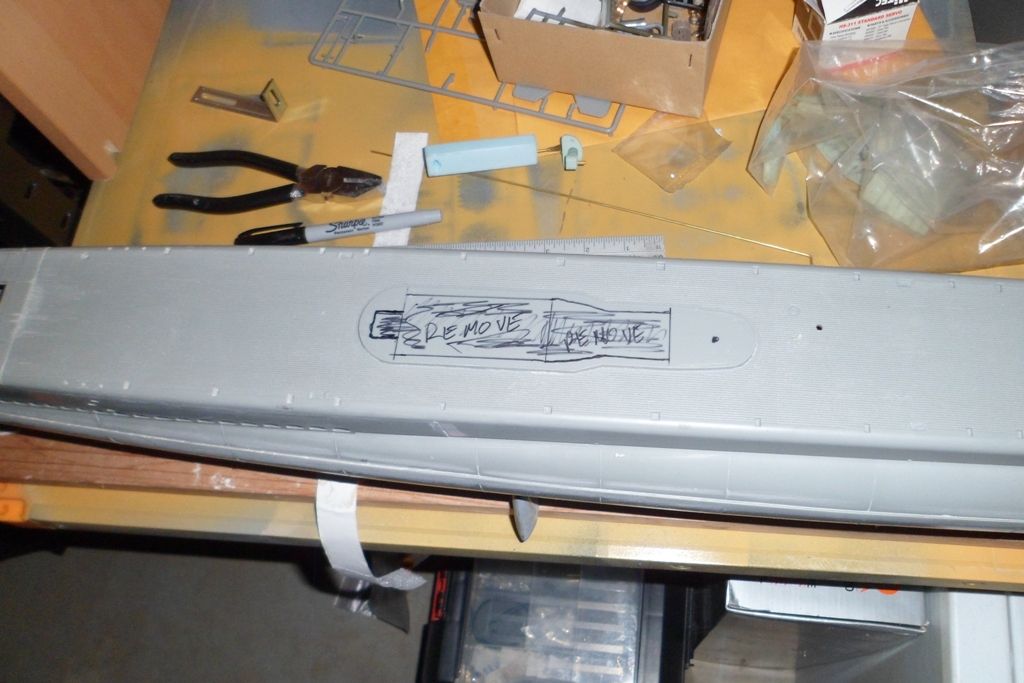
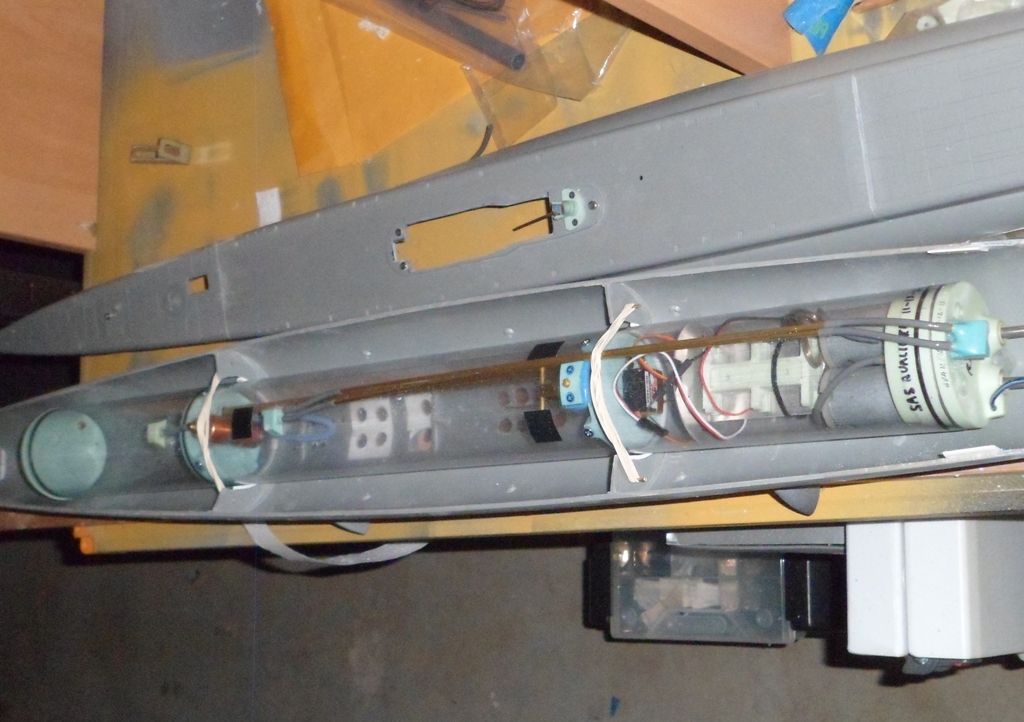
        The white strips you see on the edge of the limber hole sections are styrene strips to help fill the gap from separating the pieces. I understand that there is always material lost when carving up styrene but I am just anal enough to try and hide/minimize them where I can as can also be seen at the leading edge of the top hull piece to the right of the video. Today I didn't put so many hours into it all I did was tidy up and test the running gear as well as grind out the models two bulk heads to get the sub driver to sit lower in the hull and remove some of the bulk heads in the top hull to accommodate the SAS system and bow plane operating shaft. With the final part of todays work marking out the area of the top deck conning tower mount for grinding/cutting away.


        This week I should have the SAS snorkle fitted and start work on the conning tower and deck guns. Replace the lost weld line due to sanding etc. Then once that is all done I will wash all the parts/sub assemblies again to get rid of anything that has polluted the model during the assembly. This will be followed by a couple of primer surfacer to help fill the little annoying scratches and such. I will also need to do some mods to the SAS lines as the tubing supplied in the parts kit is about an inch short to go from the motor bulkhead manifold to the SAS ballast tank manifold for the inlet/outlet lines. No biggie I reckon I can get away with adding a length of brass tube in the middle for the inlet and outlet lines. I will also look at whether I need to add a strain relief tube from the snorkel assembly as I did for the Skipjack?
        Cheers,
        Alec.


        Reality is but a dream...
        But to dream is a reality

        Comment

        • crazygary
          Captain
          • Sep 2012
          • 610

          #5
          Quite a bit of useful information which can assist me in my 1/144 Gato build!
          Thanks for your post, Alec!!!

          First time I have seen the forward dive plane operating mechanism! Pretty well
          thought out and appears to work flawlessly!! Too bad there is so little room in the bow
          of the 1/144, otherwise I may just give that bit of mechanical wizardry a shot!!

          Best of luck with her completion!! Looking forward to future photos as you progress!!

          Comment

          • He Who Shall Not Be Named
            Moderator
            • Aug 2008
            • 12253

            #6
            Originally posted by crazygary
            Quite a bit of useful information which can assist me in my 1/144 Gato build!
            Thanks for your post, Alec!!!

            First time I have seen the forward dive plane operating mechanism! Pretty well
            thought out and appears to work flawlessly!! Too bad there is so little room in the bow
            of the 1/144, otherwise I may just give that bit of mechanical wizardry a shot!!

            Best of luck with her completion!! Looking forward to future photos as you progress!!
            Well ... you have turned out to be a handy sort of guy -- I bet you can make 'em retractable. I would consider making the deploy-retract mechanism actuated by a float.

            M
            Who is John Galt?

            Comment

            • crazygary
              Captain
              • Sep 2012
              • 610

              #7
              Aw, Gees, M!! That's all the "old fart" here needs! A challenge!!

              However, sounds doable, me thinks!! May lead to my having to take out a loan
              with the "brain cell bank", but I digress!! Hah!!

              Hmmm!! Lessee,,,pivot points, linkage, float...Yup!! Soon's I have a chance, I'll
              slip into "ponder mode", and see what, if anything, I can come up with!!

              Thanks for the "encouragement"!!?

              Comment

              • alad61
                Commander
                • Jan 2012
                • 476

                #8
                Your welcome Gary and I too would be keen to see how you make your 144 Gato planes retractable. As for complition I have just over eight weeks to have mine running in the water. I reckon this week will see the finishing of the conning tower and SAS snorkel, next week will be the subdriver fit out and installation in the boat with the following two weeks to get the trim right leaving the last four to paint, detail and weather it for final sea trials.
                Cheers,
                Alec.


                Reality is but a dream...
                But to dream is a reality

                Comment

                • alad61
                  Commander
                  • Jan 2012
                  • 476

                  #9
                  Well this week didn't see everything completed as planned due to a couple of interruptions to the man cave time... Sandy wanted more time with me, wives they can be so demanding... The weather/heat has been a bit oppressive the last few days which kind of saps the desire to much of anything.(poor excuse I know) Also the indoor pistol range & club I recently joined opened back up after some maintenance so that took a night away but it's a good distraction and I have to say that after 8 weeks I have found something apart from building/assembling models that I have some natural skill at. I say that because up until 8 weeks ago I had never fired a pistol in my life. But I digress..
                  Click image for larger version

Name:	SAM_0686.jpg
Views:	1
Size:	90.7 KB
ID:	90047Click image for larger version

Name:	SAM_0684.jpg
Views:	1
Size:	86.4 KB
ID:	90048

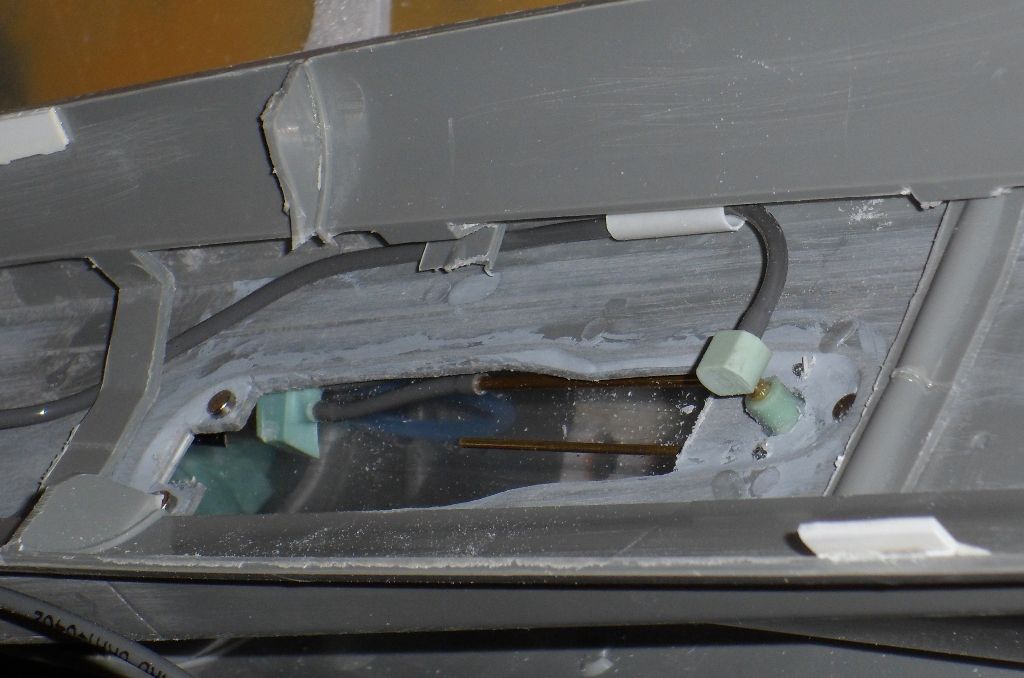
                  I have however completed fitting the SAS snorkle and induction line and added the brass tube to take up the short fall with the short tubing lengths.

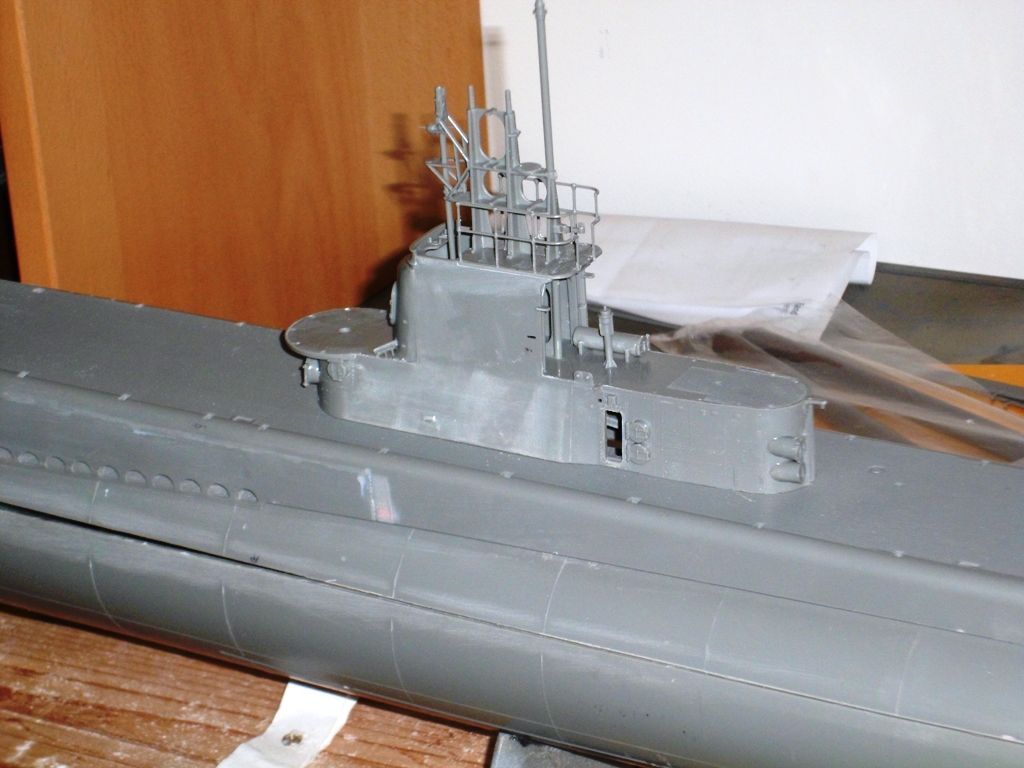
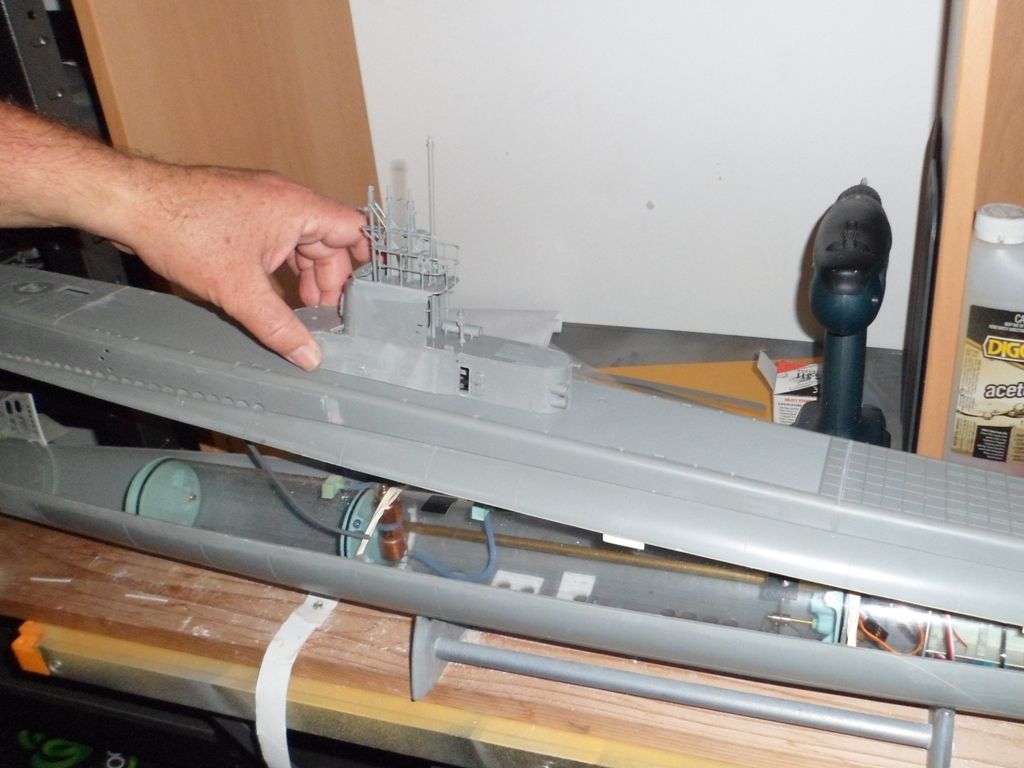
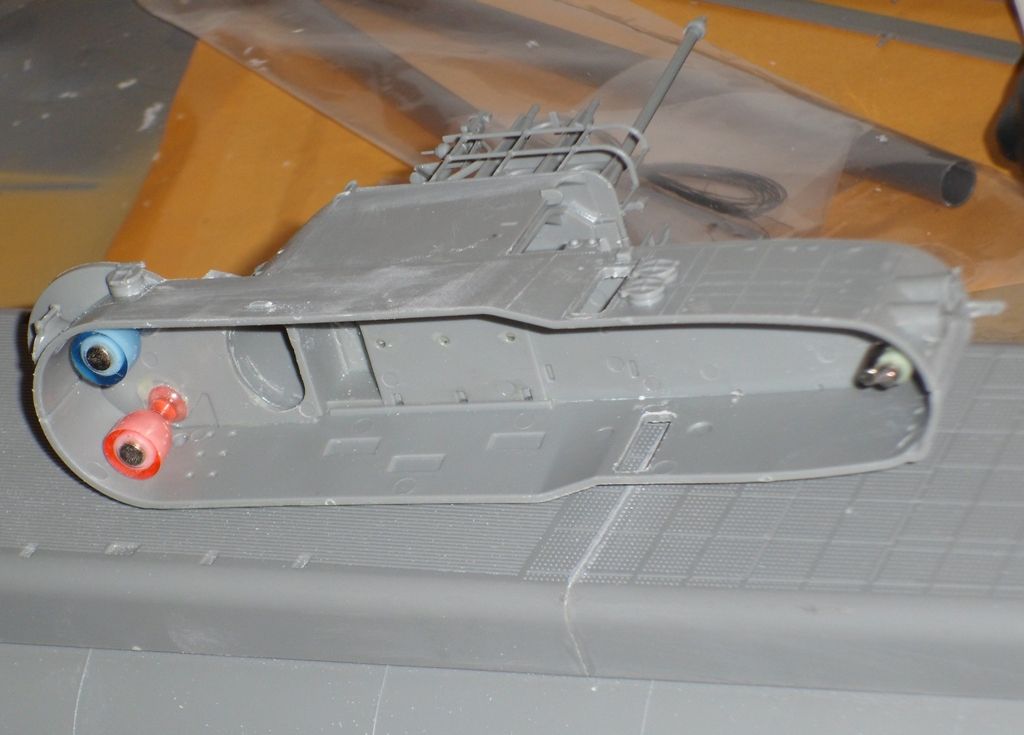
                  As for the conning tower it's about 75% completed excluding the guns. Unlike my first one I did a couple of mods to this one with the first being to remove the two doors. I did this more so I could have a quick visual of the snorkle and float as opposed to any scale realism. I also sanded off all those rectangular box things on the sides. That I did do for a bit of scale realism as most of the pictures I have seen don't really show them as a feature

                  I found some novelty rare earth fridge magnets which worked in nicely for the magnets to hold down the tower to the hull. They only came in a pack of 5 so i substituted the back with a couple of klik ons. Now I will be honest and say I did have my doubts about how well magnets would do the job. So much so I started to draw up plans in my head to add additional clip bracing, but when I tested the magnets after the glues had cured I reckon my fears were groundless... A couple of other mods to the conning tower was to grind out the deck behind the curved forward bridge wall, you can see that in the second picture and I also opened up a the hole in the raised bridge deck as well so that any trapped air can have a better chance to get out. I also opened up a hole under where the front gun will sit and I'll do the same on its mounting plate just to add an extra vent for letting air out. This idea I got from Tom and his Gato. Something I may also do is add a vent hole to the rear gun platform for venting as well but I won't do that till I have tested it in the tub first. I also played with the idea of making the main periscope active via a float system but with the sas float needing clearance I was only going to get an extra 1/2-3/4s of an inch in raised scope so I dropped it as it was going to be a lot of addition work for no real gain.

                  This week end has my calendar full with attending the play Sandy is in and also some community stuff with work however I am hoping to have the rest of the tower finished this week end.
                  Cheers,
                  Alec.


                  Reality is but a dream...
                  But to dream is a reality

                  Comment

                  • alad61
                    Commander
                    • Jan 2012
                    • 476

                    #10
                    No pictures yet but this week I have finished fitting out the conning tower, assembled the forward .50cal and rear Akak gun all ready for priming. I plan to leave a lot of the main deck detail on such as the side hand rails with mag wire as the cables, my reason is just for added features when running it on the surface. If bits start coming off then I'll snip em off and file them back to the deck. Tonight should see the deck gun completed and the last of the hull detail added which means I can start on fitting the SD components ready to ballast and trim next week.

                    This time I am not even touching up the weld lines that have been sanded away or priming the boat till I am satisfied she runs right. I now have just over six weeks to go before the regatta so I am quietly confident she'll be done on time.

                    David I plan on running lipos in this one but I plan only using 2 x 7.4 1800ma in parallel. That way I shouldn't need to add a resister to the pump and as long as my math is ok it should provide enough current draw running the motors between 50-60% on the radios epa.
                    Cheers,
                    Alec.


                    Reality is but a dream...
                    But to dream is a reality

                    Comment

                    • He Who Shall Not Be Named
                      Moderator
                      • Aug 2008
                      • 12253

                      #11
                      7-volts works for me. Check that the motors don't get too hot. Yeah, take the resistor out of the MPC circuit.

                      M
                      Who is John Galt?

                      Comment

                      • alad61
                        Commander
                        • Jan 2012
                        • 476

                        #12
                        Fitted out the sd over the week end and did as suggested with running the motors from the 7.4 for around 5 minutes with no decernable heat, in other words the cans weren't hot to handle. Also I must be getting better at running push rods though because I have virtually no bind/friction. I have the tx, rx and servos all tuned, we'll as much as I can till it gets wet. However... The only thing that I found absolutely frustrating was getting the bow plane mechanism torque arm to do its thing. After around 12 hours finishing at a very late hour last night I have temporarily fixed them open. The reason is that my main goal is the have a functioning rc sub ready for Easter. So if needs be the b.p.m can wait. I was meant to finish assembling all the styrene parts but I needed a break from that but now that the sd is done I'll finish adding the last of the hull detail I planned and do the first tub test this week.
                        Cheers,
                        Alec.


                        Reality is but a dream...
                        But to dream is a reality

                        Comment

                        • alad61
                          Commander
                          • Jan 2012
                          • 476

                          #13
                          So now it's at the "fun" stage with getting the trim right... The first action was cutting the lead sheet and laying it in the keel with minimum foam on the waterline. The first stages are done with everything installed in the sub but no power to the electrics. All I wanted was to get it level keeled on the surface and submerged. After several hours I got it where I was happy. Something I didn't take note of was how the subdriver sat and behaved. With everything installed the sd has a tendency to roll to the left when looking directly down. Dynamically this added to the listing in the early stages but additional lead and foam got around that. When it came time to test run the sd powered up I ran into a snag. The switch was not completely switching off so it off to acquire a new switch from Jcar.

                          Things I noticed when I was running with a powered sd is that you need to move the sas float foam as far back as possible towards the inlet valve. This lets the float fall better to open up the sas to outside air intake. I was planning on running two 7.4 1800 milliamperes lipo packs in parallel. However it looks like I will have to run just one pack which means I need to measure the lipo pack so I can add the same weight of lead to the sub just forward of its c.o.g to compensate when I split the parallel set up.

                          This sd has a big ballast tank, which when taken into consideration with how much actual air volume is available in the engine/electrics section after everything is setup. That air volume not being much and in the battery compartment with the two lipo pack doesn't give you a lot of the air volume you need to get the sub out of the water enough to breath open air. Just to make sure I ran the fill ballast/blow ballast cycle several times. Moving the float foam back helped a bit but the sas was pumping itself to a create a undue vacuum in the sd. Which meant having to take the boat out of the water and equalise the sd via the front valve. Not normally a problem at dry dock but if the boats in the middle of the lake and struggling to get to a good surface trim with a pump going past moving air to creating a vacuum per sae and thus struggling and burning amps well... So this means a different approach to trimming than with the previous Gato gas/snort sd. One of which I am thinking will be having the submerged trim shallower than normal so that everything above the gun decks on the conning tower is above water.

                          the other annoying thing is that statically in the water the boat sits level at the waterline and at submerge red trim. But it doesn't stay that way when blowing the ballast. It gets to decks awash ok but then when it gets to a point that has the water below the deck plates it rolls and lists to port?? By that stage I had been at it for more than a good while last night so I packed it in to tackle tonight. So far my schedule for completion is pretty much on track so at this point I'm not panicking...
                          Last edited by alad61; 03-10-2014, 11:55 PM.
                          Cheers,
                          Alec.


                          Reality is but a dream...
                          But to dream is a reality

                          Comment

                          • alad61
                            Commander
                            • Jan 2012
                            • 476

                            #14
                            Progress has been a bit slow since the last post... Life and the wife just keep getting in the way. So as the saying goes (para phrased a tad) have the strength to change what I can and the knowledge to accept what I can't change and just deal with the rest of the stuff as it happens...

                            I think I got round the listing thing when blowing ballast. It was pretty simple really... ADD more weight at the cog. I also took apart the parallel batteries and now only run with one. Now class if you had been paying attention then you would remember that I had pretty much trimmed the boat so taking out a battery would play havoc with said trim. So I grabbed some additional foam cut to the same dimensions as the battery and add that to the aft end of the sub to counter act the light weight and greater air volume now in the battery compartment. Now this combined with extra lead in the keel around the cog got me a boat that sits at a good waterline and submerged with the conning towers gun decks awash. I figure with the power of the props I should have no trouble getting her to full periscope depth and lower. I was happy and Sandy was happy because she now had the other bathroom back.

                            With it trimmed the next phase was painting. However here is where I hit a bit of a snag... It seems that I neglected to notice or ask what the girlie decorations were around the tub. It turns out they were soap!!! so now the model was covered in a thin soapy scummy film. Just flaming wonderful. David here is where you can say I told you so... I now had to clean the thing without snapping, shearing or bending all the rails, posts and poles I had put on the deck. However this is where I can retort that "what a clever bugger I am with a couple of hours, a denture brush, scouring pad cut into different sizes and a measure of patients I got that boat ready for paint with only two hand rail posts that need some minor surgery.

                            Which is what I did some three days later when I primed it all with an auto primer filler...Click image for larger version

Name:	2nd Gato...Prefered primer.jpg
Views:	1
Size:	86.9 KB
ID:	90666

                            I let this dry for a couple of days to ensure it had vapoured out before I started applying the primary base colour, black. I decided that unlike my first one I would paint all the model in black. I did this for a couple of reasons. The first is that the majority of the boat is black and secondly it would act as a shadow base for the lighter greys. Much the same as pre shading which is not a process I normally do but it doesn't hurt to step away from your comfort zone occasionally...
                            Click image for larger version

Name:	2nd Gato... Complete boat with with first of base colour.jpg
Views:	1
Size:	79.5 KB
ID:	90667
                            With the first coat applied I then put the model under a different light to look for any areas that need additional or extra filling. Which of coarse there is always something...
                            Click image for larger version

Name:	2nd Gato...more filling and priming.jpg
Views:	1
Size:	82.3 KB
ID:	90668Click image for larger version

Name:	2nd Gato...Painting and priming touch ups.jpg
Views:	1
Size:	65.9 KB
ID:	90669
                            Once the new layer of primer was dry I removed the tape and then sanded it over with some 600 grit paper to feather in the edges before adding more black. Now with it all painted in the base colour I will leave it sit for a day or so before I start the weathering process, Of which I will start by giving it a light over spray of dull coat to protect it during handling as well as providing a better surface for the pastels and washes. I still have just over three and half weeks before the sub-regatta in Canberra so my time table at this point in time is still ok...

                            Oh and I managed to get the bow planes/torque tube to function. Whilst painting the boat out of the blue I realized today what I had been doing wrong. It appears that I had the bow plane retract arm upside down. It was certainly one of those grey moments that I couldn't get passed and the more I thought about it and fiddled with it the more frustrated I became, so as I said in the previous post I left it be with the knowledge that I had forward planes that could at least dive and surface the boat.
                            Last edited by alad61; 03-23-2014, 06:53 AM.
                            Cheers,
                            Alec.


                            Reality is but a dream...
                            But to dream is a reality

                            Comment

                            • crazygary
                              Captain
                              • Sep 2012
                              • 610

                              #15
                              Your Gato's shaping up very nicely, Alec!!

                              Perseverance pays off in the long run, which you certainly have proven!
                              A whole lot of patience doesn't hurt, either!!

                              Well done, Sir!!

                              CG

                              Comment

                              Working...