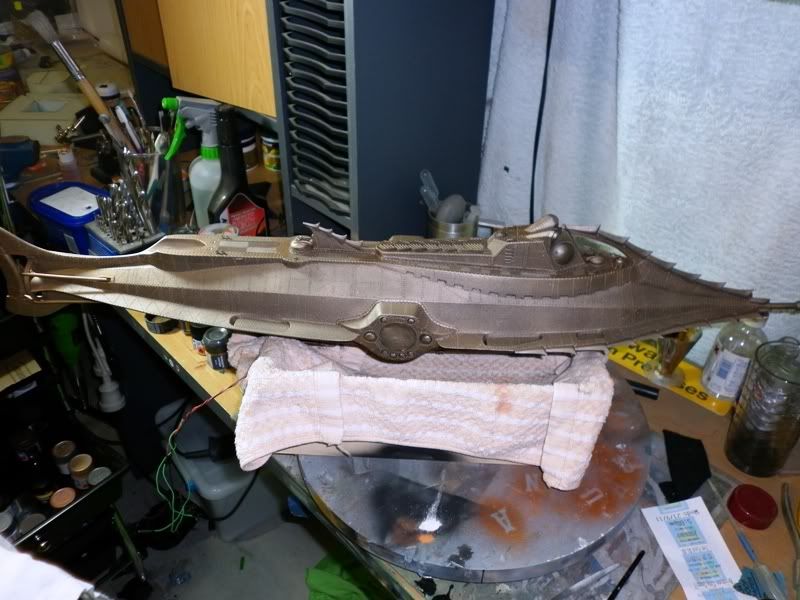
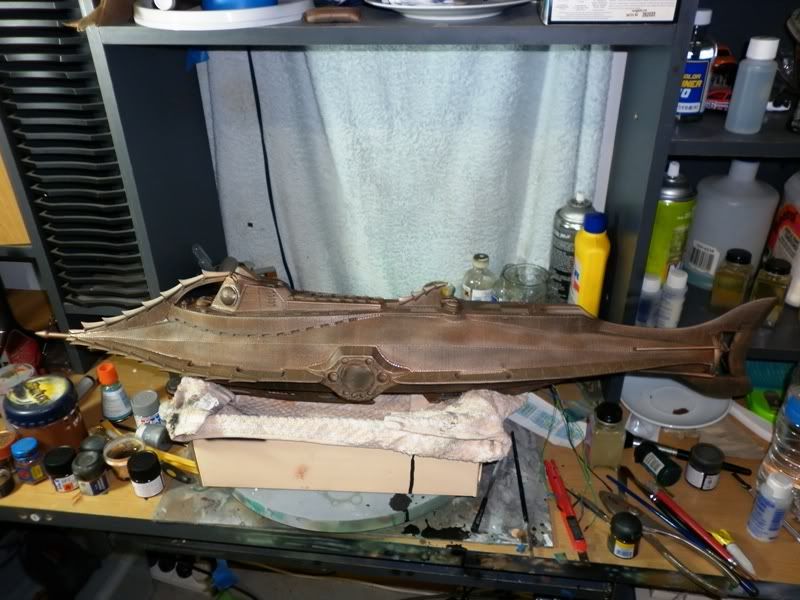
31 inch Disney Nautilus... Not an RC version

Collapse
X
 
  • Time
  • Show
Clear All
new posts
  • alad61
    Commander
    • Jan 2012
    • 476

    31 inch Disney Nautilus... Not an RC version

    My apologies for any breaching etiquette for the forum for a non rc post/thread...

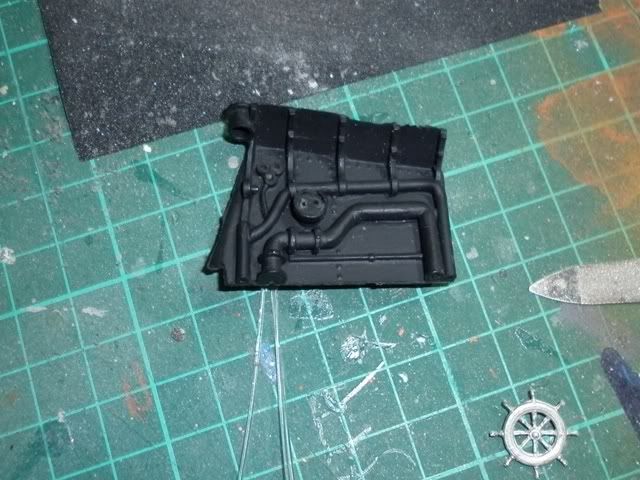
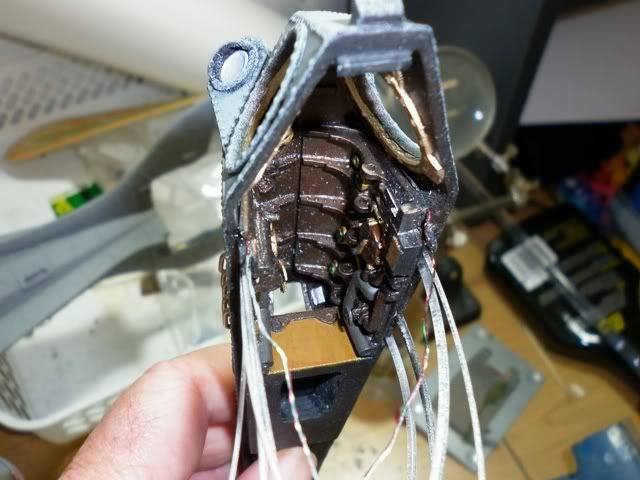
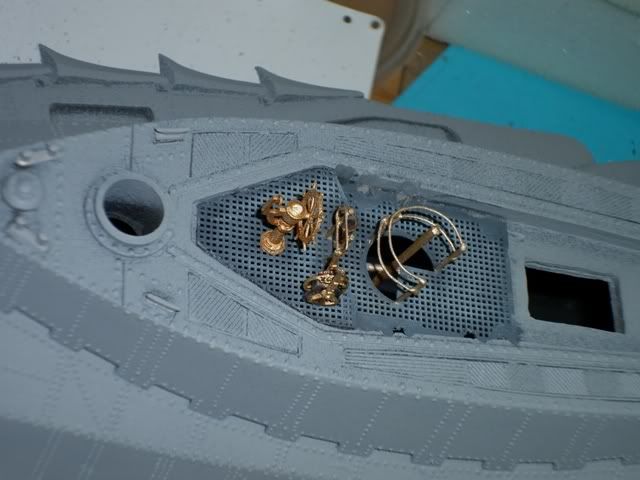
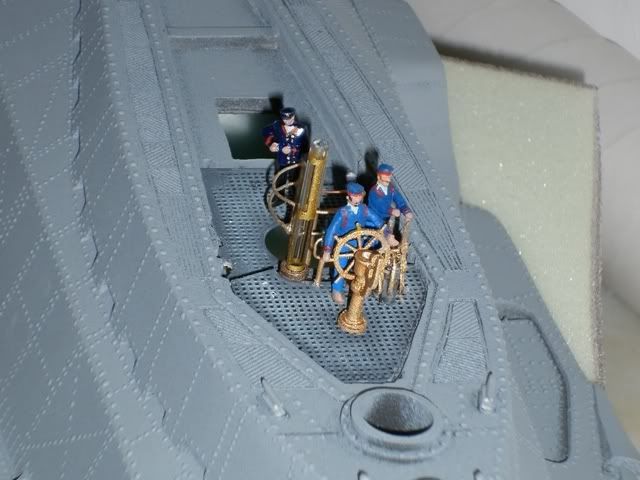
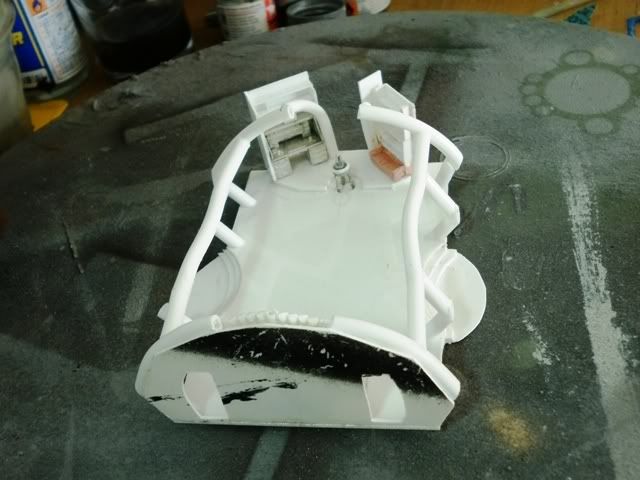
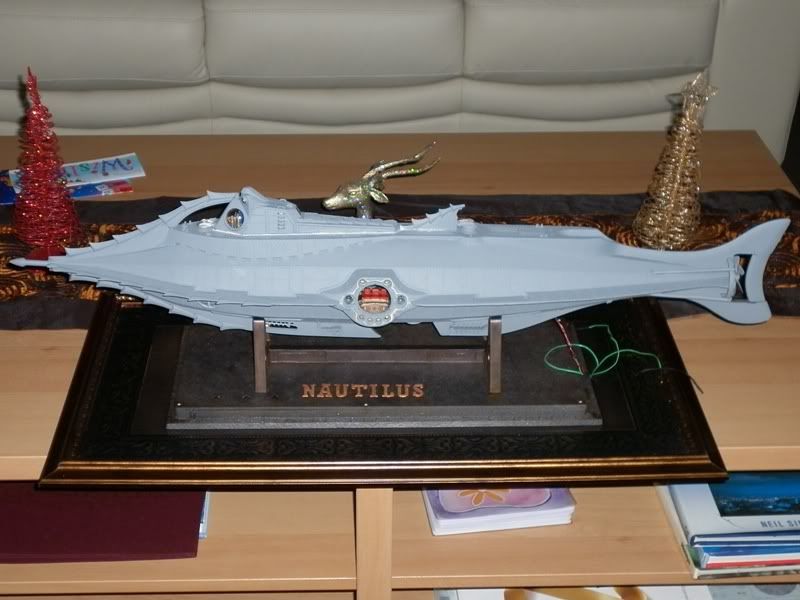
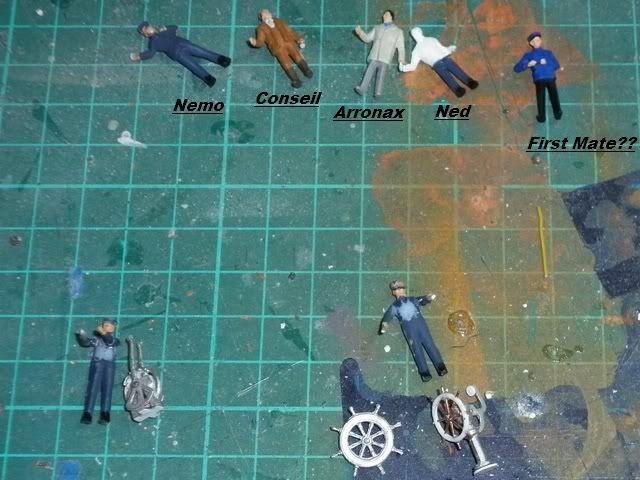
    I just thought I would post up a thread on how I did my static 1/69th scale Nautilus I got from Nautilus Drydocks that I did when I was recovering at home from a sporting injury a couple of years back. I have already put up some pictures of the completed model but I thought those here would enjoy how I got to the finished model. This has always been a model desaire for me since I was a kid and saw the movie back in the sixties after my mother took me to see it one day instead of going to school. I did look at the total immersion version but the idea of getting what I was lead to believe a possible knock off of the Brodeen kit put me off. Also I’m kicking myself a little because I didn’t take a picture of the parts before any assembly… Sorry about that. I decided from the outset that I was going to do as much to this build as I could e.g. adding some lighting, some people, a detailed salon interior behind the two big observation windows and adding a motor to animate the propeller. The salon would prove to be by far the biggest challenge as it needed to be entirely made from scratch. The model is sold as a 1/69th scale for accurate over all lenght, which I was told by Bob @ Drydocks, figures in that scale look a bit large. Due mainly to Disney doing the usual cheats on making the interior sets. I don't think they were cheats as such, just necessities for being able to film with the size limitations of equipment from the times. I tried various scales but in the end went for a line of HO railway figures. For those that don’t know the main kit parts are molded in a very nice dark grey resin and the only interior extras the kit comes with is a basic wheel house interior, consisting of left and right walls, white metal parts for the wheel, binnacle, dive plane controls and a clear length of plastic tube for the depth tube indicator. The detailed walls for the wheelhouse though not screen accurate are still pretty good for its scale. When I dry fitted the wheel house parts I thought they looked a bit out of scale so I rebuilt the wheel,binnacle and dive plane controls and added some additional detail with the chain cog but I couldn't get the scale look with the chain so I left that out. I also added some fiber optics to the wheelhouse gauges as I had planned for this to be a fully lighted display piece...
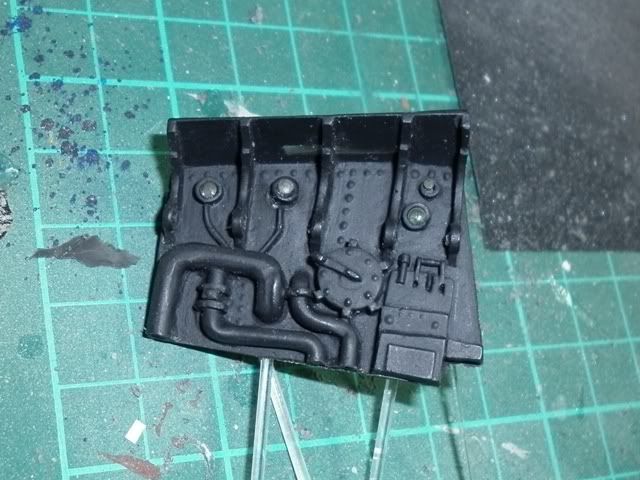
    After adding the gauge lights I decided to paint up the wall pieces. I had already gone out to a LHS and purchased about 6 different shades in metallic for the build. However I had through my own doing, a near disaster that almost reduced me to tears of anguish, rage & despair. After spending over an hour painting up the right wall piece via hand brushing instead of airbrushing (1st mistake), the colour that I chose I didn't like (2nd mistake). So I grabbed some eco-friendly water clean-up paint remover, which has worked a treat before on my styrene kits, (3rd mistake- not testing it on resin). It turned the piece into and soft rubbery piece of yuck!!! All the thinner wall & ceiling sections had either melted away or just curled up and broke away from the larger pipe sections as it dried. However from despair came inspiration, of sorts With No11 exacto, sandpaper, files, plasticard, white glue and filler in hand I began a desperate salvage of the piece along with some added detail to boot.
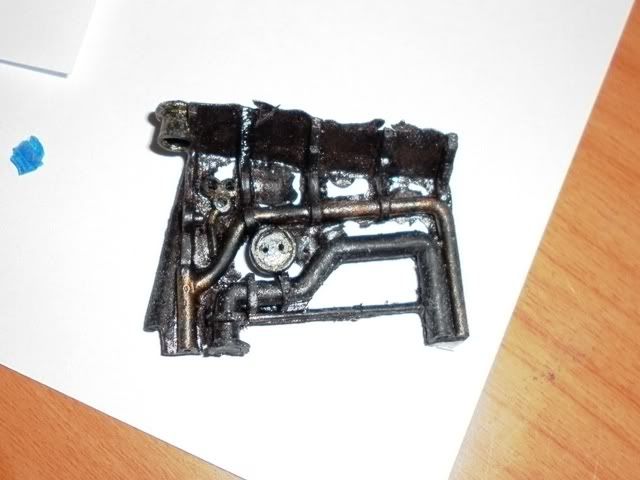
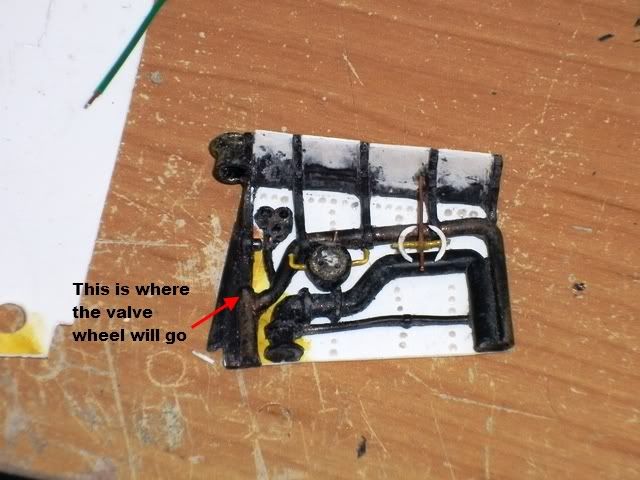
    Things that I added where the valve wheel under the 3 dials, the small bobbing lever on top of the atomic clock and some small right angle pieces of wire for added detail around said clock. I also added the double bow gauge at the back end of the wall near the map table. Not to mention redoing the fibre optics due to the addition of the plasticard wall sections to replace the damaged ones. Over all I was pretty stoked with my repair and once it was in place along with the completed port wall piece, to which I also added a valve wheel, it looked damn fine if I do say so myself. Except for painting the map table and adding the ballast control lever & windows I had pretty much kitted out the wheelhouse assembly including adding another valve wheel to the opposite wall.


    I tried a couple of different lighting ideas for the wheel house gauges with various green leds
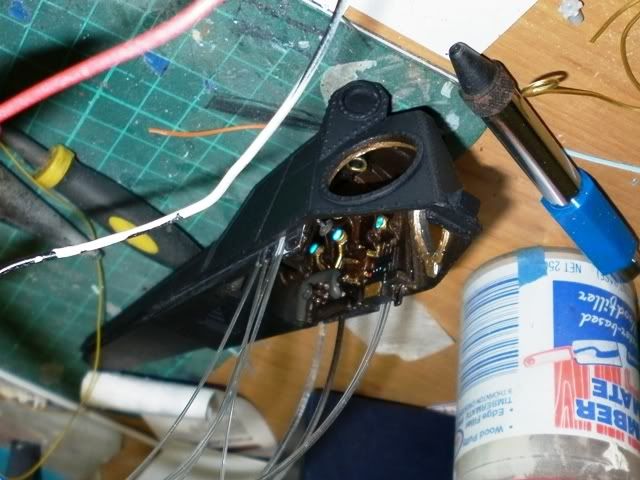

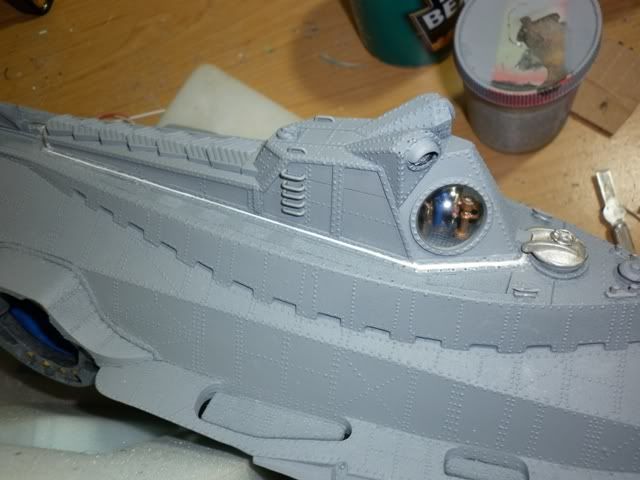
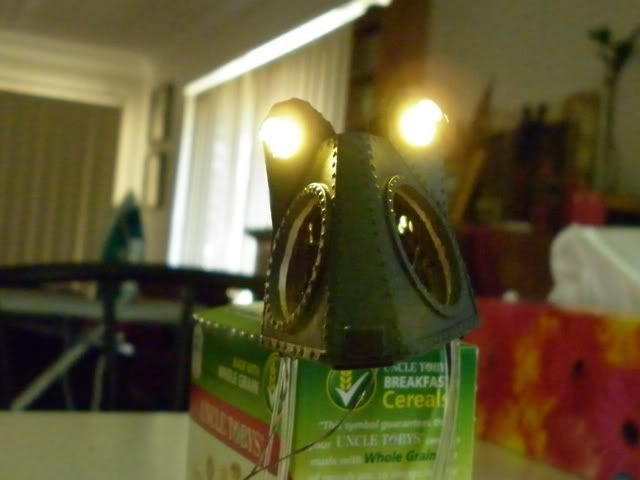
    but none gave me what I wanted or seemed to have the wrong luminescence or hue as above. In the film the dials all have a green glow around the edges so I glued the fibres with the pva and added the green wash letting it settle around the edges the result though not entirely accurate came out ok for me. Next on the to do list was lighting the alligator eyes. This was done with micro leds which I up to then had not used a lot but those that I had seemed to give me a better scale effect. Also I could recess them farther back again helping me, I hoped, with the scale effect and it did just that. Let me say that attacking the model with a dremel was from begining to end a heart starter.

    More to follow...


    Cheers,
    Alec.


    Reality is but a dream...
    But to dream is a reality

  • He Who Shall Not Be Named
    Moderator
    • Aug 2008
    • 12256

    #2
    Magnificent! I love this stuff. Post away .....

    M
    Who is John Galt?

    Comment

    • He Who Shall Not Be Named
      Moderator
      • Aug 2008
      • 12256

      #3
      Magnificent! I love this stuff. Post away .....

      M
      Who is John Galt?

      Comment

      • greenman407
        Admiral
        • Feb 2009
        • 7530

        #4
        Neat stuff Alec!
        IT TAKES GREAT INTELLIGENCE TO FAKE SUCH STUPIDITY!

        Comment

        • alad61
          Commander
          • Jan 2012
          • 476

          #5
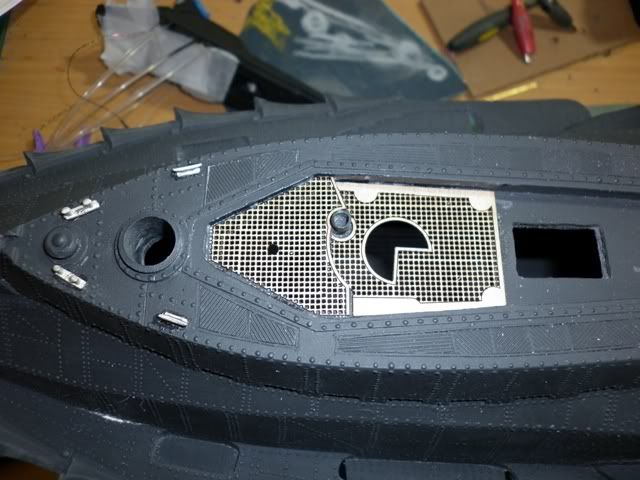
          What I forgot to mention was that all the micro led lights I got all came pre wired with resisters and in a warm light rather the normal white. Other things I found when doing this were laser cut wooden floors for the wheel house. It was only later after doing some more lighting test that I found the added bonus of the open grating in the floors helped with the lights from below deck coming through the floor as it did on the actual sets. I remember making a conscious decision about adding extra detail to the wheel house knowing I was bound to loose some of it when it was assembled but I still proceeded to add things anyway... My poor soldering skills regardless.

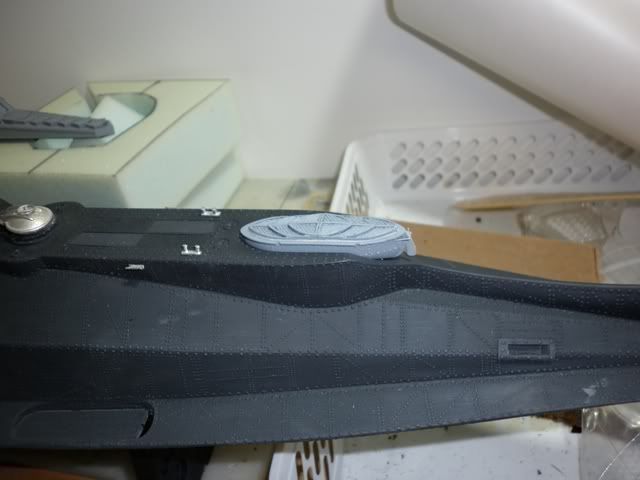
          During that week I started adding some of the other white metal parts such as bollards and cleats to the top hull. I did this more to prevent me loosing stuff, as I am frequently apt to do... Something else I wanted to detail was the skiff with rudder and tiller arm detail and for fairly obvious reasons some detail wasn't on the model such as the tiller arm and rudder on the skiff, something only true Nautilus buffs and rivet counters would complain of with such detail missing. I understand that the realities of molding, sculpting, casting and shipping issues make such detail difficult to do and so I made my own. The simple logic of it was that to do all the interior detail of the wheel house and what I had planned for the yet to be done salon I had to make or at least attempt to make a rudder for the skiff. I think it took the better part of three nights to get it done. I also made all the hatches work so that I could open or close...


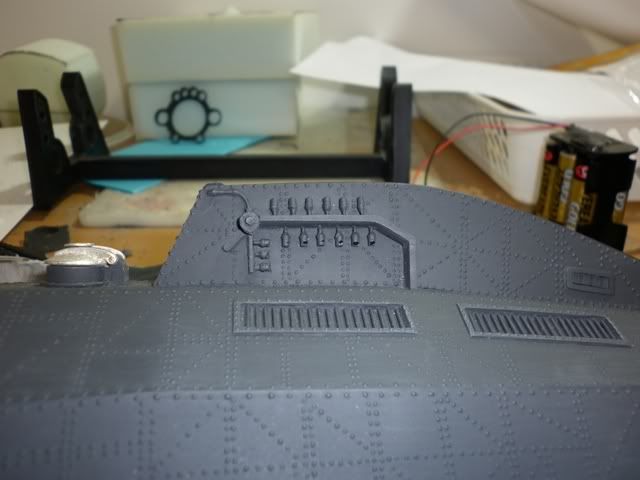
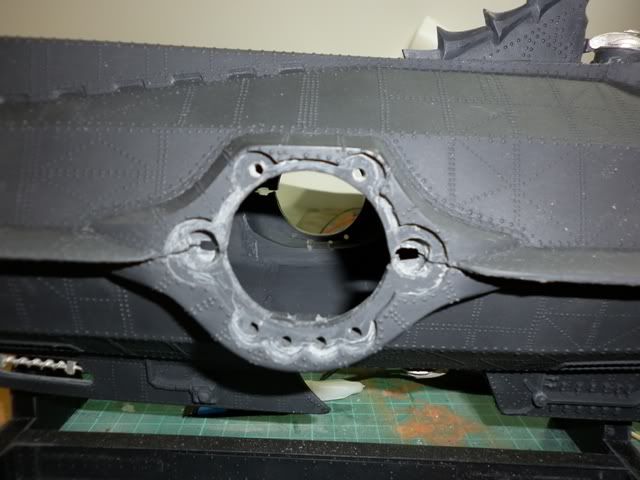
          That week also saw me going over the hull and fixing any voids that can often happen with resin models but from memory there just weren't that many to find except for a few rivets here and there that had pin holed and the worst per say was on the phosphoric atomizer I also drilled and dremelled out all the flood lights around the large salon window in readiness for the lighting.


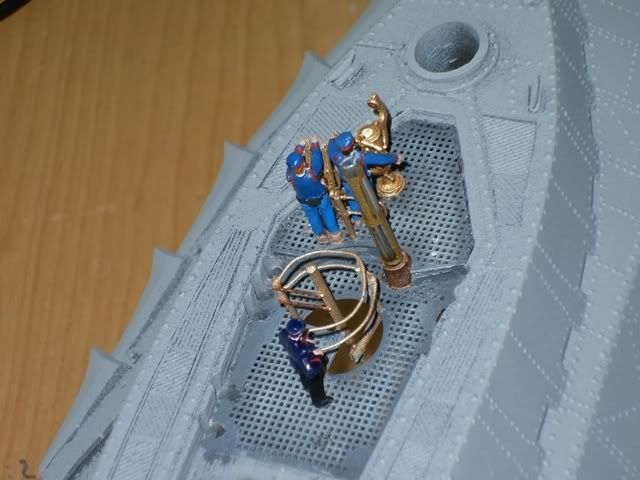
          With those voids filled I then put on the first coat of primer. For this I used an auto one that acts as a filler and primer. It was good for filling those tiny little pin holes and highlighting the larger ones I had missed. After laying down the first prime coat I then went back to completing the wheelhouse by adding some final detail... The operating manuals that Nemo hung on either side of the chart table, painting up the wheel house floor and fixing the wheel, dive pane pieces, two crew members and the first mate I had converted from the railway figures as well as adding the depth gauge tube after I painted on the brass frames to it... With the number of times I have watched the film I still think I may have gotten the floor colour wrong but...


          I'm not sure if it was a mad after thought but I recall also going down to jacars, our version of radio shack, and getting a couple of blinking circuit boards so that I could animate the atomic clock. A habit I have is often to get two or more such things as a precaution. A good thing as it turned out too because the first board I assembled failed on me!! Something that I found out in final lighting tests before buttoning up the completed wheel house.
          Cheers,
          Alec.


          Reality is but a dream...
          But to dream is a reality

          Comment

          • alad61
            Commander
            • Jan 2012
            • 476

            #6
            Thanks David and Mark.

            I was going to be cheeky and post this in the competition thread but common sense took hold. Also the tricky part is remembering the timeline of it all...
            Cheers,
            Alec.


            Reality is but a dream...
            But to dream is a reality

            Comment

            • alad61
              Commander
              • Jan 2012
              • 476

              #7
              So going back through my pictures and stuff I assembled the wheelhouse to the hull after I added the windows and alligator eyes light lenses all the lights were tested and fixed. With the windows I dipped them into some future floor polish and then sat them on some tooth picks resting on absorbent paper. All of this was then covered to help keep the dust off and left to dry overnight. I then glued them in place with a good quality pva glue and set it aside till the glue had fully cured. I used pva instead of ca because ca can some times send clear plastic brittle. It will fog the plastic too but the future will generally get rid of that but I am not sure what type of plastic these and the salon windows were vac-formed from I opted for the pva. One thing that was annoying to me was the rather large gap around the wheelhouse and where it sat on the hull... It was an easy fix with some styrene strips and filler but still annoying


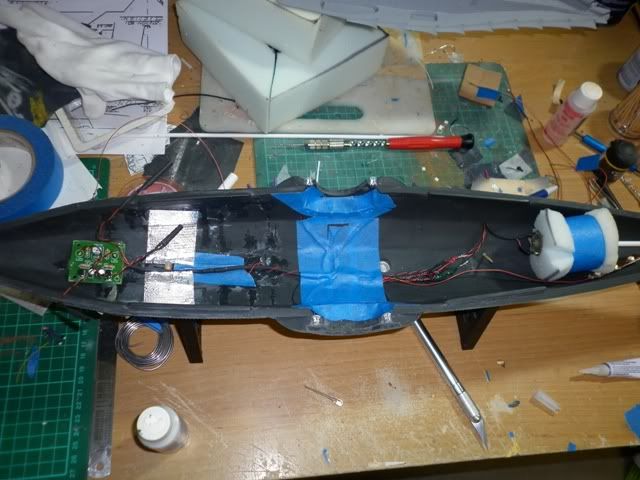
              The next thing was adding the lights around the salon windows then wiring the remainder of the lights and motor for the propeller and making up a shaft from evergreen tubing. To keep down the sound of the motor I wrapped it in foam. I am pretty sure it is a 500 series motor rated for 12 volts. I actually lucked it with its running speed because the entire system runs off 9 volts the motors revolutions on the lower volts are pretty close to the spin as seen on the prop in the film when the sub is just cruising. What I forgot to do was add some suppressors to the motor as it plays havoc with the TV and DVD recorder when I switch on the prop BLUSHER For the lights around the salon windows the two large ones are 5mm leds that I ground back and the smaller ones are the micros. I dug around on my pc and found the link to where I got the lights fromhttp://www.modeltrainsoftware.com/

              Before I masked off all the lights I did yet more lighting test in different lighting conditions. I knew that once this was buttoned up there would be no fixing anything afterwards...
              Click image for larger version

Name:	P1000461.jpg
Views:	1
Size:	25.1 KB
ID:	83897Click image for larger version

Name:	P1000468.jpg
Views:	1
Size:	28.8 KB
ID:	83898Click image for larger version

Name:	P1000471.jpg
Views:	1
Size:	86.3 KB
ID:	83899Click image for larger version

Name:	P1000472.jpg
Views:	1
Size:	86.1 KB
ID:	83900Click image for larger version

Name:	P1000473.1.jpg
Views:	1
Size:	75.2 KB
ID:	83901

              With the exterior pretty much done it was on to the salon and a real test to match dreams and ability... By that stage most of the pieces I needed had arrived in the mail and I had cleaned up the copy of original blue prints I have on a disc. By cleaned up I mean I had to enhance and resharpen the scanned images so that I could work with them.
              Click image for larger version

Name:	P1000477.jpg
Views:	1
Size:	40.5 KB
ID:	83902Click image for larger version

Name:	P1000474.jpg
Views:	1
Size:	38.0 KB
ID:	83903Click image for larger version

Name:	P1000475.jpg
Views:	1
Size:	28.4 KB
ID:	83904
              Cheers,
              Alec.


              Reality is but a dream...
              But to dream is a reality

              Comment

              • alad61
                Commander
                • Jan 2012
                • 476

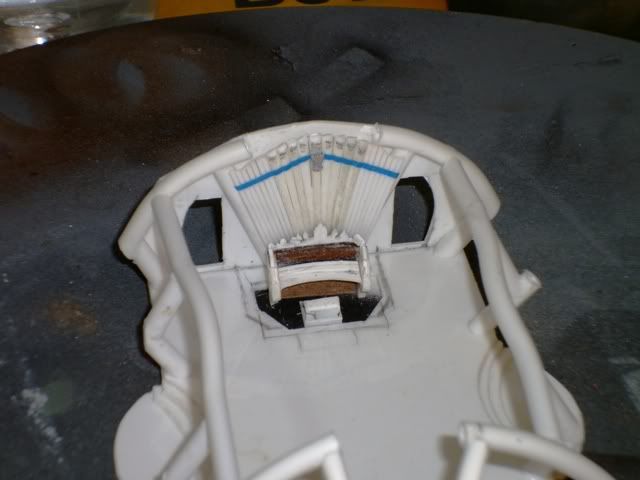
                #8
                For the salon fit out I again used HO scale items with some desks, chairs, picture frames, jars and bottles and settees for the curved window couches. All of these were in white metal so they were pretty easy to file and rebuild. Things made from scratch were the organ, tear drop couches, specimen table, the little fountain, some of the rows of books and shelves along with the couch under a bookcase. The little fountain suffered a 'DOH' accident and was rebuilt for the better as it happened. I also made various gauges that hung from the ceiling and on the work desk in front of the three aquariums
                Click image for larger version

Name:	P1000576.jpg
Views:	1
Size:	39.6 KB
ID:	83905Click image for larger version

Name:	P1000587.jpg
Views:	1
Size:	30.7 KB
ID:	83906Click image for larger version

Name:	P1000604.jpg
Views:	1
Size:	39.9 KB
ID:	83907Click image for larger version

Name:	P1000606.jpg
Views:	1
Size:	92.9 KB
ID:	83908

                The pictures, curtains and rugs are again HO stuff which I scanned and re-sized and things like the lamps are odds and sods from the bits box. The gold braided rope around the organ pit is very fine gold thread from a scrap booking craft supplier and the gold edging on the specimen table and book shelves is trimmed from craft ribbon and glued to thin clear acetate sheet.Looking at the dates the salon took around ten days and nights to complete to the finished result. Which included watching the film and taking snapshots to help out as well and I had to take some liberties with some things due to its scale and my abilities.


                Once the salon was done it was onto final assembly and painting It was by then late November and I had set a time frame to have it finished by New years eve 2012. Time was ticking... I remember that doing this I could only sit down for no more than two hours because of my back injury but it was actually good therapy in many ways for both the body and brain.
                Cheers,
                Alec.


                Reality is but a dream...
                But to dream is a reality

                Comment

                • alad61
                  Commander
                  • Jan 2012
                  • 476

                  #9
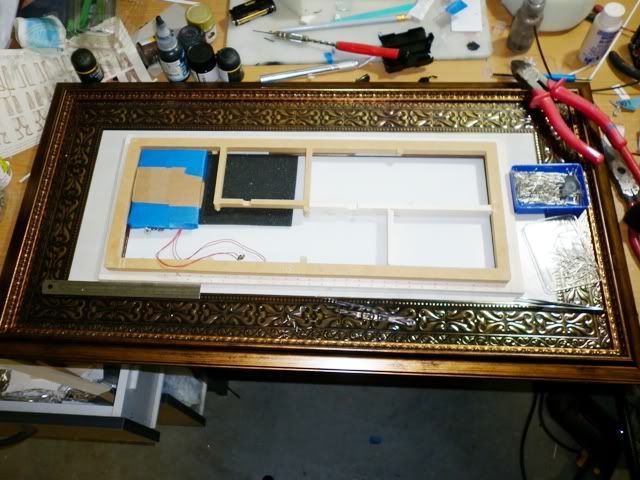
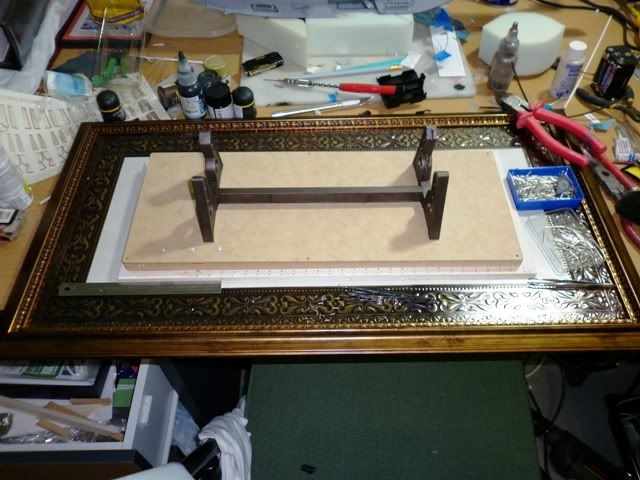
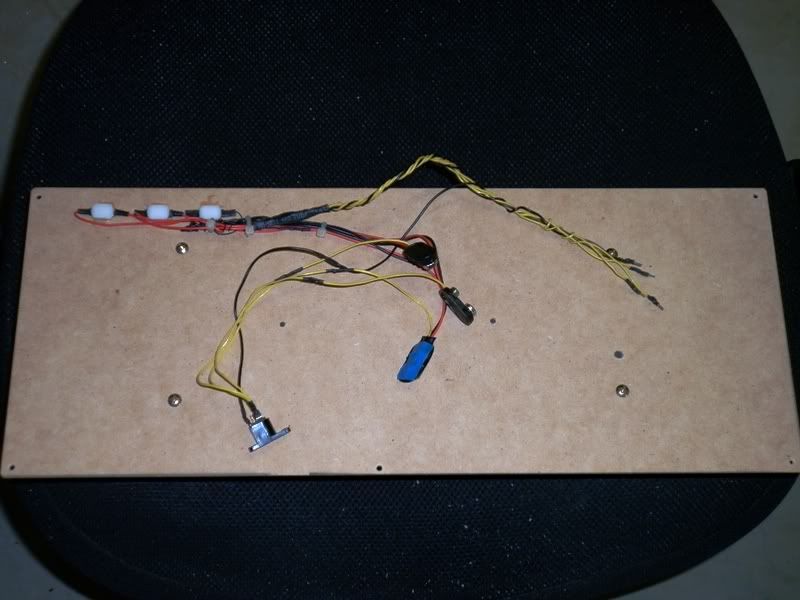
                  Before I got stuck into painting the actual sub I decided to put together the display base which was something that was going to house the batteries, sound card and power jack connector. It was a pretty simple set up consiting of a picture frame and embossed matt board from one of those bulk cheap retail outlets, an mdf multi-picture frame kit from a craft outlet, some balsa wood and dress making pins.
                  in the picture I have the sound card resting on some thin open cell foam. I also had to cut away most of the boxes that the mdf fram had so I could run the wiring and fit the card and batteries. I designed it so that if I took the model away to a comp or something then it would run via 9V batteries or from a wall transformer.

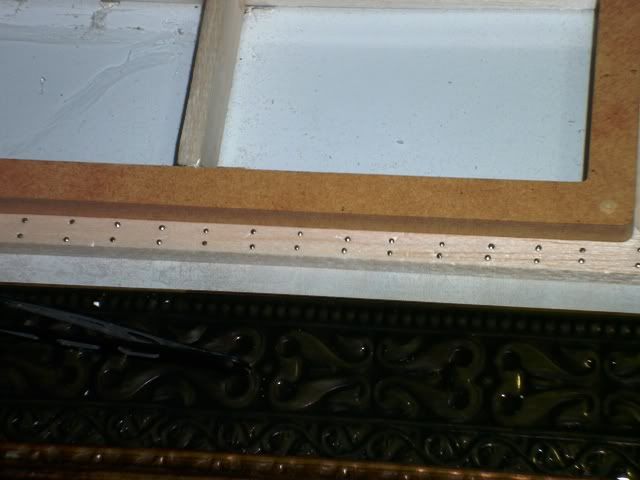
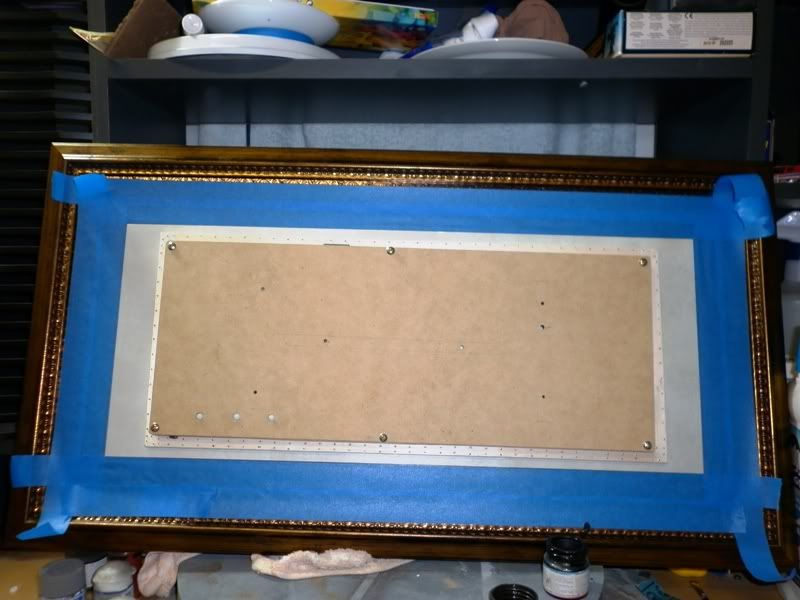
                  I mounted the mdf picture fram on the balsa wood fillet. All of which fitted inside the embossed matt leaving about 10mm or so of white card. I added cut down pins to the balsa to keep with the Victorian rivet theme. I then positioned the models stand marked it out for the fixing screws, push button switches and where the wires were going to come up through. Note that the base was already painted as I used that to practice my weathering on. If you look closly at the stand near the side cutters you will see the groove that the wires will run along and up into the lower hull.


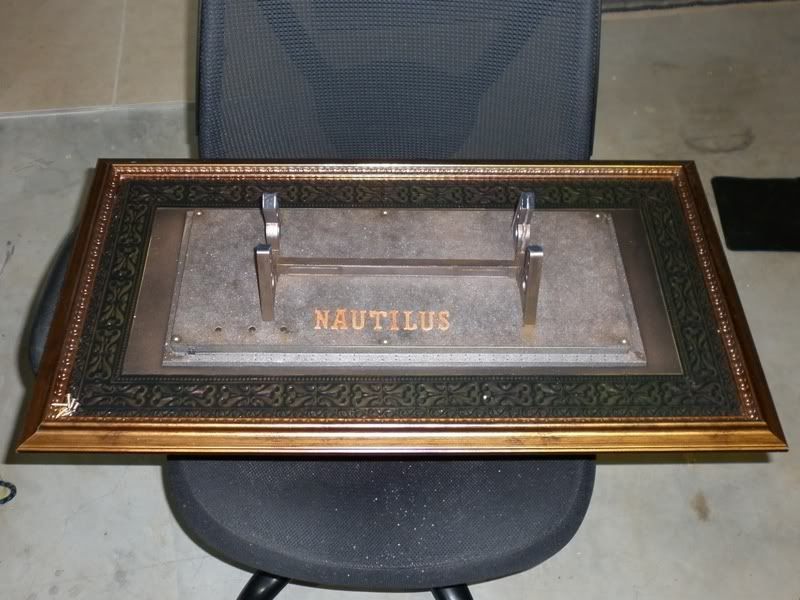
                  With that done I masked off the embossed matt and painted the stands base. Attched the stand and weathered it down. The atual base colour is a blend I metalic browns and blacks mixed with gold, silver, and bronze. I kept the stand darker for some added contrast. To get the varigated look on the large flat base I took some the base colour and lightend it with the silvers and golds before adding a rust wash airbrushed over it all and finally adding a chestnut wash streaked on as rust stains. To finish off the base I used lettering from a craft store my wife frequents. These came pre-glittered which I airbrushed a bronze.


                  Cheers,
                  Alec.


                  Reality is but a dream...
                  But to dream is a reality

                  Comment

                  • alad61
                    Commander
                    • Jan 2012
                    • 476

                    #10
                    With the base finished came the slightly daunting task of painting it. I had seen on the web countless versions and paint jobs to depict the look. What I was trying to achieve is a look that mimicked the film and not based on what an ironclad would have actually looked like. I believe that the character of Nemo based on his scientific genius would have forged a metal that was based on iron but yet better. The eleven foot hero model is I believe made of bronze. But Nemos boat was not made of bronze nor was it Iron so that and the look of the film was my starting point. Here is the model on the stand and it sat there for a couple of days as I played withmy paint mixes

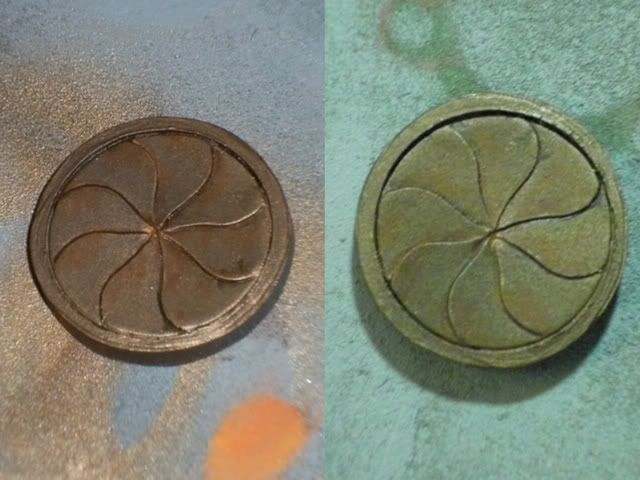
                    I used the cut out iris pieces as my experimental pieces for the subs colours. One of the test colours came out to green under a daylight light the other was to red/bronze not grey/black enough for me.

                    After a couple of nights from memory I finally had a batch of base colour that differed from the stand enough for me to be happy with so I worked on the skiff.

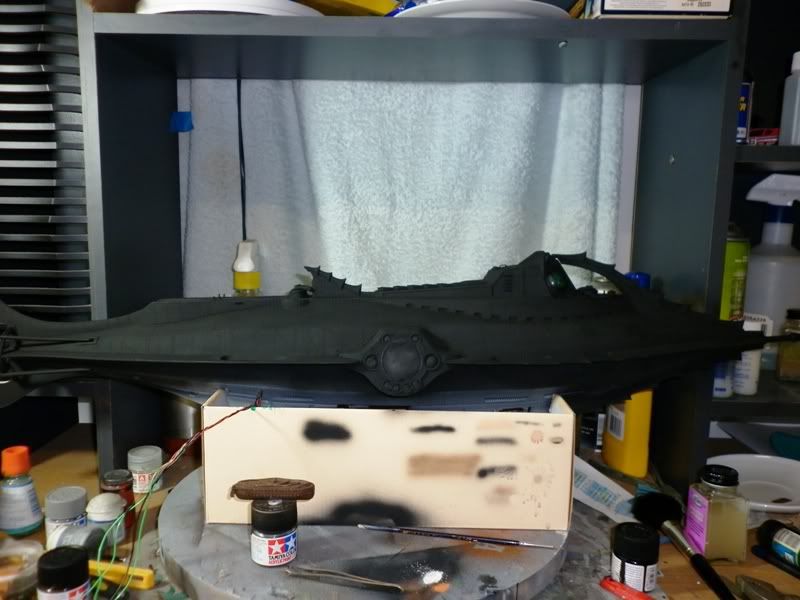
                    Satisfied with that I moved on the the model proper... To begin with was the black base over the grey after I had masked off all the various lights windows etc. Then the first of the other base colours followed by the dry brushing and weathering.


                    This is the wash applied over the primary base colour

                    I decided as a bit of a lark to video the painting process and post it on youtube. Looking back I am glad I did!!
                    Cheers,
                    Alec.


                    Reality is but a dream...
                    But to dream is a reality

                    Comment

                    • alad61
                      Commander
                      • Jan 2012
                      • 476

                      #11
                      Above I used the word "mimiked" in regards to how I wanted the sub to look in hindsight I should have said paid homage...

                      Anyway the next clip is about how I dry brushed the model. The term dry brushing as we know is a technique but it is a technique that can be done to a models death if it's not practiced as a skill. I remember many years back a hobby shop owner belittled one of my gaming pieces for being over dry brushed. I pointed out it was an old reptilian hero meant to hundreds of years old and so it should look that way. Yet he was still arrogant and dismissive about my work. The last laugh was on him though when it won a top award and a regional comp and expo... David talks a lot about using a colour wheel and I agree that it can be invaluable and if your not good with colours then you should have one. But for me I work with colours as part of my job so I go a bit further than tones as we often go into shades and depths. There are days I eye match a fair bit from decorative paints to industrial two packs so as a result I don't have one at home just the fortunate skills that came from starting with the wheels basic use. Don't mean I haven't screwed up thoughScuba Diving
                      Last edited by alad61; 10-20-2013, 12:31 AM. Reason: Bad link..
                      Cheers,
                      Alec.


                      Reality is but a dream...
                      But to dream is a reality

                      Comment

                      • alad61
                        Commander
                        • Jan 2012
                        • 476

                        #12
                        These videos I did were on the final weathering stages of the model and the last is of it the completed for display.

                        Cheers,
                        Alec.


                        Reality is but a dream...
                        But to dream is a reality

                        Comment

                        • alad61
                          Commander
                          • Jan 2012
                          • 476

                          #13
                          The pastels and final work...

                          Cheers,
                          Alec.


                          Reality is but a dream...
                          But to dream is a reality

                          Comment

                          • alad61
                            Commander
                            • Jan 2012
                            • 476

                            #14
                            And finally a small video of the completed model. And yes I know that I spelt propeller incorrectly... BLUSHER

                            Cheers,
                            Alec.


                            Reality is but a dream...
                            But to dream is a reality

                            Comment

                            Working...