Hmk 1/72 hms astute

Collapse
X
 
  • Time
  • Show
Clear All
new posts
  • Subculture
    Admiral
    • Feb 2009
    • 2127

    #46
    Indeed. Well anyone can book up a schedule of events they 'plan' to attend. Then when the day looms- the cat ate my sub!

    Notice how the delivery schedule is over a fortnight after the auction ends. Are they delivering it by canal barge?

    Comment

    • gingyer
      Ensign
      • Apr 2009
      • 4

      #47
      I was interested in the astute by rc subs
      I sent them an email asking for pictures and got this reply:

      Thanks for contacting us. our Company launched launched on 7th January 2013, and we had some promo pictures and videos taken by an advertising Company however due t the Christmas holiday they have taken longer than expected to return them to us, we have been assured that they will within the next couple of days at which time we will post them on all our social media pages and our website and on this sale.

      I think it is all very suspect.....
      also they are laying on the charity donations/events a bit heavy
      Colin

      Comment

      • greenman407
        Admiral
        • Feb 2009
        • 7530

        #48
        Just thought that I would post a couple more pictures of the Astute. This time the port side. Im wondering what differences we will see between the "Artful" and the next one(cant remember the name) as far as the holes behind the sail.
        Click image for larger version

Name:	Astute port side large.jpg
Views:	1
Size:	83.1 KB
ID:	75800Click image for larger version

Name:	Astute port side large zoom.jpg
Views:	1
Size:	71.4 KB
ID:	75801
        IT TAKES GREAT INTELLIGENCE TO FAKE SUCH STUPIDITY!

        Comment

        • greenman407
          Admiral
          • Feb 2009
          • 7530

          #49
          Forgot one.Click image for larger version

Name:	Astute Torp doors.jpg
Views:	2
Size:	60.5 KB
ID:	75802
          IT TAKES GREAT INTELLIGENCE TO FAKE SUCH STUPIDITY!

          Comment

          • Slats
            Vice Admiral
            • Aug 2008
            • 1776

            #50
            Originally posted by gingyer
            I was interested in the astute by rc subs
            I sent them an email asking for pictures and got this reply:

            Thanks for contacting us. our Company launched launched on 7th January 2013, and we had some promo pictures and videos taken by an advertising Company however due t the Christmas holiday they have taken longer than expected to return them to us, we have been assured that they will within the next couple of days at which time we will post them on all our social media pages and our website and on this sale.

            I think it is all very suspect.....
            also they are laying on the charity donations/events a bit heavy

            I'm mindful of steering Joel's thread off course. (sorry Joel).
            That said - I've made some inquiries - the Ebay ad now has the following text:


            Q: Hello I am very interested in this item. I am also a bit puzzled. There seems to be no photos available for this kit either in your ebay ad, or on your website? I'd be very happy to make a significant bid on this if I can see the detail and quality of what I am buying. Can you please post photos. Many thanks J 12-Jan-13
            A: Many thanks to everyone for showing an interest in our RC Astute Model Kit. Just to clear a few matters of concern for you all. Our Company was started on 7th January 2013. We had arranged for an advertising company to take photos and videos of our kit for advertising purposes. We were assured that is would all be taken care of before the 7th January 2013, however there has been a delay due to the Christmas holiday and Photos and Videos were only taken last. We hope to have them uploaded to our website, social media site and on this sale within a couple of days. Please note that we do not expect anyone to buy our item without seeing the quality of our model first and if for any reason we are unable to get the finished product (unlikely) we reserve the right to end the sale early. This has caused a little embarasment to our company but we hope to rectify within a couple of days


            Also has the following text:
            On 12-Jan-13 at 16:13:11 GMT, seller added the following information:


            Our Model comes with 2 x ballast tanks which have pre cut holes in the bottom. In the top there are 3 x pre cut holes with valves. Tubes are connected to the valves which are controlled by servos. 2 x tubes are connected to holes on the deck fore and aft. the 3rd tube from each tank is connected to a cO2 bottle. To dive the controller simply opens the 2 valves and the water rushes in at the bottom of the tanks forcing the air out of the top via the deck. Once dived the valves are closed. To surface the controller operates the cO2 valve servo therefore forcing the water back out of the bottom of the tanks. All necessary tubes, servos and valves for the ballast system are included with the kit and full install instruction.


            I think we need to let the guy come good with photos before passing judgement. My read on this is that although the company started 7 Jan 2013, the kit must have been in the works prior.
            I pushed the guy for production photos. He kindly flicked me one of the hull in very early production process of his 1/42 scale version. I won't criticise too much other than to say it was rough, which could be unfair at this stage, and hence I won't post it.
            He also stated the reason why there are no production photos and he is only willing to post the final product's photos is that:
            "As for photos we have many of our build stages and how we got to this but as we are the only Company in the world to build Astute on this scale we have patented our product and are only willing to show pictures of finished product which we will have within a couple of days."

            The ballast details and general operating information that he has now put up for his 1/72 scale kit, are in my experience some what over complicated for a model of the 1/72 scale version. Its a basic gas system (albeit CO2 or Argon over at his web site). The complicating factor for me is the the two tanks, forward and aft. A single tank would suffice. No doubt it works, but moreover it reads to me as a very heavy setup. The mass momentum to be overcome for turning would be considerable, irrespective of the Astute's sizable control surfaces. The equipment layout (two tanks) would occupy a significant amount of real estate too, and the additional associated buoyancy would need to be offset by more ballast weight.


            Back on topic
            the tubes photo Mark - why do I get the feeling you took that yourself? - Stunning, and begging to be fitted out with the Casewell / Merriman torpedo system.

            Joel are you doing all the tiles?

            J
            Last edited by Slats; 01-12-2013, 11:10 PM. Reason: spelling
            John Slater

            Sydney Australia

            You would not steal a wallet so don't steal people's livelihood.
            Think of that before your buy "cheap" pirated goods or download others work protected by copyright. Theft is theft.


            sigpic

            Comment

            • ManOwaR
              Lieutenant Commander
              • Jul 2009
              • 217

              #51
              Originally posted by Slats
              the tubes photo Mark - why do I get the feeling you took that yourself? - Stunning, and begging to be fitted out with the Casewell / Merriman torpedo system.

              Joel are you doing all the tiles?

              J
              John, you know me better than that, of course I'm doing the tiles! :)

              Mark, that's an important shot. It really shows the thicker transition layer of tiles that end in the middle of the second tube shutter...a detail easy to miss on most other pics. Just out of curiousity, does anyone know if these shutters rotate to open like on the American boats, or do they just simply fold in on a front mounted hinge?

              Joel
              https://www.facebook.com/HMKcreations

              Comment

              • Slats
                Vice Admiral
                • Aug 2008
                • 1776

                #52
                Originally posted by ManOwaR
                John, you know me better than that, of course I'm doing the tiles! :)

                Mark, that's an important shot. It really shows the thicker transition layer of tiles that end in the middle of the second tube shutter...a detail easy to miss on most other pics. Just out of curiousity, does anyone know if these shutters rotate to open like on the American boats, or do they just simply fold in on a front mounted hinge?

                Joel
                Joel, from Mark's photo they look like they fold on a hinge up and out of the way.
                Last edited by Slats; 01-13-2013, 02:11 AM.
                John Slater

                Sydney Australia

                You would not steal a wallet so don't steal people's livelihood.
                Think of that before your buy "cheap" pirated goods or download others work protected by copyright. Theft is theft.


                sigpic

                Comment

                • Slats
                  Vice Admiral
                  • Aug 2008
                  • 1776

                  #53
                  Joel
                  was enjoying the Seawolf at the lake yesterday and it dawned on me that I should give you (least from my view), some feedback as to the operational things I find very useful about your kits. In doing so I'd love to see these with the Astute and hope these goodies come with it.

                  Indexing Lips - I find the long fibreglass lips far more useful than the tab (male / female) parts.
                  The indexing lips operationally in removing and re-attaching the upper / lower hull halves are far more forgiving than the tab connections. The tab connections require precise horizontal placement of the upper hull on the lower, a PITA especially when you lake side and have the boat stand on slightly uneven ground, and are trying to align for and aft and aligning the geared tab for the bow plans. I removed all my tab connections on the Wolf and find it so much easier. Perfect alignment achieved through the indexing lips alone. Perhaps with the Astute supply 6 sections of the indexing lip sections.

                  Gear tab for bow plan operation.
                  Love it - ingenuous and simple. Works every time.

                  Water Tight Cylinder saddles
                  Really like the way you have demarcation lines / grooves in the Saddles, that are designed to take different diameter cylinders.


                  J
                  John Slater

                  Sydney Australia

                  You would not steal a wallet so don't steal people's livelihood.
                  Think of that before your buy "cheap" pirated goods or download others work protected by copyright. Theft is theft.


                  sigpic

                  Comment

                  • Slats
                    Vice Admiral
                    • Aug 2008
                    • 1776

                    #54
                    Had the Astute plans out last night Joel, was wondering what you were planning to do re the forward lower Z cut?
                    Below is the sample profile image from the Jeacobin website. http://jecobinplans.com/estore/produ...roducts_id=391


                    Note the location of where the tubes finish forward. At that point from the full set of plans we purchased, no doubt you would have noticed the bow of the boat tends to more sharply go inward than compared with say the nice round shape of a US nuke. Given that, I was wondering if this position would be too far forward for a Z cut join, as I am thinking the lower bow cut at this point would have a tendency to contract inward away from the proper line of the rest of the lower hull.

                    For anyone contemplating the torpedo system, I am thinking this is really the only practical location for the Z cut. What do you think?
                    If it does want to creep in, could you consider perhaps including a semi circular type bracing bulkhead piece that could be installed in the forward lower bow area. I am thinking if that was installed prior to the assembler making the Z cut, you would have no problems with inward flexing at the bow. You'd need to have a small gap in the base of this semi circular type bulk head to ensure free movement of water drainage.

                    J
                    Last edited by Slats; 01-13-2013, 10:50 PM.
                    John Slater

                    Sydney Australia

                    You would not steal a wallet so don't steal people's livelihood.
                    Think of that before your buy "cheap" pirated goods or download others work protected by copyright. Theft is theft.


                    sigpic

                    Comment

                    • ManOwaR
                      Lieutenant Commander
                      • Jul 2009
                      • 217

                      #55
                      Originally posted by Slats

                      Note the location of where the tubes finish forward. At that point from the full set of plans we purchased, no doubt you would have noticed the bow of the boat tends to more sharply go inward than compared with say the nice round shape of a US nuke. Given that, I was wondering if this position would be too far forward for a Z cut join, as I am thinking the lower bow cut at this point would have a tendency to contract inward away from the proper line of the rest of the lower hull.

                      For anyone contemplating the torpedo system, I am thinking this is really the only practical location for the Z cut. What do you think?
                      If it does want to creep in, could you consider perhaps including a semi circular type bracing bulkhead piece that could be installed in the forward lower bow area. I am thinking if that was installed prior to the assembler making the Z cut, you would have no problems with inward flexing at the bow. You'd need to have a small gap in the base of this semi circular type bulk head to ensure free movement of water drainage.

                      J
                      That's the same place I think would make the most sense for the cut. I don't think the front bow will have issues bowing because it has that angular ridge at the center line to give it rigidity. Aft of that though, I could see bowing if support isn't used, just like on my Seawolf.For there, I will make a bulkhead with six holes to accommodate later torpedo installation. We'll see how it goes, those are things that would have to be looked at after I have a prototype layup built up.
                      https://www.facebook.com/HMKcreations

                      Comment

                      • Slats
                        Vice Admiral
                        • Aug 2008
                        • 1776

                        #56
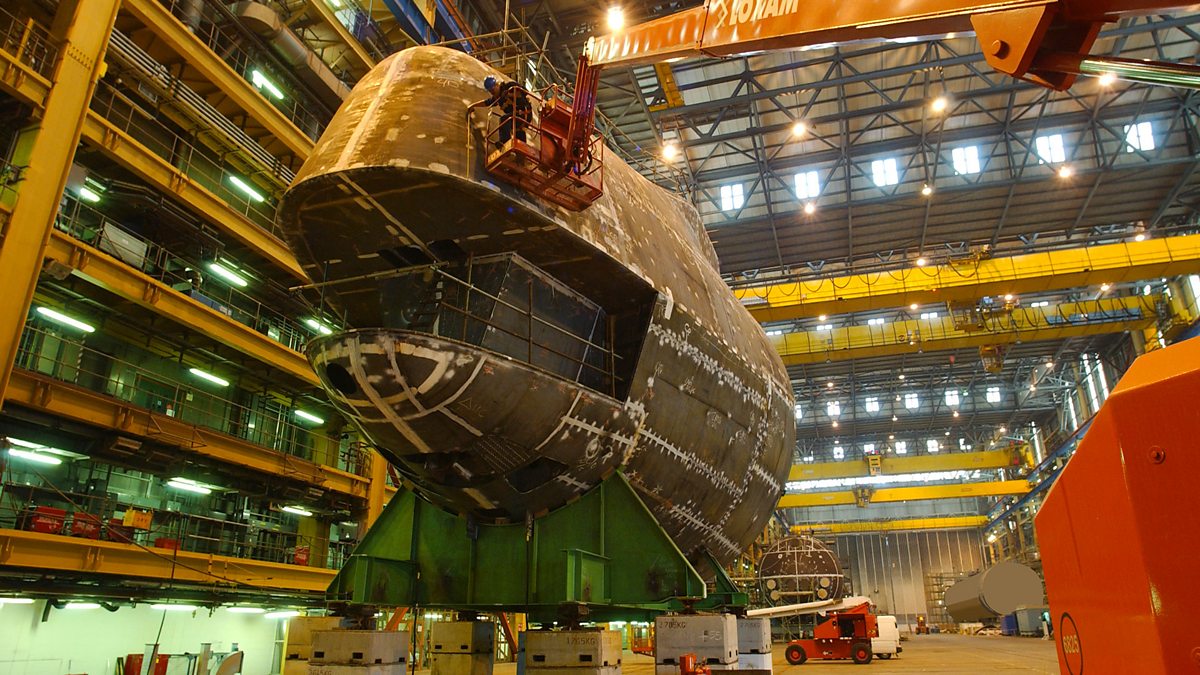
                        For those who might not have seen them, there is an excellent 3 part documentary on the BBC website regarding the Astute class construction.

                        This URL has clips
                        Documentary following the construction of the Astute nuclear submarine.


                        Here is the documentary:
                        Enjoy the videos and music you love, upload original content, and share it all with friends, family, and the world on YouTube.

                        J
                        Last edited by Slats; 01-15-2013, 07:10 AM. Reason: URL added
                        John Slater

                        Sydney Australia

                        You would not steal a wallet so don't steal people's livelihood.
                        Think of that before your buy "cheap" pirated goods or download others work protected by copyright. Theft is theft.


                        sigpic

                        Comment

                        • ManOwaR
                          Lieutenant Commander
                          • Jul 2009
                          • 217

                          #57
                          Astute Chapter 3

                          The Stern,
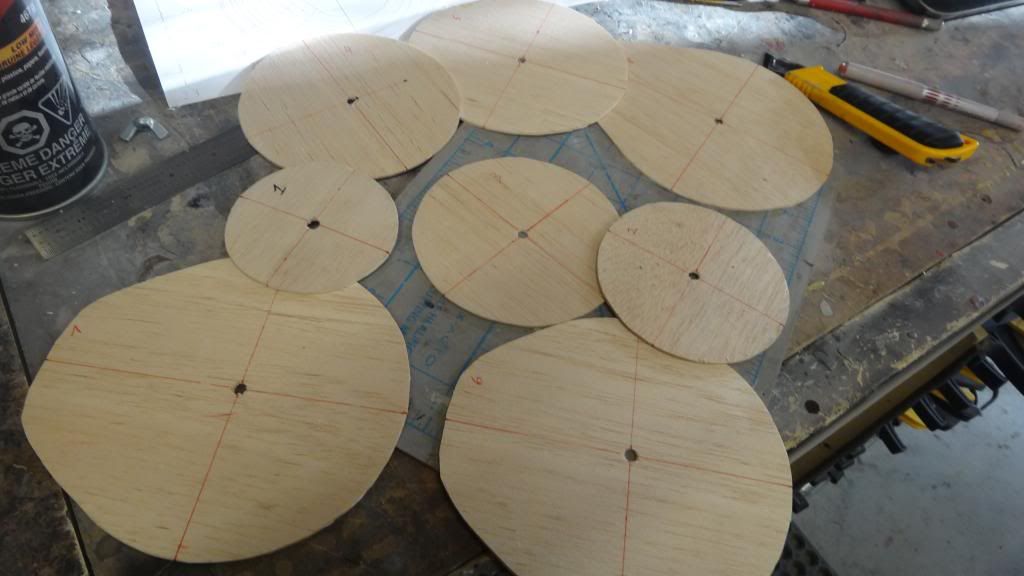
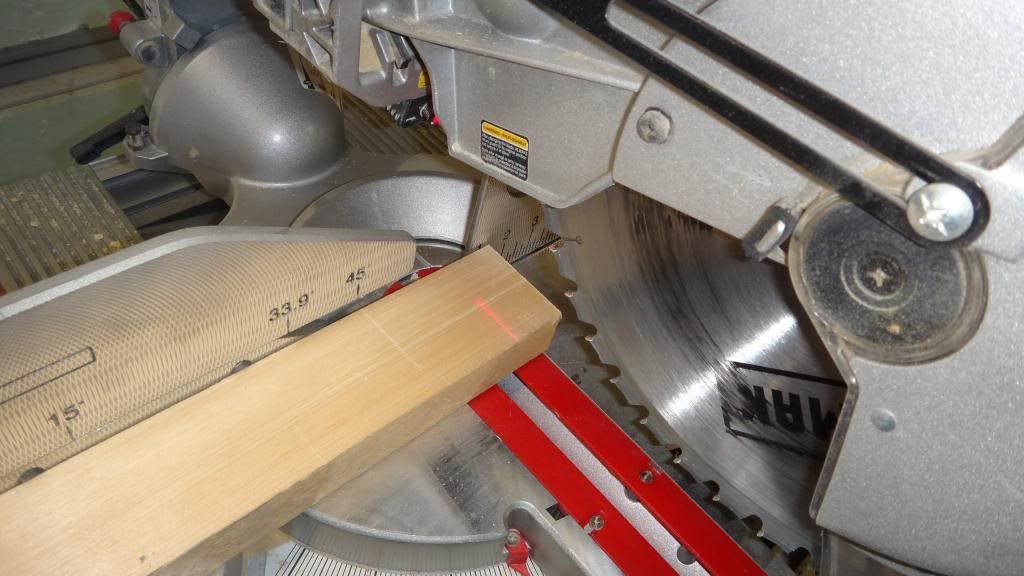
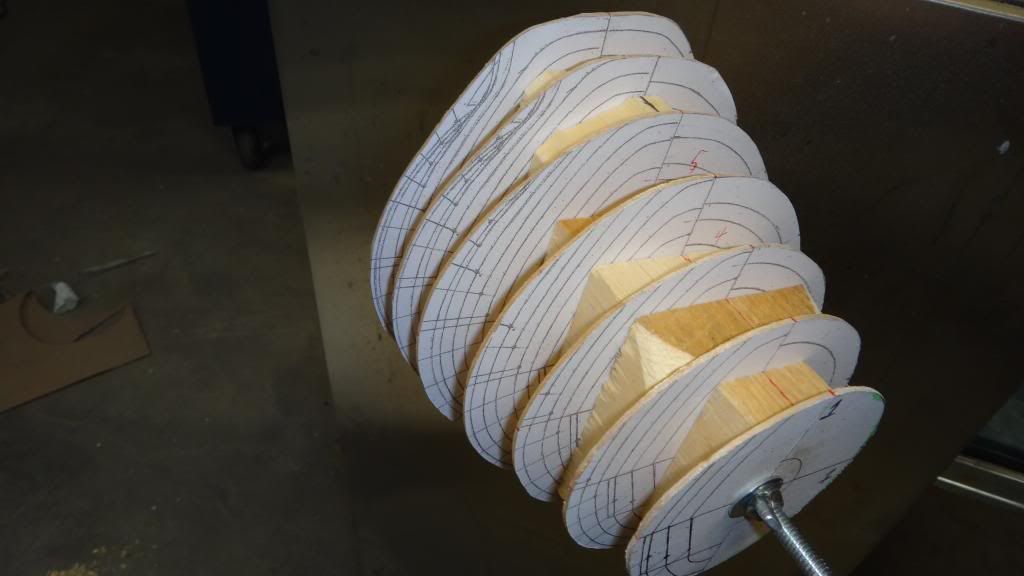
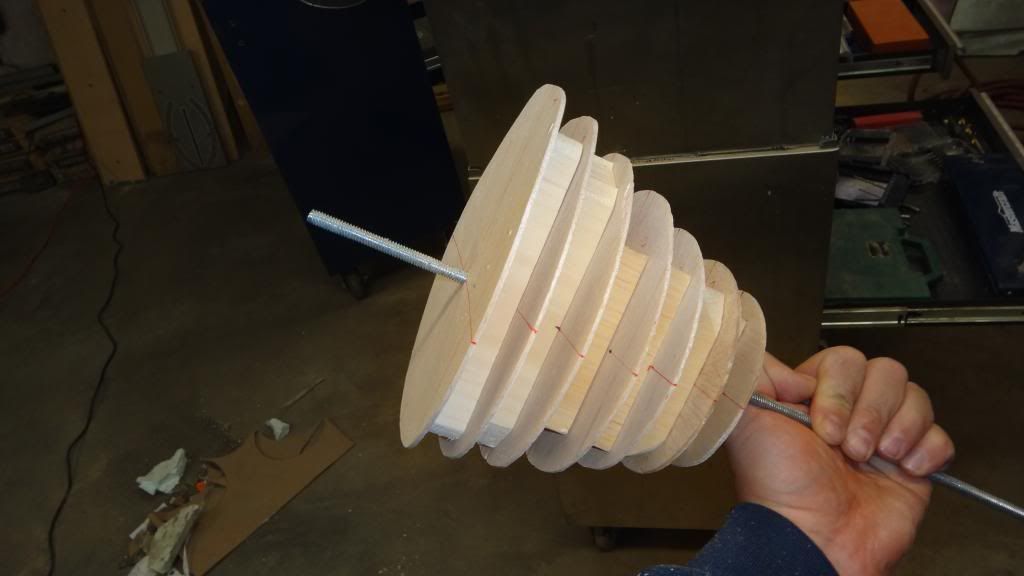
                          I used hull section print offs glued to balsawood so that I could make the stern section. Balsa is a great material to work with because to cut it to shape all I need to use is a #11 exacto scalpel. Between the sections are blocks of white pine that is precision cut to the measurements that is in between each section. I used different sized blocks in order to fill as much volume in the spaces between each section as well.


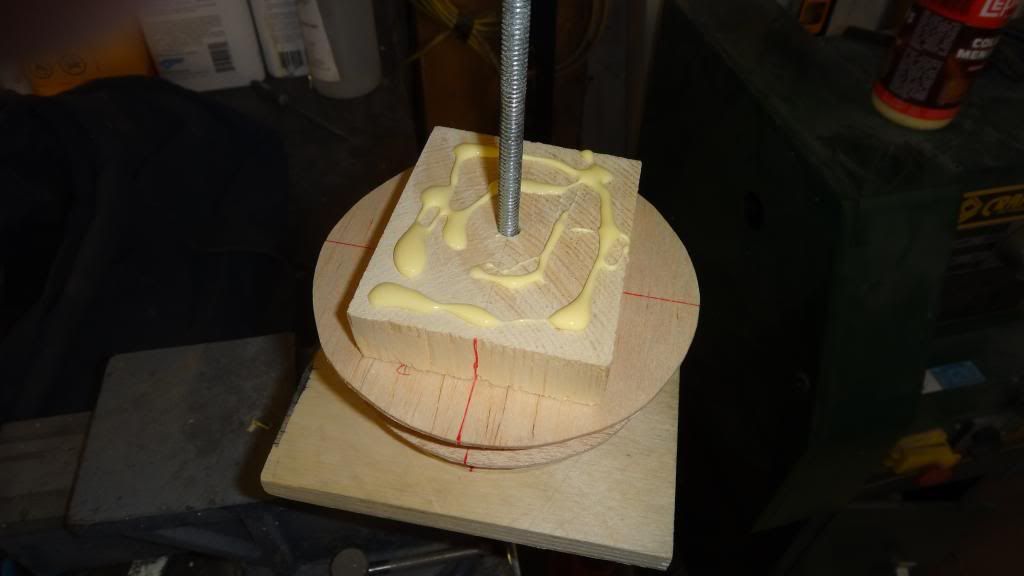
                          Each section and block has a ¼” hole drilled through the center reference cross-points, and the blocks are marked with center lines both horizontal and vertical to allow matching up of the parts. The whole assembly is held together using ¼-20 threaded rod and nuts, and has large fender washers at each end to distriThe bute the levering force of the nuts when tightened.


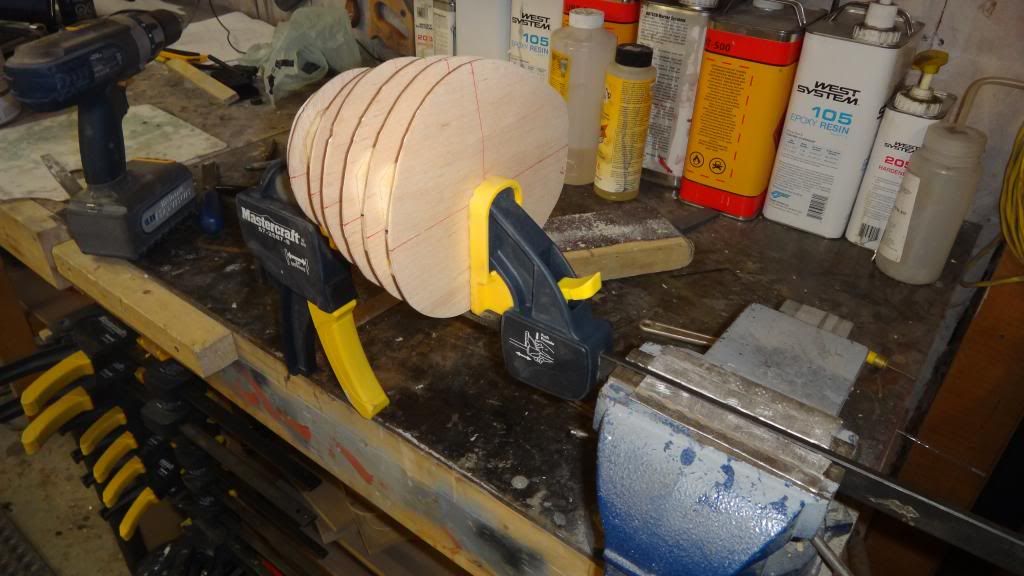
                          The assembly is dry fit at first to make sure the measurements match the prints and then taken apart. I then applied glue to each section and block did an aligning, then went on to the next section and tightened the whole thing together using a clamp, which was in turn held steady in my vise.


                          Now, from here, it’s a matter of filling the remaining spaces between each section with Evercoat. This is a multi-step process that starts with a base of plastic that adheres to the wood and stabilizes the sections, more fill and then a final coat of filler that will conform to the shapes guide lined by the balsa sectioning. Once happy with the general shape, then the balsa wood will be ground out and replaced by filler to give me a homogenous surface from which to my work on. This is going to be a lot of work, but I think the results will turn out pretty good.
                          https://www.facebook.com/HMKcreations

                          Comment

                          • ManOwaR
                            Lieutenant Commander
                            • Jul 2009
                            • 217

                            #58
                            Astute Chapter 4

                            Pressure hull continued


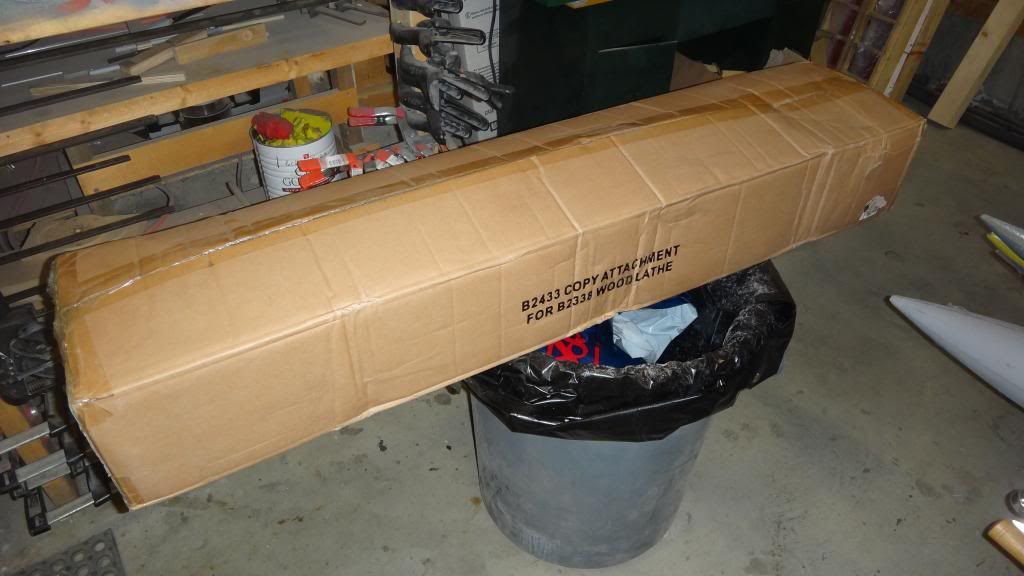
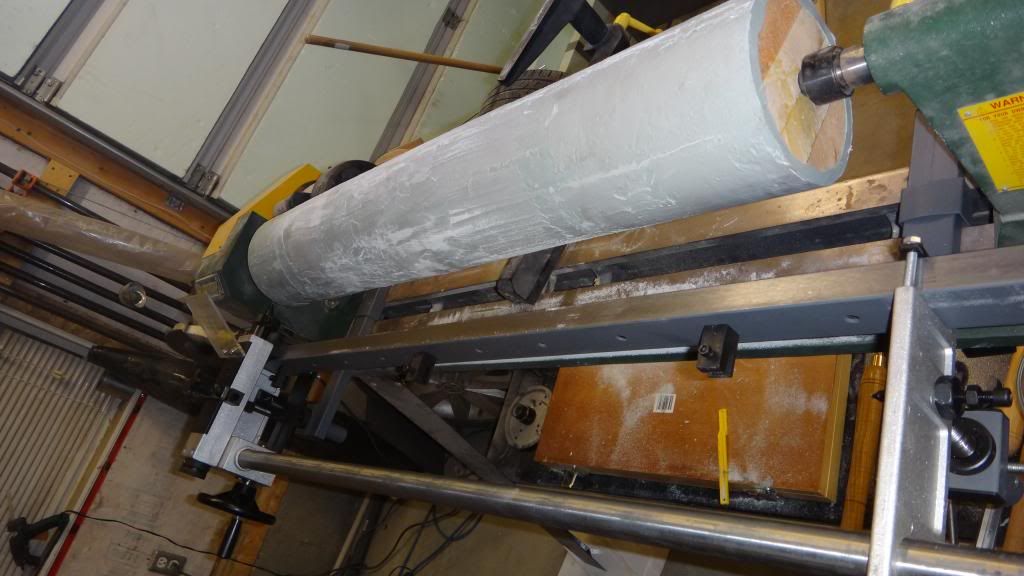
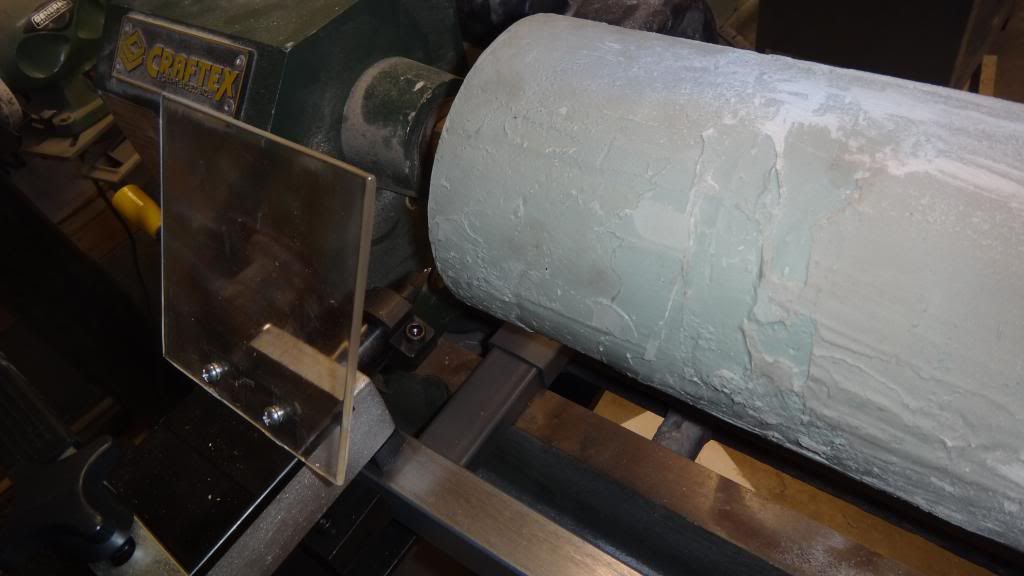
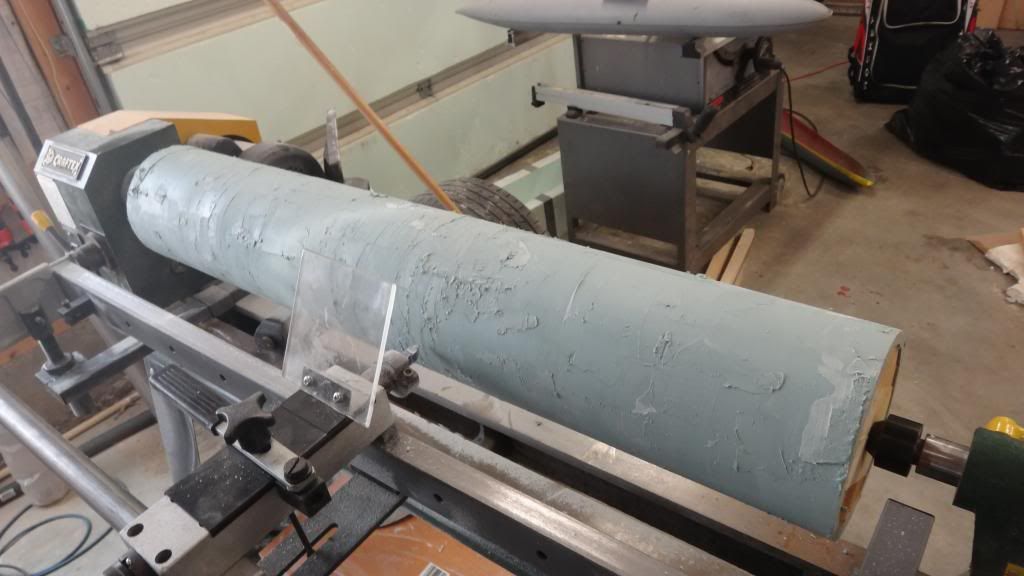
                            So last time a few weeks ago, I had to put the pressure hull to the side as I was waiting for my new lathe attachment to come in. Well it finally has, and I’ll tell you a few things about what it can (and should) do. It’s a copy attachment and it’s made for reproducing multiple copies of a finished work piece ie…stair spindles, baseball bats and the like and eliminates all the extra work it would take if you were doing each piece measurement by measurement. Another cool feature is that instead of copying and actual finished piece you can simply make a template, clamp it in place and your copier will follow this shape exactly. So, for those thinking of doing a hull-of-revolution shape, have a wood lathe and some skills, here is the tool that will cut down a whole hell of a lot of work off your machining time AND be more accurate.


                            The theory behind how it works is pretty cool, in a nutshell you have a follow pin which rides the original work. It’s spring loaded so that there is pressure against the work and as the guide goes, so goes the cutting tool. There is also a handle that allows the operator to add extra pressure to the work or take it away, but at the end of the day, if the following pin is against the work, then that is as far as the tool can cut. This ensures repeatability to the master or template. In my case, I simply want a perfect straight line for the pressure hull so I don’t need a template at all, as the natural path for the cutter will be straight.


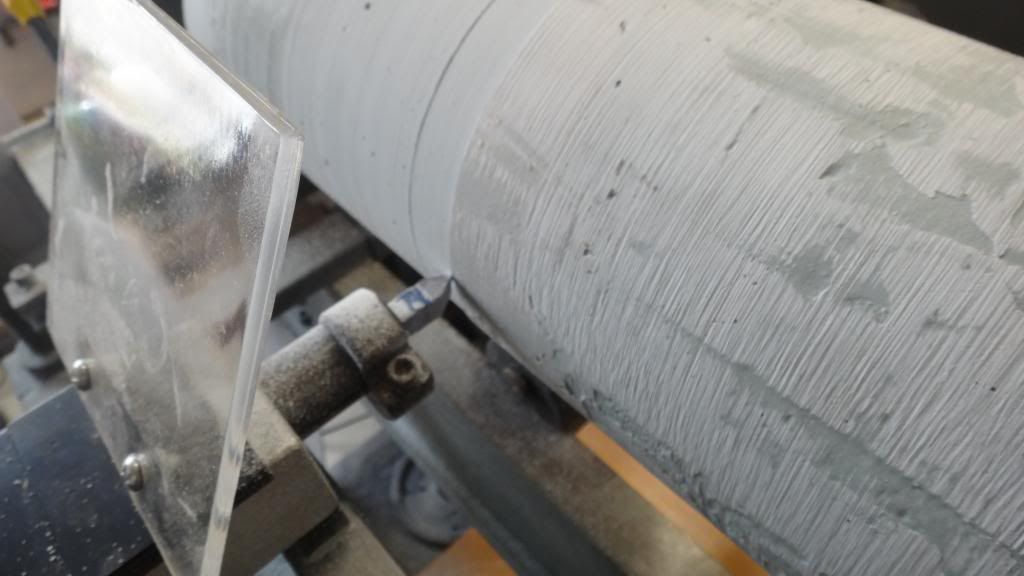
                            For every HMK build there is always a story involving disaster or something close to it. The Astute project’s first big issue comes to the machining of this pressure hull. Upon first using my copy rig I found it to not be rigid enough to mill down the Evercoat coating. I had lots of vibration. The cutting tool that came with the copy rig is made of plain old carbon steel and became dull within a few inches of cutting. I decided that the rig would still be good down the line for baseball bats or whatever else wood that I would want to copy, but I would have to cut my pressure hull into three sections and machine it on my metal lathe. I did do this and discovered that my metal lathe was short exactly 1/16” clearance to allow the work to be turned on it.


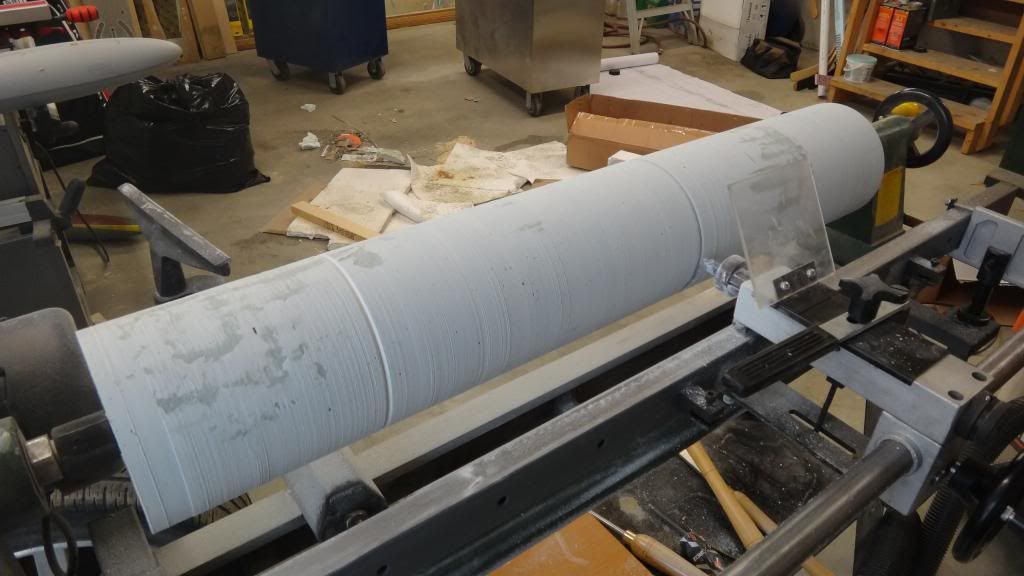
                            Back to the wood lathe! The pressure hull sections were glued back together and I went down to the store and bought some cheap carbide tools that would fit into the tool holder on the copy rig. The problem here is that the rig’s tool holder accepts round shanked tools, and the only shaped tools they have for metal working are square shanked. The solution here was to buy the square that didn’t quite fit into the circle and do a bit a modification with my bench grinder so that it eventually would. Anyways, the end result was that the carbide tip is the answer, and by being able to properly cut the material, I reduced the vibration that was introduced into the copy rig.
                            The moral of the story is, however, that model making is a process of innovation and problem solving. This is what the hobby is all about and should be accepted if one is to enjoy it. There WILL be more problems…so bring it on!


                            This process is done in a few stages as well. First I’ll do my rough machining to a little larger than the pre-required diameter. I’ll do a skim coat of plastic to fill the voids (which are evident by dark, untouched sections and fill in the air bubble holes or other flaws. I also machined a larger groove where I rejoined my sections and over-filled them with plastic. Once cured I’ll machine this down to size and do another skim coat if needed. Not much sanding yet!


                            https://www.facebook.com/HMKcreations

                            Comment

                            • Slats
                              Vice Admiral
                              • Aug 2008
                              • 1776

                              #59
                              Great work Joel.

                              J
                              John Slater

                              Sydney Australia

                              You would not steal a wallet so don't steal people's livelihood.
                              Think of that before your buy "cheap" pirated goods or download others work protected by copyright. Theft is theft.


                              sigpic

                              Comment

                              • He Who Shall Not Be Named
                                Moderator
                                • Aug 2008
                                • 12359

                                #60
                                Gotta get me one of 'em!
                                Who is John Galt?

                                Comment

                                Working...