She is a beauty!
I LIKE IT!
-
Here is an update on the Gato leading up to yesterdays Seaviews esc & lipo disaster...
Taking in the above advice I added more lead & foam In the tub the list was all but gone but on yesterdays maiden trials it was still showing a tad on the port side. Here are some wip pictures of the trimming process I have kept them at a minimum as we all know the basics of it.
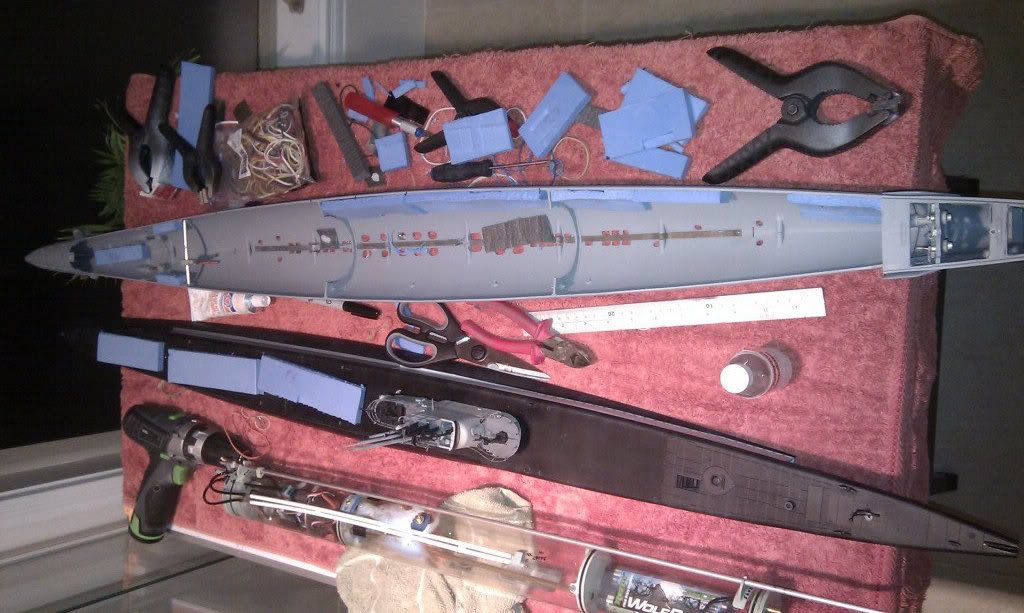
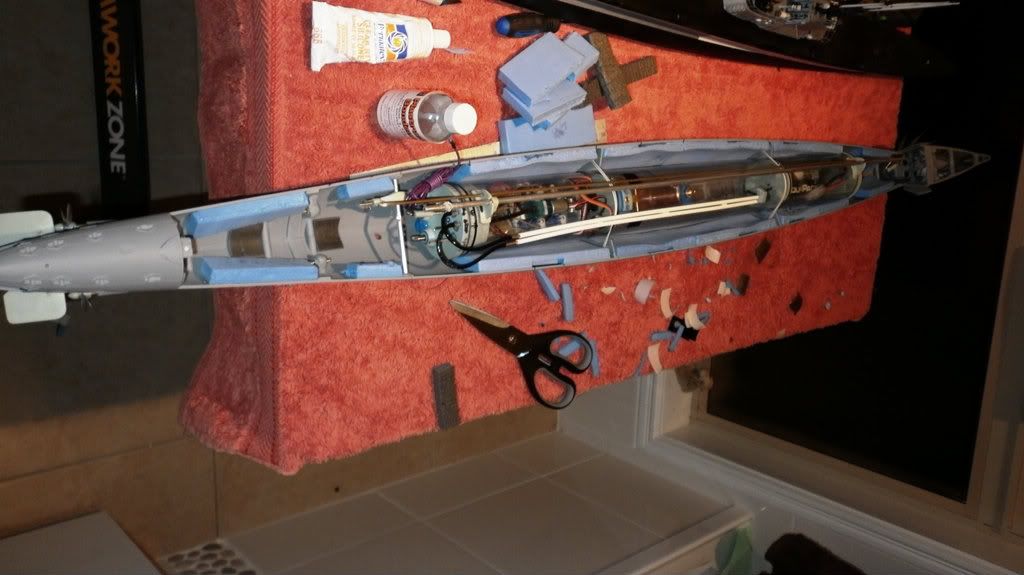
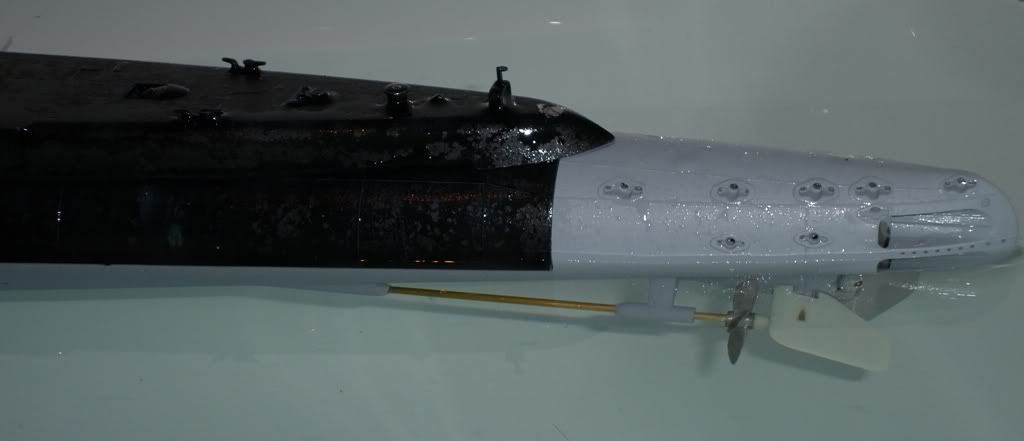


When I had finished with the tub on the trim n ballast Sandy was happy to get here bathroom back after a week... though her response did lack some sincerity. So the last week has been painting and weathering the boat proper because I felt pretty confident about how her sea trials would go, note I wasn't naive about them, just confident. As it turns out just a bit too confident as in the water on the lake she still listed a tad to port. I queried this with another rc submariner and he said that the different densities and clarity between the tub test and the lake could play a part. He is an elderly soft spoken bloke that has many years of experience in the field here so I see no reason to doubt him and as such I will take what he said on board. It would explain why in the tub I get the decks full wash when the ballast is full yet out at the lake they stayed just out of the water. So it looks like sandy will lose possession of the bathroom for a while again this coming week.
The other thing I found was that I couldn't get her to submerge even with an increased throw on the forward planes. My conclusion was that the extra foam I had in the top hull section was providing to much flotation resistance when I tried to nose her under which is a complete opposite to the Seaview... The other glitch was the flexible tube I have on the end of the prop shafts which tends to walk off at anything over 80% thrust power. How ever the lake at Boondal does have a lot of that stringy weed which gets wrapped around the props occasionally so That may have some influence as well with additional drag on the props. The posatives from the day was that she sailed well both with a full and empty ballast, the lpb worked well and got her to water line smootly and not as slow as I though it would. Everybody also had good comments on the paint & weathering and how it looked in & out of the water.
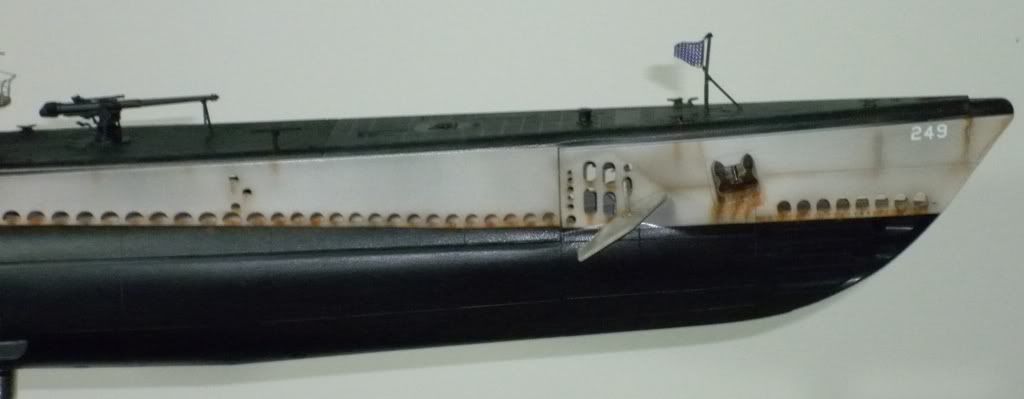

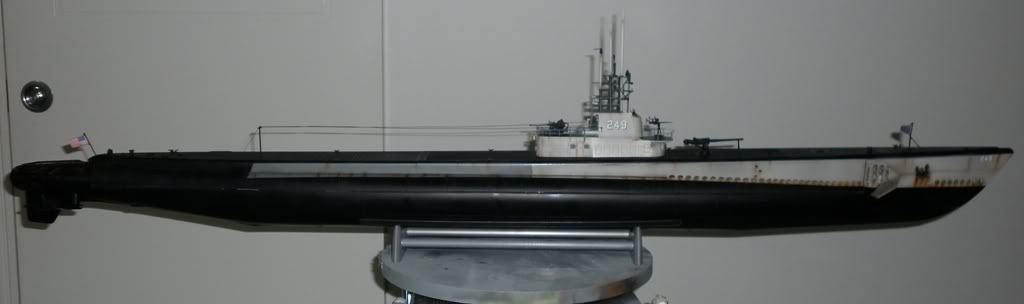

I'm sorry that I don't have any pictures of her on the lake I got carried away with the testing and sailing...Leave a comment:
-
Myron!
Good to hear from you. New Zealand's loss is Hong Kong's gain. More model boat club opportunities there, I bet!
DavidLeave a comment:
-
David,
You just answered a question that was bothering me, in that my LPB was taking a long time to empty the balast tank on the Gato? Well, if your's takes 1 1/2 minutes and so soes mine, GREAT, I don't have a problem after all!!
Regards to you and Mike and just to let you know I've moved back to Hong Kong lock stock and 4 Submarines! I still have 6 smaller sub kits waiting for your 1.25" sub drivers with the LPB built in.
MyronLeave a comment:
-
Adding weight as low as you can and foam stopped the listing on my Gato.
Peace,
TomLeave a comment:
-
Alec,
The listing issue -- which occurs only when the ballast tank is filling or emptying and was a potential ship control issue on the GATO/BALAO/TENCH class prototypes -- is owing to relatively short metacentric height of the design (very high length to height ratio) and absence of any longitudinal slosh-baffles within the SubDriver's ballast tank.
You're not fully emptying the ballast tank with the LPB, Alex. Mine takes a minute and a half of LPB operation to empty a full ballast tank. By the way, if your using a 11.1-volt battery, make sure you have a 22 Ohm resister in series with the input power to the LPB's MPC as that motor is rated for only 7 or so volts. You can cheat and put a 12 Ohm resister in there, but you're eventually going to fry the poor thing, but you will almost half the blow time.
(on the TRUTTA, in my navy day's -- a TENCH class boat -- I learned during qualification that if we got stuck on the surface in heavy seas, we would stay on the surface and tough it out, as the boat was at risk of rolling over as we transitioned from surfaced to submerged trim. And believe me, I can tell you from personal experience, standing bridge watches in a state-3 sea, on a boat with a stepped sail, life became a total *****!).
The metacentric height is the vertical distance between two points of force, the center of gravity (which should be as low as possible) and the center of buoyancy (which should be as high as possible). The list is a consequence of the transverse motion of the c.g. as free water sloshes from one or the other side of centerline. A closely coupled c.g. and c.g., which this design of submarine suffers, will not exert the force adequate to counter the off-center water. But, at some critical c.g.-c.b. vertical distance, the righting force will overcome the destabilizing force presented by the ballast tank sloshing water (a condition that only occurs as the ballast tank fills or empties).
The cure for the listing issue -- which goes away when the tank is either full of water, or completely empty -- is, as you suggested, to increase the metacentric height by adding weight low and adding compensating foam high.
Get to it.
DavidLast edited by He Who Shall Not Be Named; 06-02-2012, 08:46 AM.Leave a comment:
-
Now I have installed the esc I have been able to trim it with power. Only to find that when I open the bpow vent it lists to the port side until it gets to decks awash then it sits true and when I switch on the lpb it does the same except it stays listed.... I though by adding more weight in the centre under the conning tower it would fix it. It didn't and now I'm thinking I will need more weight which would alter my waterline so I'd need more foam but then would that just be going in circles... I reckon it is the conning tower that is the main cause. What I am hoping is that under power blowing ballast & running the lpb will negate the listing. If someone has got some pointers how to get around this...?Leave a comment:
-
Thanks for the sentiment guys...
David I would love to jump from a perfectly good aircraft again, however in the interest of marital harmony that is, at least now, just a dream. That said once September finishes I plan to drag out the ropes and harness etc and hit some vertical rock with my mates. :wink: I have how ever taken a step back, well just a bit anyway ;) Friday night I took a night off and Saturday I finally got to see the Avengers in 3D to boot. First modern/digital 3D film too. But come today I was back at the bench and tub with Gato n foam in hand. As I posted previously these are the pictures of what I have done till today. The servo push rods I actually found easier to do than I was expecting. But I had already designed the set up I wanted during lunch at work on paper. I had to redo my original indexing pin as I reduced the hull supports that the sd sits on.

Note the larger outer hole in the servo horn. That will be the bow plane mechanism one. I figured that the extra length and position might give it a better throw for operating the planes... I still don't have my esc yet, it should be here this week?? So all the testing is with a 4.8 NiMH battery.
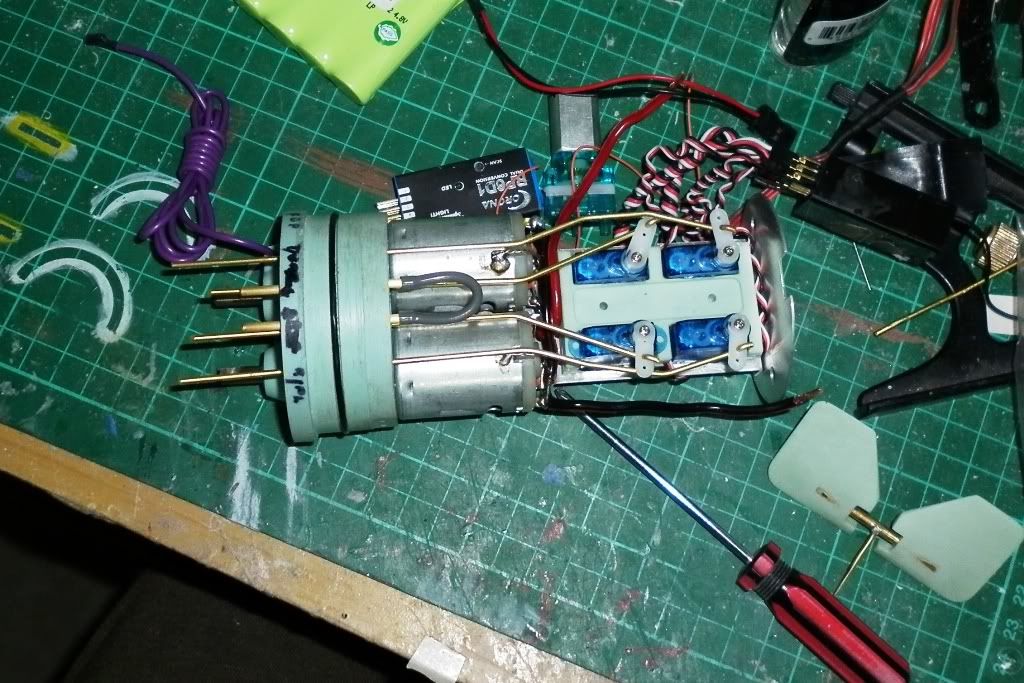
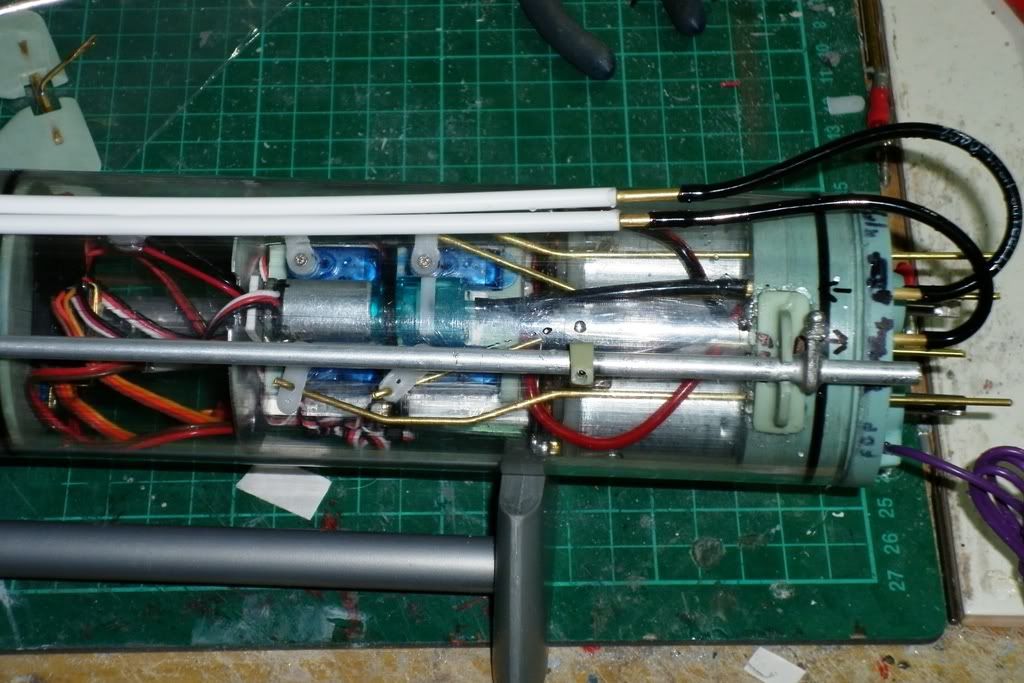
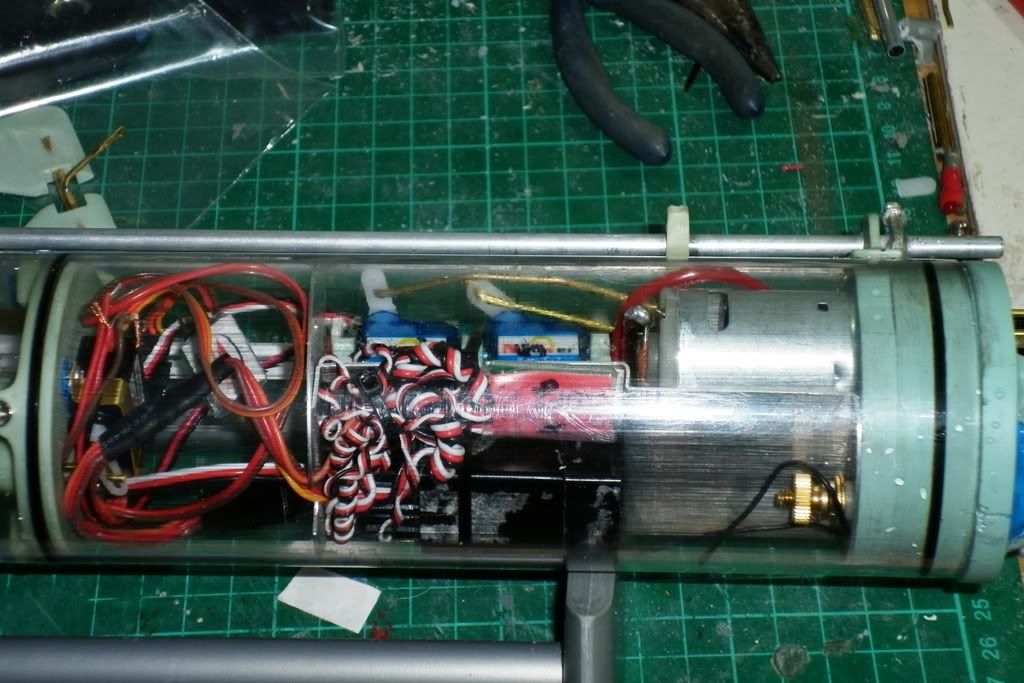
I decided to go with a JR receiver as the corona one didn't play nice with the ADF. You may notice the lpb pump sitting between the servos. The JR rx was a tad to big so it resides under the equipment tray. I have done a dry run with the lpb and it doesn't seem to upset the ADF or make it go glitchy and as for the esc I'll mount that the same way as trout did at the forward ends of the tray.

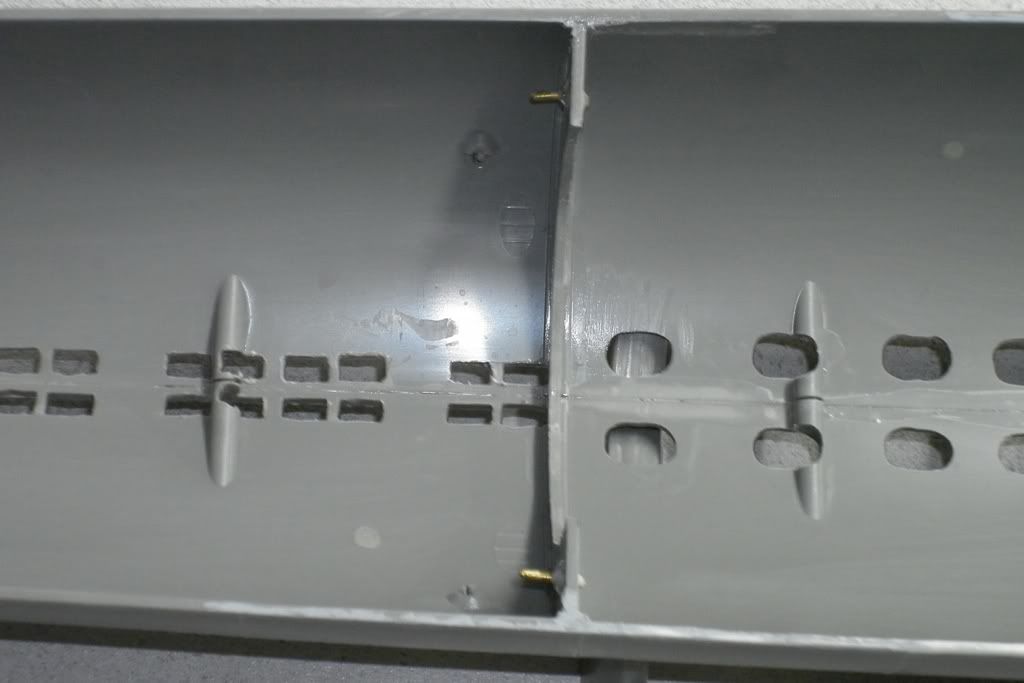
Because of the lower sitting sd and flood vents I made the call to add the center ballast weight to the bottom of the SD asa well as the little pins to attach the rubber bands I will use to lock down the SD in the sub.


Putting the cars outside of our garage I hit the lower hull with the first primer. This helped pick out some things to correct like a couple of small cavities in the strut tube bearings. Nothing some baking soda and ca can't fix as they are a wee bit small for epoxy fillers. Then after I have finished the trimming etc I will finish the paint and weathering work.
Also after I pressure and balance tested the sd in the tub I also added some extra weight to the inside keel in the form of a lead strip around 6mm wide. I was a little unsure about the weight added to the SD rather than being on the inside keel proper but testing in the tub today showed my concerns to be groundless. At the moment I am flooding the ballast manually by inverting the model under water but I am finding that this won't get all the water out of the tank and so I get a bit of rocking and some listing when It comes to surface trim. But this seems to corrects itself... To-nite after the foam dried I began fixing it in place in sequence. I did the same as I did with the Seaview. Whilst the foam was on the outside held in place with the rubber bands I marked them from forward to aft and port to starboard and then marked out wear the upper hull indexing tabs will sit and using a new sharp blade cut out those areas.. I am hoping that once the foam is fixed in place I'll get the same results for trim levels as I got in testing?? With an empty ballast I get a good almost spot on water line but with the tank full I can only just get decks awash. But that at least puts the planes nicely under water so diving her should be easy, in theory...Leave a comment:
-
That is good news that your passion is still strong and we are far from burnout, very thankful for that!. You and Mike are a good team, I agree!
Now, enough of the hi-jacking this thread....
Let me beat David to the line....
Alec, get to building that sub!Leave a comment:
-
Your sentiment is appreciated. But, this IS my full time job. And I get paid for it. So, I have no distractions, and there is a pot of gold at the end of the rainbow. As you can see, I'm well motivated. Oh, and I like building/assembling model r/c submarines and driving them too.
And, as Manfred recently suggested, this is a bit more of a sickness/passion than anything else. No burn out in my future, just death -- and that a long way off if I keep my nose clean, live the good life, and the creek don't rise.
My association over three years ago with Caswell Inc. saved D&E Miniatures -- Mr. Caswell's guidance and advancement of our product line breathed life into a business that was, up to that time, miss-managed, and horribly promoted. With a true businessman at the helm, I now work day-to-day with the confidence I can make the bills and effectively promote my work to paying customers.
I've been in the professional model making business for over three decades now, and the joy and sense of accomplishment has not diminished. Production work can be a drag, but it pays the bills. The creative master-work, design work for outfits like Moebius, and driving at model boat evetns are the fun bits -- a good mix of bread-earning and fun. What other work-place offers that?
DavidLeave a comment:
-
David,
We love you! Give out ribbing, you get ribbing.....
That being said...... I pray you do not get burned out David. That would be a major setback to our hobby.
Peace,
TomLeave a comment:
-
You guys are here for fun. Me? ....
... I'm here to be punished.
DavidLeave a comment:
-
"It's a hobby, damit. Not a JOB!"
HAHAHA The pot calling the kettle black.
Do take a break! I would rather not hear from you for awhile rather than not hear from you again. Burn out sucks. You are talented and a value to this forum.
Peace,
tomLeave a comment:
-
Back off from the models some. Go jump out of perfectly good airplanes for a bit. Life is supposed to be a buffet. Enjoy its many pleasures.
It's a hobby, damit. Not a JOB!
David,Leave a comment:
Leave a comment: