
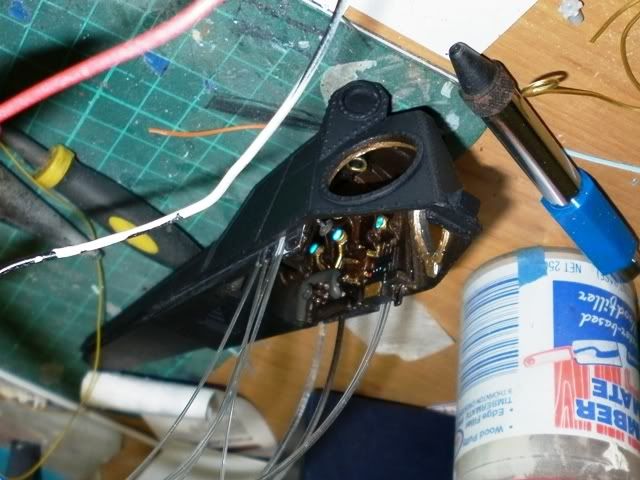
That's exactly what i had in my mind, the little piece with all the tubing will seal off the hole where the top of the gas bottle is, i'll take some close up pictures for you.
Greetings Manfred.
-
Manfred, since you won't be using the gas bottle why not put the float valve assembly in it's place then just run tubing to and from the SD for the SAS.Leave a comment:
-
-
Beside the work on the optic fibre i solved another issue for me, delivered as a kit, a velcron band was added for keeping the WTC at it's place, when you preform the Z cut like David mentioned in his cabalreport it will only hold the WTC at it's place.
I created my own problem by not to do the Z cut, so i needed a much better way to secure the upper part, pictures.


I used the frames to give me a base for fitting some copper bands, thickness 0.3 mm, made a special connecter on the frames with some M2 nuts, by using M2 screws you can lock the WTC tight.
By making some connections for the upper deck on the copper bands i will get me a solid connection to keep the upperdeck at it's place.

Getting the WTC out stays easy, just unturn the two screws, swiffle the bands away and take the WTC out.

Next step will be, attacking the WTC, the liquid gas container has to go, just like the schrader valve, want to go full SAS, only safety feature will be a safety buoy, the boat will be balanced such way that only 1cm of the conningtower will stick out of the water when fully submerged.
I drive the V80 the same way, works for me, when you slow down the speed, she will float to the surface, the V80 also has the safety buoy, it will only activate with a delay of 30 sec on failsave, or direct on the water detection system.
Since the room inside the WTC is small i'll only take the failsave option, this should be enough, you only have to check the WTC on a regular base during driving it, just to see if there is water inside due to a leak.

Just to show you guys some live footage, this way you get a better impression than just pictures.
Greetings Manfred.Leave a comment:
-
I even think i'll get some more volume by removing the liquid gas container, won't be using it since i go for the SAS, also made some progress to keep the top part tight on the hull, have to upload some pictures, be patient
Greetings Manfred.Leave a comment:
-
Yes, but with the increased volume of all those do-dads above the surfaced water line, will he have enough volume in the main tank to sink it? Remember, buoyancy is a function of volume not weight.
Curious in Canton,
DanLeave a comment:
-
You have about 10-15% more floodible volume in that ballast tank for a 212 boat without all the brass and do-dads you're putting above waterline. I suspect that you will still have enough reserve buoyancy in the existing tank to push your tricked-out 212 up to correct surface trim waterline, Manfred.
DavidLeave a comment:
-
Damned, i knew that i had something forgotten, when the WTC is ready we will know if i've done my homework right, if not , then i have to loose some internal parts.Leave a comment:
-
Manfred,
With all the bells and whistles you're adding does the original ballast tank have enough volume to support the hull or still have enough space to add foam?Leave a comment:
-
Redboat you can colour the tip of the fo with many things e.g food coloring (not a good choice for water submersion), acrylic and or oil paint thinned a little or just straight paint but the thicker the film build the dimmer the glow so you need a brighter led, you can also get coloured acrylic rod but again you need a much brighter led and the opposite for thin coated coloured tips so you don't wash them out to much. In my static 31 inch Disney Nautilus by Scott Brodeen I used fo's in the wheel house and used a drop of white glue mixed with green wash but for an in water environment clear epoxy should work just as well. Fo's also work well behind decals too..Again depending on the leds lumen output a little colourd ink added to the decal helps reduce the washed out effect.

But Davids comment on micro leds is the way to go as you can get a much better in scale look with out as much effort. As I did on both the Nautilus and my RC Seaview .
Sorry Manfred you can have your thread back now;)Leave a comment:
-
How about using a single white light source but with different colored lenses/fixtures on the opposite ends.Leave a comment:
-
But alas, with out a lot of trouble, only a single color per source with the fiber optics.Leave a comment:
-
-
Is there any advantage to using fibre optics over say micro LED's (e.g. SMD)?Leave a comment:

Leave a comment: