-
Wow! You did it. You're frightening sometimes.
DavidLeave a comment:
-
Exceptional or not, i idiot broke something and had to pay for it by attacking my nervs to get it fixed, i hate that sort of moments.
Upgrading such a nice detailed kit is a pleasure, drawback is, it's consuming more time than estimated, so the XVIIb is on hold, wish i had more time to devide between both subs.
To please somebody more some more detailed pics from those God awful guidingwires, enjoy
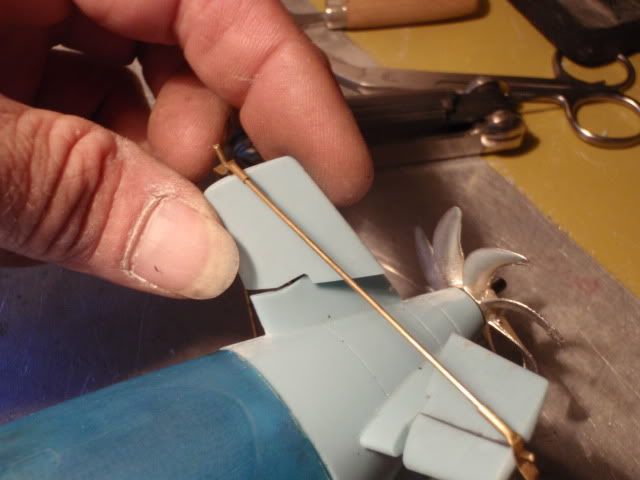
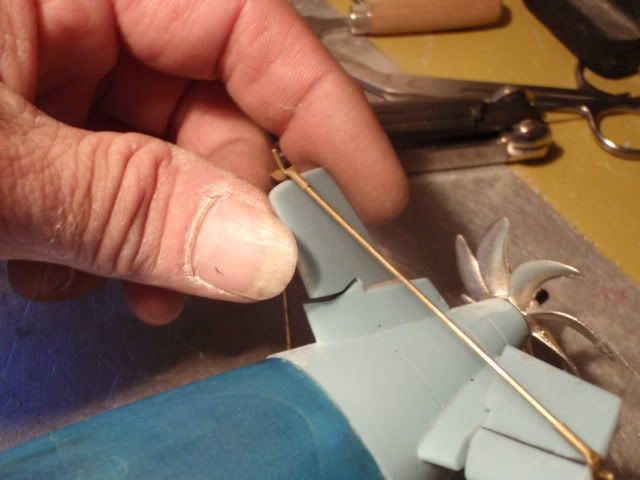
Just to test if the feathers have enough room to turn.
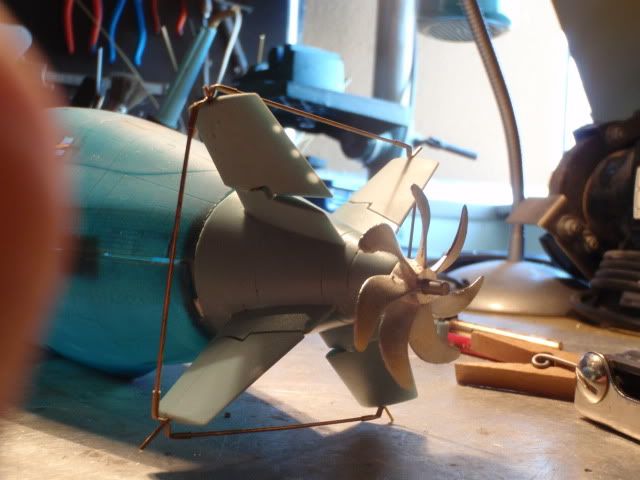
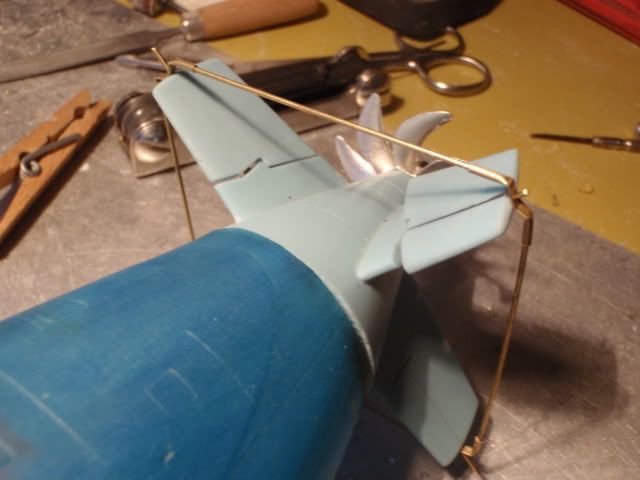
Wether you like them or not, it's adding more to the model, but that's my opinion.
Greetings Manfred.Leave a comment:
-
As you well know, any idiot can say something can't be done. It's the exceptional people who get those same things done.
It's been a very special thrill to follow this WIP, Manfred: you working up a Caswell-Merriman kit. It's Like hearing a piece of music we wrote played well at Carnegie Hall.
There! .... Now, to pull my head out of your ass so you can get back to work
DavidLeave a comment:
-
With every fibre of my body David, i hate it when people now best, especially when things go wrong.
greetings Manfred.Leave a comment:
-
Alec, like David said we are in deep, it seems like a fantastic job, but like this week it's hell on earth.
I wanted to make the guidingwires, well, making the wires wasn't difficult, next problem happened, you have to take apart the X tail for adding the hinge points, that's where it went wrong, the U shaped thingy inside snapped due to much force.
Now i know why it's copper that i normally use, yet again i made a attempt to repair the damage, clamped the piece and carefully used the soldering iron on it's lowest setting, giving me a repaired U thingy.
Next problem that happened was, since the U thingy was becoming smaller by my repair action, the O shaped thingy could not turn freely anymore, so yet again had to tinker that by taking the X tail apart again, took the dremel with the sandingdrum and carefully lost some material.
Oh, by the way, each time you want to make a dryfitt you have to take apart the X tail, about 6 times , such a pleasure crammed spaces, anyway lesson learnt, white metall is delicate stuff, be gentle with it.
Pictures of the result sofar,
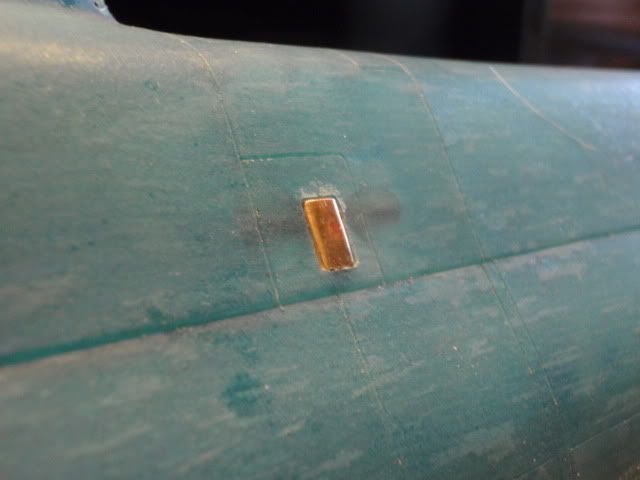
The meshed grill i used on the exhaust was wrong, ripped it out, they placed a kind of cover on the inlet, when using the diesel it will swing open on command.
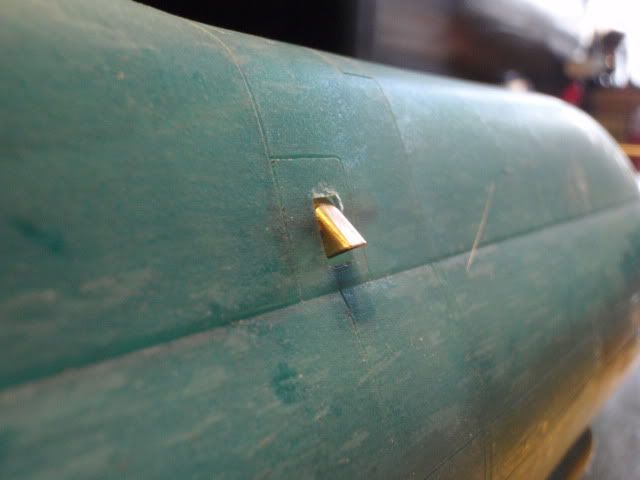
It should look like this, deflecting the fumes down into the ocean to keep a low IR profile.
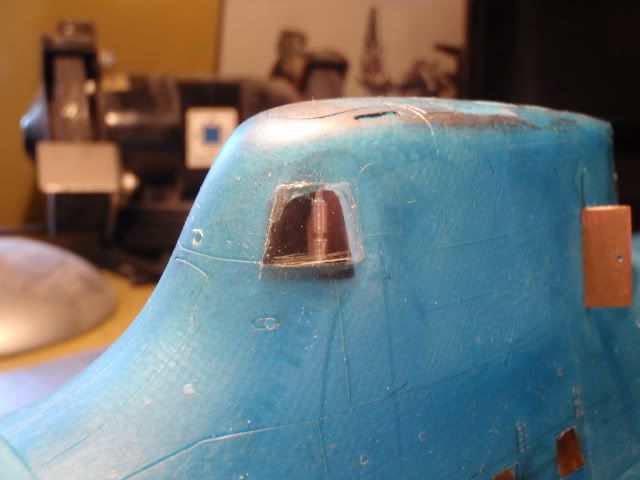
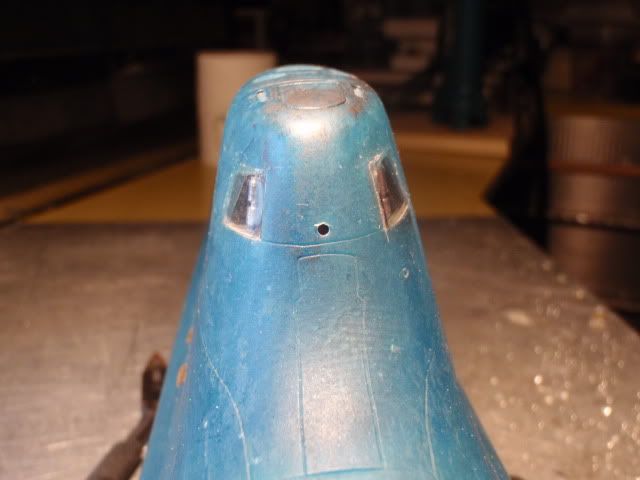
The navlights are behind the windows, carefully tacked with minimal CA, don't want to have that white haze, they will be reinforced with some 2K glue.
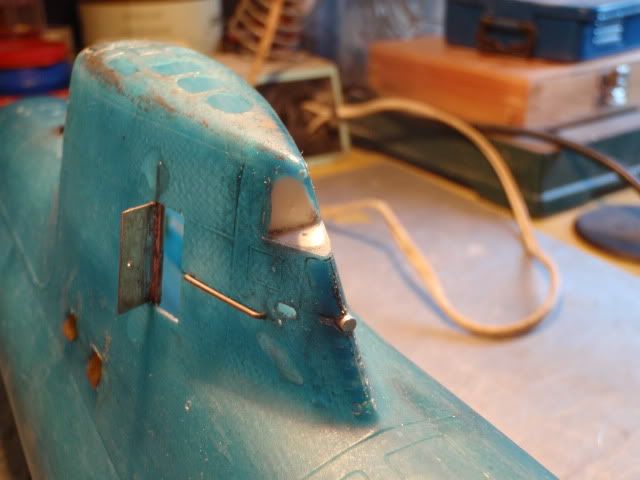
Started with filling up the cutted space for the rear navlight, added also the light lower inside the tower, done this with a scrap piece of aluminum.
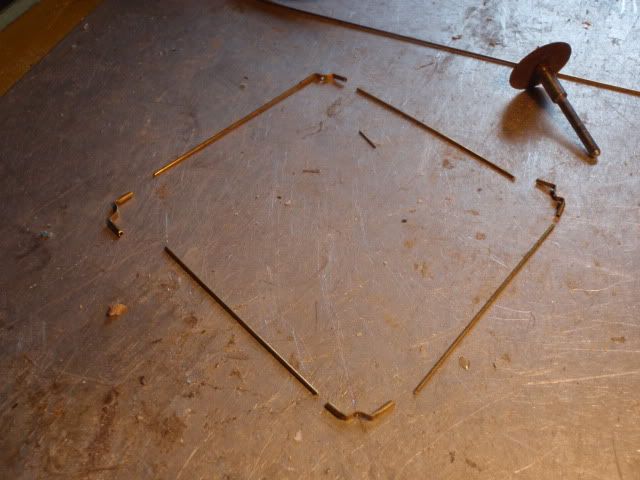
And now my beloved guidingwires, I wish i had listened to David, those things gave a lot of trouble, on each point of the four rods there is a hinge part, made them from thin copper tube, you can insert the rods into the bended tubes.
I had also had to make pins on top of the X tail feathers to place the hinges, you guys allready know the lovely story behind that.

This is the first stage, just to see if it can work, i allready know now that the diameter of the rods is to big, have to change that, for me it proving that i can place the guidingwires without obstructing the tail feathers.
Greetings Manfred.Leave a comment:
-
Stick around, we all step in it deep around here on a regular schedule. Welcome aboard.
DavidLeave a comment:
-
Thanks for setting me straight redboat & now I am officially embarrassed...Leave a comment:
-
Alec,
The Type 212 is not a nuke boat, it's a diesel-electric/air-independent propulsion.Leave a comment:
-
Talk about skill & talent working in miniature!!! This is one of the few nuclear subs I like the look of but as I have never worked with anything in fibre glass I will admire it and your amazing work from afar....Leave a comment:
-
Hmmmmmm, i could leave them off, i'll make a deal, i put them on and ask again if i should remove them or let them on.
My intial move for making the guidance wires is to prefent the catching of the emergencybouy wire by the propellor.
Greetings Manfred.Leave a comment:
-
Oh, no! .... you're going to put that god-awful torpedo guidance-wire guard around the tail-feathers! Perfect way to ruin the aesthetics of that little boat, Manfred. I hear that some CO's of those boats would 'accidentally' loose that gear over the side with alarming regularity. I for one, don't blame them.
Anyway. You continue to amaze, confound, and please this very appreciative audience with your skill, and 'anything-goes' attitude.
DavidLeave a comment:
-
If you think that's nuts, how about the next stage after the floodvents,
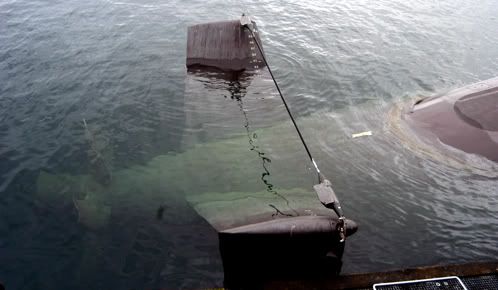
I do know that those wires were used on the protoype boat, nice addition i think, wait and see.
Greetings Manfred.Leave a comment:

Leave a comment: