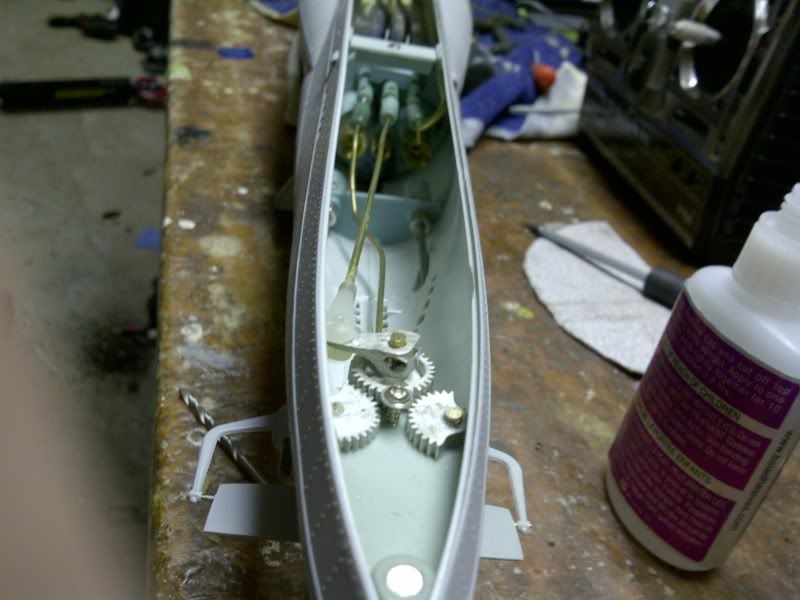
I didn't do anything building the SD .. again I received it assembled as is, same as the model. I only just powered it up a few days ago. all I've done is index the SD to the model, and tweaked the manifold for the Snort on top of SD to clear the deck and get the tube into the sail without kinking
once I get the mechanical sorted out, I'll move onto making sure the SD doesn't sink the boat before I tell it to and fry electronics LOL ... I'll grab an extra stem valve from work too, just incase.
-
Reckless,
Did you put silicon or anything on the end cap seals? I will assume so. I do not remember, you have all your pushrods in and put silicon or your proper oil of choice on the seals? I ask these questions because recently I did not hear the hiss - it turned out to be a seal and some case bubbles. I removed the valve stem from the end cap, stretched some vinyl tubing over it and did a pressure check. That may help you find any leaks.
Peace,
Tom
David beat me to it...
Here is a link to the test I did on the wtc http://forum.sub-driver.com/showthre...art-duex/page3 Post #30Last edited by trout; 02-25-2012, 11:40 PM.Leave a comment:
-
Doing the blow-in-a-hose-connected-to-the-equalization-body thing as the unit is held underwater will identify the source of air-leaks through bubbles. Keep me informed, Reckless.
DavidLeave a comment:
-
if I can't get it apart without snapping the tail or the planes I'll cut the brass and visit the LHS and just redo the brass, cheaper and faster for all involved ;)
now if I can't get the SD to seal up (the valve isn't going "poof" when I close it up and push the valve, I'm guessing its not sealing it hasn't seen a proper test yet) I'll definately be talking with you David.
thanksLeave a comment:
-
You got it, Myron. Whatever you need, Reckless, let me know. Along with your mailing address.
DavidLeave a comment:
-
So Reckless doesn't know what he has? If he can't get them apart without damageing the hull I suggest he cuts one side off with a pair of dykes, puls the other side out and you send him 2 new planes and a shft?,
MyronLeave a comment:
-
-
I didn't glue it... I bought it all assembled slowly making adjustments and such to get it waterbound.
I'll give it a shot this weekend Dave... let you know if it simply came apart or if I ended up having to rebuild the tail of my sub.. LOLLeave a comment:
-
David, If I remember correctly, the stern planes had square holes molded in?
MyronLeave a comment:
-
With a stern plane in each hand, twist them at the same time, but in opposite directions. This very high torque on the square sectioned brass rod (operating shaft) will flex it, eventually fracturing the CA bond between it and one of the planes, permitting you to pull the operating shaft away from the skeg and out of the bell-crank, freeing it for the hammer work.
DavidLeave a comment:
-
What type of glue did you use? If you used CA maybe you could try some superglue remover although I don't have any knowledge as to their effect on resin or styrene parts.
Btw, I've had success removing cured CA by soaking it in isopropyl alcohol (70% rubbing alcohol) which is safe on styrene.Leave a comment:
-
the stern planes are glued to said rod... I tried several ways and forms to pull or pry them off .. ain't no friction fit LOL ... so I gotta figure that out... probably a cut and rebuild
but I made some progress and got the rods finalized
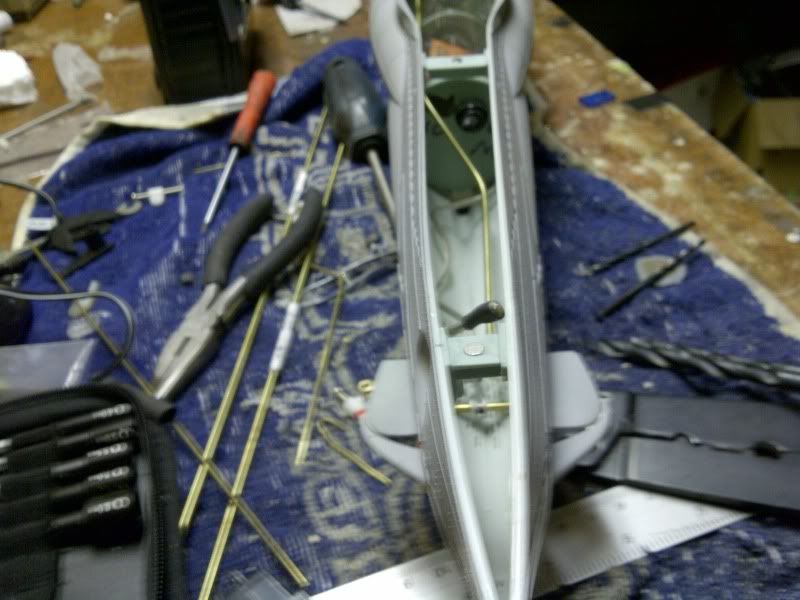
getting closer!Leave a comment:
-
Either both or one of the stern planes should only be a friction fit to the square sectoned operating shaft -- this permits you to pull the operating shaft out of the square hole in the bell-crank, permitting removal of the bell-crank out of the skeg so you can perform the hammer trick.
DavidLeave a comment:
-
.... what is this... lightly, you speak of? ...
:biggrin:
can this be done after it's all be put together? LOL ... I dunno if it'll come apart without breaking something.. as in .. I dunno what Ire glued/locked inplace before hand...
eh... I'll figure it out... .. but progress is being made... things are living and moving... the great fun will be to see if the SD is still sealing up ..etc... heh..Leave a comment:
Leave a comment: