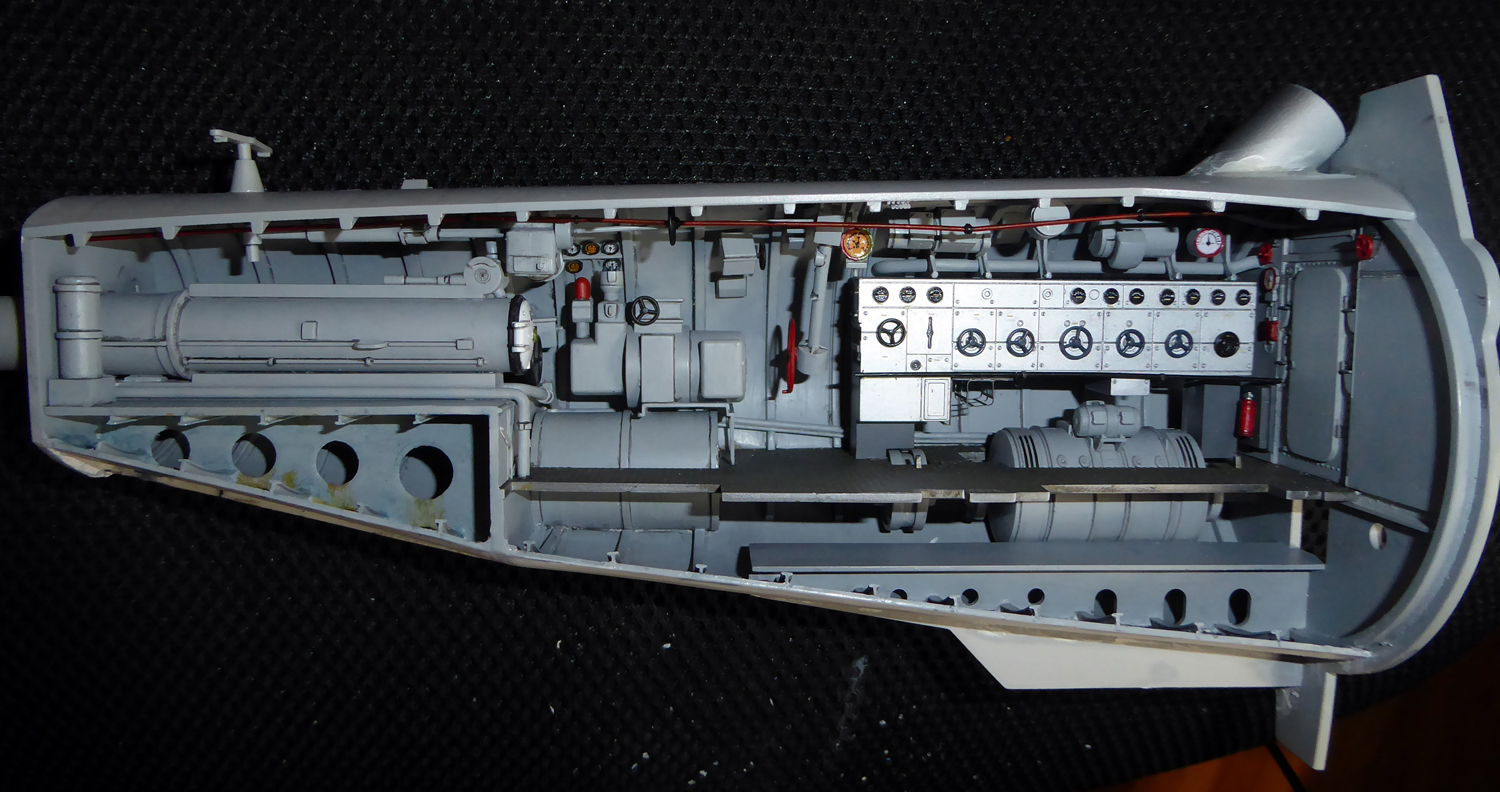
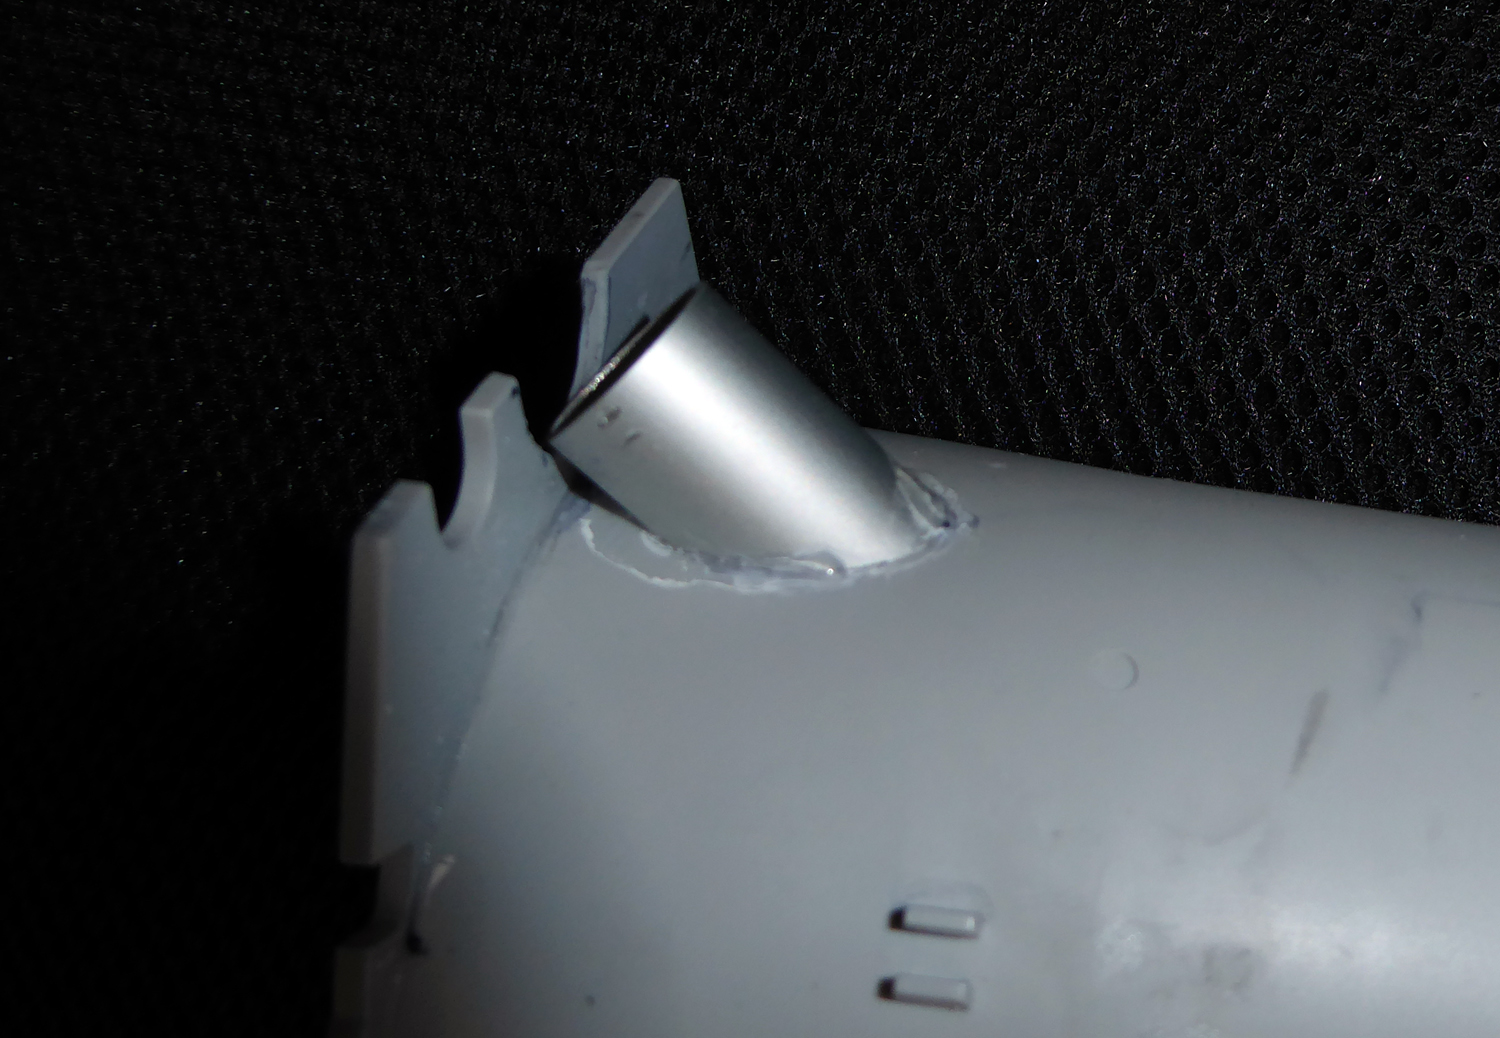
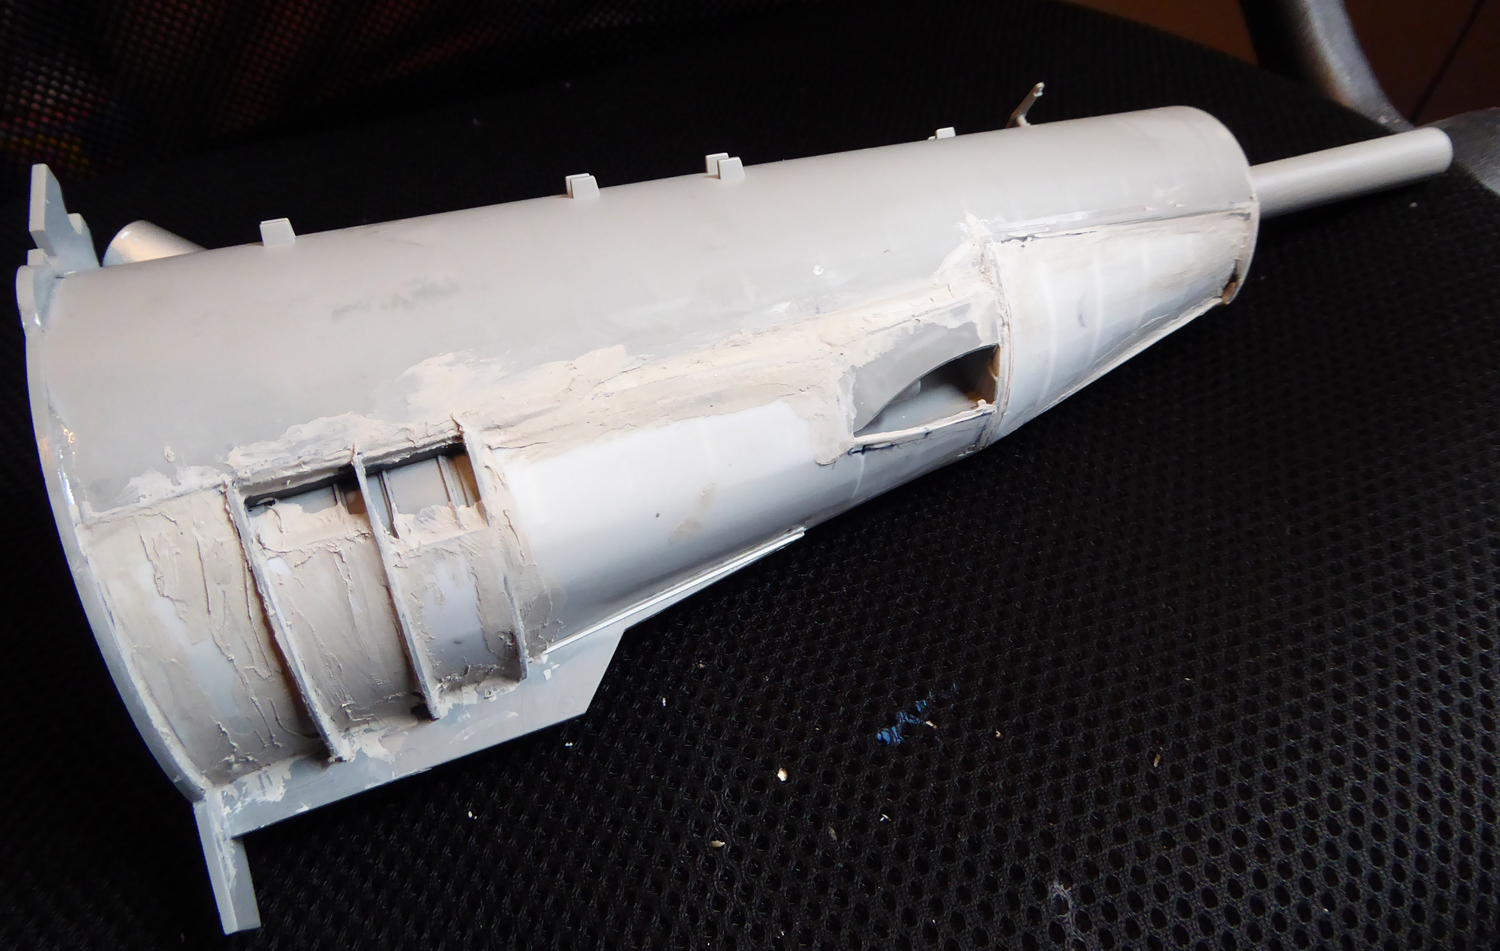
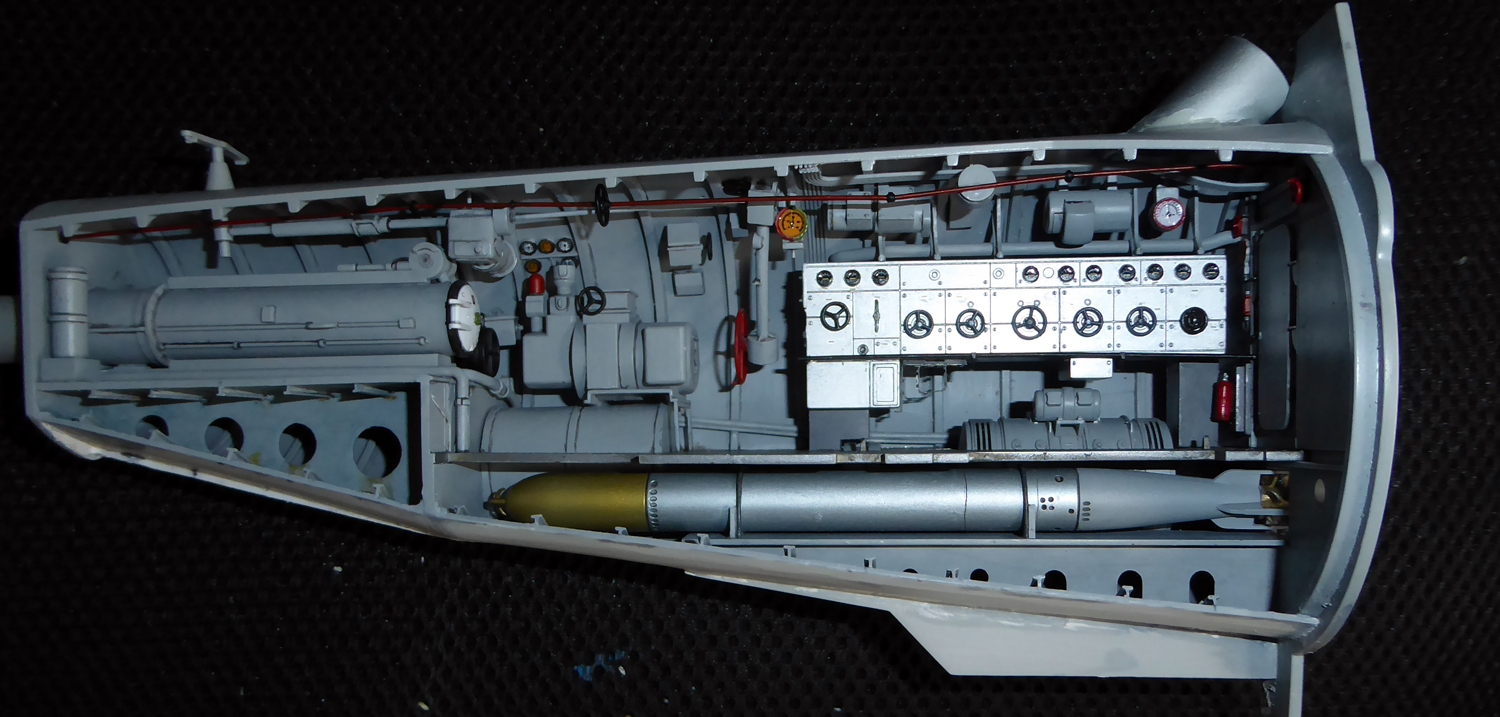
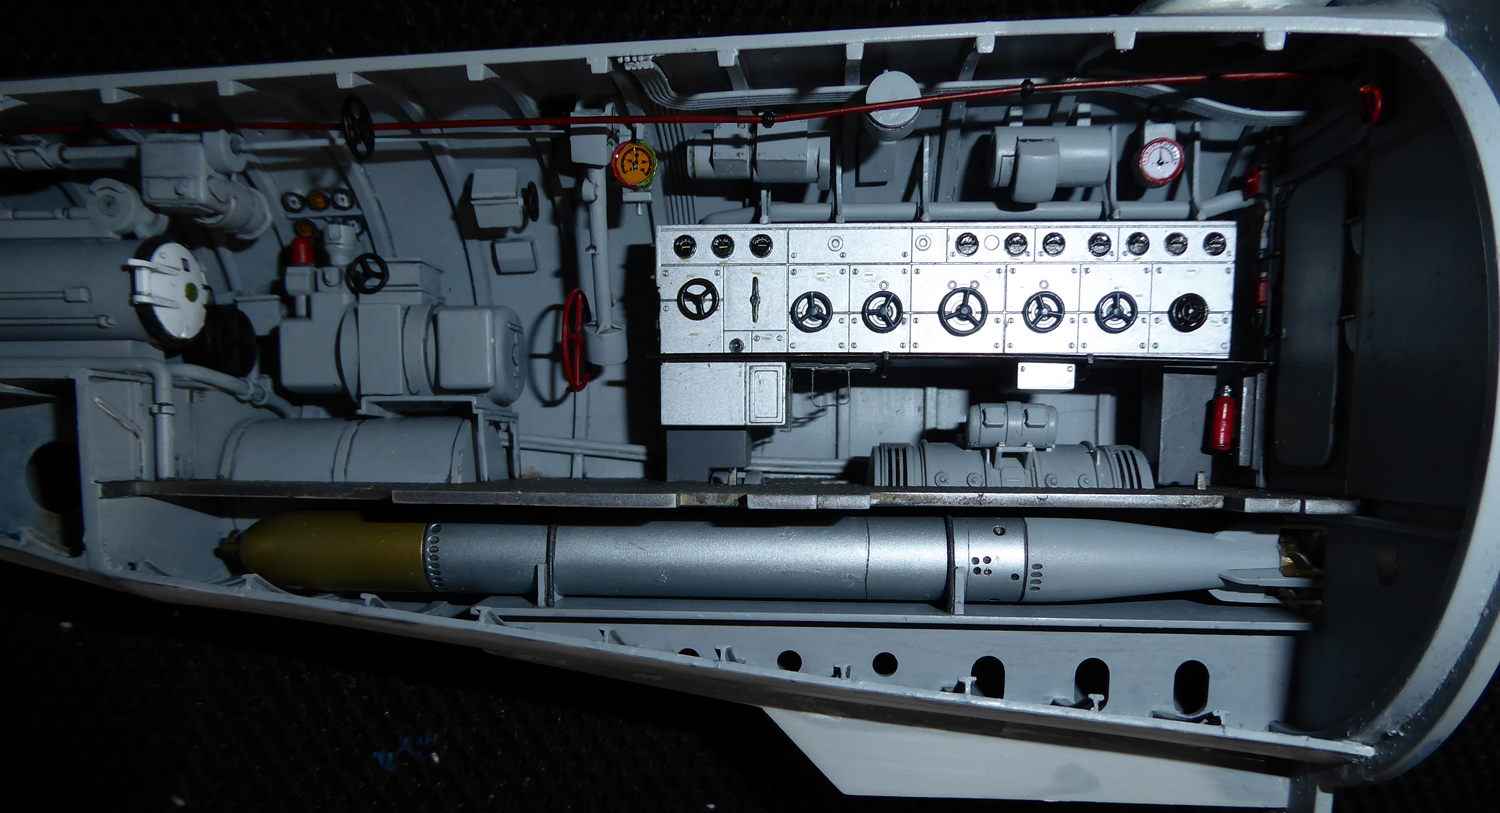
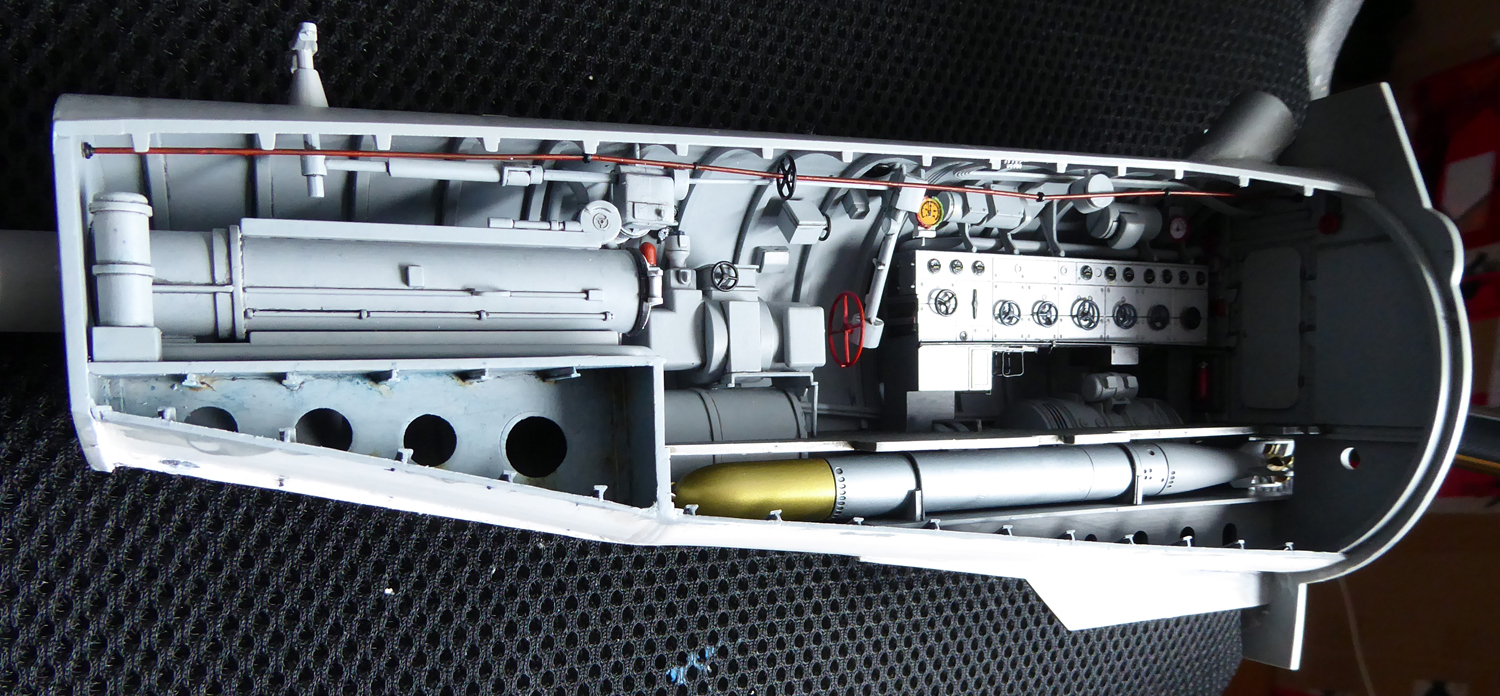
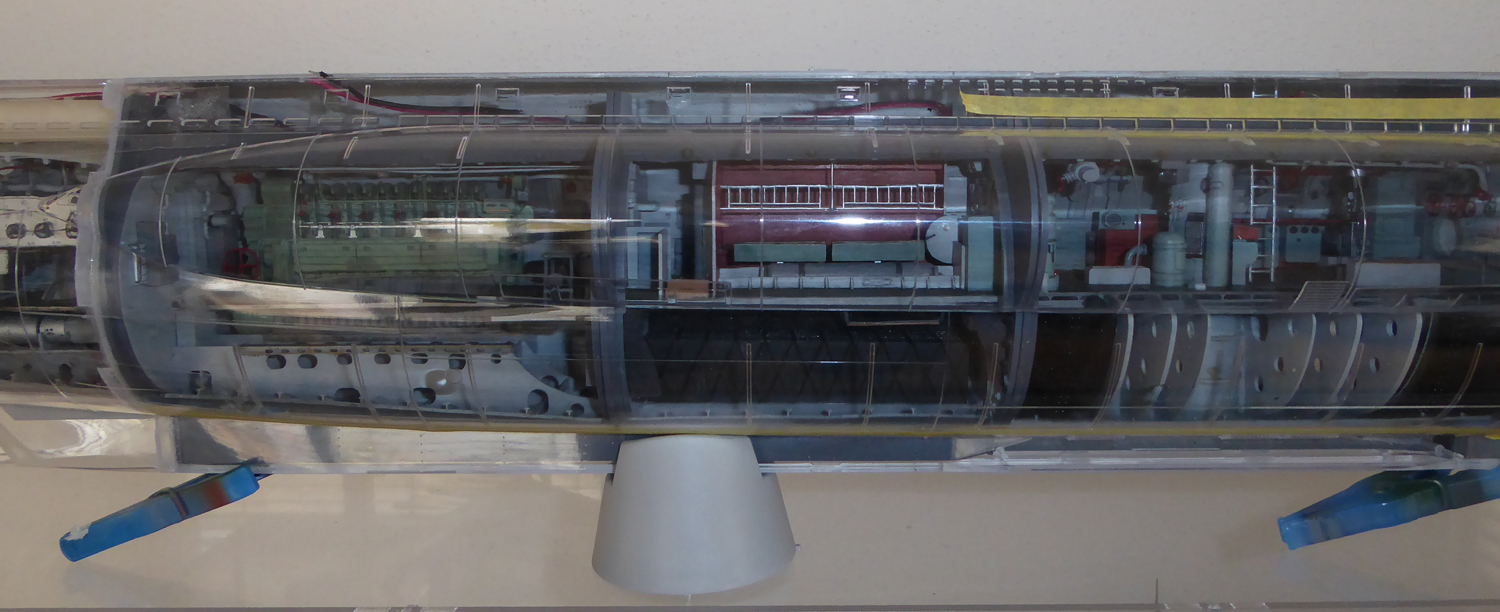
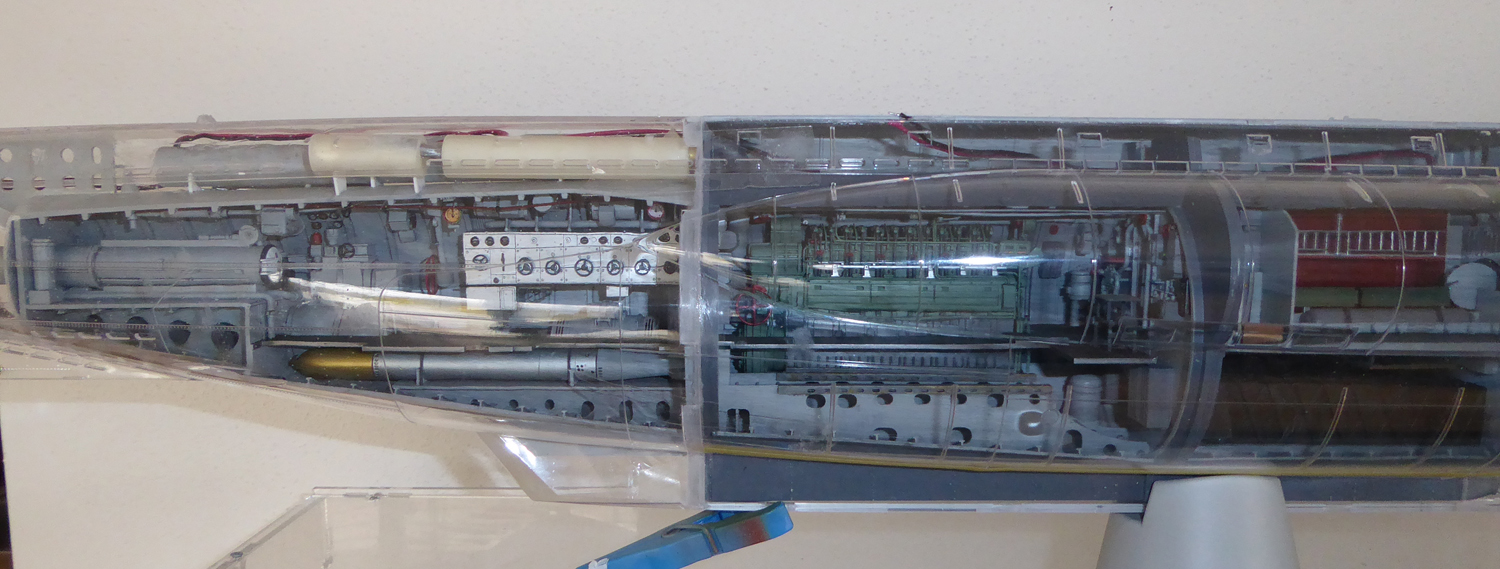
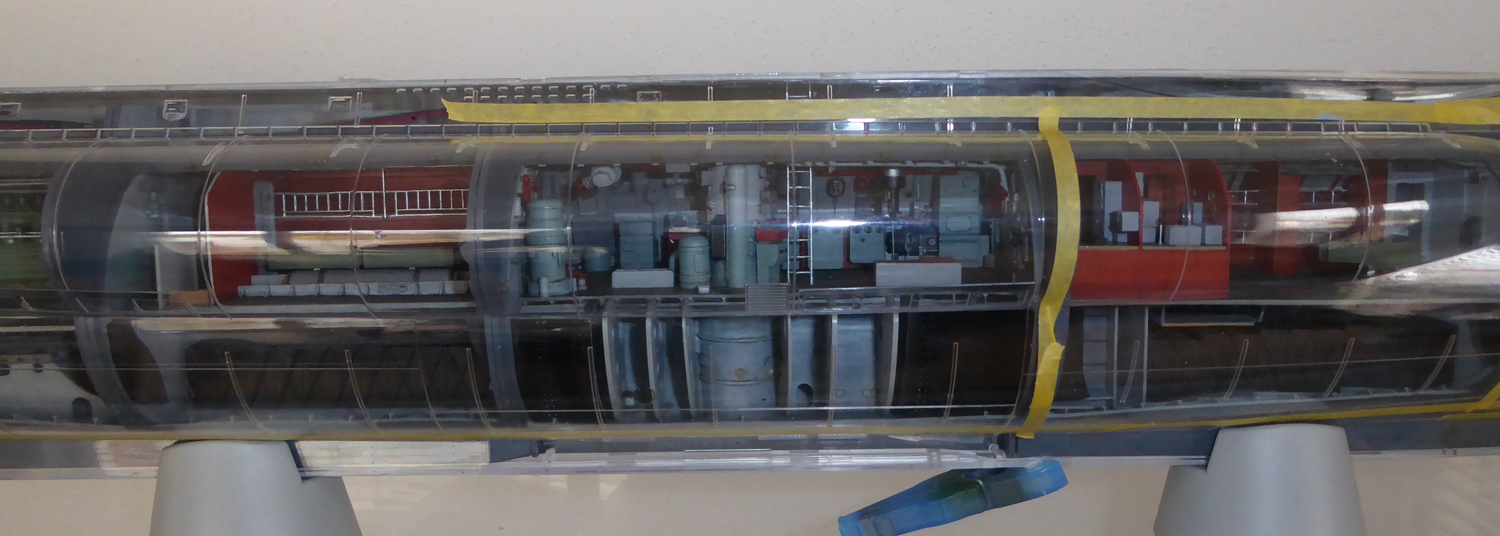
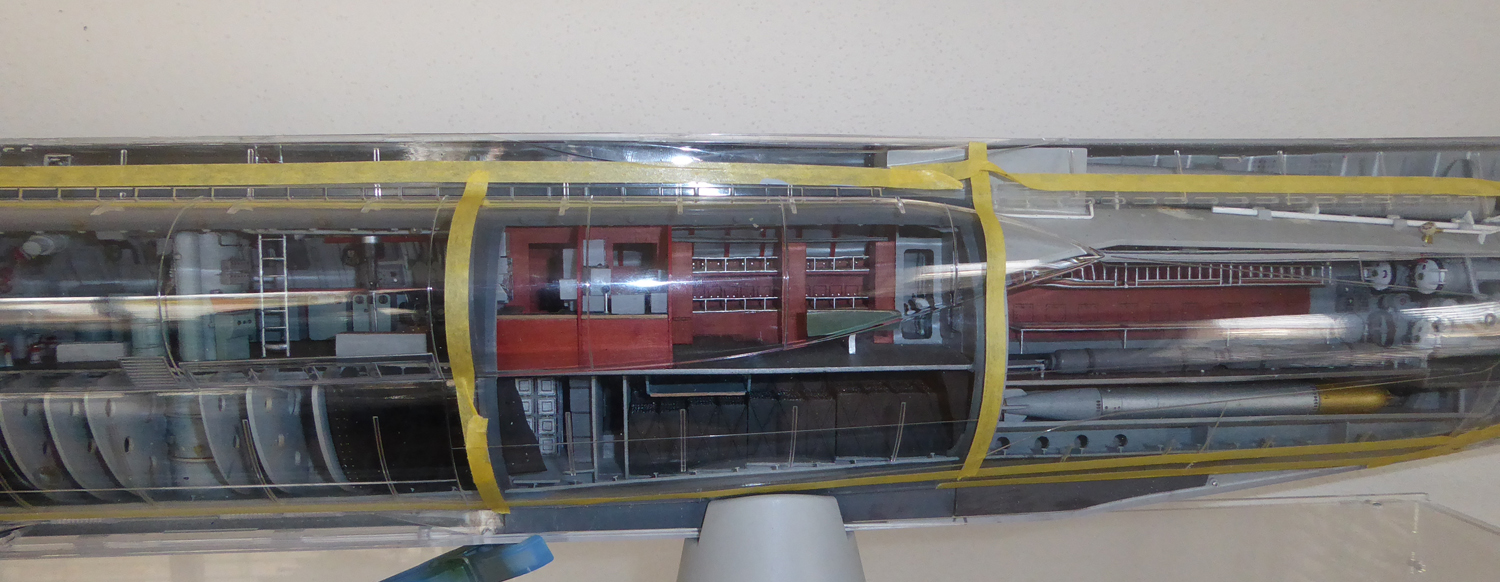
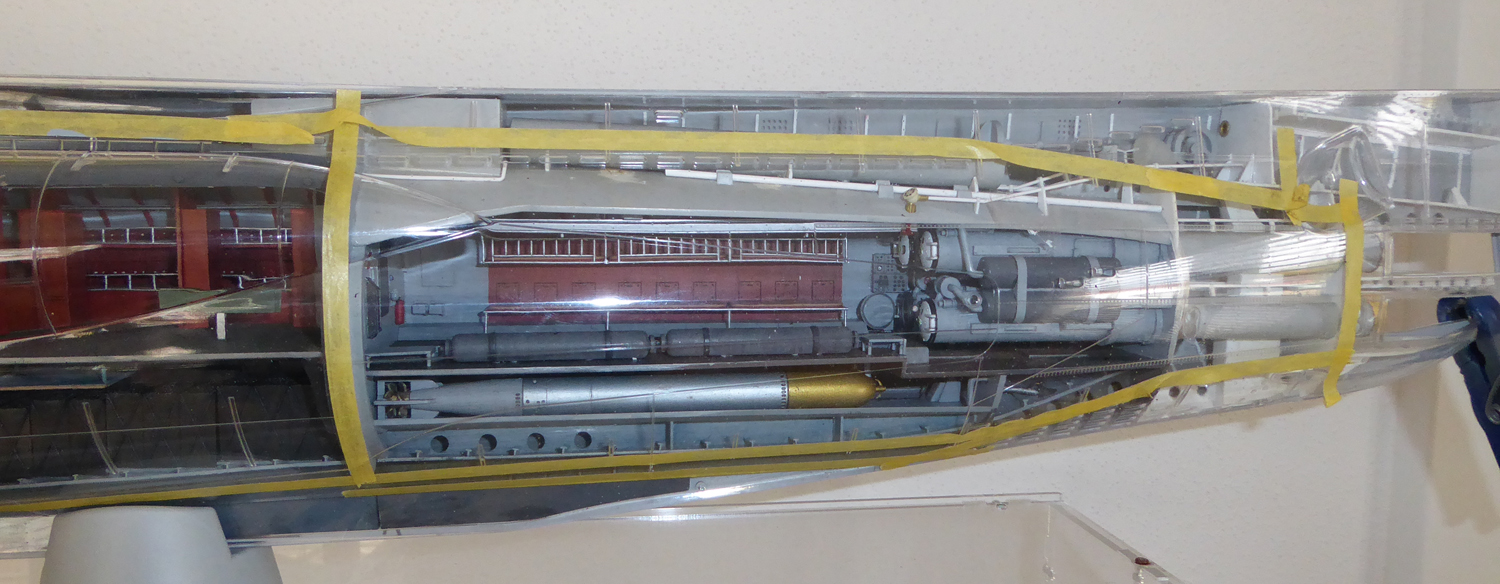
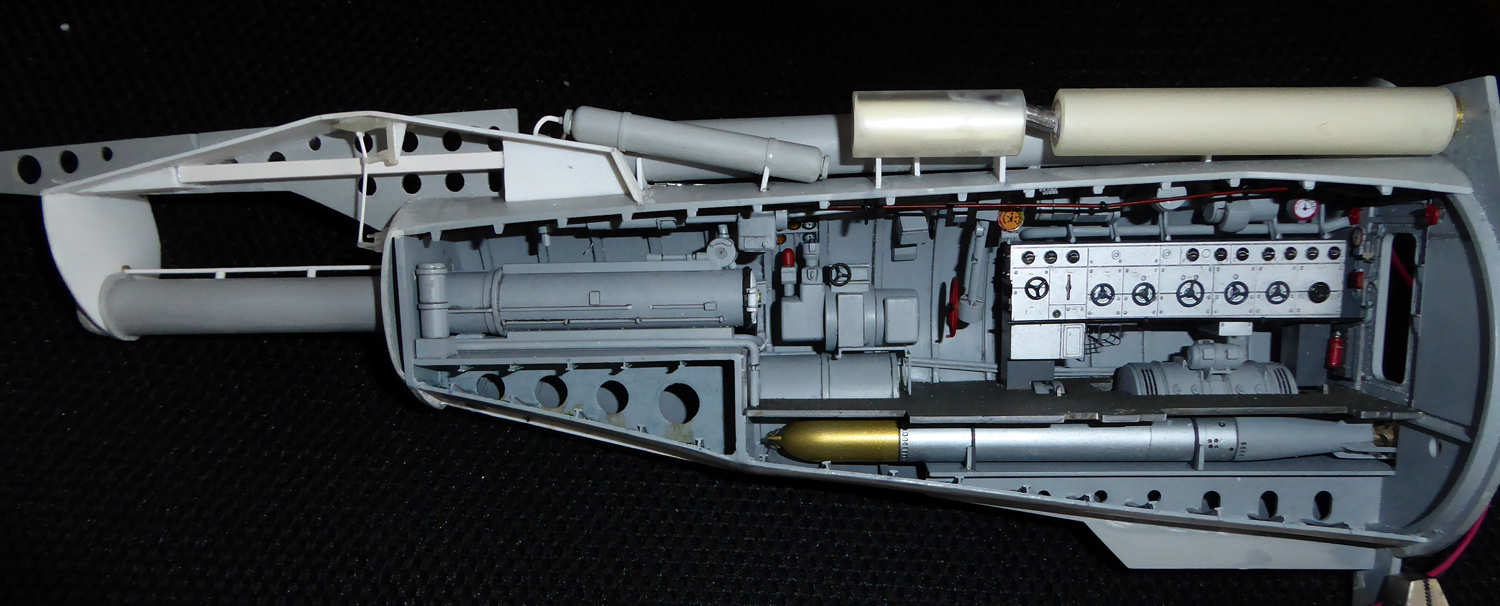
When one looks at above pictures one could believe, that the stern torpedo room is done....well, not quite. The complete lower half of the pressure hull and the t-frames are missing. Also the section below the torpedo tube, where the stern trim tank was located, was wrong. So I altered the back part to resemble the trim tank and added the lower pressure hull with the frames. Tedious job, but finished it looks quite good.....well, despite the backside. I also added the torpedo loading tube, which was missing in the kit, too.
Trumpeter VIIc 1:48 (static)
Collapse
X
-
And complete with the stored extra torpedo. In the kit the torpedo is just sitting flush on the floor with no fixation. Kinda bad idea with a boat roling in heavy seas. So I scratch built two bases and tied the torpedo down with styerene wire. Looks better me thinks ;-)
Comment
-
What a gorgeous piece! Great work. I really like the washing that you're doing, really makes everything "pop". What ink/paint are you using? What about technique - washing everything and letting it gather or just applying to nooks and crannies? Beautiful model, keep it up!Comment
-
I use a combination of filters and washes. The filters are from M.I.G. productions. I mainly use warm grey for panzer grey, but also green for panzer grey where more wear is appropriate. Washes are from Vallejo. I use black, grey, and light grey. I usually apply filters thin and evenly across parts. The washes are applied with a fine brush at the required locations and then corrected by wiping with a soft tissue.Last edited by DrSchmidt; 10-27-2017, 07:30 AM.Comment
-
Progress is slow as there are many little things to do that require some time. E.g. the hatch and of the rear torpedo tube is missing as is the parts of the hull where the torpedo exits the boat. I shaped this using glass fiber and made the hatch from resin. I also started to modify the outer sections that go into the stern, e.g. dive bunker 1. Lots of fitting, modifying and whatnot. But it comes together. I will make a real cut away boat, so I'll cut the transparent hull and the stern section open. To do this properly I already glued the stern section to the starboard transparent forward half of the hull. Assembled that thing looks ****ing huge...compared to a 1:72 Revell VIIc
👍 1Comment
-
Hi Dr,
perfect work !!!!! It's exactly what I want to do for my model with trasparent parts of th hull.....
I look in advance for hull painting....
CheersComment
-
O.K., still slow progress. Mainly because I had to rebuild the aft dive bunker 3 times. Ripping of styrene, putting on new sheets in a new configuration. reason was, that the bunker has an intricate shape, that I had problems figuring out from the drawings I have. But now I guess is pretty accurate. The bunker has a dome like shape with the bow end splitting into two sections that sandwich the rudder lever (to which the drive shafts) for the rudders are attached and the spare torpedo compartment. The two bottles for compressed air rest on these sections, angled upwards. I also put in the blow valve for the bunker and the corresponding mechanics. I also added the drive shaft for the aft torpedo tube hatch and cover. What is still missing is the electric drive for the rear dive planes, it's drive shaft and the deflection mechanism that connects it with the planes. But I'll have to think a bit how I'm going to make that.
Comment
-
-
Hi again,
a last question: can you tell me where you took informations to do the aft dive bunker in the shape you did ? I'd like very much to know.....It would be a good thing if you post the drawing....
Thanks in advanceComment
-
Hi Dr,
thanks for reply; I'm not sure you made the stern section with its tanks i the correct way.....Look at the images I posted: maybe, your major error was to decide that the main structural beam of stern section ( Stringer IV in the posted drawing ) is only one, instead of two....I'm not sure of anything, in this moment, but I'm studying drawings, photos and all material I have...
Let me know what you think....
Cheers
12 PhotosComment
-
Ok, don't worry.....I tought that you would be in time to correct some eventual errors, before close the hull....
Anyway, I'll inform you for eventual progresses in my research....
Thanks for your interest.
And be proud of your model.....Comment
-
Hi my friend,
I post a drawing that clarify the configuration of structural beams in the stern section: there are n. 3 beams, two lateral, and one central.....
No matter if you don't want incorporate in your ( beautiful ) model this explanation: I think it's basic only if you cut in two halves also the aft stern section of the hull, that in Trumpeter's model comes in only one part ( the thing that I intend to do )....
Cheers1 PhotoComment
Comment