Here's that BJB silicon rubber thickening agent: https://bjbenterprises.com/index.php/sc-5001/
David
-
Make sure the rubber you get is of the 'brushable' type (the term is a misnomer -- you actually apply this non-sag stuff with a flat stick or big putty knife). The TC-5030 is the best I've found for this application:

and you'll want some rubber thickening agent (I'm checking with BJB on that and will post what they say when I get an e-mail back from those guys).
DavidLeave a comment:
-
Thanks for the info. I've ordered some silicon rubber and I'll get busy with the parting board now. Lets see if I can get a result - then we'll talk about a trade!Leave a comment:
-
Hey! When you get your tooling done, I want a copy of this thing. Trade? If so, what do you want?
DavidLeave a comment:
-
Yes, on non-round hulls I prefer to split the hull into an upper and lower half at the designed waterline. Makes it easier to hide the equatorial break with boot-topping and the scum-line (in my world there's always a scum-line!).
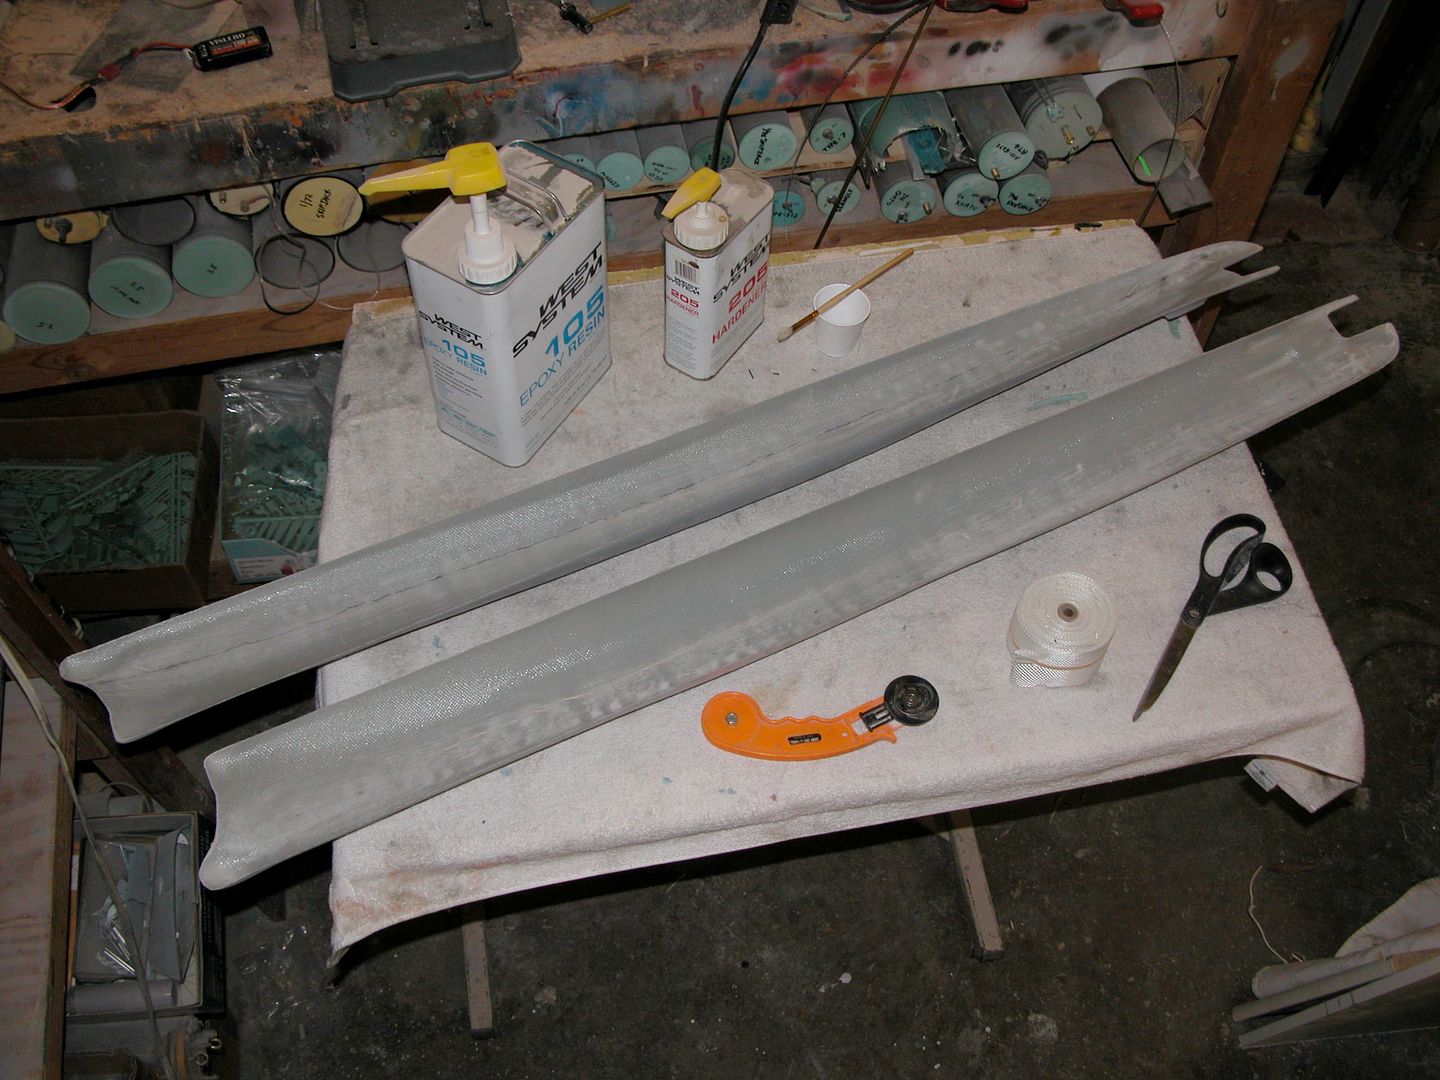
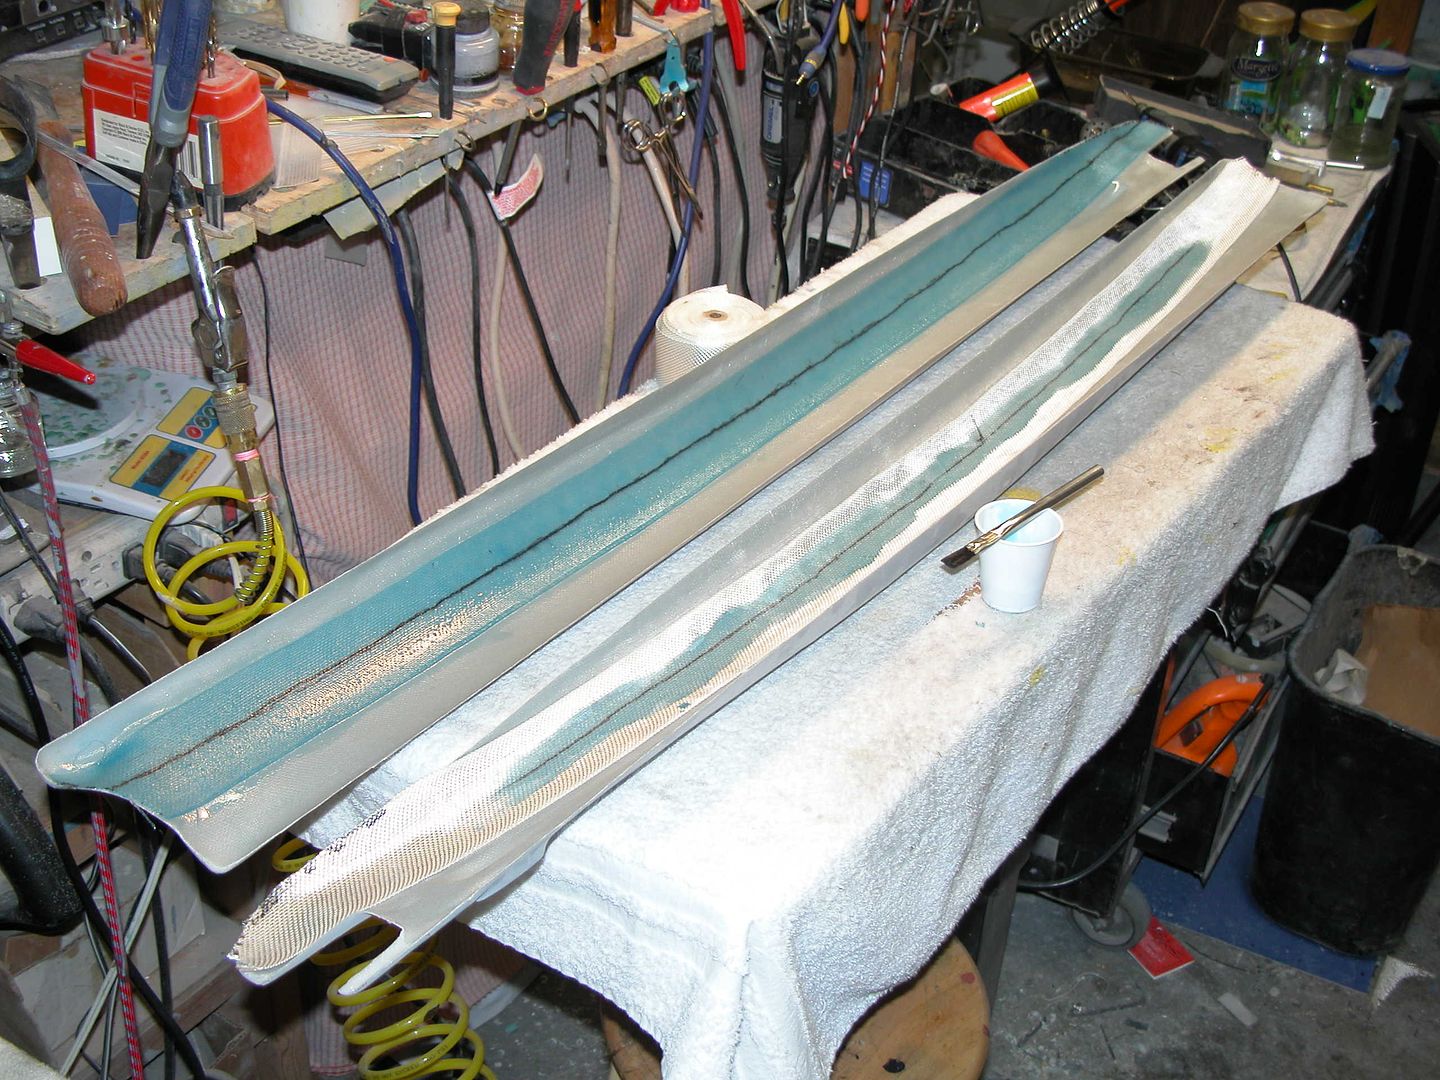
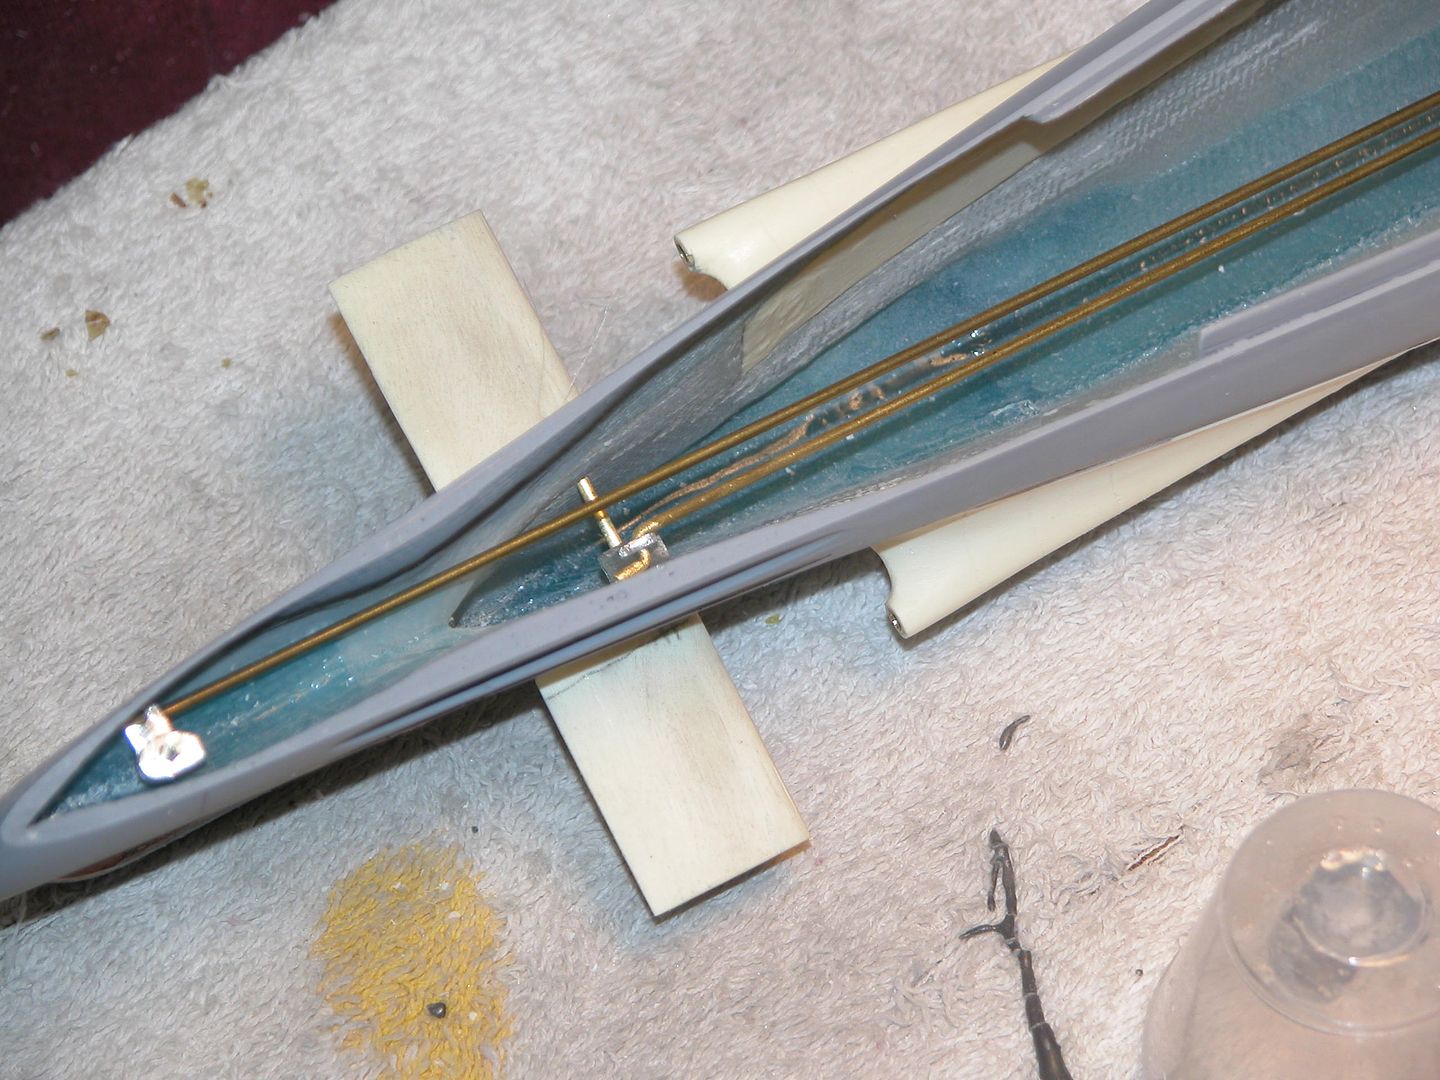
The hull portions of the kit arrived as a left and right half. These of course, first had to be assembled into a whole, and later marked out and split at the waterline. Rick is an r/c plane guy so his idea of an adequate wall thickness for his subs is at variance with our idea of the proper thickness. These parts were what I would consider, flimsy. So, I laid on some glass on the inside of the two halves to thicken up the eventual edges once the waterline split was accomplished.
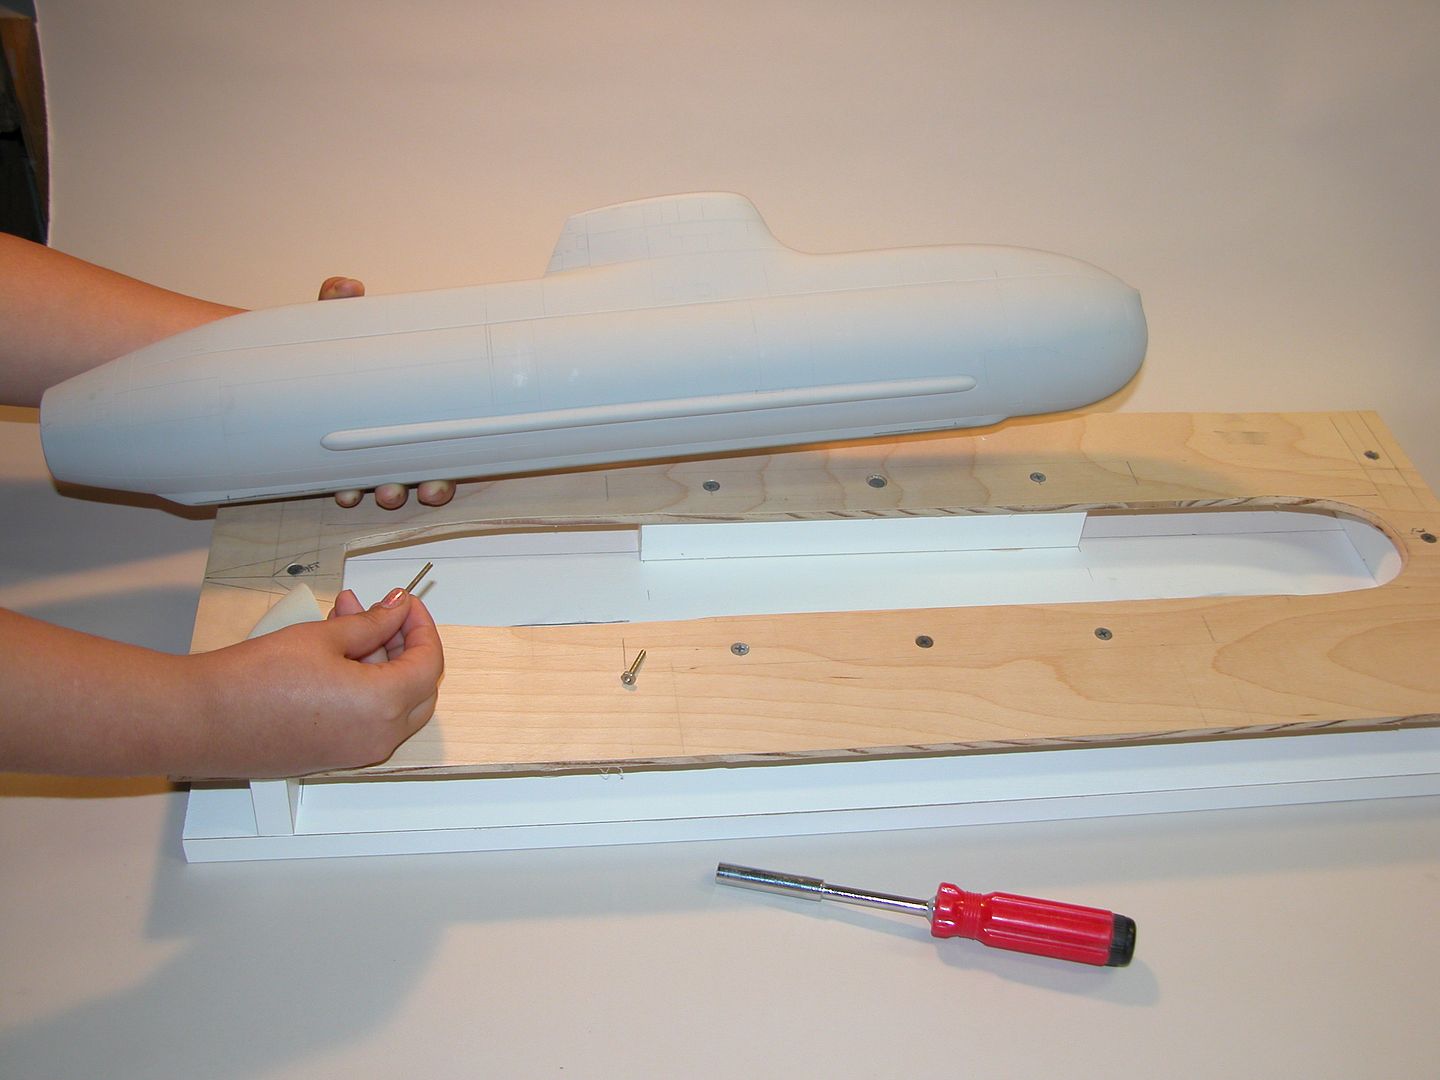
Once I had achieved the upper and lower hull split I worked out an array of indexing strips and false bulkheads to insure tight registration of the hull when assembled.
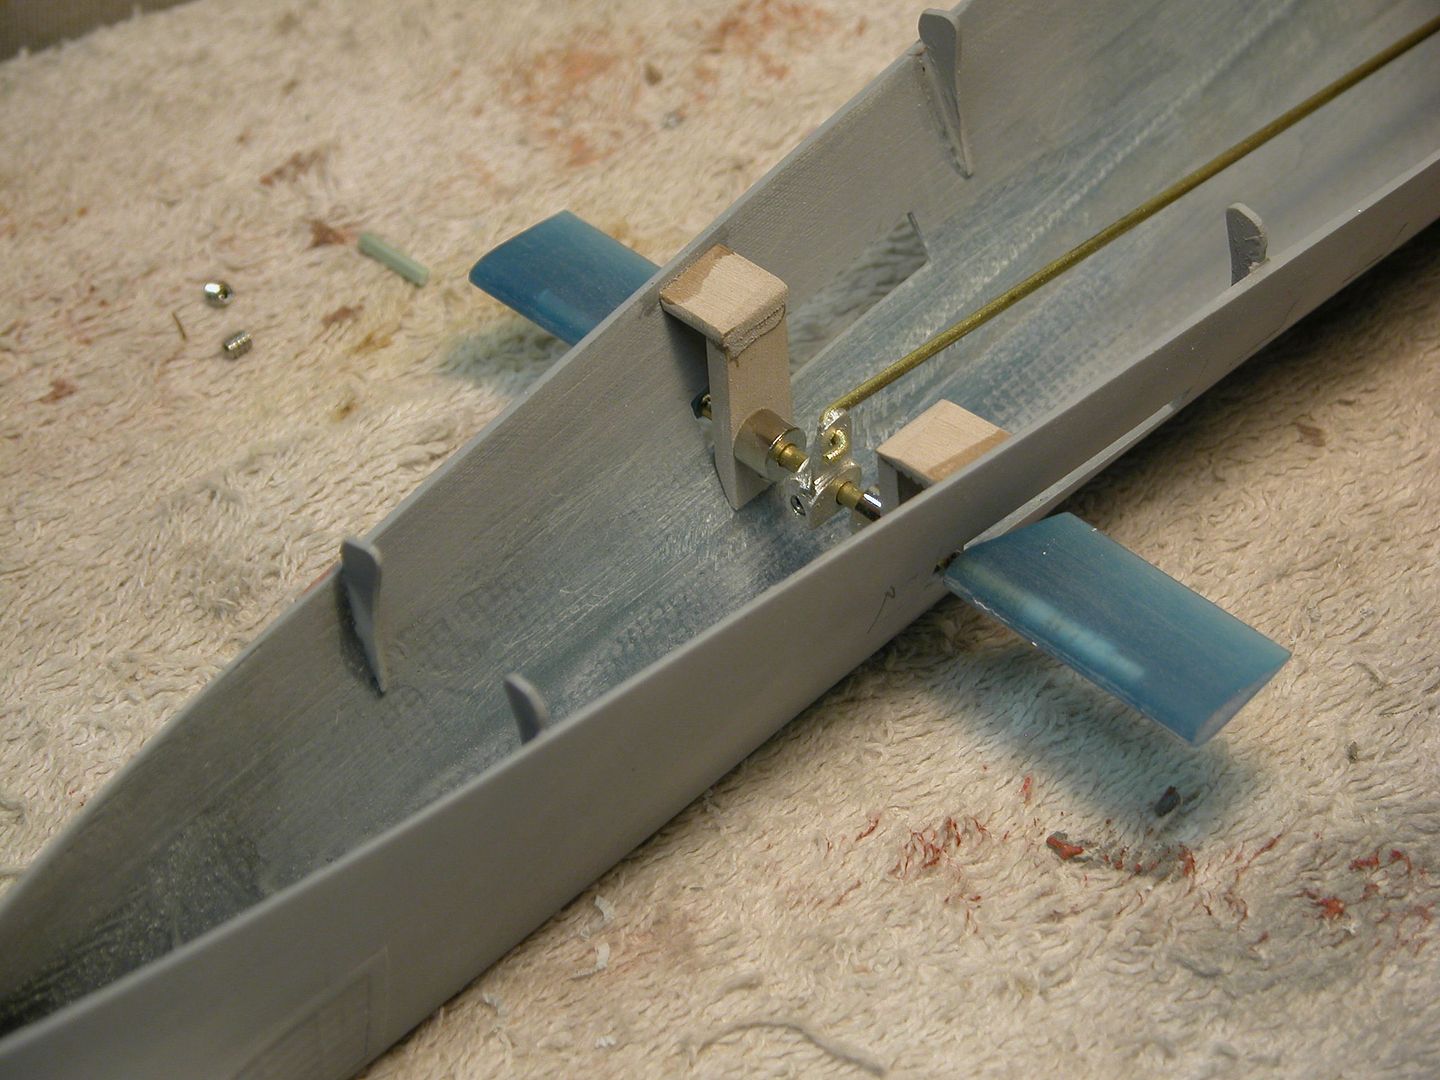
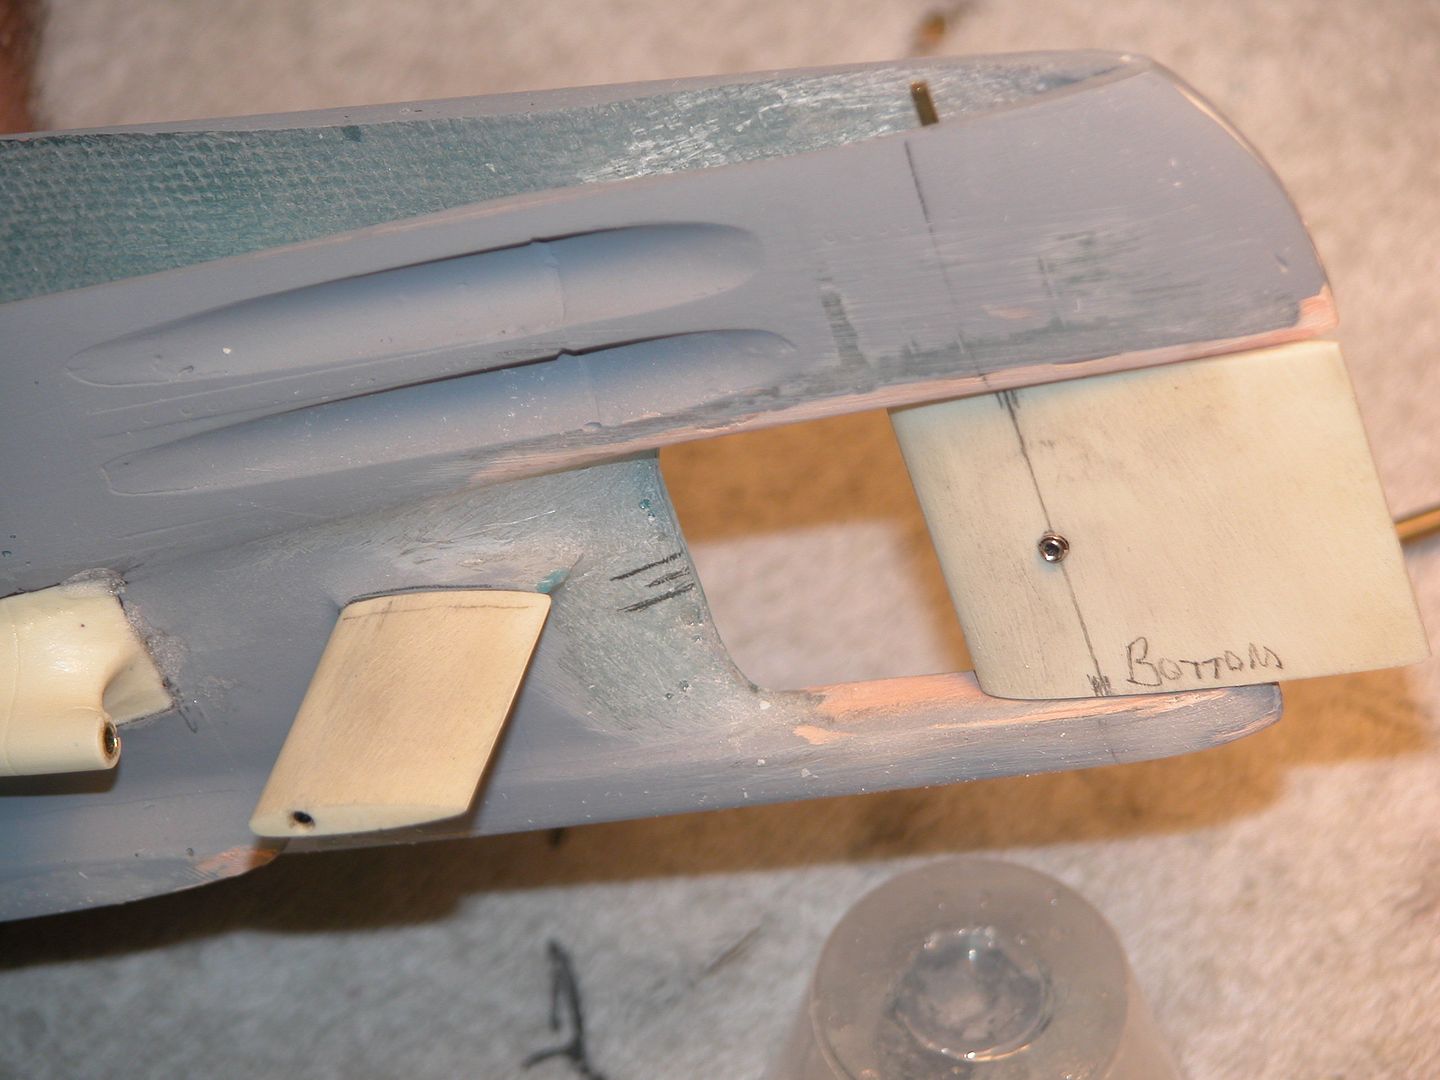
As you can see, the waterline break gives plenty of access for SD and linkages. This is an easy boat to outfit and maintain because of this accessibility.
Here's what you do:
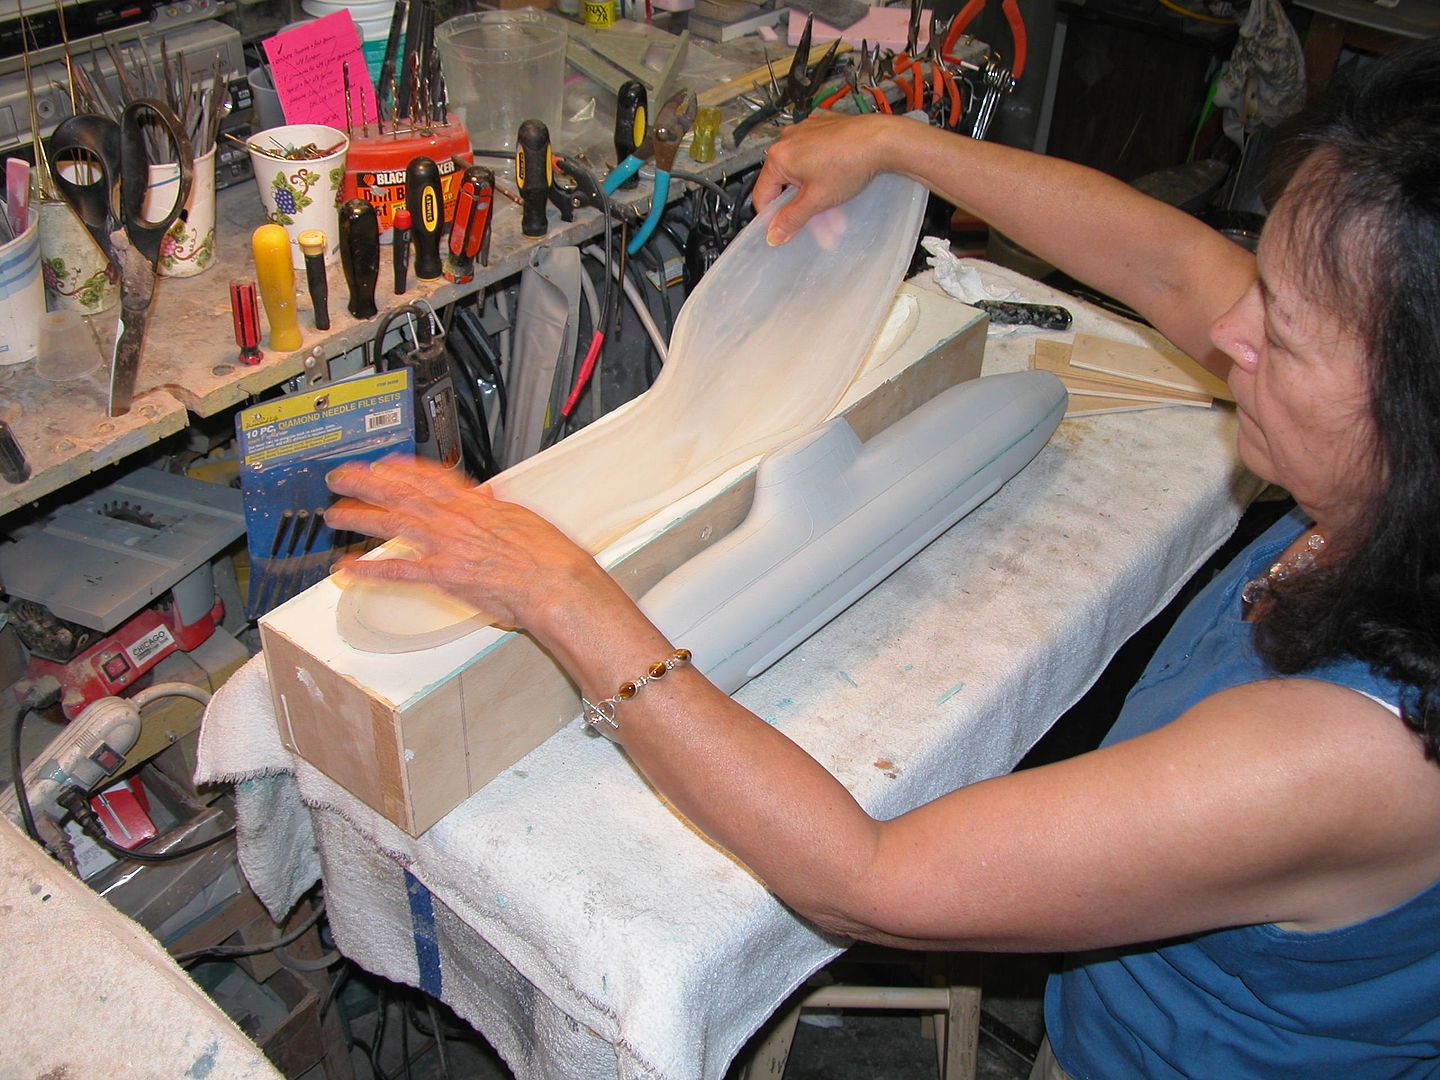
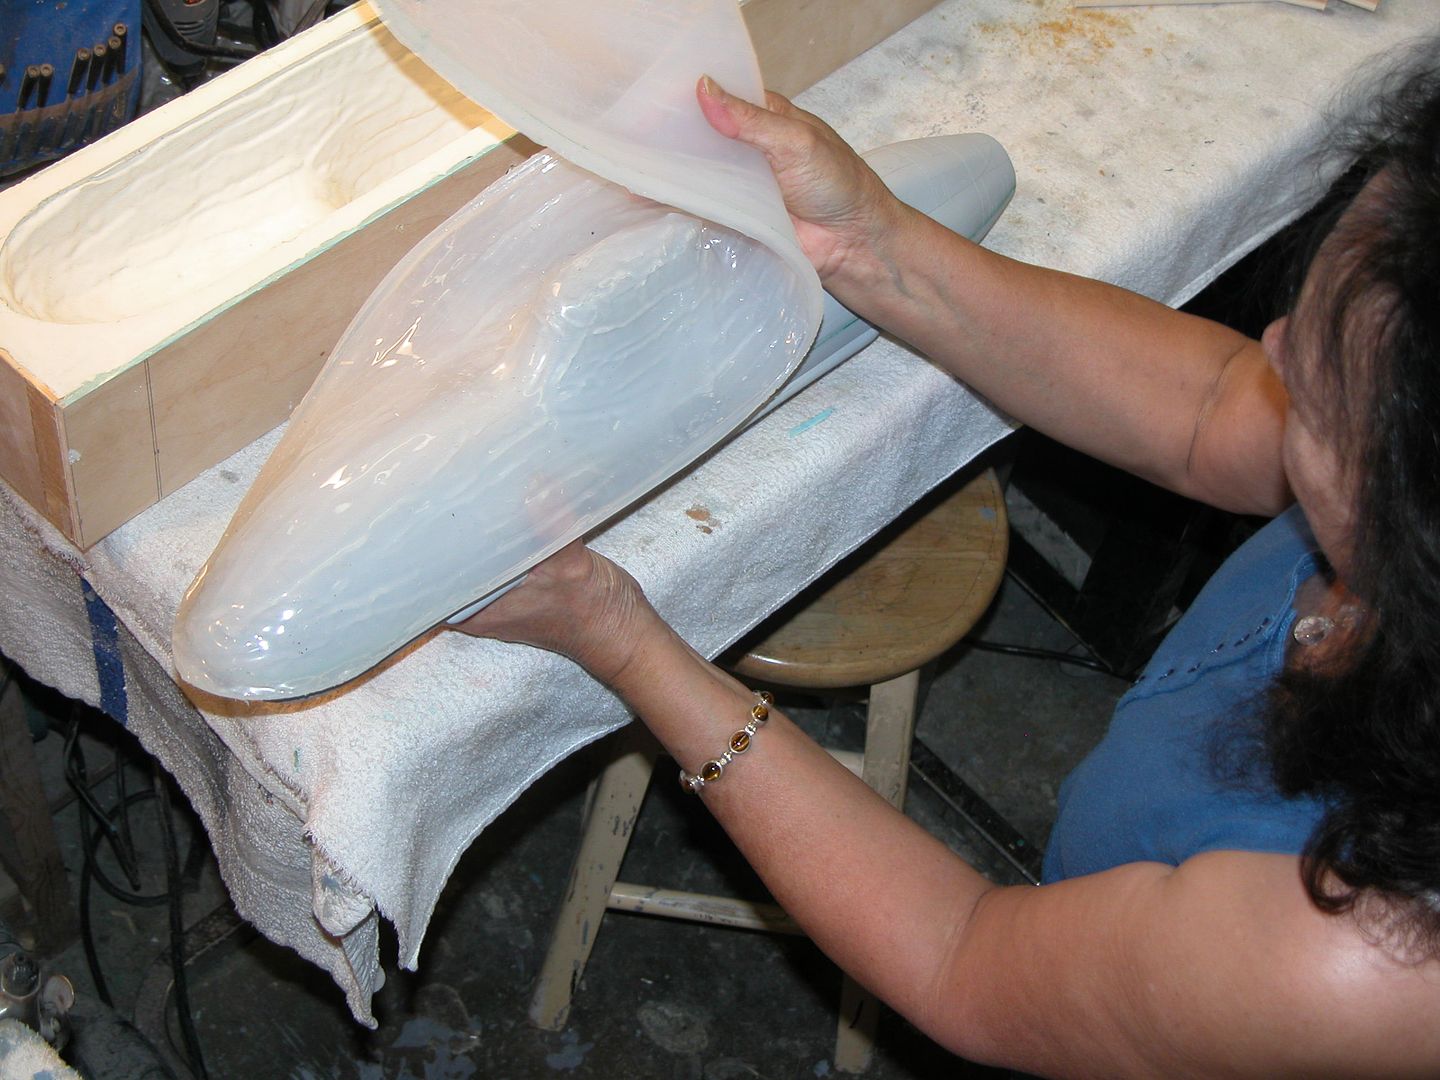
split your master at the waterline from the get-go (or use a parting-board if you don't want to molest your master). Make your tooling so you can deal with the negative draft of the bow sonar dome, and stern under-cuts. That means going the rubber glove-hard shell mother mold route. Like this:
As you can see, once the unsupported glove mold is out of the mother mold, it's an easy matter to flex it anyway needed to release it from the GRP part laid up within. This is vital to your project as your ROMEO has so many undercut, and high-low detail points (the limber holes). Such detail is hard to capture in a hard-shell tool unless you break it down into three or more sections, which makes production a ****ing nightmare. Go with the glove!
More pretty pictures of the glove mold-mother mold process here: http://s262.photobucket.com/user/dme...mother%20molds
DavidLeave a comment:
-
A question on the Foxtrot. It looks like the hull is split along the water line. If that's so, is the bottom section cast as two halves or as a single lower casting? I'm considering doing the Romeo this way and I wondered if its a viable solution. It would mean that there would be three sections to align and more margin for error but I think that some of the detail might go missing if I just try to do it as an upper and lower hull. Your thoughts?
Leave a comment:
-
An afternoon of blending in the photo etched bits. Not finished yet but well on the way.
Attached FilesLeave a comment:
-
-
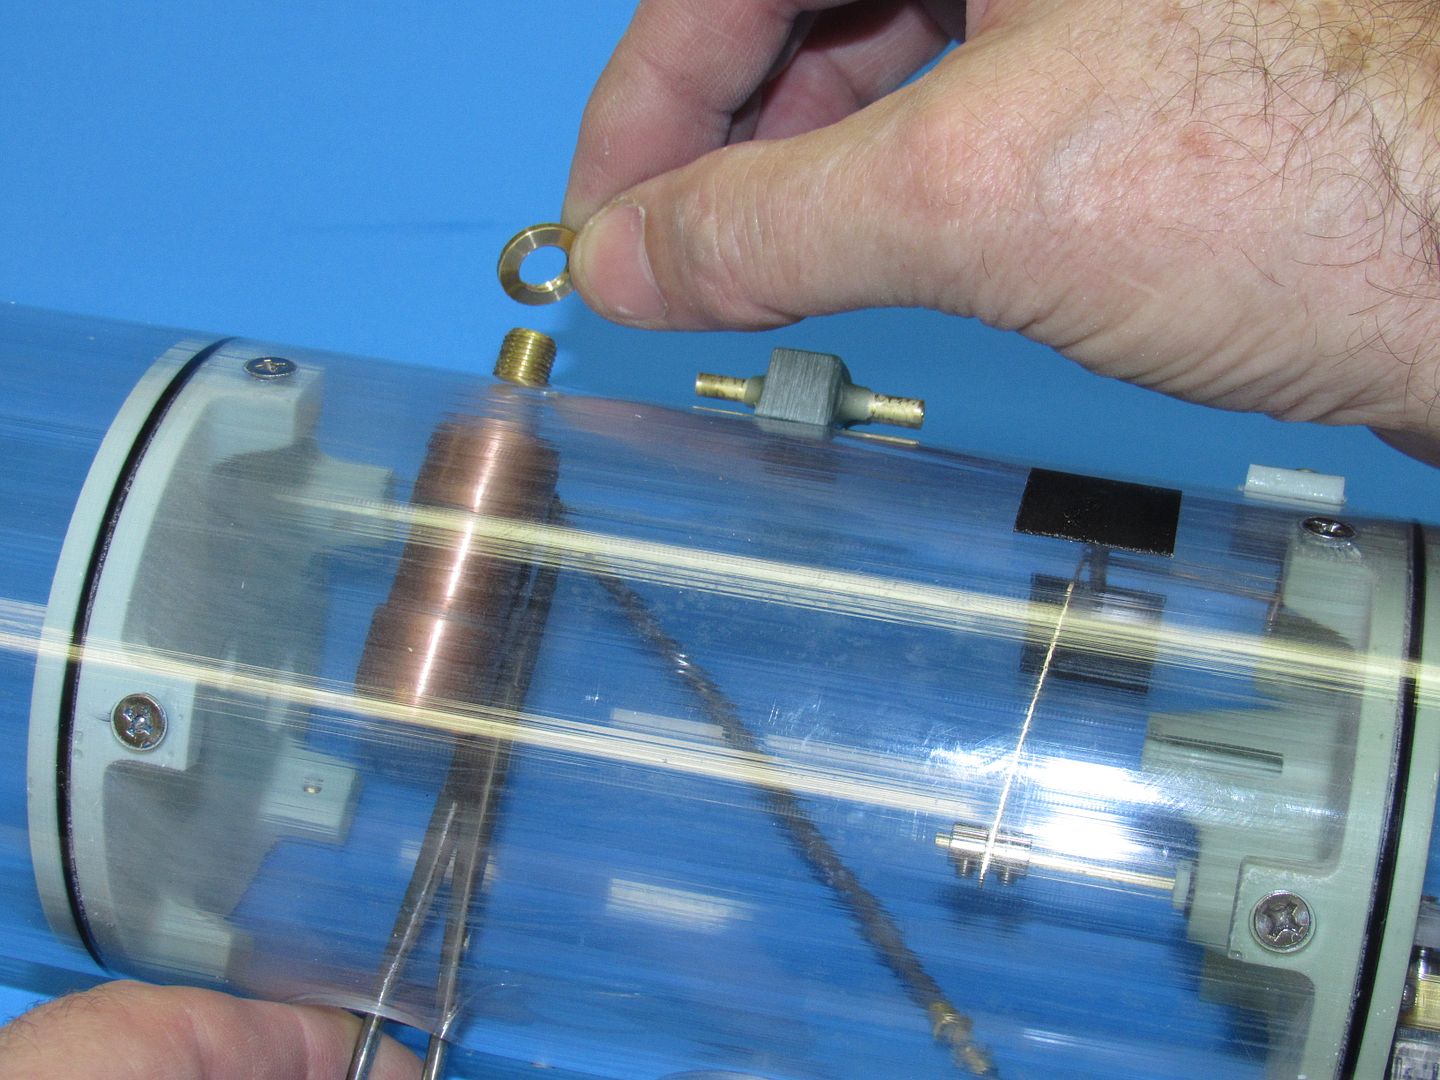
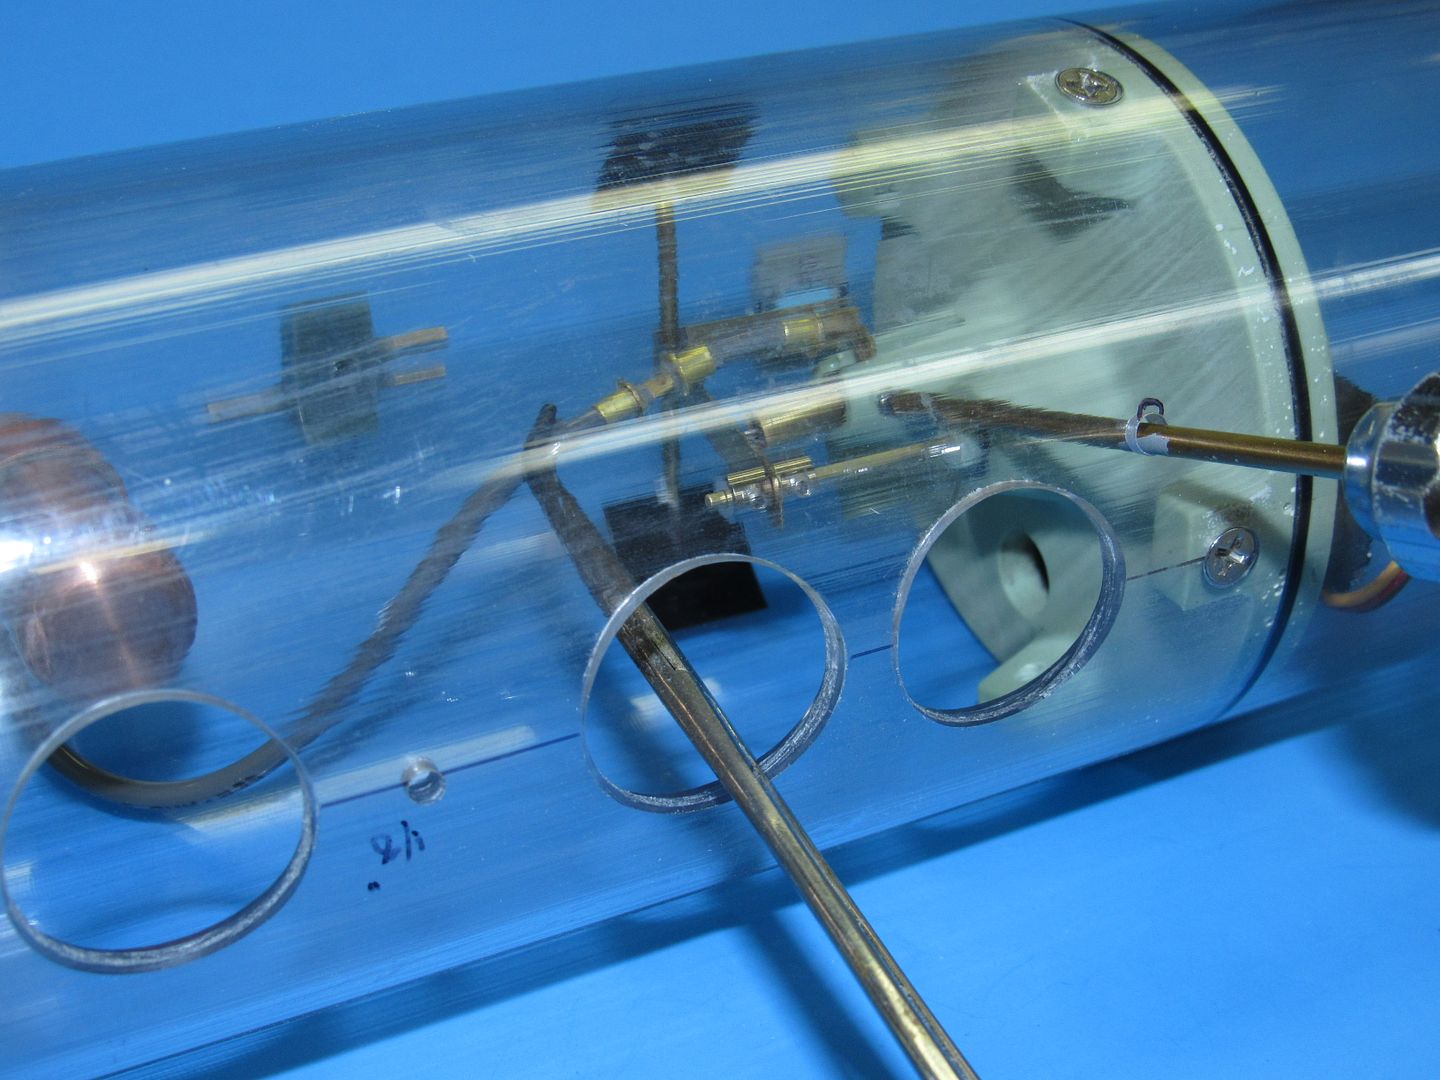
That SD comes to you stock with the SAS ballast management sub-system. However, the SD (as all our static type SD's, 2" and above) is configured for a quick retrofit of the emg. gas ballast device, available from Nautilus Drydocks. And you can have it plugged in and working in 30-minutes.
Like so:

David
Leave a comment:
-
Will do. Although I think I'll ask for a gas only version if that's OK. My damn dam is over thrity feet deep and nothing is coming back up from that depth without gas. I lost the Oscar in there a while ago and had to send number two son on a deep diving mission to recover it.
OK. Order placed with Bob.Leave a comment:
-
-
Getting the access hatches and the vent holes stuck on this morning.
Time for a short break while I take the hound for a swim in the creek.Leave a comment:
-
Looks like I will need a 2" SD for the Romeo. I have one for the 212 but I suspect that the ballast tank might be a tad too small. Did you ever do a twin motor bulkhead for the 2" SD? I'm not expecting to get this fininshed for a month or two yet, but I'm lining up all the bits in advance, if possible.Leave a comment:
-
Me too. The guy who did the masters and laid-up hulls (only a few were produced) just left town with no forwarding address -- leaving Mike and me high and dry. Our relationship with that guy was to purchase his GRP hulls and sails for sale. Never to be. Boy ... did I invest a lot of time working up the fittings for that never-to-be kit! So did the guy who did all the art-work and acid-etching in support of this never-to-be kit.
I've run this thing, and it's a great performer on and under the water.
Leave a comment:


Leave a comment: