Scratch Build Project 685 Plavnik K-278 Komsomolets NATO: Mike

Collapse
X
 
  • Time
  • Show
Clear All
new posts
  • Davidh
    Captain
    • Nov 2010
    • 719

    #166
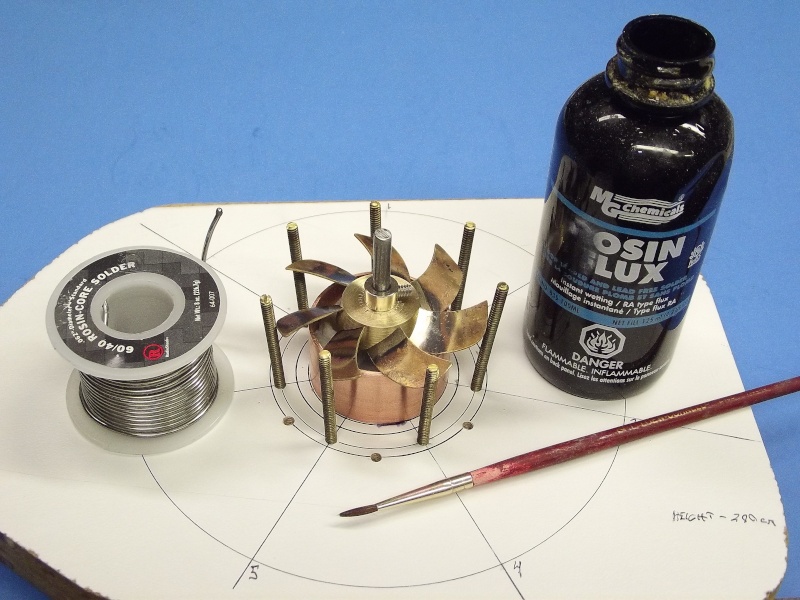
    Hello anybody out there..

    I took the boat down to the local duck pond. Wet humid sticky day. Still without a prop shaft. (that has since arrived) No ducks, plenty of water from last weeks deluge. Good opportunity to look at the trimming, and take some photos of how she looks in the water. I had put some foam and ballast lead in along the lines of how It usually is positioned according to the experience I have with these boats. Big chunk of foam in the front and squeeze as much in the back at I can.

    Initially when she first went in the water she was stern heavy. Took it out and shifted weight up front then squeezed even more foam in the stern. Lower cubic area in the stern means less buoyancy anyway. I think she looks quite nice in the water and I can't wait to see her under power. The photos of her from the 7 o'clock position look like some of the main photos taken of the real boat.


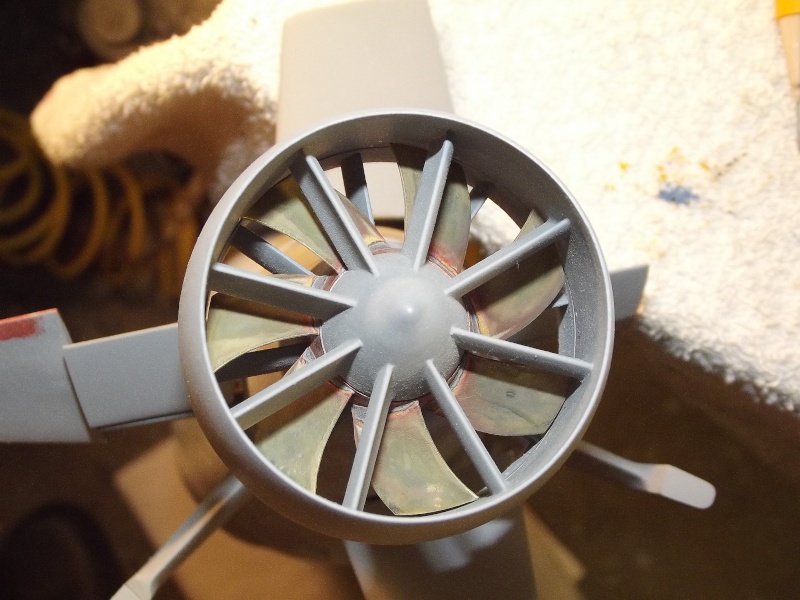
    Hopefully the next pic's will be of her underway and underwater. As mentioned earlier I have a kit in production if there's interest. I'm also trying to get a website up and running.


    Any comments appreciated.

    David h
    Click image for larger version

Name:	Mike (20)03.jpg
Views:	129
Size:	73.4 KB
ID:	112307 Click image for larger version

Name:	overhead view mike.jpg
Views:	110
Size:	25.5 KB
ID:	112315 Click image for larger version

Name:	Mike (21)04.jpg
Views:	158
Size:	66.0 KB
ID:	112308 Click image for larger version

Name:	Mike (22)05.jpg
Views:	133
Size:	76.7 KB
ID:	112309 Click image for larger version

Name:	Mike (23)06.jpg
Views:	104
Size:	58.5 KB
ID:	112310 Click image for larger version

Name:	Mike (24)07.jpg
Views:	117
Size:	70.2 KB
ID:	112311 Click image for larger version

Name:	Mike (26)09.jpg
Views:	133
Size:	74.8 KB
ID:	112312 Click image for larger version

Name:	Mike (25)08.jpg
Views:	106
Size:	54.9 KB
ID:	112313 Click image for larger version

Name:	Mike (27)02.jpg
Views:	128
Size:	55.3 KB
ID:	112314

    Comment

    • greenman407
      Admiral
      • Feb 2009
      • 7530

      #167
      Fantastic Job Sir! Anyone who can build a sub from scratch, has got more than the normal amount of scruples if you ask me. LOOKING FORWARD TO SEEING IT UNDER POWER
      IT TAKES GREAT INTELLIGENCE TO FAKE SUCH STUPIDITY!

      Comment

      • HardRock
        Vice Admiral
        • Mar 2013
        • 1609

        #168
        Looks great Dave. You're going to have to bit the bullet though and PAINT those masts!

        Comment

        • trout
          Admiral

          • Jul 2011
          • 3658

          #169
          Looks amazing in the water! You have created a wonderful sub!
          If you can cut, drill, saw, hit things and swear a lot, you're well on the way to building a working model sub.

          Comment

          • He Who Shall Not Be Named
            Moderator

            • Aug 2008
            • 13421

            #170
            Will you PLEASE learn how to scribe a straight line, and do so at a consistent depth!. Your scribing is TERRIBLE. You need to hear this. You need to know more on how to do this, just say so and I'll spoon-feed you till you can do it.

            You're prolific; you build fast; you do good tooling; you produce reasonable GRP and resin parts. Your scribing SUCKS.

            M
            Last edited by He Who Shall Not Be Named; 01-22-2016, 09:22 PM.
            Who is John Galt?

            Comment

            • Davidh
              Captain
              • Nov 2010
              • 719

              #171
              Click image for larger version

Name:	IMG_3034.JPG
Views:	136
Size:	12.6 KB
ID:	112762 Click image for larger version

Name:	IMG_3036.JPG
Views:	104
Size:	17.1 KB
ID:	112763 Click image for larger version

Name:	IMG_3037.JPG
Views:	103
Size:	18.0 KB
ID:	112764 Click image for larger version

Name:	IMG_3039.JPG
Views:	100
Size:	33.5 KB
ID:	112765 Ok,

              So everybody probably thought this build log was dead. I could have left it there, however I don't give up that easily. OK David so, ..hit me for more scribing gems, just remember I haven't got Renshape, as much as I would like it, the nearest supplier is in WA. (perth) 4000 kms away` and I can't seem to get a reasonable quote for the stuff. So yes, it's wood I'm dealing with...
              Mike has only had one or two outings, She did manage to successfully get caught in algae in Scott's pond!

              Propellers...

              The Mike has a really unusual Propeller arrangement as mentioned previously here. The only other subs that have the same arrangement that I can think of is the Victor III class. It is made up of two 4 bladed propellers skewed at about a 45 degree angle to each other. They are not contra rotating. You are not going to be able to find this screw off the shelf so to speak. So a fabricated one is in order. I will be making it for production so I will be making silicon moulds of this sucker. It will be four pieces in the overall moulds as I am creating the design as two separate propellers. It will give me a good opportunity to start using my new lathe. Building a propeller is a skill area I have wanted to develop for a long time. My last attempt at building a prop was my pumpjet propulsor design for my Astute from 2011. That was spectacularly ..average..

              I have been looking at Bart (BWI)'s write up on his Akula class and looking intently at his propeller design and fabrication. Given me lots of ideas and thoughts about how to do it myself.

              So I have started to turn a nice piece of brass on the lather to make the rear hub. I drilled a 3.5mm hole in the rear end and then rotated my chuck to cut a thread with a 4mm tap. This gave me the thread I need. Then parting off. I am finding this is probably the least enjoyable part of the exercise. Still it's easier to part brass that mild steel.

              Once this is turned up to the right diameter then making the brass Blades is the next step. These have also been cut out of brass and given a twist with lemon.. Like BWI I have made a jog to hold the blades in place whilst soldering them. I have learnt through experience that without one you are trying to solder one blade in and the heat goes to the other side and the opposite one that you spent all that time getting right, literally drops out... You have to have some kind of jig for this job...

              more later....

              Dave H

              Comment

              • HardRock
                Vice Admiral
                • Mar 2013
                • 1609

                #172
                Nice jig. Where is the site for the Mike?

                Comment

                • Davidh
                  Captain
                  • Nov 2010
                  • 719

                  #173
                  Hi Scott,

                  Model kits of Radio Control Submarines. Six kits are on offer. Five are Cold war era Nuclear submarines and one is a World War One U-Boat.. These kits are fibreglass and are scale models of full size vessels.


                  Hope this works. Did you get my text message?

                  Dave

                  Comment

                  • Davidh
                    Captain
                    • Nov 2010
                    • 719

                    #174
                    Hi Scott,
                    Hope this works.

                    Model kits of Radio Control Submarines. Six kits are on offer. Five are Cold war era Nuclear submarines and one is a World War One U-Boat.. These kits are fibreglass and are scale models of full size vessels.


                    Did you get my text message

                    Comment

                    • He Who Shall Not Be Named
                      Moderator

                      • Aug 2008
                      • 13421

                      #175
                      Back for more, huh! I can't beat you into submission? You won't quit, will you!!!!

                      Good!

                      Now, about scribing in wood:

                      What makes wood such a bad substrate for scribing is that it has a grain that will act on a traveling engraving tool differently depending on the aspect of the grain to the direction of tool travel -- going with the grain is easy. Crossing the grain is tough. Engraving a curved line subjects the traveling tool to varying resistance as it makes the curve -- effecting width, and depth of cut. The grain will also pull the tool away from the inside edges of your scribing template.

                      If you're master is wood, fine, what you do is gouge out those areas that will have engraved lines. Make the gouged areas 1/16" deep and 1/8" wide. Come back with some laminating resin and fill those gouged areas and let cure hard. File and sand the plastic areas flush with the surface of the hull. You now have substrate that will be most receptive to the cutting action of the scratch-awl tip.

                      Some tips for a propeller fabrication jig:


                      Who is John Galt?

                      Comment

                      • Davidh
                        Captain
                        • Nov 2010
                        • 719

                        #176
                        Click image for larger version

Name:	_DSC4988.JPG
Views:	125
Size:	45.2 KB
ID:	112866 Click image for larger version

Name:	IMG_3041.JPG
Views:	105
Size:	28.5 KB
ID:	112867 Thanks for the write up David,

                        Learned a lot from that. I have yet to set up a drill / grinder set up at an angle to do the slots for the blades like what you have done there. In a week where I was focussed at least in a model sense on getting the propellers for the mike done, However, I got all fired up to re-tool the Resolution after seeing some efforts done on a 1/96 resolution over at the Subcommittee website. There is a really nice Resolution class taking shape over there and it's inspired to me to address some of the issues that I've discovered with my own...

                        Anyway back to the prop. The jigs that I turned up on the lather have been excellent. I then turned up two brass bosses, one, the inner shorter one for the inner screw and the outer one with the longer stators attached. Attached a centre drill into the live tailstock and drilled a 3.5 mm hole. then placed an M4 tap in the tailstock and manually turned the lathe chuck onto the tap to create a nice 4mm thread for the prop shaft. Worked well.

                        Then it was time to mark out and cut the angled grooves for the blades to slot into the boss. This was marked up and carefully done with a hacksaw. I know I need a proper set up and eventually will get something up and running. Once this was done it was simply the case of putting all the blades and boss into the jig and soldering. It has taken me a while to get the hang of soldering like this. the right solder makes a difference and with a clean soldering iron and the right temperature it was staring to flow. I am still not great at soldering and there would be the need for some sanding and filing here and there. Eventually when I am happy I will look into the making of the silicon moulds for these two props.

                        David H
                        Click image for larger version

Name:	_DSC4990.JPG
Views:	99
Size:	46.0 KB
ID:	112863 Click image for larger version

Name:	_DSC4992.JPG
Views:	101
Size:	47.3 KB
ID:	112864 Click image for larger version

Name:	_DSC4999.JPG
Views:	100
Size:	49.8 KB
ID:	112865

                        Comment

                        • Davidh
                          Captain
                          • Nov 2010
                          • 719

                          #177
                          Thanks for the write up David,

                          Learned a lot from that. I have yet to set up a drill / grinder set up at an angle to do the slots for the blades like what you have done there. In a week where I was focussed at least in a model sense on getting the propellers for the mike done, However, I got all fired up to re-tool the Resolution after seeing some efforts done on a 1/96 resolution over at the Subcommittee website. There is a really nice Resolution class taking shape over there and it's inspired to me to address some of the issues that I've discovered with my own...

                          Anyway back to the prop. The jigs that I turned up on the lather have been excellent. I then turned up two brass bosses, one, the inner shorter one for the inner screw and the outer one with the longer stators attached. Attached a centre drill into the live tailstock and drilled a 3.5 mm hole. then placed an M4 tap in the tailstock and manually turned the lathe chuck onto the tap to create a nice 4mm thread for the prop shaft. Worked well.

                          Then it was time to mark out and cut the angled grooves for the blades to slot into the boss. This was marked up and carefully done with a hacksaw. I know I need a proper set up and eventually will get something up and running. Once this was done it was simply the case of putting all the blades and boss into the jig and soldering. It has taken me a while to get the hang of soldering like this. the right solder makes a difference and with a clean soldering iron and the right temperature it was staring to flow. I am still not great at soldering and there would be the need for some sanding and filing here and there. Eventually when I am happy I will look into the making of the silicon moulds for these two props.

                          David H

                          Comment

                          • He Who Shall Not Be Named
                            Moderator

                            • Aug 2008
                            • 13421

                            #178
                            Not a bad looking propeller there, Dave. You're learning. If you stick with this Craft you'll eventually accumulate the tools needed to match your ever growing talents. Keep at it. You are tenacious!

                            M
                            Who is John Galt?

                            Comment

                            • Davidh
                              Captain
                              • Nov 2010
                              • 719

                              #179
                              Thankyou David,

                              Once again at it but at the tail end of this task. The two sets of four mould pieces have been created and the first moulded parts have come out.
                              As mentioned this propeller is a two piece proposition which means that four mould halves will be needed. These moulds are a first for me as I have never moulded a round mould shape and never created a mould with the pour vents in the middle of a mould and not split down a part line. This will be a little different. Also the propeller is probably the most complex shape that you could mould so 'I have intently looked at how HWSNBN does things and effectively copied it.

                              So I have taken a plywood board and drilled a hole in it to place the M4 metric thread that will be the prop shaft. Insert bolt up from underneath and into underside of the propeller hub. Screwed the propeller down onto bolt until tight against surface. It is key that at this stage the bolt sticks up a little so that the mould will take the bolt profile for later on as the bolt would eventually act as an insert. Once done I would take some modelling clay and place around underside of the blades. The clay is packed up underneath each blade as it angles upwards. The clay is then angled away and down at about a 45 degree angle so that It makes a triangular profile. I extended this triangular profile out form the blades to where it would connect with the PVC pipe that would create the boundary of the pour. I then placed little brass inserts along the ridge of the clay just touching the tip of the blades and heading out towards the perimeter. These tiny little brass rods would mould the channels for air vents out side ways and would split easily with the mould line.

                              Once the clay was moulded around the prop then I drilled register holes all around the rest of the flat base. I also placed a further piece of clay down to create a unique point of reference so that I can easily align up the two halves because they kind of look similar. After this all that remained was the pour and wait.

                              Once the first mould side is done then I wold need to look at developing the pouring vents. Having never made a prop mould before would take a little time working out the vent / pour arrangement. This intricate shape really would be a nightmare for air bubbles. The lower photos show the first half mould complete and the arrangement for the pouring vent and an air vent. I had to glue small brass tubes to either side of the back of the prop hub. At the top of these tubes I places some tapered clay. As the second mould is poured the silicon would rise up along the brass vents and around the tapered clay, when set these clay bulges would act as funnels allowing the fine dribble of polyurethane to easily flow into the mould.

                              David H
                              Click image for larger version

Name:	_DSC4996.JPG
Views:	129
Size:	54.0 KB
ID:	113001 Click image for larger version

Name:	_DSC5001.JPG
Views:	101
Size:	50.2 KB
ID:	113002 Click image for larger version

Name:	_DSC5004.JPG
Views:	99
Size:	49.3 KB
ID:	113003 Click image for larger version

Name:	_DSC5005.JPG
Views:	98
Size:	48.5 KB
ID:	113004


                              Comment

                              • Davidh
                                Captain
                                • Nov 2010
                                • 719

                                #180
                                Hello All,

                                With the bottom mould created and the propeller in place the vents arranged, the upper mould could be created by pouring silicon into the PVC pipe that makes the outer part of the mould. when the mould was cured it was simply a case of pulling the mould from the top and then cleaning out the clay that created the pouring spout. Removing the two brass sprues and then extra brass rods out the sides for the air vents.

                                Once this was done and the overall mould cleaned and trimmed of excess silicon then a spray of Polyurethane release agent would them make the moulds ready for use. As mentioned I am in the process of getting hold of some vacuum equipment to rid the urethane mix of air bubbles. In the meantime I have to be careful how I go about a pour to minimise the amount of bubbles that form. We have had very humid and hot weather lately. Sydney gets very hot in January - February as summer finishes off however we have had very hot weather (over 30 degrees) up until about a week ago and it's march. We should be well and truly into autumn. Sydney also gets very humid and this plays havoc with polyurethane moulding. It starts bubbling up almost immediately. Don't cast polyurethane in humid conditions.

                                So I timed my casting weather to minimise my incidence of bubbling. After pouring and letting cure it became evident that I would need to increase the numbers of vent holes. the air bubbles were congregating along the top of the blades at the highest point on the moulds. So Drilling some extra holes along the top edge of the blades and certainly minimised the number of bubbles it has however created some little sprues that you need to cut out.

                                Once both the propeller parts are removed from the mould I can lightly sand them down and screw them onto a shaft. The slight flex in the urethane allows the blades to give a little as they but up against each other as you wind them together until a 45 degrees relationship is met.

                                David H


                                Click image for larger version

Name:	_DSC5037.JPG
Views:	103
Size:	48.3 KB
ID:	113170 Click image for larger version

Name:	_DSC5036.JPG
Views:	95
Size:	49.1 KB
ID:	113171 Click image for larger version

Name:	_DSC5038.JPG
Views:	94
Size:	43.9 KB
ID:	113172 Click image for larger version

Name:	_DSC5039.JPG
Views:	97
Size:	53.3 KB
ID:	113173 Click image for larger version

Name:	_DSC5000.JPG
Views:	92
Size:	72.8 KB
ID:	113174

                                Comment

                                Working...