CA glue over filler?

Collapse
X
 
  • Time
  • Show
Clear All
new posts
  • wlambing
    Commander
    • Nov 2020
    • 291

    CA glue over filler?

    David,
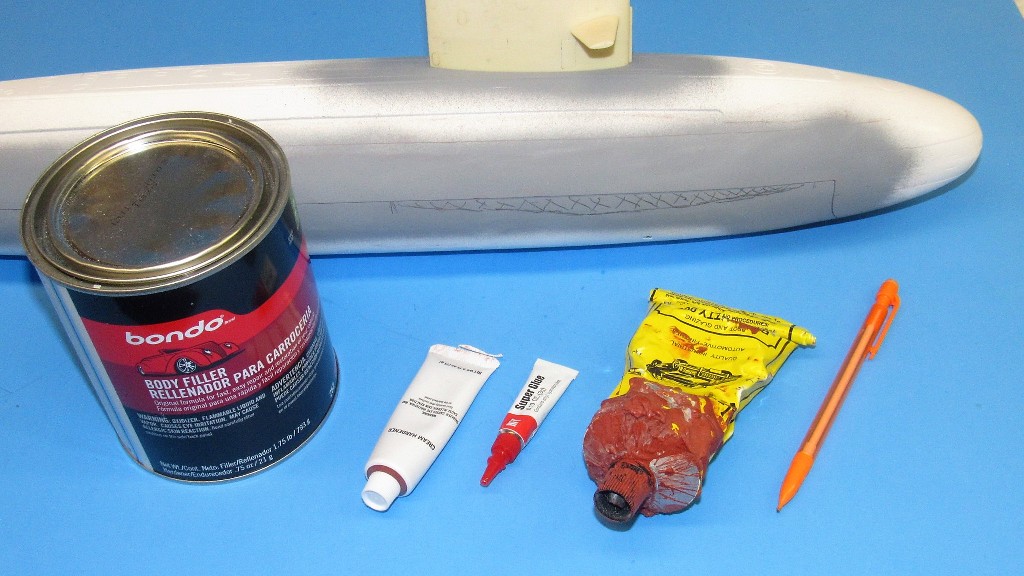
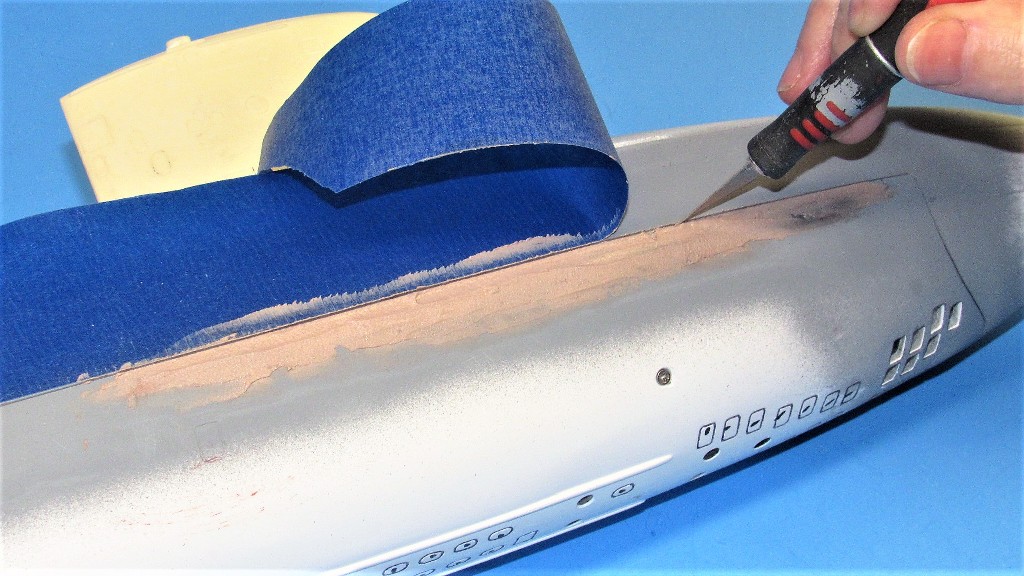
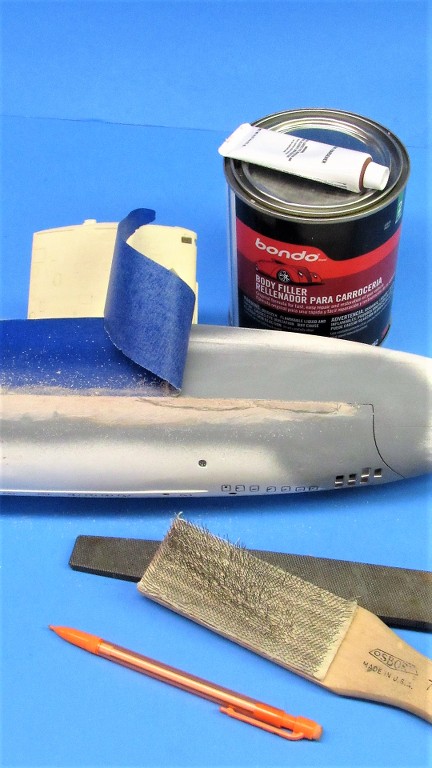
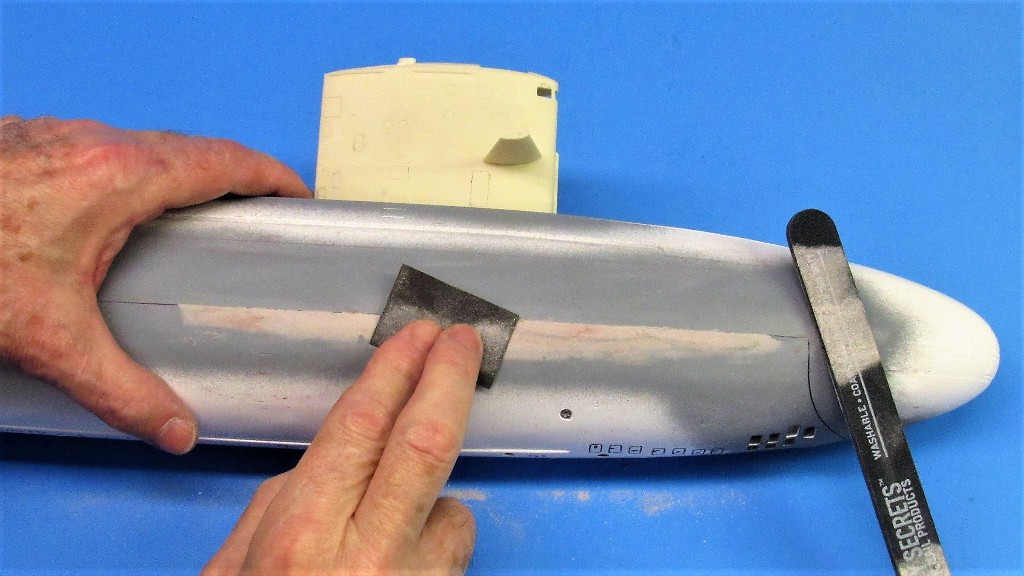
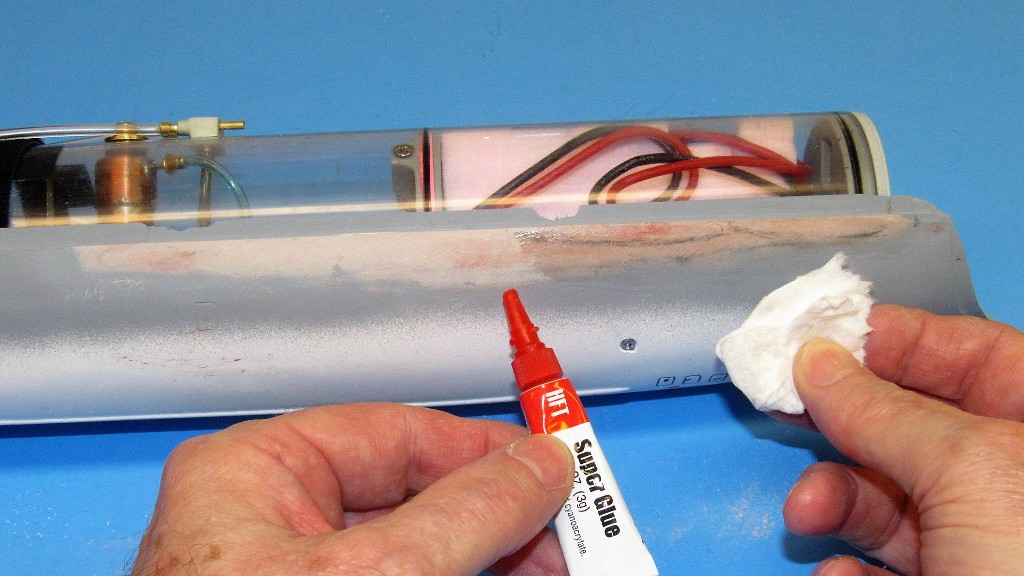
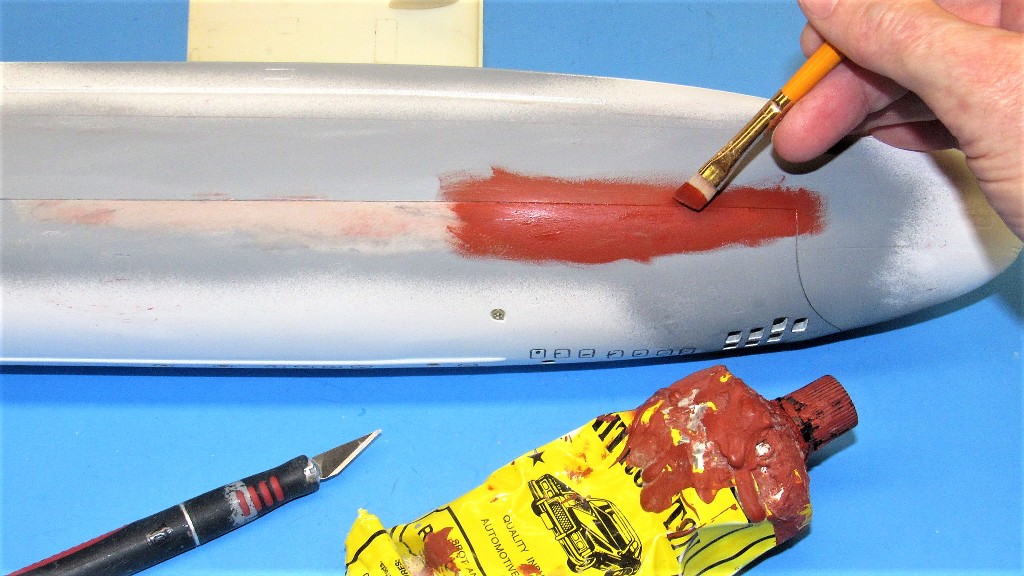
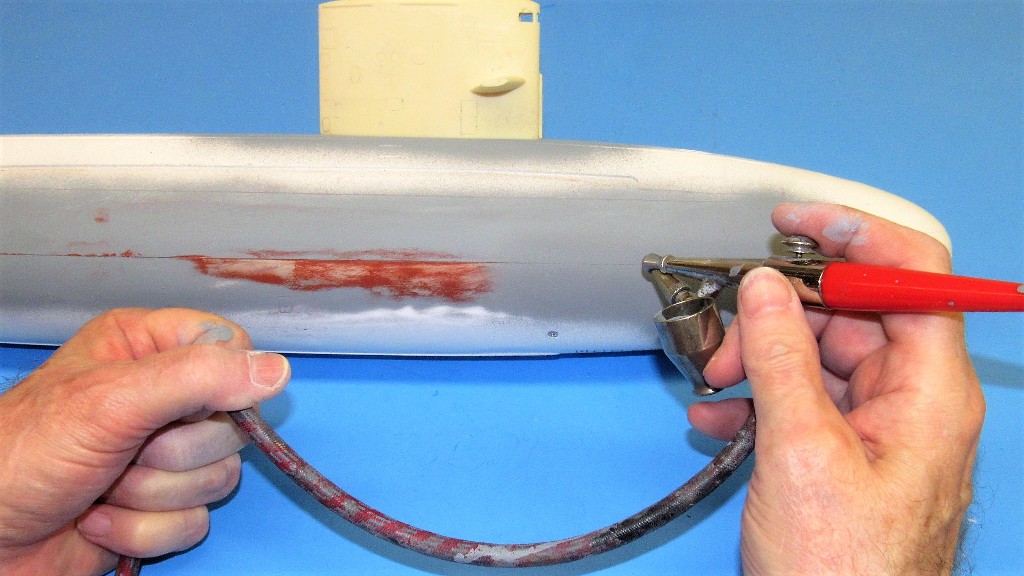
    I have seen your advice regarding application of thin CA over filler, with a quick wipe down following. Is that to strengthen the Nitro-Stan, or just a sealer? Does that also apply to other fillers? I pretty much exclusively use Evercoat F27. This is a very fine grain, extremely hard filler that sands well and is pretty smooth when finished off. Bondo looks like a rock beach in comparison!

    Thanks,

    Bill
  • He Who Shall Not Be Named
    Moderator
    • Aug 2008
    • 12253

    #2
    I only overcoat a polyester type two-part filler (Bond, Evercoat, and others) with the CA after the filler has been sanded to shape. It's perfectly fine to prim over the CA (which acts as a water absorption barrier on the otherwise porous 'Bondo' type material), but you have to wet sand the surface of the CA surface so primer and paint will stick better.

    Click image for larger version

Name:	IMG_0056.JPG
Views:	142
Size:	48.4 KB
ID:	159529
    Click image for larger version

Name:	IMG_0061.JPG
Views:	129
Size:	52.3 KB
ID:	159530

    No need to CA over the tight-grained air-dry putties like Nitro-Stan.

    David
    Who is John Galt?

    Comment

    • He Who Shall Not Be Named
      Moderator
      • Aug 2008
      • 12253

      #3
      This post to Bill's thread is amplification of the quick-and-dirty answer to his questions about over-coating a two-part filler with a protective coating of cyanoacrylate (CA) adhesive.

      As most of the two-part automotive fillers produce a rather grainy surface finish -- a finish subject to water absorption if not totally filled with primer and paint -- it is of particular importance to those of us who run vehicles totally submerged in water, for extended periods of time (isn't that right... Ken!), to ensure that the surface of the worked filler is sealed before progressing to putty and primer work.

      My current project, getting a 1/96 BLUEBACK kit put together and partially ready for a friend, demanded a re-contouring of the upper and lower hull longitudinal edges as they got slightly out of alignment after I installed the WTC saddles, and WTC. This problem presented the perfect opportunity to document how to protect said filler against water entry.

      The problem area in question is high-lighted by pencil hash-marking the lower hull near where its longitudinal edge meets that of the upper hulls edge; there was a bit of over-bite to the upper hull. The miss-match is too deep to address with a slow hardening, air-dry putty. No. This was a job for the quick-curing, two-part automotive filler, Bondo (or any other of the Bondo like products out there in car-restoration land).

      Four steps are followed to get the two edges back into alignment: First is to fill the sunken half hull with filler and file and sand it to proper contour. Second, is to overcoat the surface of the Bondo with thin formula CA to produce a waterproof barrier over this porous filler, give the CA coating a light sanding to produce some 'tooth'. Third is to over-coat all that work with a thin layer of air-dry, touch-up putty to fill all file and sanding marks, followed by a wet sanding.

      Then... FINALLY! the work is given a heavy coating of primer.

      Believe it or not, all that work accomplished in under an hour (thank you Black & Decker heat-gun!).


      A small about of Bondo was catalyzed on a palette and putty-knifed onto the hash-marked areas of the lower hull. I had previously laid the edge of some low-tack masking tape above the longitudinal break between hull halves to minimize the filing and sanding work which came next. Here I've temporarily pulled away some of the tape to run the point of a #11 blade into the gap. This to break any bridging of Bondo between the two hull half edges.

      I then hit the Bondo with a heat-gun to quicken the cure of the stuff. 5-minutes of that and I was ready to rock-and-roll with file and sand paper.


      Initial shaping of the Bondo was done with the biggest, ugliest single-cut file I had in the drawer. The cutting was done with a surgeon's touch; just enough pressure to cut the Bondo but not obliterate adjoining areas of the models surface. A file card was used often to clear Bondo chips from the files teeth. Clean cutting tools are efficient cutting tools.


      Putting the big-gun away I switched to a stiff, double-backed #220 grit sanding square, to remove the file marks. I also made use of a #240 grit nailfile for the compound curved areas near the bow. All this cutting was done dry.

      Always file and sand in the direction of the curve, and when dealing with a compound curve, sand in a swirling motion, favoring the dominant direction of the curve.


      The Bondo 'ed areas were then given a heavy coating of CA adhesive. This seals the surface of the Bondo and greatly strengthens the upper edge against chipping or other type damage resulting from forced trauma, typically the joining/separation of the two hull halves.

      The CA cures quickly so you have to be quick with the wiping rag!

      (One hour later at the local Doc-in-a-box: "hey, can someone remove this submarine looking thing from my fingers?").

      The hardened CA skin was then wet sanded with #400 to produce some tooth that will aid greatly to the adhesion of the later putty and primer layers.


      To fill the inevitable tool marks and missed dings I brush on a very thin layer of Nitro-Stan air-dry, touch-up putty.

      Don't have any? GET SOME! Automotive refinishing supply houses are your friends!

      Some more heat-gun action and the putty is dry enough to wet sand in 5-minutes.


      The putty is wet-sanded with #400 grit sandpaper.


      ... And primed. All this performed within 60-minutes! Nothing to it fellow air-breathers.


      Who is John Galt?

      Comment

      Working...