Cutting the hull is one thing. Making up the material lost to the cutting blade (known as kerf) is another.I'll address here how to make a straight and true cut using a well controlled diamond wheel saw and how to back-fill the resulting kerf with one of several materials.
Regardless of the material the hull is made of -- polystyrene, wood, or GRP -- cutting the hull is the same process: The hull is secured over a work table so that the hull separation plane (the cut line) is parallel with the work tables surface. Then, using a diamond disc spun by a moto-tool, the horizontal cuts need to separate the upper from the lower hull half are made.
CUTTING THE HULL AND MAKING UP THE KERF WITH PLASTIC STRIP
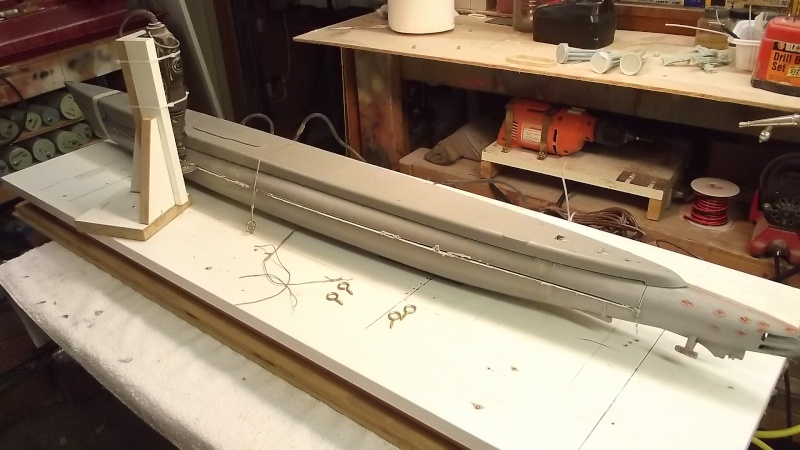
The hull is secured to the work table with straps of heavy twin. under the keel and glued to the work table are strips of #100 sandpaper that keeps the keel from sliding along the table once the twine straps are made up and cinched down. The hull is shimmed till the proposed separation plane is parallel with the surface plane of the work table. Note that the hull cut stops near each securing twine strap -- that material is latter cut with a hand-held hack saw blade after the hull is removed from the work table.
]
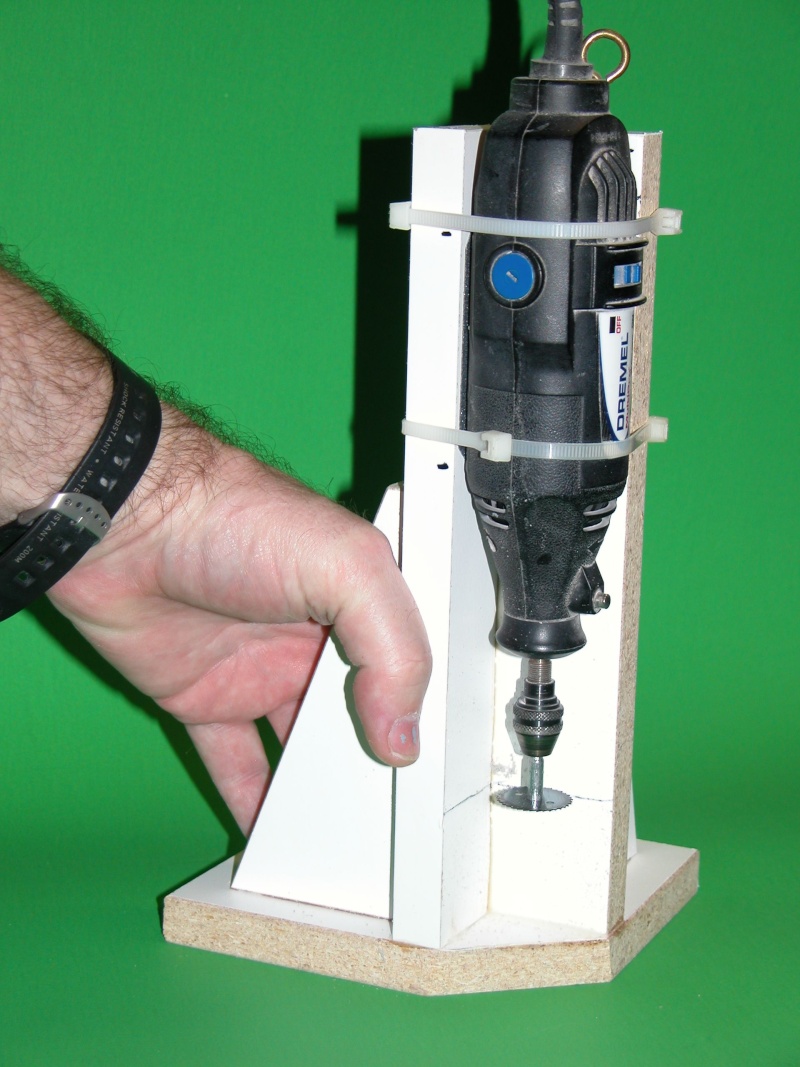
Take a humble moto-tool equipped with a diamond saw wheel, mount the moto-tool into a fixture that holds the blade at a specific height over the work table and horizontal, wax the bottom of the fixture, and you have the means of making a precise equatorial cut around the model submarines hull. As long as the hull is held securely to the work table and the cutting fixture slides easily over the surface of the work table, all is good!
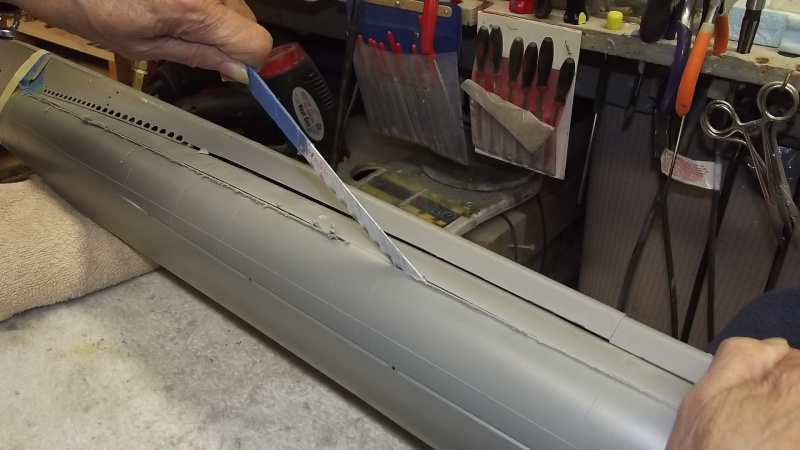
Once all the horizontal hull separation cuts are completed with the diamond saw (less those portions under the securing twine straps), the hull is taken off the work table and the equatorial cut is finished with a hand-held hack saw blade. The required vertical cuts are made with a very thin razor saw (very narrow kerf), separating the two hull halves.
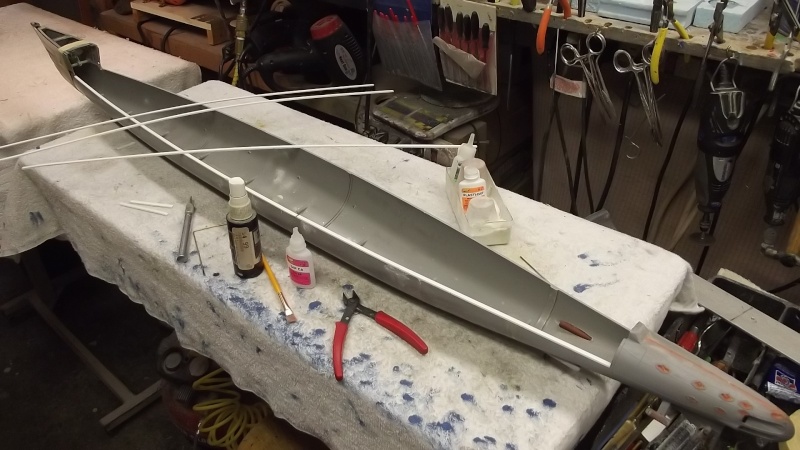
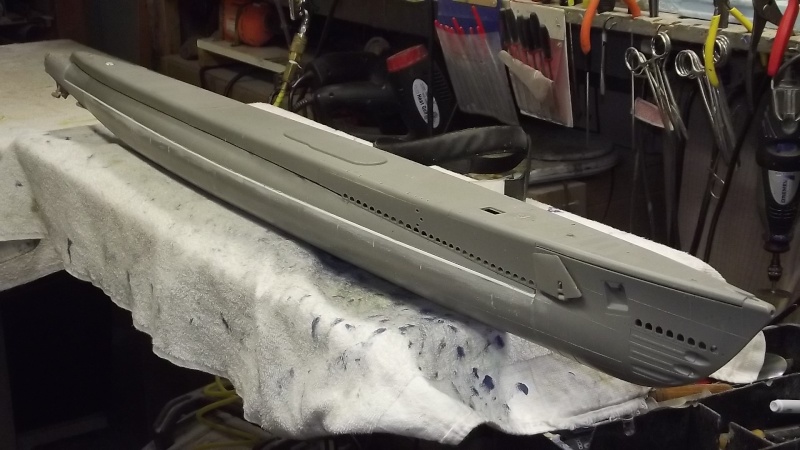
Since the substrate to this Revell 1/72 GATO plastic model kit is polystyrene I elected, with this particular kit, to make up the lost kerf with strips of polystyrene -- thickness of the strip just a bit more than the thickness of the cutting wheel. Got to account for slop. You can either adhere the strip to the hull edges with CA or weld the strips to the hull with a solvent type cement. I'm the impatient type ... I went with the CA.
CUTTING THE HULL AND MAKING UP THE KERF WITH CA REINFORCED BONDO
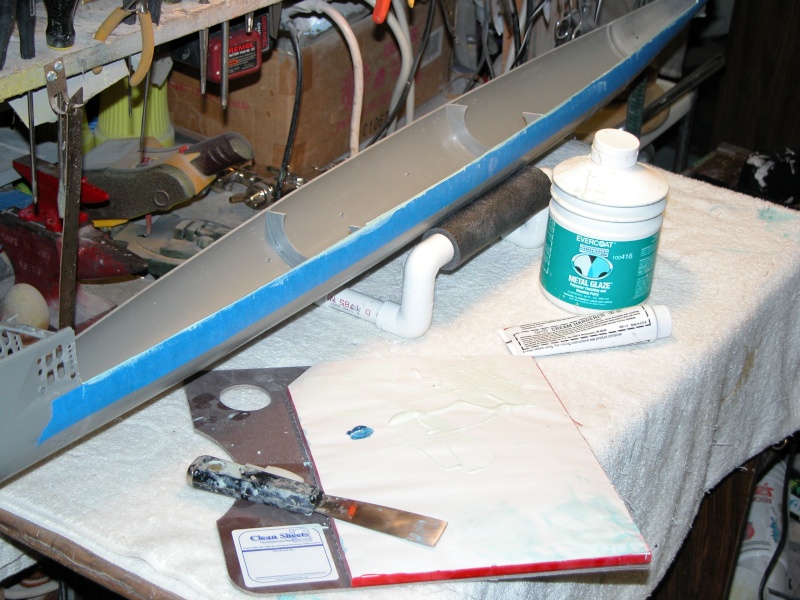
I've assembled four Revell GATO's to date. On this one I went with a different means of making up the material lost to kerf. I laid on masking tape to the outside and inside of the hull, with the upper edge of the tape extending past the edge of the lower hull by about 3/32", the mean thickness of kerf lost to the diamond wheel.
A two part automotive filler was catalyzed and pushed into the space between the two tape strips and left to cure hard.
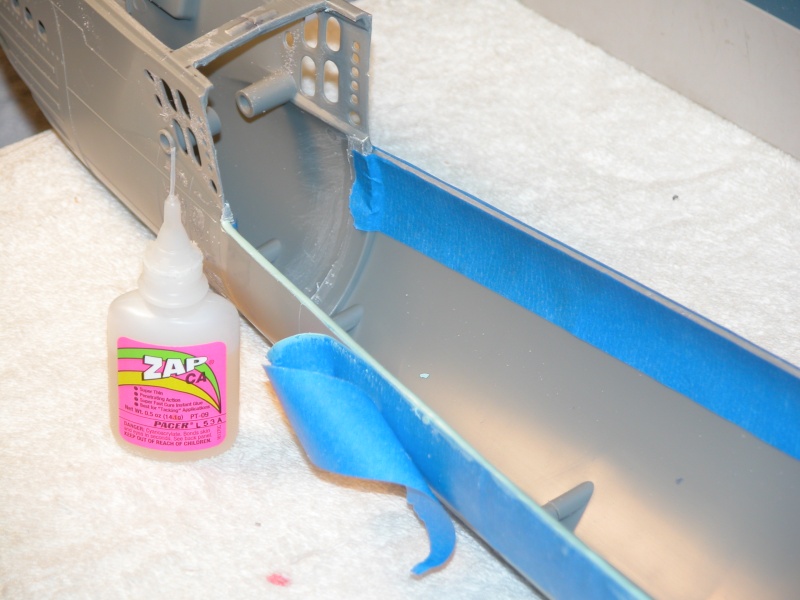
Very carefully, the outboard strip of tap was removed and thin formula CA was applied over the outboard face of the filler. The very porous filler becomes saturated with the CA. The result is an enhanced bond between filler and edge of the lower hull. This thin strip of filler, now bonded to the edges of the lower hull, assumes about the same surface hardness as the surrounding polystyrene.
The inboard strip of masking tape is removed and the CA treatment repeated. The CA also enhances the bond between filler and plastic model.
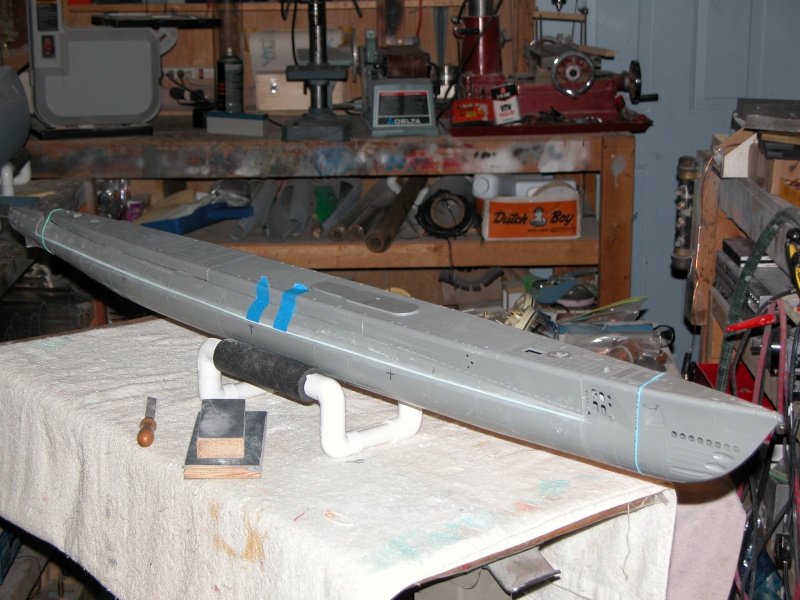
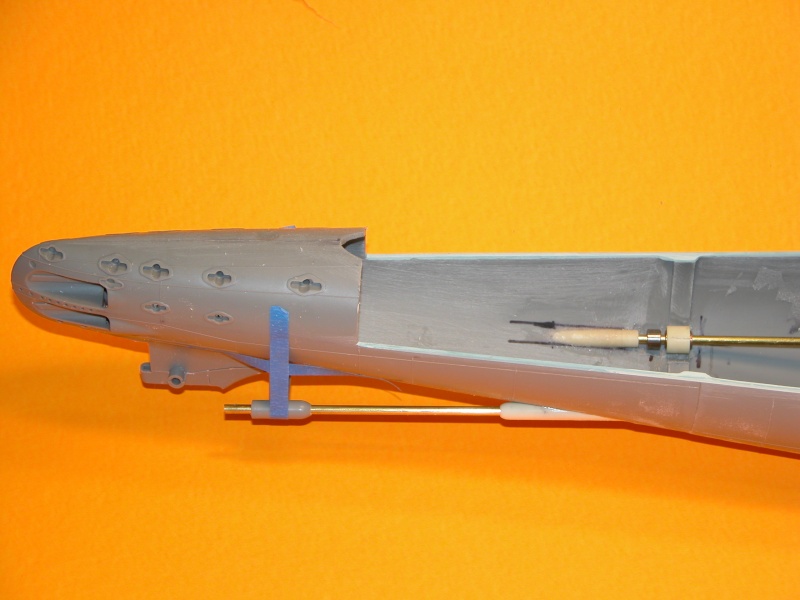
The completed hull separation task. The cuts made and plastic lost to kerf made up with automotive filler strengthened with CA adhesive.
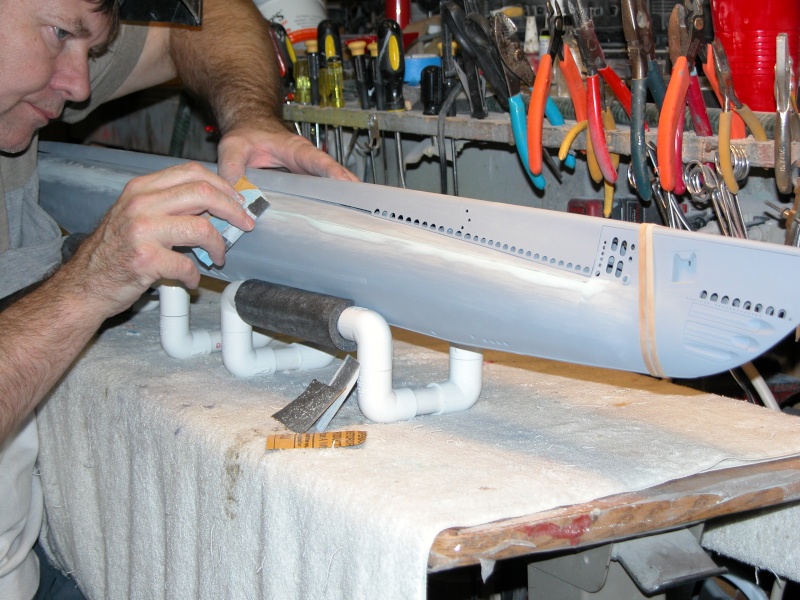
After outfitting the upper and lower hull with indexing tabs, filler was mixed up and applied on and near the seam line between the assembled upper and lower hull. Before the filler cured hard, a knife blade was run along the seam to prevent the filler from sticking the two hull halves together. After the filler cured hard, I went at it with a soft sanding block. This is how you get a tight, barely visible seam between the two hull halves.
And here you have the two hull halves, material lost to kerf built back up to produce a very tight seam between the two. Note the use of sheet styrene indexing tabs, there to insure a tight, well registered fit.
Regardless of the material the hull is made of -- polystyrene, wood, or GRP -- cutting the hull is the same process: The hull is secured over a work table so that the hull separation plane (the cut line) is parallel with the work tables surface. Then, using a diamond disc spun by a moto-tool, the horizontal cuts need to separate the upper from the lower hull half are made.
CUTTING THE HULL AND MAKING UP THE KERF WITH PLASTIC STRIP

The hull is secured to the work table with straps of heavy twin. under the keel and glued to the work table are strips of #100 sandpaper that keeps the keel from sliding along the table once the twine straps are made up and cinched down. The hull is shimmed till the proposed separation plane is parallel with the surface plane of the work table. Note that the hull cut stops near each securing twine strap -- that material is latter cut with a hand-held hack saw blade after the hull is removed from the work table.
]

Take a humble moto-tool equipped with a diamond saw wheel, mount the moto-tool into a fixture that holds the blade at a specific height over the work table and horizontal, wax the bottom of the fixture, and you have the means of making a precise equatorial cut around the model submarines hull. As long as the hull is held securely to the work table and the cutting fixture slides easily over the surface of the work table, all is good!

Once all the horizontal hull separation cuts are completed with the diamond saw (less those portions under the securing twine straps), the hull is taken off the work table and the equatorial cut is finished with a hand-held hack saw blade. The required vertical cuts are made with a very thin razor saw (very narrow kerf), separating the two hull halves.


Since the substrate to this Revell 1/72 GATO plastic model kit is polystyrene I elected, with this particular kit, to make up the lost kerf with strips of polystyrene -- thickness of the strip just a bit more than the thickness of the cutting wheel. Got to account for slop. You can either adhere the strip to the hull edges with CA or weld the strips to the hull with a solvent type cement. I'm the impatient type ... I went with the CA.
CUTTING THE HULL AND MAKING UP THE KERF WITH CA REINFORCED BONDO

I've assembled four Revell GATO's to date. On this one I went with a different means of making up the material lost to kerf. I laid on masking tape to the outside and inside of the hull, with the upper edge of the tape extending past the edge of the lower hull by about 3/32", the mean thickness of kerf lost to the diamond wheel.
A two part automotive filler was catalyzed and pushed into the space between the two tape strips and left to cure hard.

Very carefully, the outboard strip of tap was removed and thin formula CA was applied over the outboard face of the filler. The very porous filler becomes saturated with the CA. The result is an enhanced bond between filler and edge of the lower hull. This thin strip of filler, now bonded to the edges of the lower hull, assumes about the same surface hardness as the surrounding polystyrene.
The inboard strip of masking tape is removed and the CA treatment repeated. The CA also enhances the bond between filler and plastic model.


The completed hull separation task. The cuts made and plastic lost to kerf made up with automotive filler strengthened with CA adhesive.

After outfitting the upper and lower hull with indexing tabs, filler was mixed up and applied on and near the seam line between the assembled upper and lower hull. Before the filler cured hard, a knife blade was run along the seam to prevent the filler from sticking the two hull halves together. After the filler cured hard, I went at it with a soft sanding block. This is how you get a tight, barely visible seam between the two hull halves.
And here you have the two hull halves, material lost to kerf built back up to produce a very tight seam between the two. Note the use of sheet styrene indexing tabs, there to insure a tight, well registered fit.


Comment