Welcome to our forums. For the best in R/C submarine kits, components and accessories, be sure to visit the Nautilus Drydocks
If this is your first visit, be sure to
check out the FAQ by clicking the
link above. You may have to register
before you can post: click the register link above to proceed. To start viewing messages,
select the forum that you want to visit from the selection below.
Hi John,
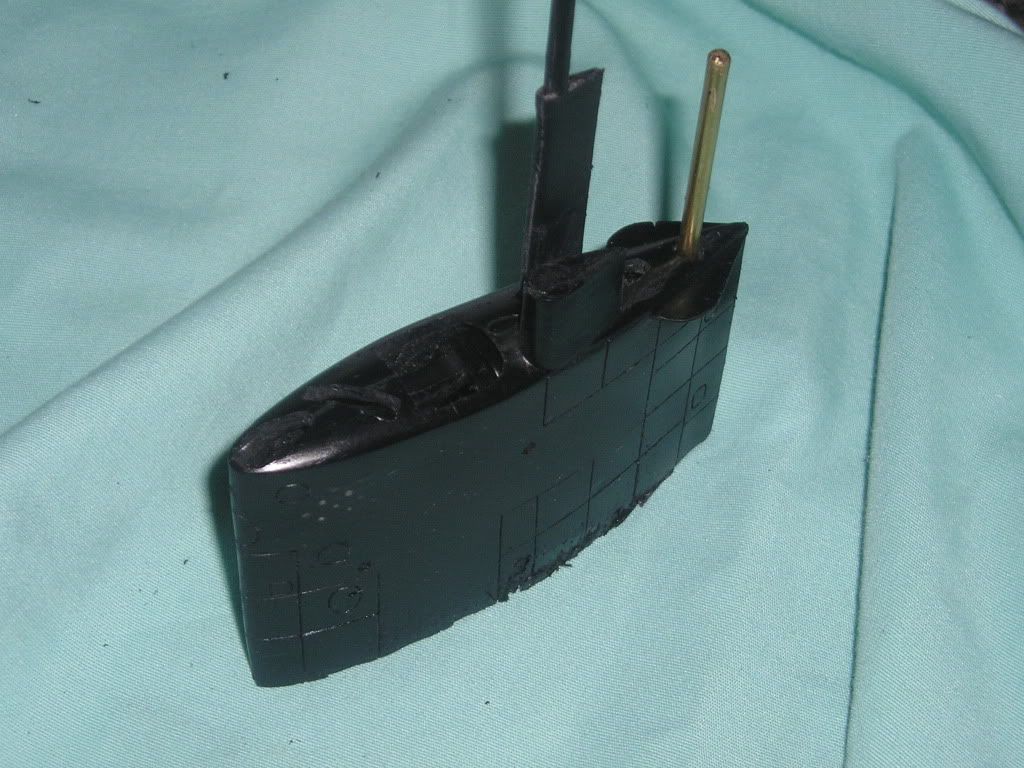
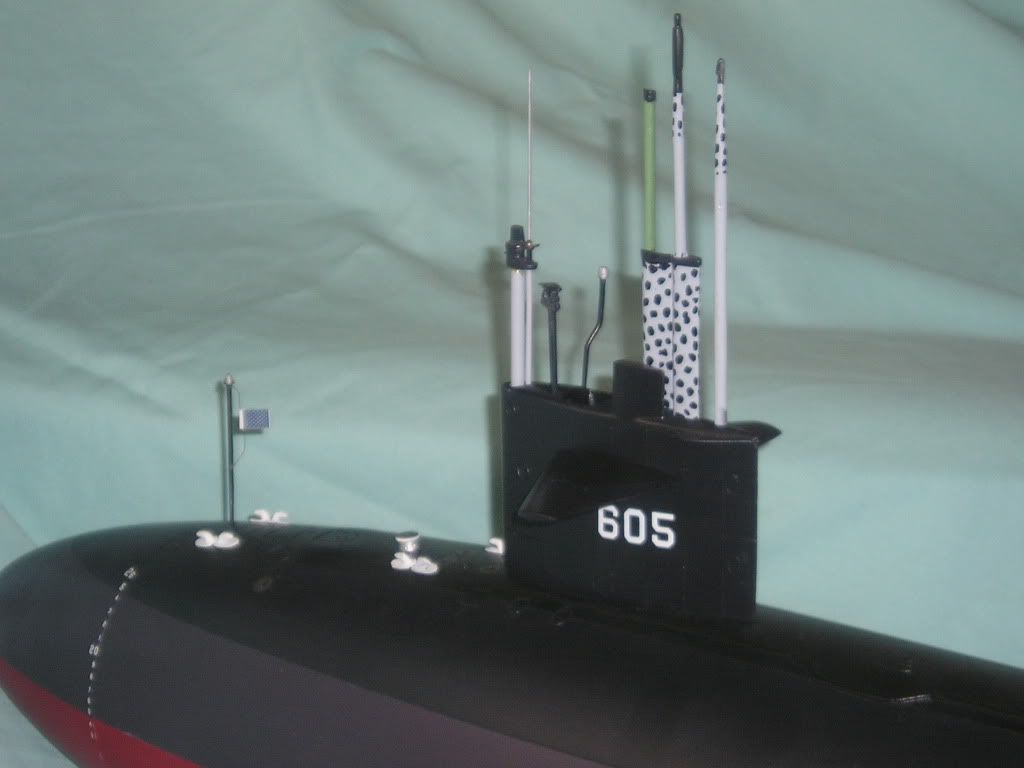
Looking at your bottom picture of the masts from left to right:
The first scope is the new BRD mast, it goes in the mini sail
The old BRD mast, number 7 from the left is not used anymore
Number 10 is the UFF IF antena and is not used anymore as the mini sail takes it spot. That antena is now the wart on top of the snorkel (number 9)
Number 14 the last mast on your picture is the new observation scope. This is now located where the old BRD mast was right in front of the attack scope
Number two is prop dunce cap
three is a hull mounted light
Four and Five are flagstaffs
Six is the helical sail mounted rotating light
Seven and eight are not used on your sail
Ten is the radar
Twelve is the MF/HF antena and still goes where it used to
Thirteen is the attack scope and still goes to the same spot
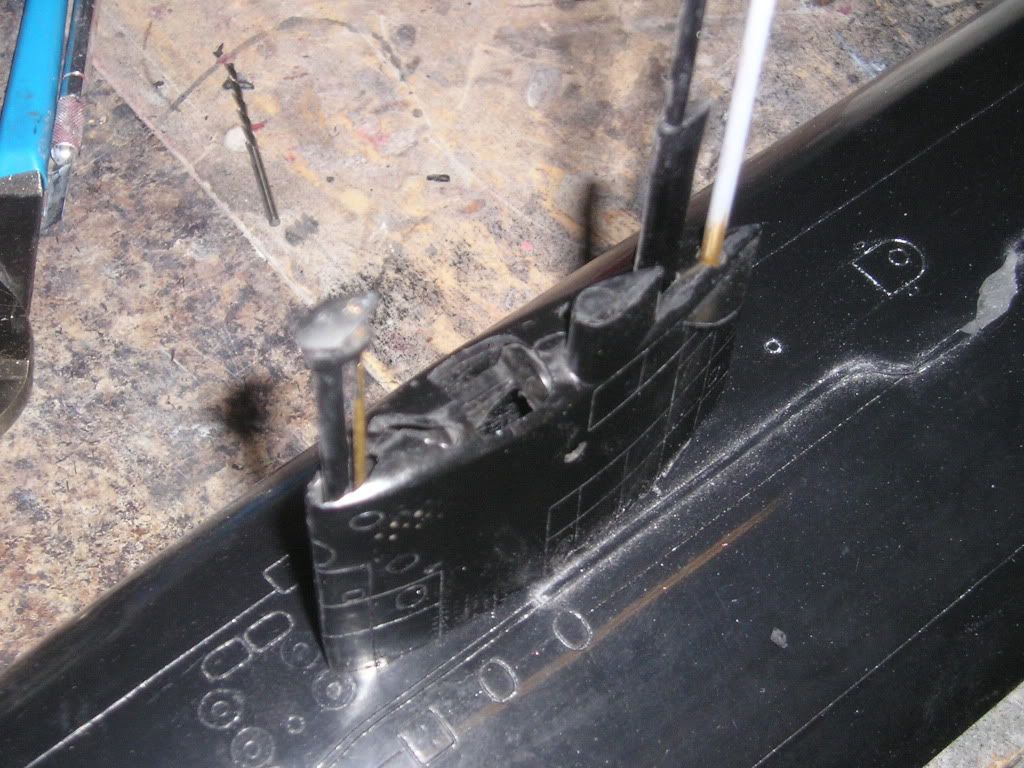
As for the rack itself, it is imperitive that it is installed correctly before going onto tthe sailplane bearings. Cut out all your mast holes on the sail first, you have to ensure that each mast has room to fit into it. The holes should be slightly larger than the scope shaft just like on the real boats.
Next you can install the rack. It should be able to slide in and out of the sail without much trouble. If not you can use some heavy grit sandpaper on a wood block and do a little trimming. You don't want the rack to distort the sail walls if you have to force it in Slide to the top and place your scopes in and check for straightness in relation to the sail. If the angle is off (it was slightly on my Jack) simply remove the rack and block sand along the top and side opposite of which way the scopes lean. Then sand along the bottom and side of the rack on the opposite side. I opened the cockpit on my boat and you have here too. The scope rack should come flush to the front of the cockpit opening
You would not steal a wallet so don't steal people's livelihood.
Think of that before your buy "cheap" pirated goods or download others work protected by copyright. Theft is theft.
Thanks very much John. Yours will be awesome because you have the 79 version kit (cooler looking in my opinion) and you're an ol' hand at this...You're doing good sofar!
The only thing about the 79 that I don't like, if my read of the painting scheme is right is she will be all black and technically without any hull or sail numbers.
Might just add them anyway.
J
John Slater
Sydney Australia
You would not steal a wallet so don't steal people's livelihood.
Think of that before your buy "cheap" pirated goods or download others work protected by copyright. Theft is theft.
Hey Joel,
could you please post a photo of the complete Jack's sail top with all those scopes in place.
Thanks
J
John Slater
Sydney Australia
You would not steal a wallet so don't steal people's livelihood.
Think of that before your buy "cheap" pirated goods or download others work protected by copyright. Theft is theft.
Hi John,
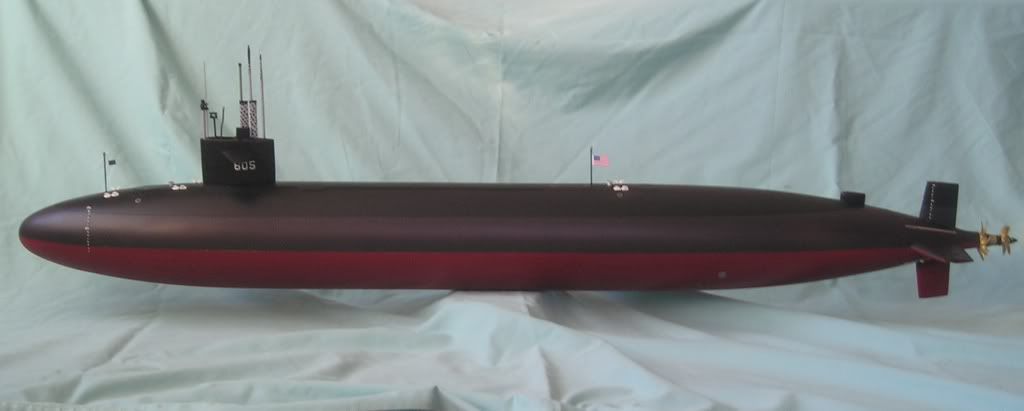
Here's a pic and some pointers on the paint colours
I used Sikkens urethane automotives for all the colours. I had the auto shop mix up the anti foul although I think it needs more brown in it. I have a pint of white and a pint of black and I custom mix my colours. All of the Permits throughout their service lives had red anti foul. The navy only started going all black in the 90's so you will be 100% safe by painting it with antifoul applied. Now, because they wanted anti foul below the water line but didn't want that bright red visible from the air, they painted anti foul up to the surface line then painted the black over top of it. The result was a purple grey colour. I made this colour by mixing about 50% red oxide and 50% very dark grey mix. This very dark grey (almost black) was mixed just slightly lighter than the anti skid which only had a few drops of white in it. That anti skid can also be painted lighter than the very dark grey which is representative of being wet as well. I chose dark and clear coated it to an orange peal (no reducer at all and sprayed farther away than normal). Scopes were a light grey and the leopard spots I just used a black sharpie. I used an automotive urethane clear to seal it all.
The 79s didn't have the big water line bow number or the actual unit name farther aft. They did put the sail numbers on when in port though. Make sure you look at pictures of the real boat, they differed with draft marks and the amount applied...
Joel
Thanks Joel,
I'll have to get some more info of you later on the orange peel effect for the anti-skid. Just beautiful.
J
John Slater
Sydney Australia
You would not steal a wallet so don't steal people's livelihood.
Think of that before your buy "cheap" pirated goods or download others work protected by copyright. Theft is theft.
The USS Plunger is coming along nicely - and its been about a month or so since I updated this thread I hope to have an update in the next day or so.
The excuse - Tales of the South Pacific - been walking in the footsteps of James A Michener's war time experience on Vanuatu's islands and the islands of New Calendonia
If you have an opportunity do so or perahps check out the 1948 Pulitzer Prize for Fiction "Tales of the South Pacific". A ripping yarn and a great work of literature.
See: http://en.wikipedia.org/wiki/James_A._Michener
The USS Plunger work completed thus far:
HULL:
-upper and lower halves mate - indexing lips fore and aft install - side
indexing lips installed.
-Tabs -no need on your hull to use them - its too perfect - yes guys the alignment is that good.
-screw connections fore and aft installed
-rear stabilsers and planes installed
-openings drilled out
-torpedo tube shutter openings installed (the Merriman tubes will telescope inside).
-shaft bearing installed
SAIL:
-upper opennings
-scope rack installed
-screws for mating to hull installed
-bearings installed
-sail planes installed and linkage to low hull
Anyway film or pictures at 11.
Last edited by Slats; 01-29-2010, 05:23 PM.
Reason: added photo
John Slater
Sydney Australia
You would not steal a wallet so don't steal people's livelihood.
Think of that before your buy "cheap" pirated goods or download others work protected by copyright. Theft is theft.
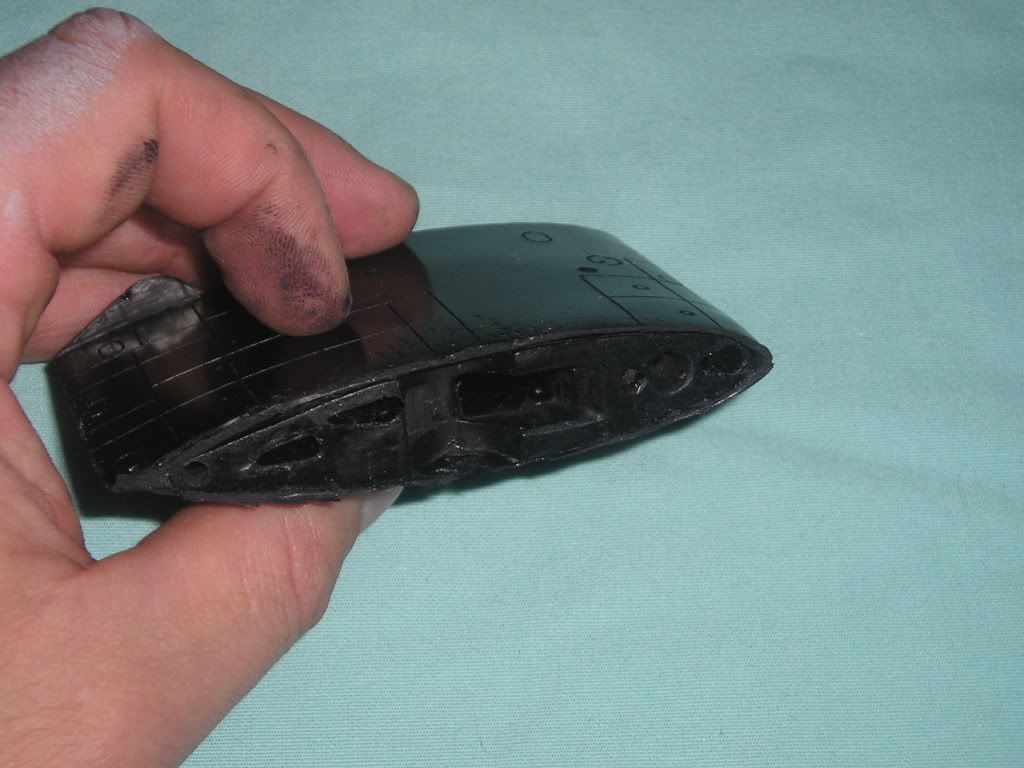
ok the project thus far last time around saw the hull Z cuts being made and affixing the respective upper tail cone to the lower hull, and lower sonar dome to upper.
Further all the lower drain holes were openned up.
Next order of business was to work on the hull indexing lips.
The kit comes with what I call 4 indexing lips.
2 conical type lips that mate with the cross sectional upper tail cone and lower bow dome, and 2 large side indexing lips.
All are important to install correctly and get right. The 2 conical types offer cross sectional support and double duty as the nut holders to take 2 screws to hold the whole thing together and the 2 lateral lips ensure alignment along the length of the hull.
It is crucially important that the surface areas are roughed up to ensure proper adhesion of the surfaces.
If you own a Dremel you might have included in the kit a small oblong type abrasive stone. I make use of this for rough up surfaces. I also use this pet piece of granite.
here you can see a roughed up side indexing lip
Joel reports that the side indexing lips are a tad big (too high) and you can cut these back if you like. I'd aim for around 1/2" being the lip above the lower hull. Any higher and you risk the size of the lips starting to encroach on the round upper hull a tad too much and you might experience some hull bulging. That said the long indexing lips Joel supplies are contoured very much to the hull's shape so it should not be too much of a problem. One area where upper hull bulging is apparent is close to the upper fixed conical stern join. This is remedied after installation of the side lips by tapering the lip downwards about 2-3 inches back from the join.
Other consideration for installing the lips are torpedoes - I pre fitted the exit ports for the fish. The Merriman designed system will telescope inside.
Here you see the allowance I made for the torpedoes in the indexing lips - of course you could simple cut the torpedo exit points through both the hull and the lips. Both ways are valid.
Here you see the lips clamped in place whilst the expoxy drys.
I then follwed Joel's great instructions on installing the shaft bearing. Be sure to get the alignment right. I was planning on using the carbon prop that Joel supplies but the recent purchase of the new Subdriver 3.5" Twin motor single shaft means I'll be heading to brass. If you do get the Raboesch prop for this kit, one of the advantages is a neat locking nut which is concealed behind the props boss. I have the prop on order the Collins Class Raboesch prop is shown here.
Last edited by Slats; 01-29-2010, 05:20 PM.
Reason: Spellin - bulding - should be bulging
John Slater
Sydney Australia
You would not steal a wallet so don't steal people's livelihood.
Think of that before your buy "cheap" pirated goods or download others work protected by copyright. Theft is theft.
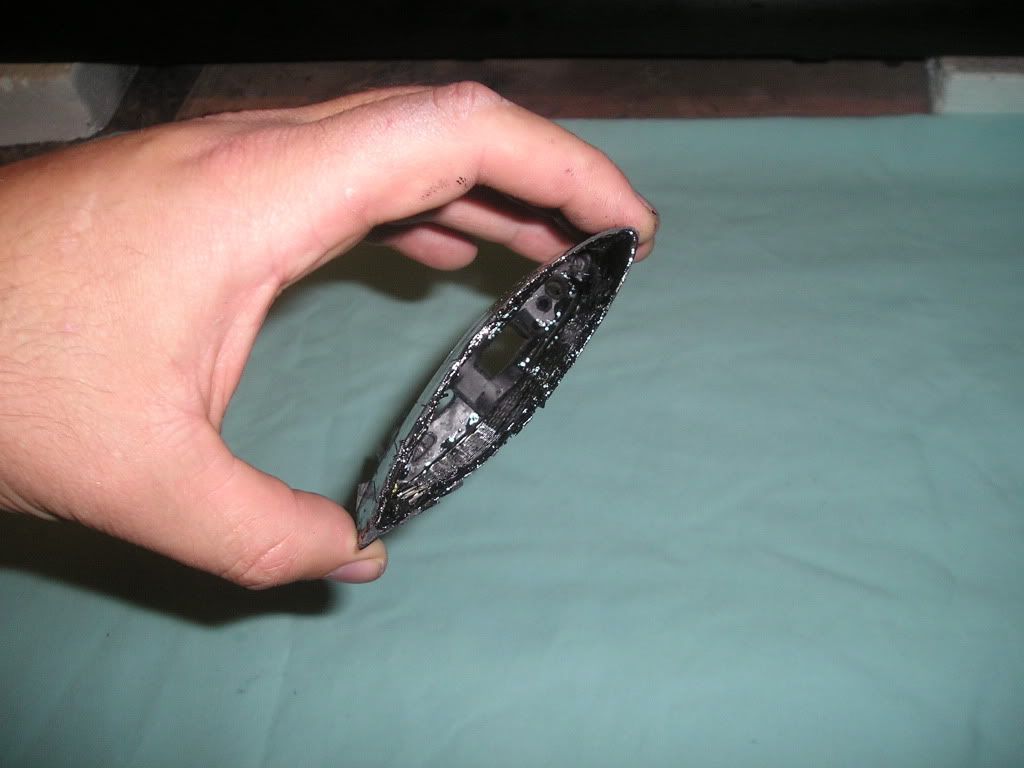
For those who are interested here are the torpedo exit tubes I made from some K&S Brass tubing.
At this stage in the assembly the plans call for the installation of some tabs into the upper hull to keep and hold true the hull alignment. Joel supplies these and boy over the years I wish I had thought of using something similar with some of the hulls I have worked on. In fact David's Alfa Cabal report shows the use of these well. Its a big call then when I say whilst I appreciate their inclusion in the kit, I cannot see the use with Joel's Permit. I have never had a more perfectly manufactured submarine hull period.
At this stage the main hull assembly is done save for appendages, sail, and inner WTC supports.
The next order of assembly is the stern planes and rear horizontal supports / stabilsers. Take your time here.
Joel includes stainless screws with allen key heads that serve as the outer axel through the plane and support structure, an inner brass piece goes through the planes most inward section and through the hull bearing to mate with a control U bracket / horn. Note very well that this inner brass piece is installed from inside the hull. You will need long nose pliers for the job.
The bearings are the first bits installed by drilling out 5/32" holes at the dimple marks on the hull - also check the plans.
You can apply a drop of CA to the brass part of the bearing and push fit it in place. You should of course check the aligment of both bearings before any CA is applied.
Here you can see the bearings in place and the hull roughed up to bond with the horizontal fixed stabilisers.
As an addition to the bonding process I added a brass tabs into the stabilsers and drilled mating holes in the hull - probably overkill on my part.
Joel recomends you expoxy these in place I used Resin loaded with GRP strands - either method is fine, BUT roughing up both the inner stabiliser surface and the hull is crucial.
Here you see the installed rear planes in obvious need of a clean up - as is the whole boat.
John Slater
Sydney Australia
You would not steal a wallet so don't steal people's livelihood.
Think of that before your buy "cheap" pirated goods or download others work protected by copyright. Theft is theft.
I'll be getting back into this assembly very soon - been otherwise fully occupied dealing with nanny state issues surrounding the hobby in Australia.
John Slater
Sydney Australia
You would not steal a wallet so don't steal people's livelihood.
Think of that before your buy "cheap" pirated goods or download others work protected by copyright. Theft is theft.
Heading down the home stretch
just need to pop in a WTC get a ballasted and do some final detailing.
J
John Slater
Sydney Australia
You would not steal a wallet so don't steal people's livelihood.
Think of that before your buy "cheap" pirated goods or download others work protected by copyright. Theft is theft.
next up sail plane linkage - film (thanks to the Camera being fixed) in a day or so.
J
John Slater
Sydney Australia
You would not steal a wallet so don't steal people's livelihood.
Think of that before your buy "cheap" pirated goods or download others work protected by copyright. Theft is theft.

 Tweet
Tweet


Comment