-
Alec, please forgive me......but David started it with those pictures (said with an obnoxious little brother voice). -
Start another thread ... we're hijacking Alec's good work here. Have you decency, sir! ... Hurumph!Leave a comment:
-
Alec: Right you are, sir. Got to follow through on my promise to Mamas. The flu season put us back a bit, but we're over that and busy now catching up. Tom: demonstrating how to 'learn' specific weathering techniques (application and mediums) on a test-article before committing to the actual model.Leave a comment:
-
David,
The last two pictures of your set of 5, what are you showing and trying to tell us?
Alec,
Nice techniques! Thank you for sharing. She looks ready to go!Leave a comment:
-
Thank David and to be fair you do have a bit on your plate... One of which is the stingray sd for mamas's future kit....Leave a comment:
-
Beautiful. Yes, flash-photography on a weathered model at close range renders a much removed form reality picture than the MK-1 Mode-0 eye ball! This is great stuff, Alex. I hate you! You beat me! This is how far I've got with my paint-job:Leave a comment:
-
I reckon I have take almost two dozen pictures trying to get the right ones. Sadly I have to do the photography after dark so the flash tends to over accentuate on some of the shots... BLUSHER
I forgot to mention that all the masts are painted but that is really stating the obvious a bit :wink::wink: Also before any clear top coats are done I always go over the decals with some more clear to help protect them duting the handling that happens with the detail process.
After the paint was done the next stage of the weathering was the water and bird poo streaks. Again I do this in stages in between the clear coats. What that does, I hope is give a some depth of field with the streaking. Looking at a lot of the sub pictures at sea the bow is under an almost constant bow wave so I tried to get the streaking a bit heavier at the aft end of the sail. I mostly used a mix of greys and white pastels with the occasional spot of rust tones. The first of the shots show the sub before the first clear coat which was a couple of coats of gloss... Do remember the Russian sub look I was trying to avoid? Fear not the clear with blend all that in nicely!!
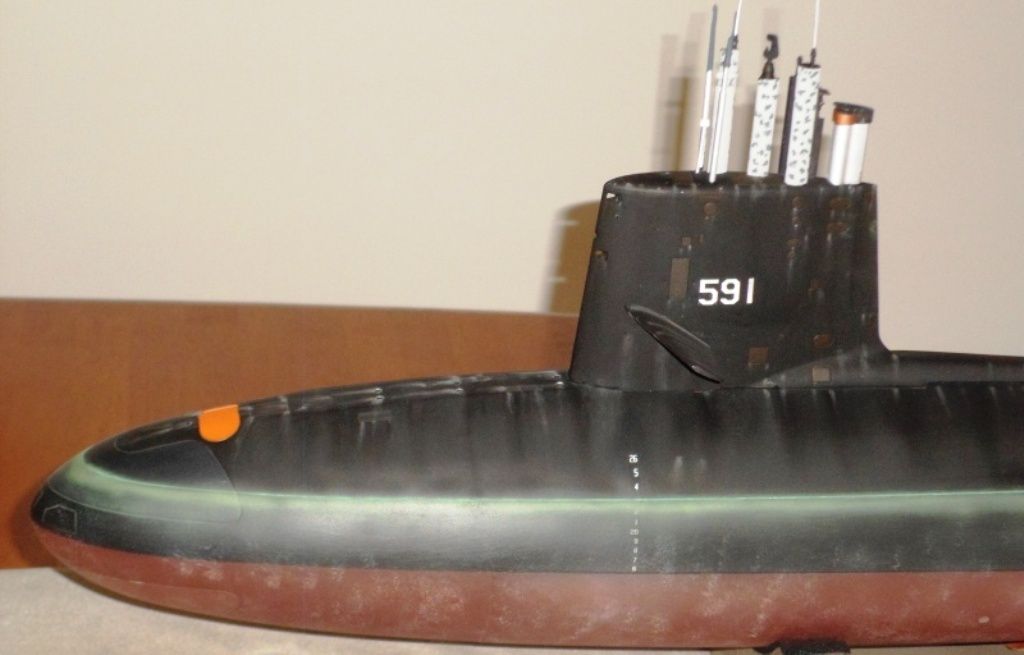
These next ones are after the first of several dull coat clears and pastel work. Using a gloss or semi gloss the dust will blow off if you sneeze on it so I use the dull coat as the flat finish makes adding the pastel dust easier. The other good reason to do them in between layers of clears is that if you screw up an area you can wash it off with out ruining whats under it. As always with pastels you have to take into account that the clears will change them. So remeber to test and confirm first if you aren't sure about the colour you've chosen
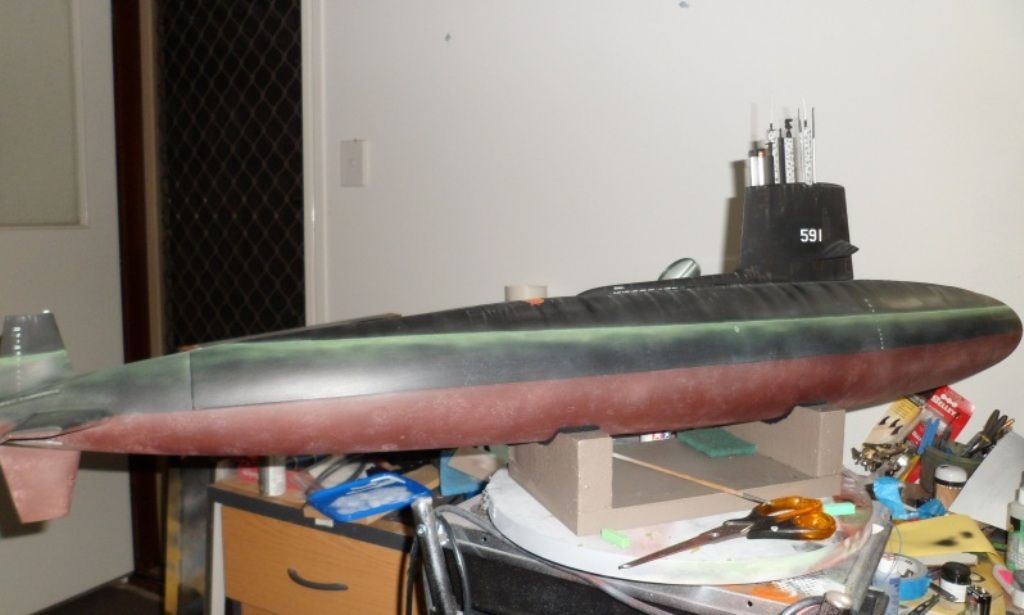
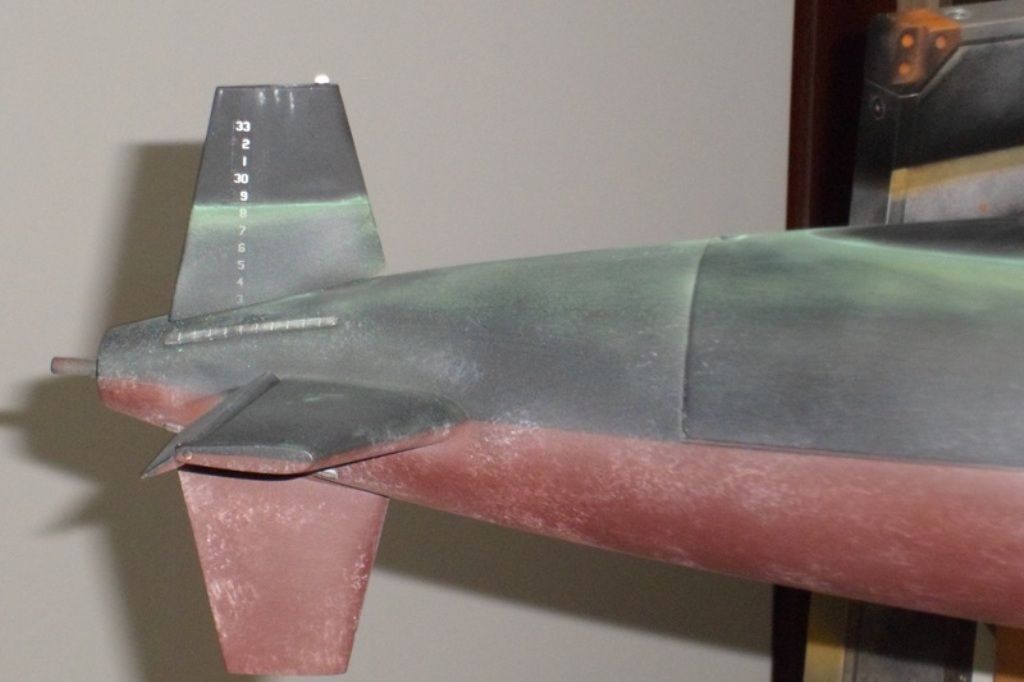
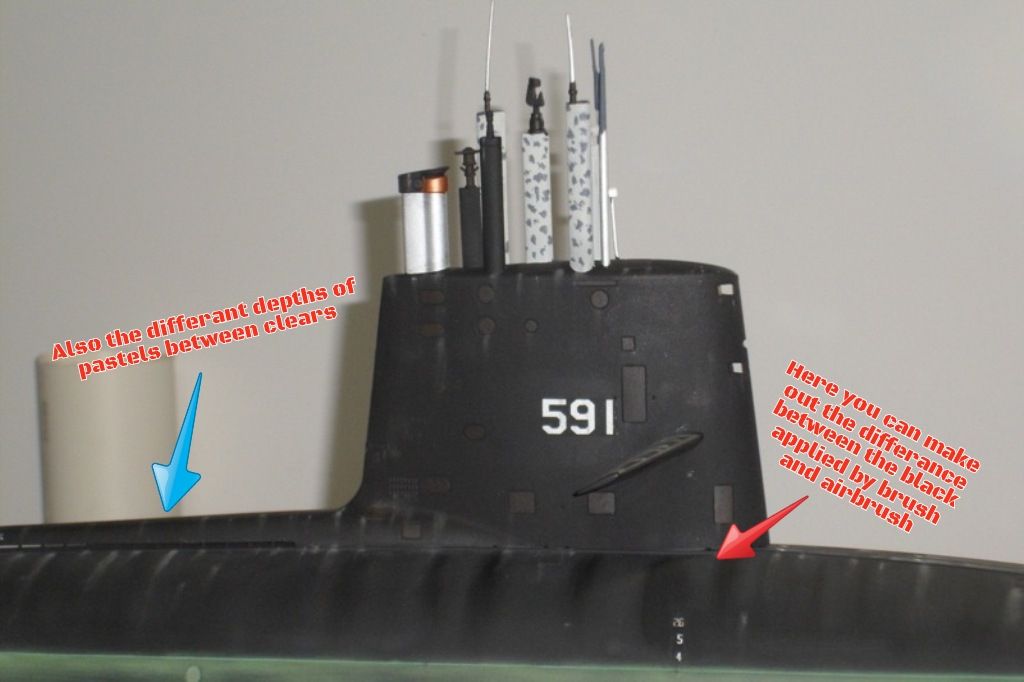
I also feather the airbrush from top to bottom with additional coats as well just to add a bit more texture. Another reason I like dull coat is that it can be worked a bit with some lacquer thinner on a brush if needs be. I also took advantage of the etched water line and rubbed the pastel stick directly the the model following the line and so filling it with chalk dust that I worked in with a brush. The next shots are of the completed model and yest I did leave the rear light clear in the sail I just forgot to remove the masking tape before the photos were taken... And before the final clear coat I again rubbed a pastel stick along the etched water line only with a brighter green and left the dust sit in the groove so that it looked like alge lumps rather than an alge film. It also seemed obvious, to me anyway that the port side would have a few extra water streaks because of the piping (sorry David I'm not sure what it is called) on the top deck which would tend to collect/pool water a bit.
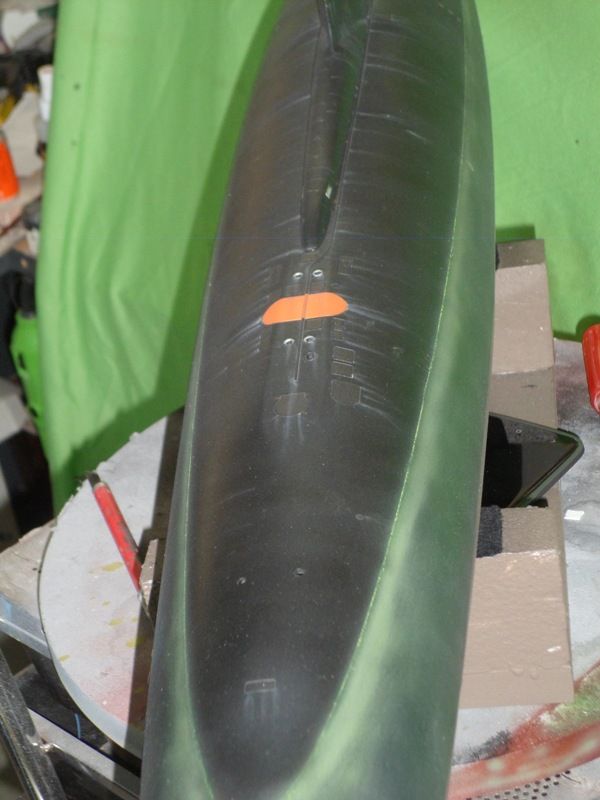
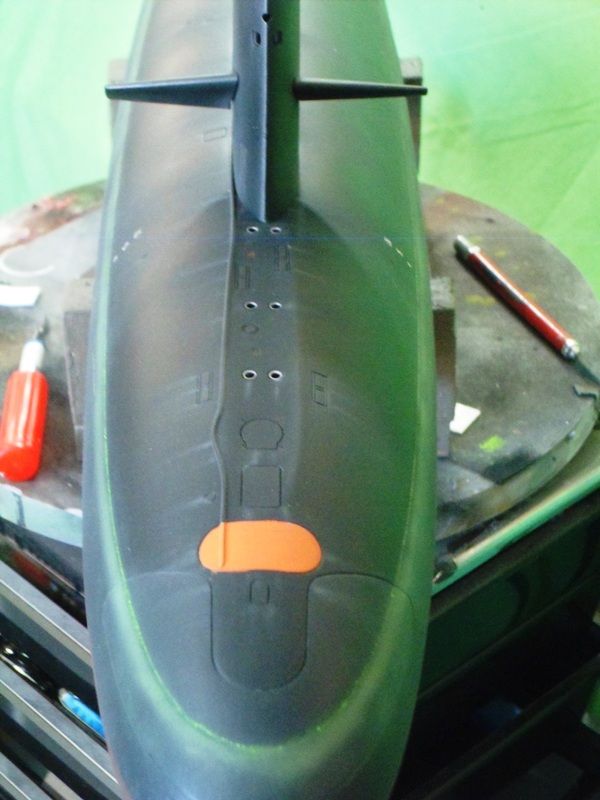
Now all I need to do is put or to sea properly now...Leave a comment:
-
How I weathered my Skipjack
Sadly no maiden voyage yetVery Angry so all I can offer is some wip pictures leading to the finished paint job....
As I mentioned earlier over the yellow oxide primer I lay down a coat of flat black as a base colour. Yes for those who will ask or point out that a black undercoat will affect the hull red for the lower half but that was a look I wanted. A couple of weeks ago I saw one done and the red on the lower hull looked a bit to red for the scale.To me anyway.. It is something I try to keep in mind when I do stuff is getting colours to work in scale. I did one of those little revel titanic kits for a 100 year anniversary party one of Sandys friends hosted. We all had to come in costume of the era and as they are 'foodies' all the food was based on what was done at the time as well. But I digress... Any way it was pointed out that my colours looked off. It took all my control not to throw someone overboard. So I explained about scale, distance, colour temperature, colour shades etc. and my beautiful wife chimed in by adding how much time I take in researching, painting and or detailing... I don't think it was a back hander??? But I accepted it as support.
Anyway enough dribble on to the show! Now before you read on I just want to say that what I write below is not meant to tell you all how to suck eggs I am just filling in how I got to a point in the pictures :biggrin:
After the hull red went down I then masked out and painted the sonar section covers in a lighter shade, Tip - don't just add white or you'll make it pink add some light ocher first with white added a bit at a time to get the right depth - To get the mask trimmed to shape I lay down the tape and then use a que tip or finger nail to follow the etched line. I then take a No11 blade and hone on some 1500 wet n dry to get a very fine and 'sharp point and edge. I then trace the depressed line in the masking tape, you'll notice I only use the low tack 3m blue tape, remember don't press to hard or you'll cut into the base & prime coats. Then carefully lift out the unwanted sections, check the trimmed edge and gently burnish it if needed which also help reduce paint bleed and paint away... I then went over the base coat black, which was applied with a rattle can, with a flatter black. When that was dry I then masked off the top sonar cover. You can see where I tried a couple of lighter mixes but they went a bit blue so I threw in a drop of red to tone back the blue and add some depth back...
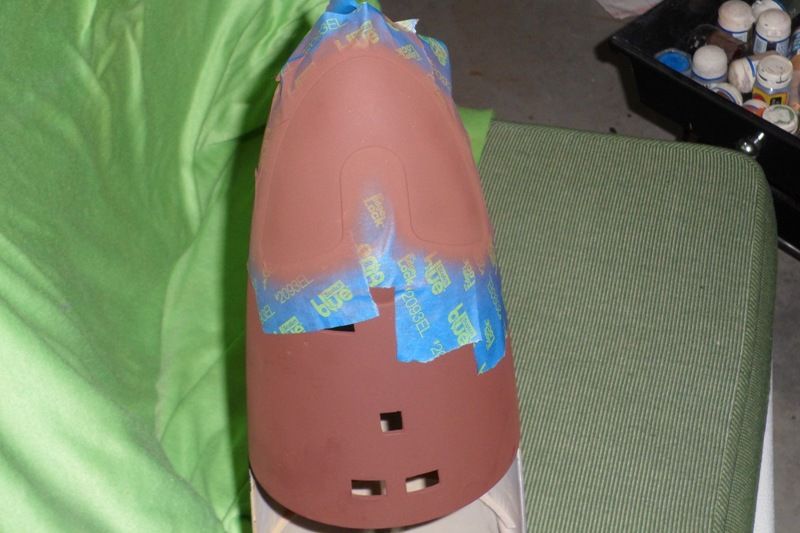
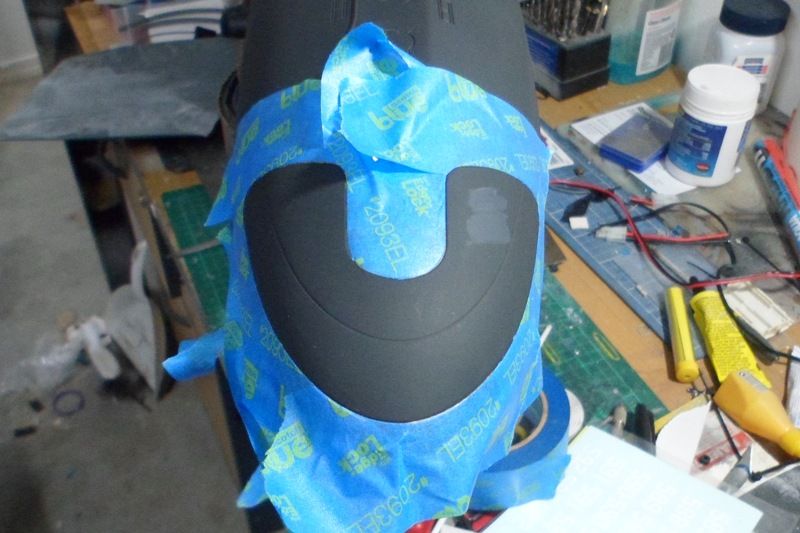
The next thing on the to do list was the decals. These were put down over a gloss surface to stop any silvering that can & does happen when they are applied on flat surfaces. The silvering is from tiny air-bubbles trapped between the very textured surface need to get a dead flat in paints. A nice even coat/s of gloss leaves a glassy finish the eliminates the silvering and also makes applying the decal a lot easier too! Once the decals are done I use micro sol & set solutions to get them bedded in nicely.
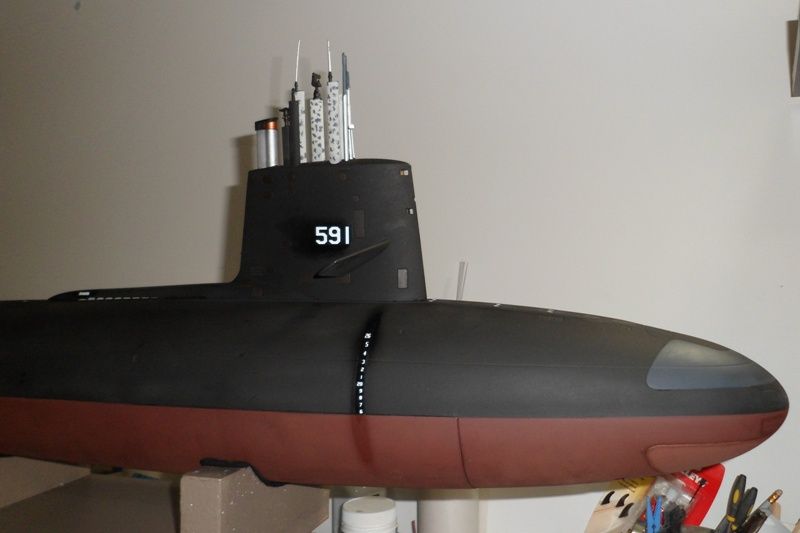
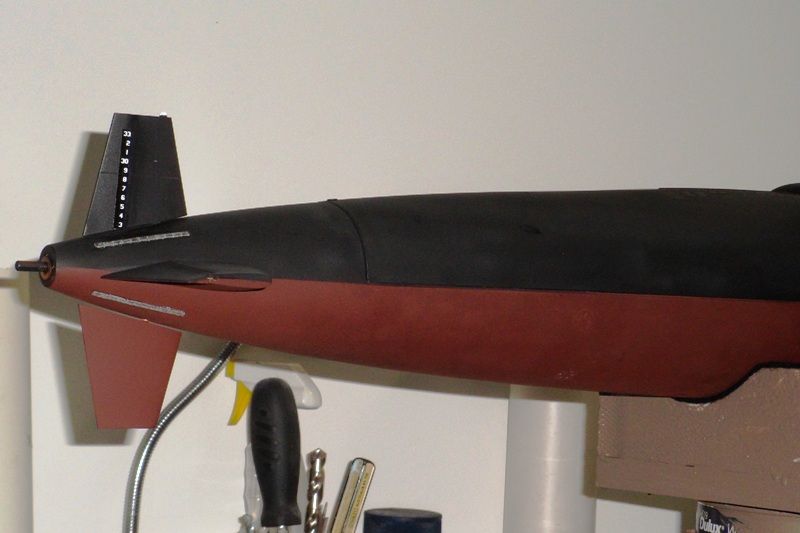
Once all that was dry it was on to the weathering detail. Depending on the subject and what look I want I'll use a mix of inks. washes, chalks and over thinned paint. My most common weapons of choice are brushes, que tips, those little foam numbers the girls use to apply eye shadow and a some fine and very fine scouring pads. I'll be honest and say that I didn't use much in the way of washes on my Skipjack . Instead I decided to use alternate blacks and my pastels to do the job. When I ploughed through the web looking at images of the subs I decided that using a wash and inks would give me a 'Russian' sub look even though I wanted a sub to like as it might after a tour of several months at sea between any full dry dock repairs and clean ups.
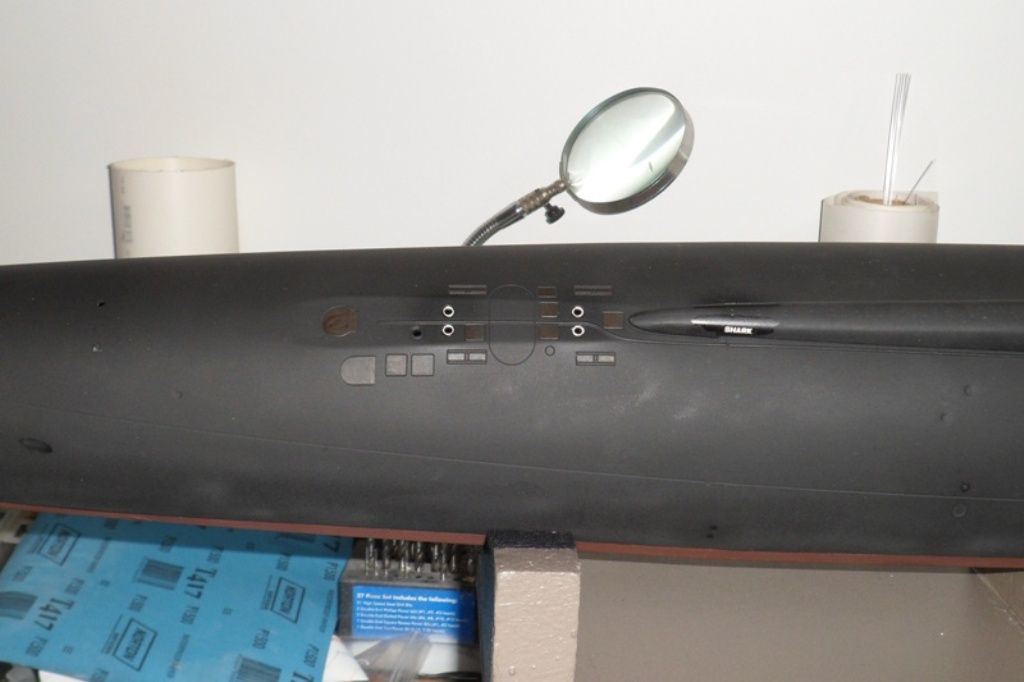
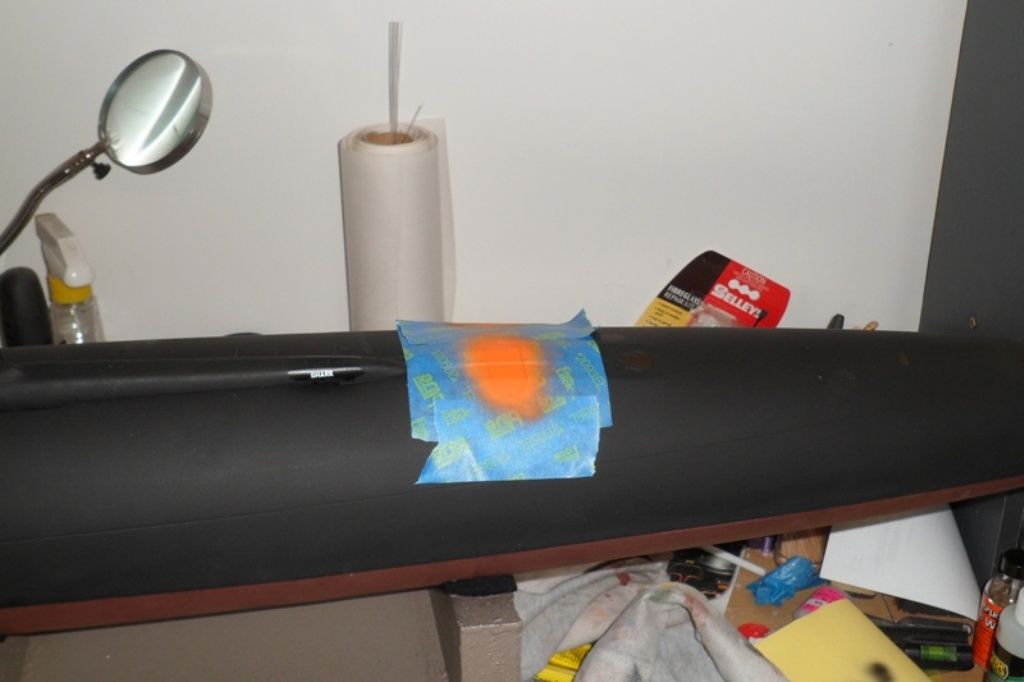
My first weathering was done on the hull proper. I have never managed the toothpaste trick that David does so well. I reckon that is because I use different paint mediums to those that HWSNBN uses. My mottling effect was done in several stages. The first was taking a damp sponge and dipping it white paint then randomly dabbing it on the hull below the water line. Stage two was blending that down with a very thin white airbrushed randomly. this was followed by doing the same, stage 3, with the flat black on the top half below the water line and the hull red on the bottom. These weren't thinned but rather using a finer needle on the airbrush and keeping the airbrush off the model a bit further than normal. The next stage was dropping the needle size again and thinning out some green paint and backing off the psi through the airline. Because of our weather here in Brisbane I run two water traps in my system, one on the compressor and the other at at the end of a 2 meter hose. The first has the psi set to 50 the second is what I regulate the brush with. After the first pass of green I let it almost dry and then used a medium 3m scourer cut to about 3 by 2 inches and gently rubbed it over the entire area below the water line. I then repeated stages two and three before adding the green wash line again. When that was done I used a 1/2 inch wide flat brush and just wet the tip, dabbed it on a rag and then brushed it on the sub from the top down on the top hull. This not a dry brush process I just wanted to get a different black on the hull than the finish the airbrush gives.
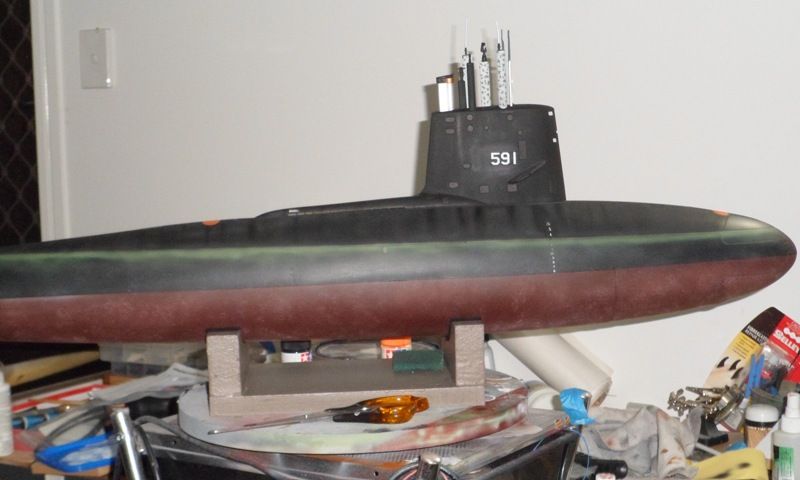
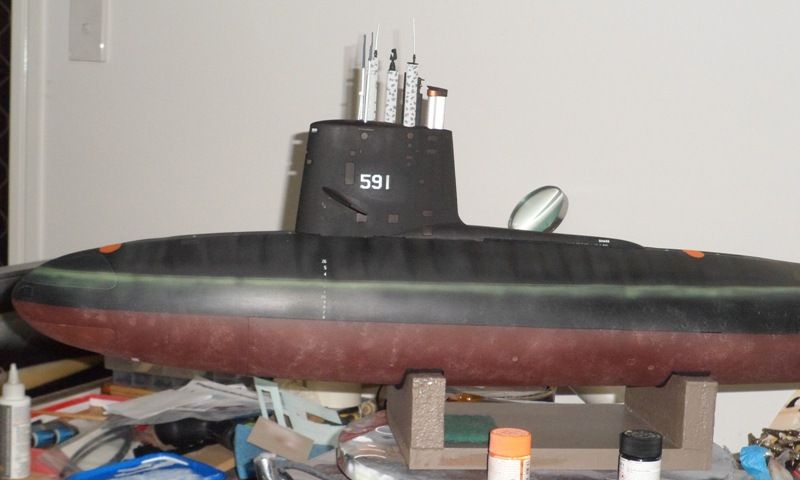
Refer below for more...Leave a comment:
-
Thanks John. I have my holidays for that weekend already booked at work. Yeah I have been doing the vinegar thing since my early days of warhammer 40k table top gaming. Last night I finally finished off the weathering detail and clear coating. This weather we've been having turned a 2.5 day job into a 7 day job. Not to mention a busted air brush... I will try to post up som wip pictures of the painting later tonight Australian time and all things going to plan I should be doing a maiden voyage in the pool at one of my subordinates homes tomorrow night. :biggrin:Leave a comment:
-
Great build Alec.
I particularly like the photos with your captions - very clear and informative. And I like you persistence in trouble shooting.
The vinegar etching is something I have never heard of before, am keen to try it. Thanks
Hope to see you at the Triple S Gosford Subregatta scheduled long weekend in October this year.
Best
JLast edited by Slats; 01-26-2013, 07:12 PM.Leave a comment:
-
Sorry I should have said I kept the strain relief tube as I could still see the ca/soda bond cracking with repeated tugging on the flexible hose. Now all I need is the weather to fine up a bit. Constant rain & 94% humidity plays hell with painting!!!Leave a comment:
-
-
Thanks David. To be honest iI hadn't considered it as such. It was more like a fix to my often clumsy & a little rough handling. I did make one deviation to your instructions with the elbow fitting. In that I glued it inplace using ca & baking soda. I held inposition with induction tube and my thumb whilst I dusted the baking soda followed by wicking on ca to each side and then when it was cured I tested it for leaks by blowing air through the flexible hose whilst holding underwater and blocking off the mounting block with my finger. With no leaks present I dried it all off and gave the elbow block several light coats of paint. To seal it up.Leave a comment:
Leave a comment: