Thanks for the compliment I did mute the front sonar covers as the colours specified look to bright & clean for me. I don't know if the escape bouyies would be the international orange when on active patrol but I kept them as visual reference.
Yes even for Brisbane the days & water are getting cooler than previous years. Most of the local pools are closed here as well as I have been told by the shore council that rc vehicles aren't all that welcome in our council run pools. Yet they do little in maintaining any community lakes in the shores park lands!
-
-
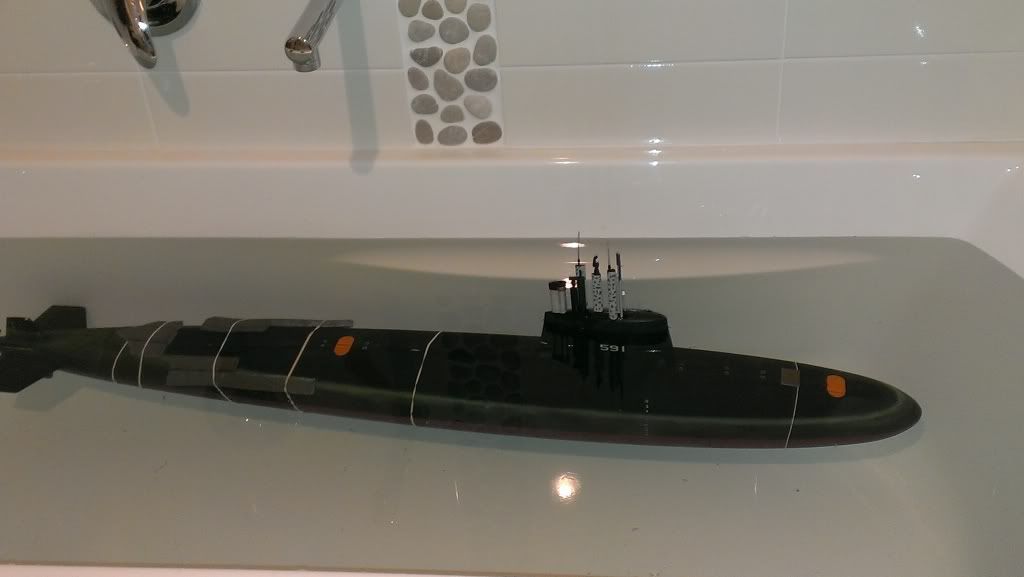
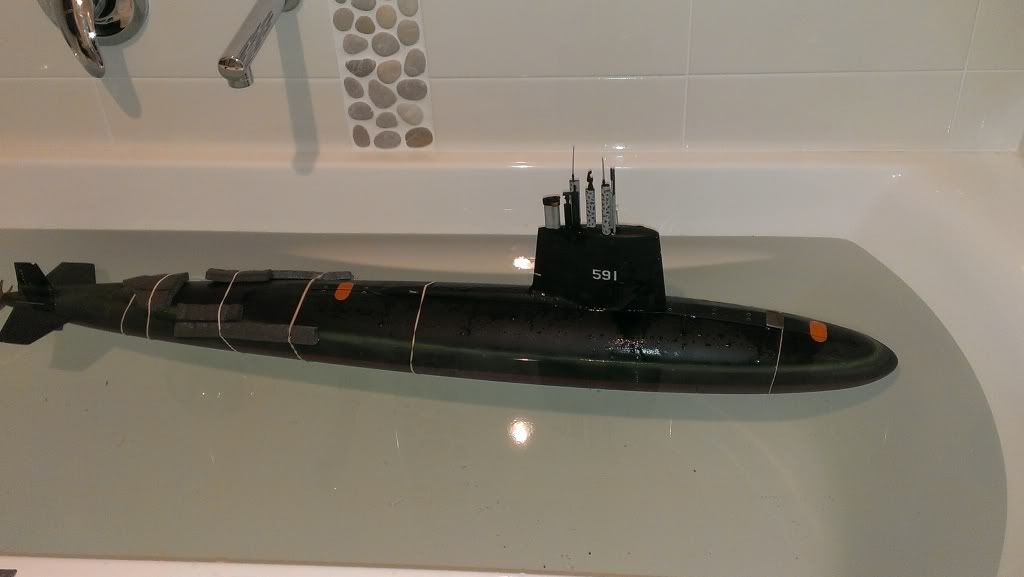
Thanks John and yes our bath is more than deep enough. Maybe one day I'll actually use it for its intended purpose... lol
Even with a bout of the flu I still tackled the trim... the first picture shows submergered trim and the second is with an empty ballast. All in all it took about three hours this is what I ended up with on the submerged trim. It's hard to tell with the water refraction but I have the sail sitting with about half an inch above the water. Tonite whith everything dry I'll glue in the foam and to make sure its all going in the right spots I took some happy snaps. So once the rtv is fully cured I'll dip it back in the tub and see how it looksLeave a comment:
-
Alec - first sorry re your your name.
Take your time on ballasting - yes please do seize the bath tub. Make sure the tub is deep enough to get her to where you need. I always set my boats up a little positive. Bit of a safety factor.
Looking back on this thread, I'm glad you had to tinker with the servo for the ballast vent, had a bum seal I had to replace awhile back, its a bit of ******* to get to but its all learning. You are doing a great job. keep at it.
Best
JohnLeave a comment:
-
Thanks Albion I reckon the adf was close to meltdown...
John the SD is set up as per David's instructions. So I reckon that part of the equation is good. On thinking back you might be right as I may have gone down the surface trim road first... Btw it's Alec not Alex, though they are both derived from the word Alexander meaning leader of men or something like that anyway. Alex is the abbreviated form where Alec is the English translation of the Gaelic (Welsh) word for Alexander. :-D
Thanks also David, I kind of thought moving the foam backwards might help. But I reckon it time to rip out the foam, claim the bathroom for the next week & put it back in the test tub.Leave a comment:
-
I assume the amount of foam is enough to hold the entire boat to a near state of neutral buoyancy -- but, at this point, at an undesired angle. If so, then it's simply a matter of taking some of the foam that is above the waterline and moving it horizontally until the boat assumes a horizontal inclination when in submerged trim. This affects angular change to the boat in submerged trim, but not in surface trim -- which is fine at this point.
MLeave a comment:
-
Alex
sounds like my very first sub USS Seesaw.
Anyway - sounds not like COG issue but rather you screwed the Trim effort. (COG is important, should be where the centre of the ballast tank sits, and at the half way mark of the profile area (not length) of the sub. To find COG - you could look at my Seawolf thread and others where I grid over a profile drawing, but I figured David would have identified this spot in the documentation for the Skipjack). If he hasn't, let us know and we can get Mike to run him over him with the Jag.
Trimming I always do sub by starting SUBMERGED. If you do so the only thing you have to change, once you empty the ballast tank, is the vertical location of some or all of the foam to achieve designed waterline.
Its sound to me Alex that you have her Trimmed perfect for the surface - and that to me means you can hand your Dolphins back Skimmer boy.
Want redemption? - Make sure you installed the SD EXACTLY where David has designed it to go in the Skipjack, and then with a 100% full ballast tank and the boat submerged start trimming again.
Re the ADF2 - get this boat working in static dive / surface mode first then throttle up and see if problems persist.
Hope that helps
JLeave a comment:
-
Assuming you have no trapped air, and the CG is bang in the centre of the ballast tank, then it sounds to me you will have to add some buoyancy at the stern, and above the waterline as you suggest although I'd expect this to be the same for all Skipjacks. An advantage with injection moulded subs is, as they are as near as you can get to perfect consistency from kit to kit, unlike a GRP lay-up which has a wider tolerance.
Hopefully there is a enough leeway in the ballast volume to allow for the extra displacement of the foam.
An out of trim boat will certainly get the leveller into a lather.Leave a comment:
-
Time for an idiotic question...
I am really strugling with the c.o.b & c.o.g. I thought it was just me at my first public outing a couple of months backs. This morning I was back to my usual water hole today thinking I had got the trim finally done after some issues required some fix ups, including some more tub tests. However a successful mission on the lake was not to be!!! With the surface trim the boat sits nice and level but when I flood the ballast it settles at about 45 degrees stern down. Now for the idiotic question. Is this a case of adding buoyancy above the desired waterline to achieve a level submerged trim? By the way the adf2 gets the boat leven under power but it just wants to porpoise all the time. Is that also because the c.o.b is off?Leave a comment:
-
Thats really good to hear Alec. Next time.......make with the pictures, will ya. I cant see that far.:biggrin:Leave a comment:
-
Last week end was when I headed out to an interclub regatta day this was what I would call the maiden voyage of my Skipjack rather than a sea trial run. The report is just a written debrief as I got carried away talking to others and running my boats I forgot to take pictures or even ask some one else too...BLUSHER
What I can say is that when trimmed right and the all the running gear set true this boat is fun to drive. I'm still not a user of LiPo's so I run a 7.2v 4200mh NhMh battery pack which gives me plenty of play time and more than enough power to run it. I have to say that with the motor set to 100% on the stick she is a rocket in the water. When the stick is pushed to flank speed the boat kicks off with a hellish torque twist and will dive itself dynamically to boot... Let me tell you when that happened it was a real WTF moment and as it was my first time in that particular lake I kicked it in full reverse nearly mincing a young fellas cabin cruiser when it shot out ass end first. So I dialed back on the throttle to 80% epa which still gave me a good scale speed with out the torque roll and dynamic crash drive!!
As for trim with a flooded ballast it sits with about 1/3rd of the sail above the water. With a little up angle on the rear planes she'll lift her bow to the surface at full speed and when I cut back to 2/3rds on the throttle she levels nicely and then its just a touch of down angle on the sail planes and it glides under the waves. To play it safe in the water I trimmed the sail planes with just a touch of rise angle and she would glide back up after some 10-15 feet or so. I did this for a couple of reasons, firstly this was a new lake for me to sail in and secondly I wanted to get the feel of how it handles. A bit more time at the stick to get the habits of her in the water and it will go from fun to delight for sure.
I only had to use the SAS as an emergency blow once when a slower boat crossed my path a little to close forcing me to throw the sail planes at full down angle to get under it. I then threw the toggle for the SAS pump and sail planes on full rise as well as cut back the throttle and held my breath for what was one of the longest three seconds of my life Scuba Divinguntil it broached the surface. I wish I'd paid more attention to how it surfaced but I remember someone behind me saying something about how cool that sub looked coming up. I throttling it back up and let the sub rise to surface trim as she sailed away from the crowded waters and headed back to the dock area. In truth I needed a cup of tea a a sit down what with cruising around the lake with a mix of yachts and power boats driven by boaties that hadn't or didn't have much experience with subs sailing their seas at periscope depth.
All in all the sub worked well along with the sub driver and even the bloke holding the transmitter worked well too. The only people from our club that turned up with subs was myself and our president who also has a Skipjack. Though he makes his own wtc's and running gear. He was even kind and generous enough to comment to some one from another club, who was asking about our boats, about me taking the extra effort to make mine look more realistic rather than his basic paint jobs.Leave a comment:
-
Thanks Mark.
I reckon I have cot the water ingress under control now... The last time out I used this little satchels like what you find in vitamin bottles. I use these occasionaly in some of my static builds to help with our humidity here. A couple of these in the sd help soak up the moisture and afterwords you just lay them on some blotting paper and let them dry out for next time.Leave a comment:
-
Alec, nice job. My experience with model submarines or any RC hobby is fraught with Gremlins. Sometimes they hit you two or three at a time. You might think about putting a sponge in the bottom of the dry section of your sub driver to contain any water that might get in. Other wise water can splash and soak your electronics during "Maneuvers".Leave a comment:
-
Thanks Mark. By all means use what you will.
My latest update is one of the good, the bad and the (almost)ugly...
I finally got to put the boat in open water rather than the bath tub, A.K.A test tank. And damn it looked good! But there were still some issues that I thought I had resolved came back to haunt me... The bad and an issue with one component that was almost the ugly...About twenty minutes from us is a public swimming lagoon which I have been tooing & froing about running my boats there as it is a salt chlorinated set up but it is lighted at night so I thought I would try it out. I even got the missus to come along as the camera woman. So out we went last Saturday night...
The plus side to her first open water trial was that it handles like a dream and under the waves it is almost a torpedo!!! Now apart from its good looks some of the surface running performance suffered from some disconcerting cavitation. Which simply told me that I need to add some extra lead just offset to the aft of the c.o.g and a little more buoyancy foam in the bow. The tricky bit was getting the ballast and buoyancy right so it sat level with a full ballast tank. I soon learned that going slightly deeper in the clear water the signal from the tx got a bit scrambled. I am guessing that the local council has the chlorine and salt levels up a bit due to the sometimes heavier public use. To be honest I hadn't considered the loss of radio signal but it was a good live open water test on the sas system and the adf2 fail-safe. Both of which performed above and beyond!! apart from the signal losses the other issue that still haunted me was water into the engine compartment of the wtc. Then to add pain to misery the ballast servo was miss behaving badly and not responding to the tx. At poolside I put this down to the signal strengths of the tx through the water. At one point the servo failed to close after throwing the channel to close. The result was the boat dropping signal and with planes locked in a slightly negative she settles on the bottom in the middle of the lagoons end we were at. Swimming time I said to Sandy. When I got to the boat I could here the pump running so I knew the the sas part was working. What it also told me was that I still didn't have the buoyancy right with a full ballast tank. Relying on the sas to bring the sub up on its own was fraught with danger. Back at the steps/dock I put the sub back in the water and did a couple of full and blow ballast tests. All of which worked as it should have so I set sail to do a loop again and decided to deliberately take it below radio signal to see what it does. Sas and ballast valve both worked bringing the sub to the surface and water line but now the aft was sitting very low now, remember the water in the wtc I mentioned?? Somewhat disheartened I opened it up to inspect it all and saw the said volume of water sloshing around the engine compartment.
Back home on the bench I set to cleaning and drying the wtc and all its components before any serious post mission review began. Then I started working through all the electrics and setting of the ballast valve system. I found that even on the bench the ballast servo was responding oddly. So I decided to replace the part but getting my little screw driver down the tube to undo the bracket screws required some ingenuity...
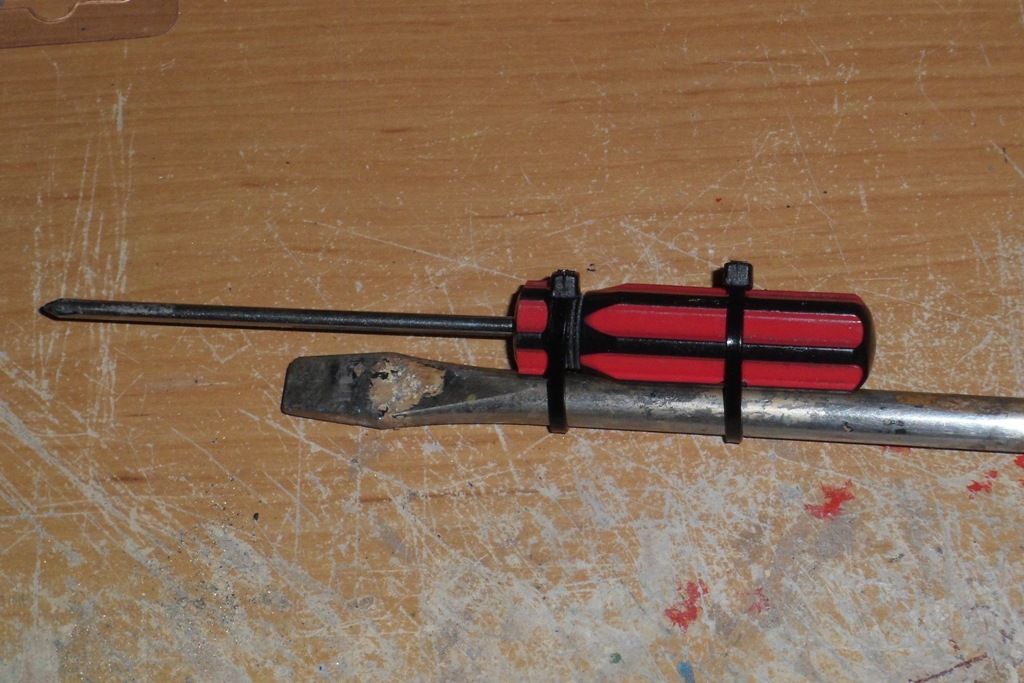
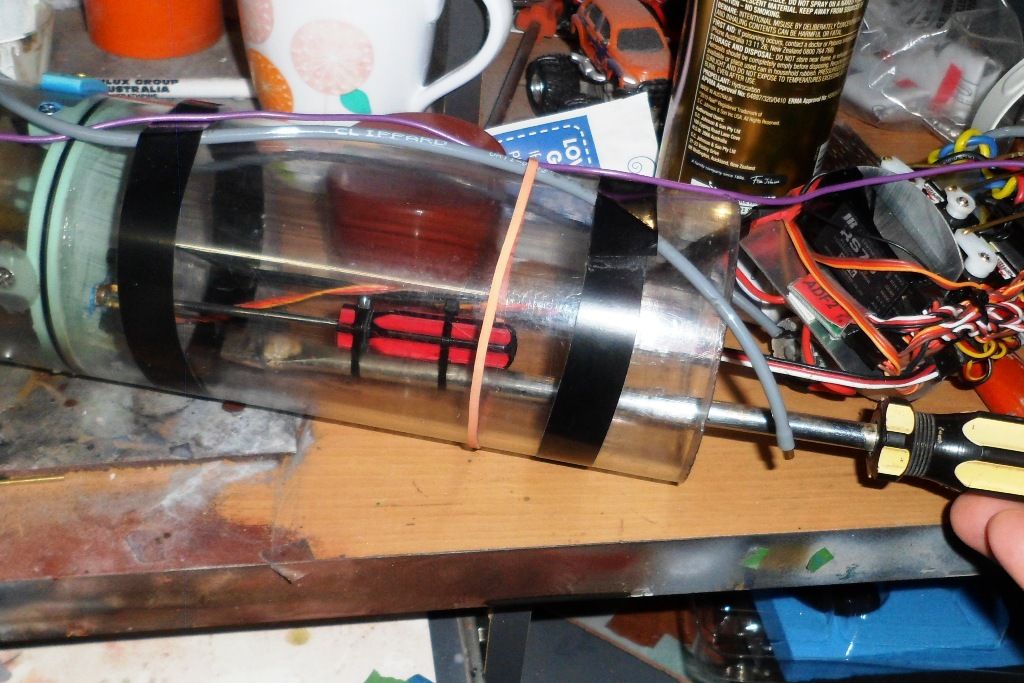
What I found was that the servo was overheating to which I put down to water and shorting...
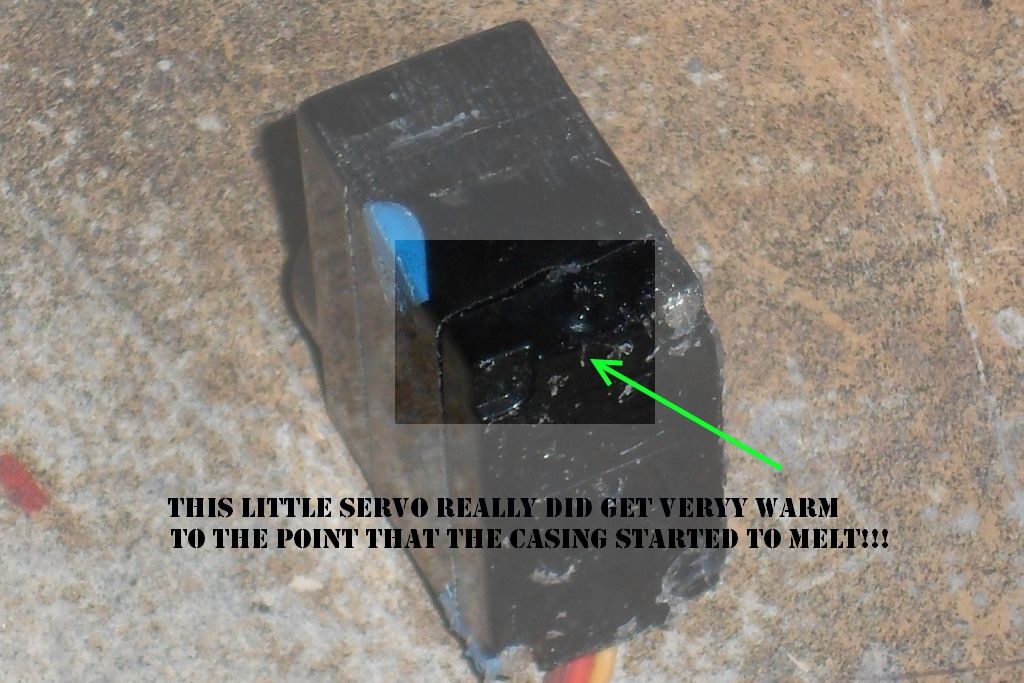
So with a new servo mounted I set about looking for visible signs of water leaks and the only area I found that was badly stained and show water ingress was the area below the ballast servo where the bulkhead sits. I also found the bottom bulkhed set screw to be very loos and some small cracks in the tube on the ballast tank side of the bulkhead. I fixed those by letting some liquid glue weep into them and let it dry. For the loose screw I added a small drop of ca to the thread and resat the screw in the mounting block, I then used a stiff bristled artist brush to apply a film of clear rtv on the area below the sevo on the electronics side of the ballast bulkhead. The next morning saw me filling the tub again and then blocking off the sas/lpb in& outlets on the rear bulk head I pushed the sd under the water and held it therewith a full ballast tank and scanned every square millimeter of the sd looking for any signs of a leak. Sure enough the rudder push rod bearing had bubbles leaving, about one every second! How the hell did I miss that I cried. Fortunately the fittings kit came with spares so I swapped it out. Once the rtv had dried around the new bearing I took out the tyre valve placed some tubing over the threaded section and pushed it back under the water with all the lpb points closed off and then blew as hard as I could into the tube. Not once but at least three times, to the point I nearly passed out... But I didn't find one out of place leak or air bubble.
So it was now time to mount the sd back into the sub and work on the trim issues and also run the sas over and over again. The good news was that the volumes of water were now nowhere to be seen. There was some water still but it was only a few drops which I believe came through the sas system from water sneaking past the sail float valve before it sits in place. Because there was evidence of water above the sas copper valve setup and this small amount can be controlled by some silica bags that I keep from the vitamin bottles placed in the sd. However I again found the ballast servo glitching on me again...!!! What I found was that the servo was sitting just a tad high which was causing bind on the push rod and seal. In fact the servo at one point just stopped moving the push rod altogether. So it to was swapped out and sure enough it was a bit hot to touch and the casing showed the same melt signs as the first. So I reinstalled the holding bracket just enough to hold the new servo and maneuvered the servo around till it actuated the push rod with no signs of force or binding. I marked its position undid the bracket and applied some rtv to the bracket and servo to help hold it in place and left it till the next night which became two nights of getting the ballast & trim right.
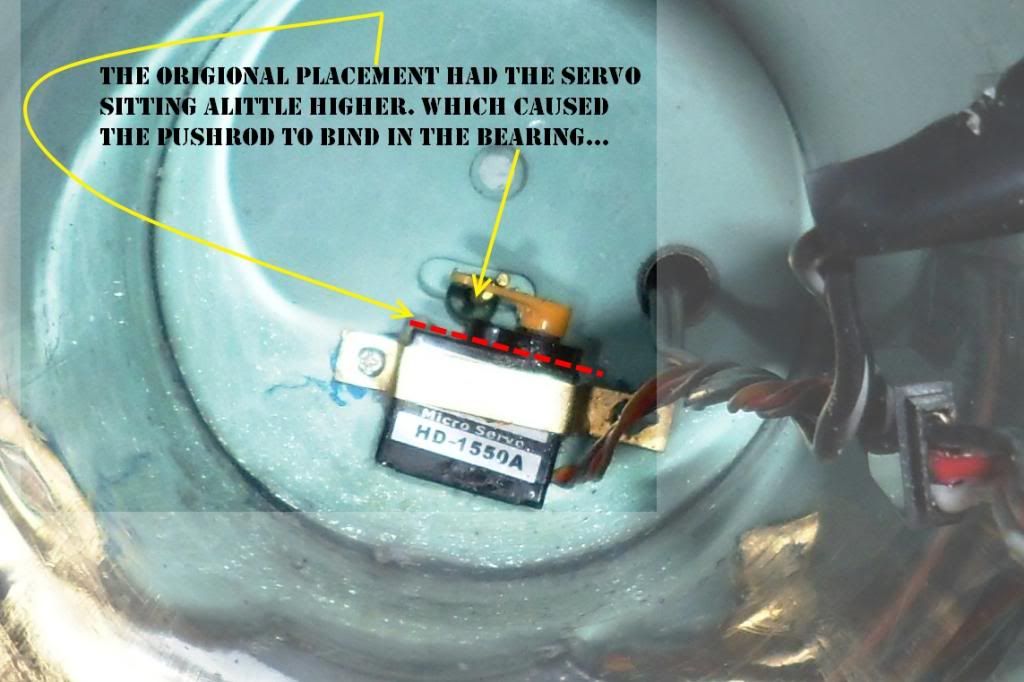
Tomorrow I have the day off so it's back to the lagoon for a second test run.
Here is a link to the video I posted on you tube for the subs first open water trials...
 Last edited by alad61; 02-14-2013, 04:17 PM.
Leave a comment:
-
Excellent work there Alec! This article will be my cheat sheet for my build.Leave a comment:
Leave a comment: