

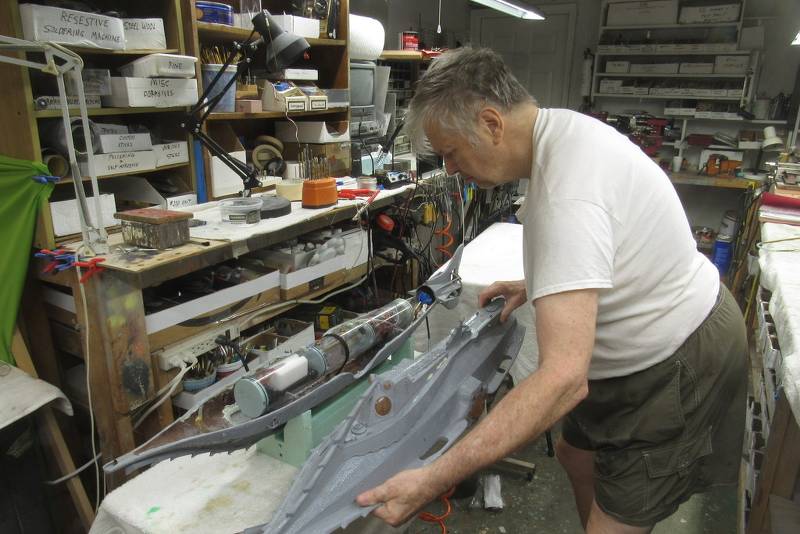
So, Saturday morning began as a very cool mid-60's, sunny awesome morning...with coffee with the day's mission to dunk the Nautilus and get the electronics dialed in and surface and submerged trim established in order to create more permanent apportionment of lead and flotation strategically placed around the vessel so a proper metacentric height is established along the god-like axis of a CB/ CG...oh forget it, if you want to know what we did it's in the Dive Manual or Bob's book. Remember the part about the electronics? It's that roundy-thingy with all the gizmos in it and there's about a bazzilion in Merriman's shop. We can't find it. After more coffee we figure out to open the Nautilus in order to see what size we're actually looking for...3" okay, it's 3-incher roundy-thingy. Found it next to the floor, Mr. Cat must've put it there, and no end-cap. This is beginning to look like an order at a McDonald's drive-in...after you drive away. So we get it and get all the wiring reconnected and protocols established...and away we go to the dunk tank...found the first leak at the battery compartment, fix that, back in the tank, another leak, battery bulkhead, fixed that, didnt work, try, try again, okay that worked...wait ANOTHER leak, fixed that and we're good to go. All the rabbits on the hillside are doing the WAVE in celebration.
-
-
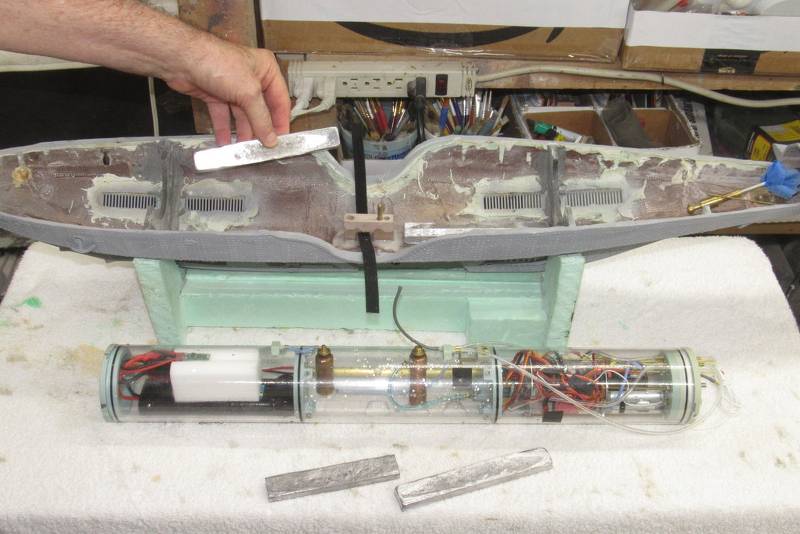
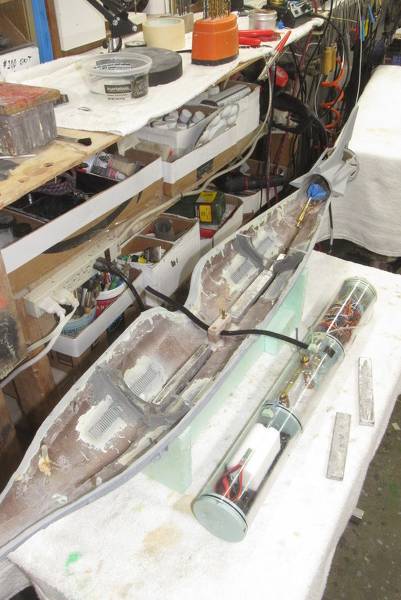
Here's the photos of the WTC test-phase. Pay attention to the rubber tube that hooks up to the schraeder-valve (without the core installed) in order to pressure the two end compartments.Attached FilesComment
-
-
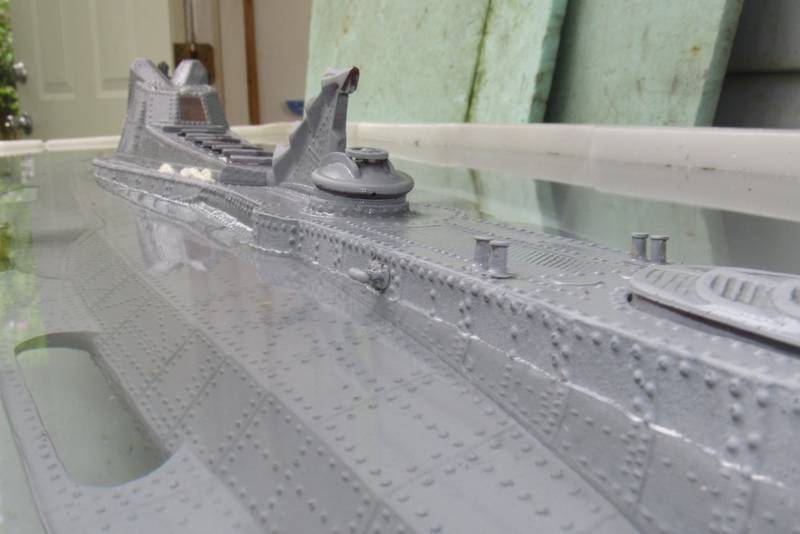
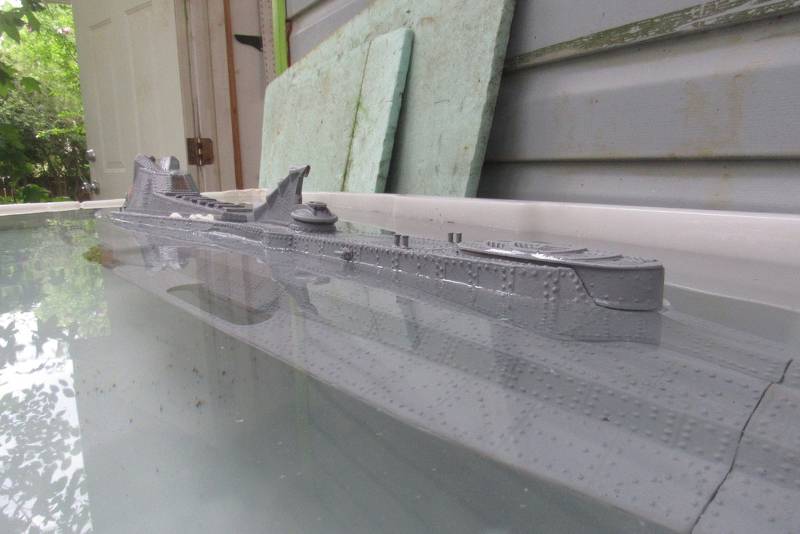
So we do a rough gestimate of where our surface/ submerged trim really is and it came out close. Boys and Girls, you always know the pain comes in the details...that is when you haven't sliced a body part subsequently super-gluing aforementioned body part (that was a different day).Attached FilesComment
-
-
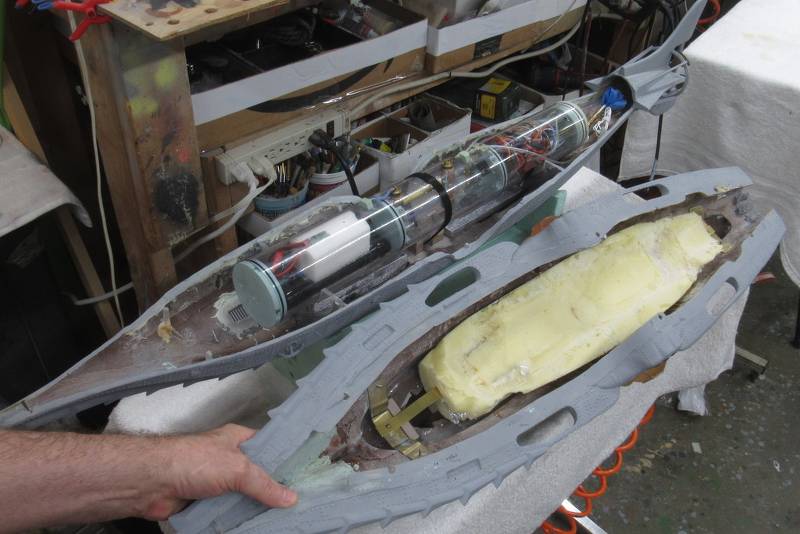
So the details, after the aforementioned placement of green foam and lead we're finally on the right track and get it dialed in nicely...but it still all impermanent. Make a speed run to Lowe's get some spray expanding foam and start installing it. Rain check time and will have to re-proceed on Monday... So Saturday night I finishe all the spray foam at home, and the next morning Dave e-mails me that the stuff is crap and will compress, and I'm thinking, 'Damn, I guess we're going deeper that 5', maybe all the way to 1300' so we can crush those little styro cups in the line locker. Ordered the new closed-cell stuff that's supposed to be here tonight. So enjoy the photos, they're the ones that were allowed to be kept. Hope you all had a happy Father's Day.Attached FilesComment
-
-
Okay Boys and Girls, this is what happens when you support people that are going to turn you into Soylent Green and get carried away with the 'Foam It'. More to follow keep reading of this week's festivities and Flail-Ex's. The first part is going to 'Plan-C' after the first two Plans failed to achieve success, this was going with green construction foam and Lock-Tite construction foam, the first took up too much space, even though the correct surface/ submerged trims were achieved, and the next was incompatible with our application as it was open-cell, and just too spongy. So most of the week was laying 3 applications of 'Foam-It' and for those curious, it's No.5 (density). It's urethane and if you've ever messed repairing surfboards, it's the same inner core stuff (the glassing class is on another post), now you all can be shapers like Robert August et al. So you're looking at photos of applying the foam and our defeated efforts of keeping it out of areas you don't want it, hence the aluminum foil, wax paper, etc. Then some of the aluminum foil won't come of so we acid etched it off...outside. We then proceed to shape it over the next few days, and then Dave breaks out some awesome tools and gets it to where he finally wants it. Then it's lead melting/ forming time, and Dave demonstrates not buring down the house or blowing crap up, spraying hot white metal on your wife...okay a lot of things bad right? Okay, so it comes off without a hitch and the new lead bars are formed. Look awesome, right? Lastly, get to mess around with the WTC...because there's always something to be check on that prior to dunking it into the tank. Dave statement rings true, spend about 3 hours of maintenance for every hour of lake time.Attached FilesComment
-
-
Preparing for the future. Spent some time this morning mixing up various rust mixes with acrylics. Need about 4-6 shades, and I thought I had it until I double-checked and took the samples out into real sunlight, swapped some colors and I think I'm ready for end of July when hopefully Nautilus will be ready for final painting when I get back from a trip.Attached FilesComment
-
-
In support of your planned late July painting frenzy, I just completed getting the N's SubDriver fully operational. Now it's time for my hideous nap. After which a leak and SAS ballast sub-system test and validation. Following that, if there is still sun-light out there, I'll give your boat a ruthless dunking in the test-tank until it submits to my will and behaves properly in submerged and surface trim. Maybe next week I'll drag its sorry butt off to the JCC pool to see if all this madness has paid-off or not. If not, into the nearest dumpster it goes!
Stand by, Tank-Boy!
David
Who is John Galt?Comment
-
It's fun watching you two work on this model. Now that you're beginning to talk about paint, why acrylic versus enamel? I've always used enamels on models I've done so I'm wondering what I should use on my Tucson display model.
Will Rogers
SSBBN659Comment
-
Lacquer paint/clear-coat solvents melt underlying enamel coats, producing a God-awful mess, no matter how 'dry' the underlying enamel is. And enamel paint takes longer to harden. Your mileage may vary. Paint chemistry preference is pretty much a matter of what's available to you and what you were brought up with.
Start with lacquer-based chemistry and stick with it all the way up to and including the primer and touch-up putty (Nitro-Stan preferred). It's OK to apply lacquer-based consumables over the polyester based 'fillers. Other than that, lacquer-based stuff all the way to the primer. After all that you have the option of going with a polyurethane, water-soluble acrylic, or epoxy chemistry for pigment and clear coat. After the clear coat, go nuts with any weathering medium that strikes your fancy.
NEVER trust a rattle-can primer as outfits such as Rustolium and Krylon change chemistry just about as often as the sun-comes up -- you never know from one can to another what crap will squirt out of the nozzle, and if it will/will not ruin previous coats of paint.
And don't trust hobby-shop paints (other than the water-soluble acrylics) -- they are formulated to be safe, not good. Hobby shops are only good for glue and bad advice from some kid with metal fitting punched into his face.
And get your acrylic paints from Walmart -- why pay a premium for the same stuff, rebranded, sold from the local Hobby-Town?
DavidLast edited by He Who Shall Not Be Named; 06-25-2023, 02:49 PM.Who is John Galt?Comment
-
Success!


Who is John Galt?Comment
-
After getting the Nautilus back from Dave over a month ago after the sub was trimmed for surface/ submerged, I proceeded to do the final painting, then we'll get it back to finally do a sea trials with it to get it dialed in. Last time, Dave said it was heavy aft, so we've got that dialed in and that's the only foreseeable change. Anyway, into my shop it goes for painting. My shop, I built it about 5 years ago to get all the smelly hobby stuff out of the house as it was really bothering my wife to the point where I'd have to spray or do chemical work outside...which royally sucks as the weather or dewpoint doesn't cooperate. Inside the shop prior to painting, I turn the AC way down to get the dewpoint very low, and I also run a water separator, so everything's so bone dry I don't get any water in the separator except in winter when I'm not running the AC. My spray booth is set up for large scale tanks...not large submarines, so I have to be creative and stick one end in a time. The booth also doesn't have enough extraction with the stock fan, so I have an additional in-line blower installed. Now it works just fine. First order of business is to remove all the moveable surfaces, then base-coat with a very dark brown/ black. I've used an automotive lacquer-based primer, so I can put whatever on it, so I'm going with Tamiya acrylics as they're pretty durable (as I use them on tanks) and have an idea about mixing them and what I can add to them without recreating the world with new paint mediums which always lead to recipes for disaster. My test subject to try colors on is the 1/48 scale Nautilus I got from Bob earlier this year. So I spray what I think will work and dial it in from there. This is all easily removeable with a can of oven cleaner (don't use the cheap dollar store stuff!). My shop is a mess right now, as I'm trying to get Nautilus finished and ready for Cohutta.Attached FilesComment
-
-
Now it's time for the initial color coat. This is one single color and modulating it to get different effects over the dark basecoat.Attached FilesComment
-
-
Now it's time for the first oil wash. I mixed raw umber with Turpenoid to where I have a medium color and go to town coating the whole sub, then let it sit for a couple days and dry. In the middle photo you can see the contrast between the 'washed' upper hull in the foreground and the 'unwashed' lower hull in the rear. Next photo, they're both done and sit for two days.Attached FilesComment
-
-
So after the dark wash/ filter and letting the model sit for two days, it got a gloss coat and sat another two days. The gloss coat will allow the following paint detailing to be applied without spider-webbing all over. The next order of business is to do a grey wash, this will contrast effectively over the dark color of the sub. The photo of the bottom of the hull you can see the left side completed with grey wash and the right side bare. You want this very faint, as it's going to be part of many effects, but not overpowering. You're kind of staying with panel lines, but doing it subtlety. You don't want to over-power seam lines. It looks unnatural and doofy. I also addressed the topside grates with a thick oil wash of lamp black. I subsequently went over the top edges with a paper towel repeatedly until the top edges were pretty clean. The top edges will subsequently be dry-brushed to increase the contrast. Lastly here, I dry-brushed the lighter of the rust color across the whole sub to give an added dimension to the existing colors. After two days it will be time for detailing.Attached FilesComment
-
-
Now it's time for detail-painting. I'm currently as of this post only partly through it, hence why I'm up at 4am posting on here right? I've got a granddaughter's birthday party to get to later, so I wanted to get some posts on and get out knocking out some painting. Since I've already completed the major dry-brushing, here I'm starting to do chipping and rust effects. Since during the week I've only got about an hour and half per day to work on it, it took about four days to lay down light chips, followed by four days of dark chips. Yes, it sucks, and I'd rather create rivets or shovel dog crap out of the yard, but it's a necessary effect that will hopefully pay dividends at the end. So with that out of the way, I also started addressing the painting of the rakers. This was a perpetually perplexing task to think about how I was going to go about it. Initially I was going to dry-brush, but then wound up applying to chipping color layers, then two metal colors. As high-carbon metal rusts in a nano-second, I want the effect that it had just occurred, so I can paint a little 'bling' onto the sub. I remember back on the real sub, even if you had a primer coat on top, the superstructure of the sub would start to rust within a couple hours. So my test canary in the coal mine was the bottom raker to see if it'll come out with the effect I wanted. It did so proceeded to the other three (no photos yet of those). I'm currently using powders and oils to create the remaining effects, then get to sit and look at it and take care of all the offending items and when satisfied, it's going to get a couple coats of flat clear and dry for a while. Hopefully by next weekend. Enjoy.Attached FilesComment
-

Comment