-
Thanks Sam Victory,
I tried doing a search for the pens you’ve described to get a look at one of these open but could not find any photos.
After my post yesterday, I decided to take another look through the many books and drawings that I have collected over the years on u-boats to try to find an answer to how the stern muzzle door opened on a Type VIIC. It appears from the drawings that the stern torpedo muzzle door was hinged at the 12 o’clock position perpendicular to the tube’s axial centerline as I suspected. In the drawings it appears there is a well just aft and above the top of the tube to accommodate the muzzle door opening this way.
NickLeave a comment:
-
If I'm not mistaken this should be the stern torpedo tube, and like the Type IX submarine, the torpedo hatch is rotating open and closed.
This reminds me of a click-action highlighter I used to use, when not in use the nib is retracted and protected by a hemispherical sleeve, when in use just click the end of the pen, the hemispherical sleeve rotates open, then the nib sticks out and you can write, very much like the U-boat stern torpedo hatch opening and closing structure, isn't it?
V
Leave a comment:
-
No significant update tonight other than I’m getting the aft torpedo tube launcher parts designed. About 85% there. It is designed much like the launch tubes in the bow. The aft tube can handle both electric weapons as well as gas driven weapons. Debating currently on adding an opening muzzle door. Can’t find any detailed drawings or images on the web of what the type VII aft muzzle door looked like. I’m guessing it rotated up towards the deck like the type XI?Leave a comment:
-
-
-
-
-
That is a really nice running boat. Glad to hear this one is all yours! Very historical boat.
I would’ve been tempted to fire some warning shots at those surface targets during that run! We get those same kind of geese here in our pond and when there’s about 20 of them all squawking at each other it gets obnoxious fast.
Leave a comment:
-
Ellie and me stopped doing commissions over ten years ago. Out side of the occasional 'help-a-friend-out' re-builds and fixes, what is assembled or built here is MINE!... all mine!!!! I have yet to finish this beautiful kit, but I have got it all trimmed out. https://youtu.be/zRdQ-h9sORE


Leave a comment:
-
David,
Thank you for sharing this very valuable wisdom! With trying to keep track of and plan for all the things that need to be considered during the build, I had not yet even considered the different expansion rates between the dissimilar deck materials in the sun. I appreciate you bringing attention to this as well as the other valuable tips and advice you’ve shared. You just saved me from a potentially big disaster.
That Nautilus looks fantastic! I hope that is one of your personal boats. Looks extremely well made.
NickLeave a comment:
-
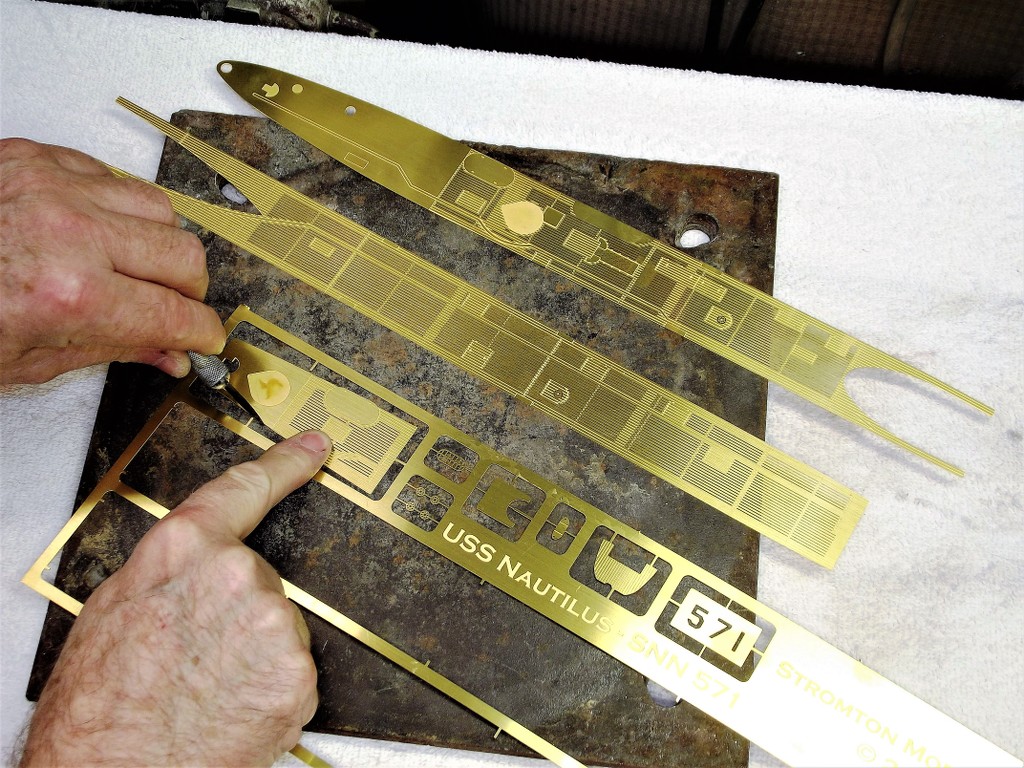
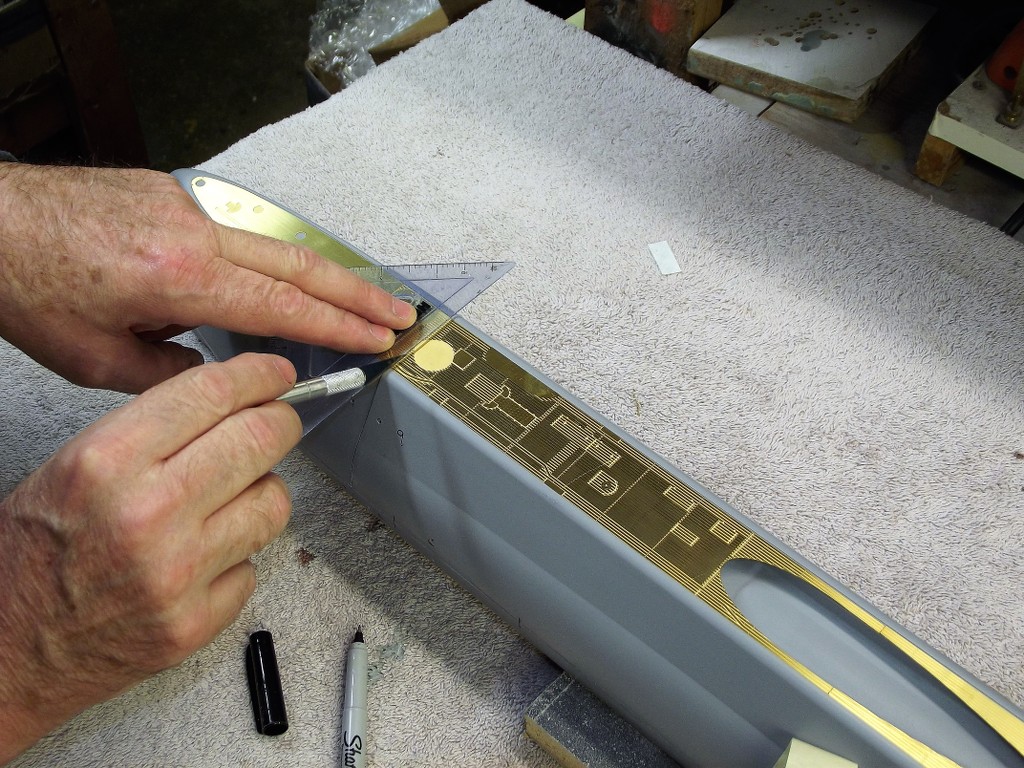
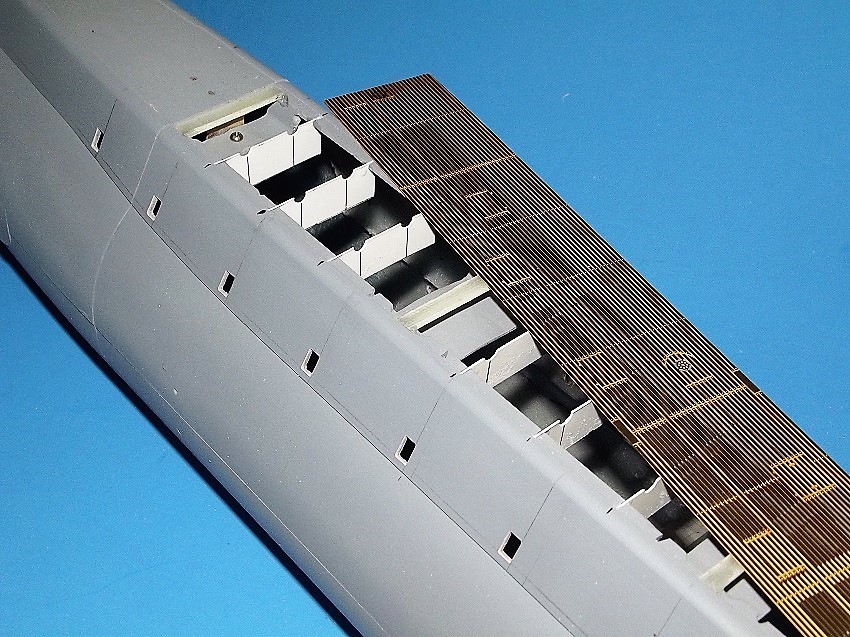
Your hesitation to use the PE parts is well founded: Polystyrene and brass/stainless will expand/contract at different rates with changes in temperature. So, with that in mind do the majority of bonding with a flexible adhesive (RTV gasket-making) and break the deck into three or four lengths to provide, 'expansion joints'. The deck will get the most heat variance in the July sun so that is your biggest concern. The inlaid PE limber and flood-drain holes will not be a problem as they are small in size and won't see as much heat flux as the deck will.
And do cut away as much of the polystyrene deck as you can for two reasons: First, it will greatly reduce the above waterline displacement, meaning a smaller ballast tank; and second, you reduce the amount of expansion/contraction between the PE deck and what remaining polystyrene deck is left to serve as a foundation for the PE deck.
I have spoken ! (rumble of thunder)
DavidLeave a comment:
-
Nick,
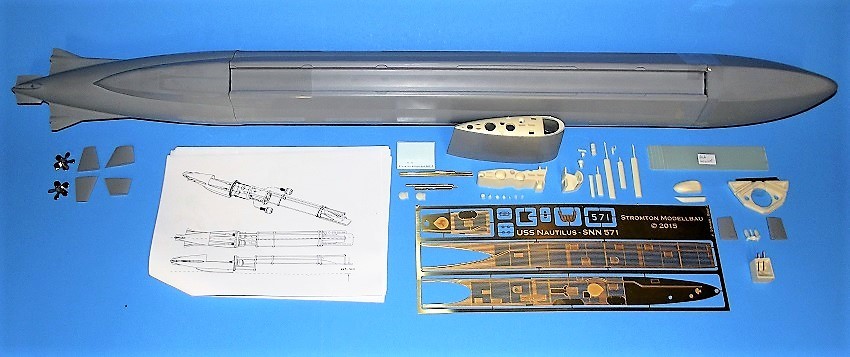
As Bob pointed out in another thread on this particular kit, it’s still a pretty good buy for the money, even with the stuff that we have run into while building it. I have used a bunch of Oto’s parts for the tower and guns, but I’m with you on the pieces he has where you need to heat them into the hull, or inlay them into the plastic. I’m skipping their use altogether. I did notice that the PE decks are off a bit from the kit supplied deck. I’m still debating the options here as well. Ultimately, what I thought was going to be a quick build (like Steve Neill did with this kit), is turning out to taking much longer than I had anticipated. But, that’s OK too,Leave a comment:
-
Sam,
It definitely sounds like we have both experienced some of the same discoveries with this kit.
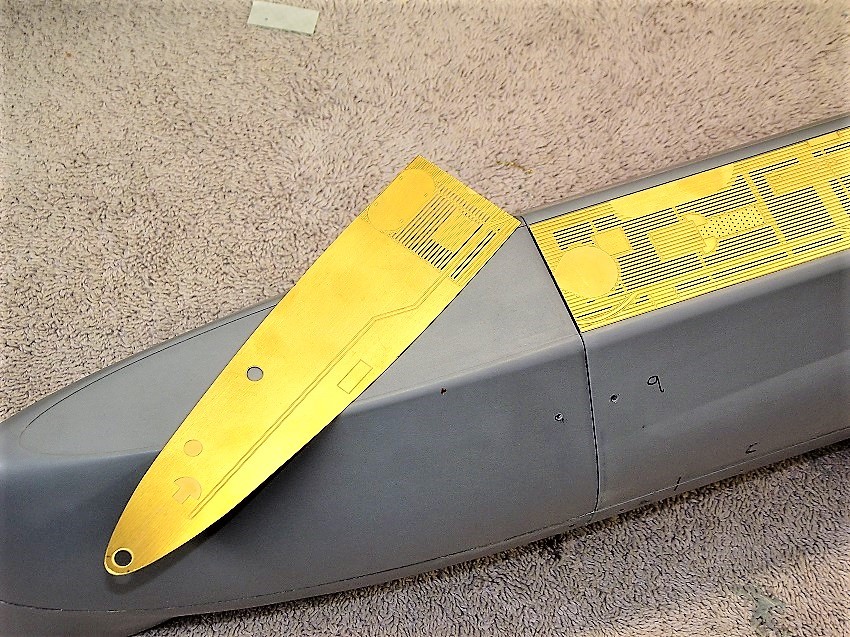
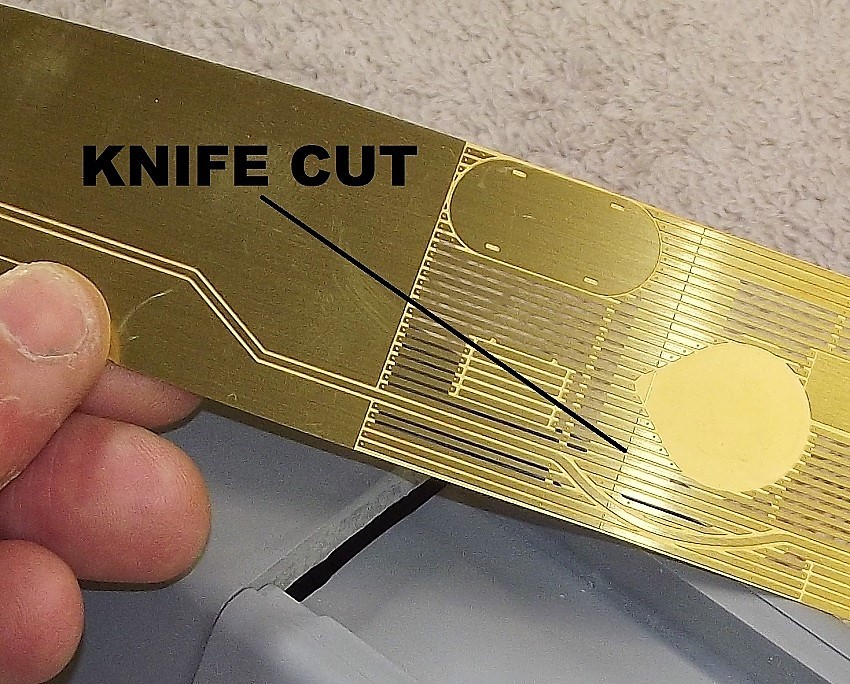
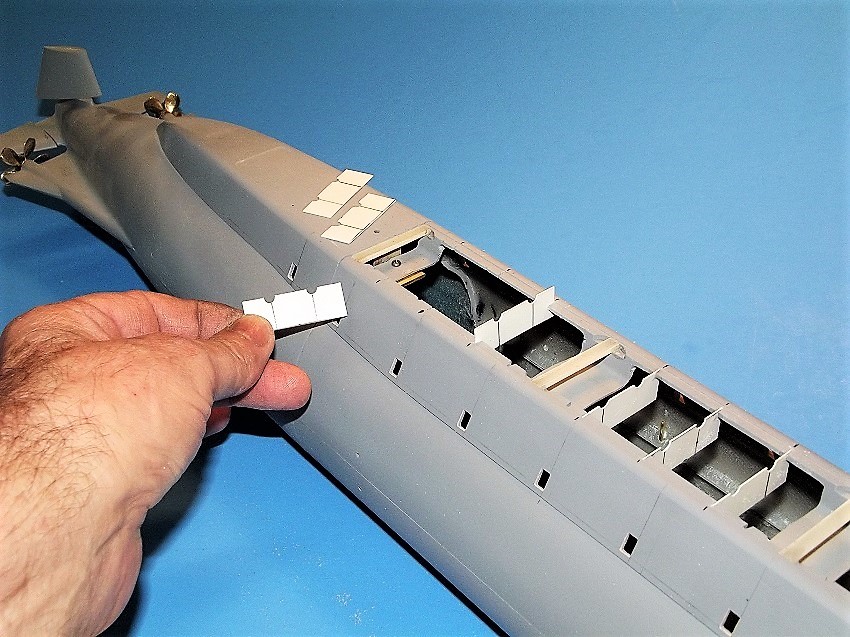
I have Oto’s PE set as well. Like you, I was concerned with constantly removing the deck and the possible damage that may occur in doing so. Now that the hull is split at the waterline, I went ahead and bonded all the sections above the waterline together, including the original kit’s deck. I had to be very careful doing this to make sure all the above waterline parts still matched up correctly with the below waterline parts. The assembled upper section is very stout now. Bonding Oto’s PE deck set to the original deck will be much easier than using the tabs you pointed out. Most likely I will cut out and open up areas of the kit’s original plastic deck to work better with the PE deck’s details. In mocking up Oto’s deck to the kit’s original deck I noticed the placement of the conning tower, deck gun and forward deck hatch are in slightly different areas when these parts are compared to one another.
This is not a big issue when using one deck or the other by themselves but using them both together does make a slight difference. I’m still accessing a plan forward for this currently with this build.
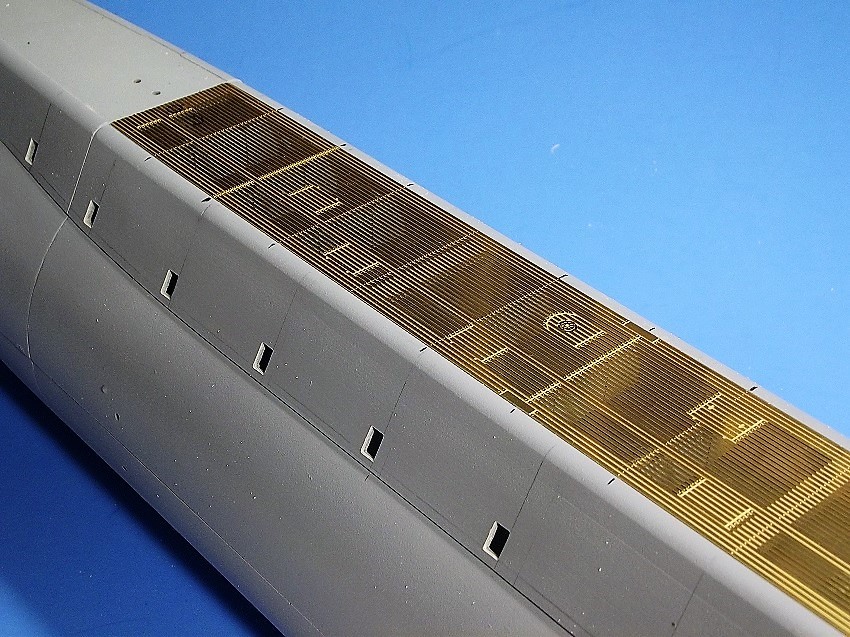
I do like the PE details that Oto’s kit provides for some or the areas on the hull to be corrected. Such as the flooding holes near the propeller shafts and the group of limber holes above the waterline on either side of the conning tower as just two examples. I’m a little bit reluctant however to use these brass PE parts as I’m concerned about the longevity of the PE staying bonded to the hull of a RC model. I’ve considered using these particular PE components as a template to recreate them out of thin abs or styrene sheets and bond those to the hull instead. Just a thought.
Regards,
Nick
Leave a comment:
-
Yes, with this design the shaft will be permanently installed in the hull once the halves have been bonded together. This was not my initial ideal design option but it is a simpler one.
Since this this part will be permanent, I chose to fabricate it all in metal and silver brazed all the pieces together for a little more added strength. The plastic dive plane can be slid off of the shaft if needed.Leave a comment:
Leave a comment: