Yet another 1/96 SKIPJACK build

Collapse
X
 
  • Time
  • Show
Clear All
new posts
  • He Who Shall Not Be Named
    Moderator
    • Aug 2008
    • 12288

    #16
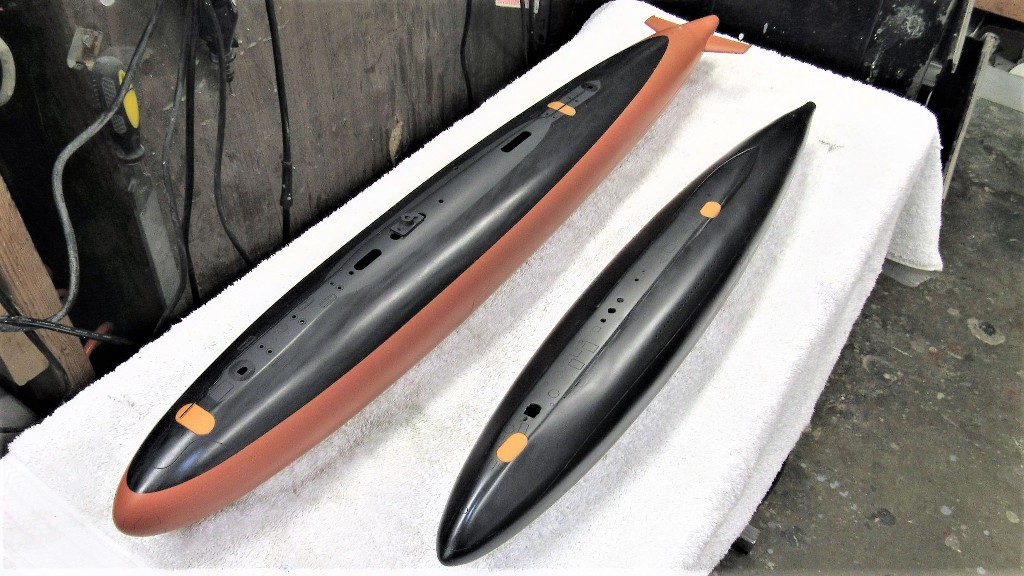
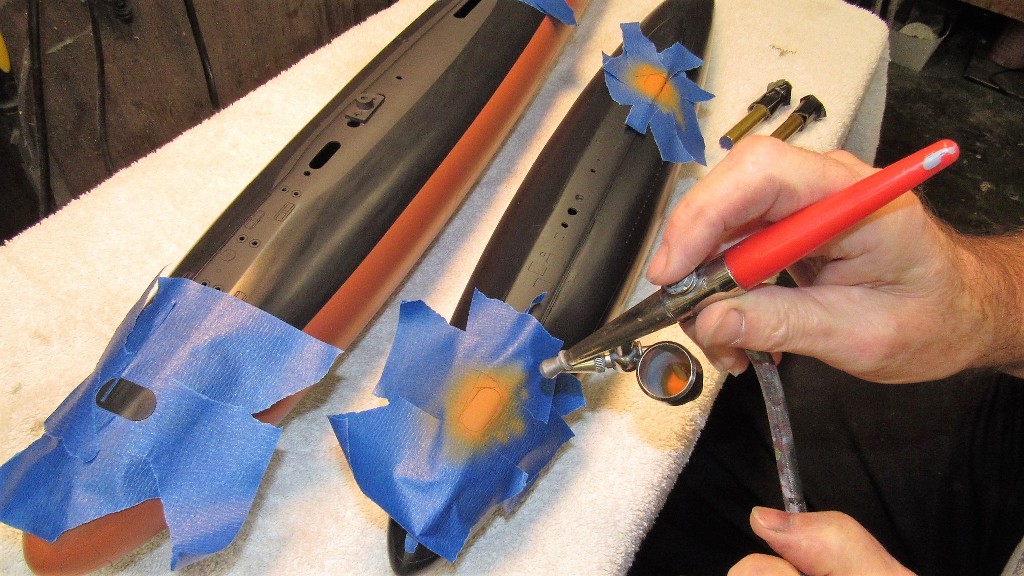
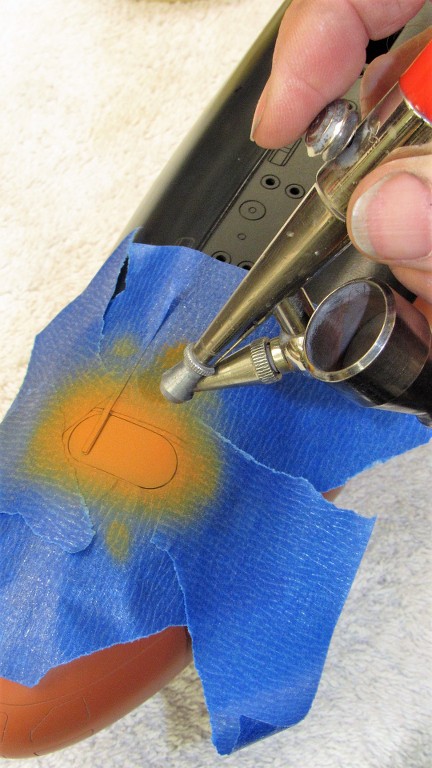
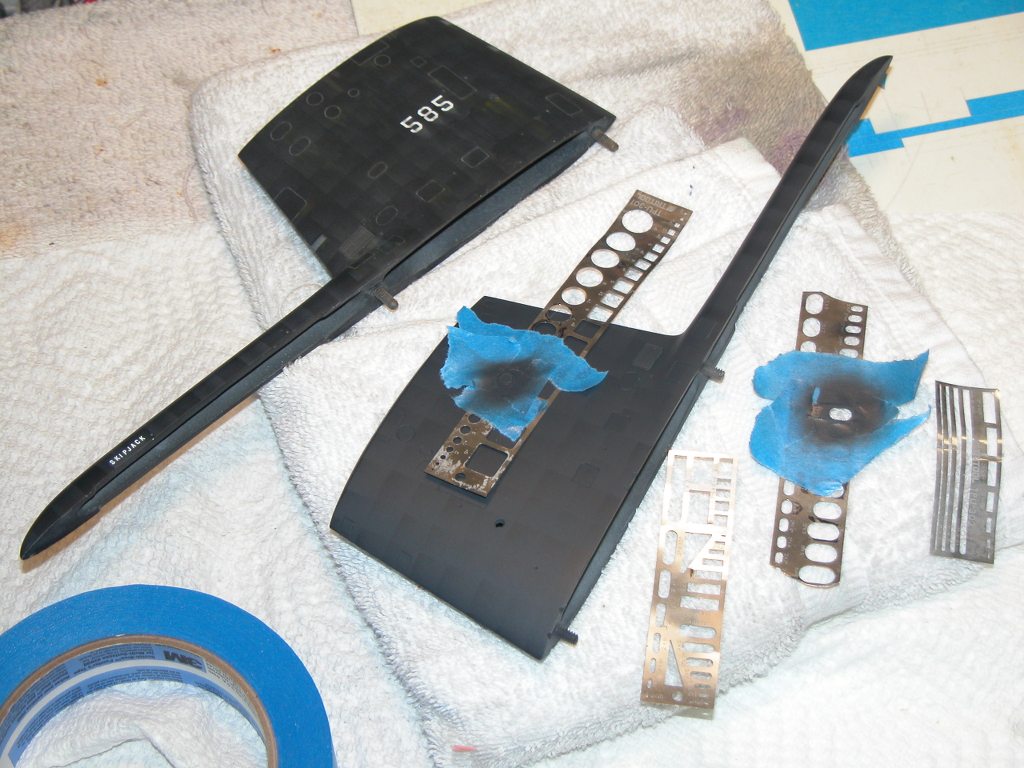
    Still working on this 1/96 SKIPJACK. Today's effort was masking off the hull and sail planes and painting in the dark gray representing the non-skid surfaces. The painting itself takes seconds. The masking takes for freaking ever!

    I'll have this thing ready for the 2021 Fleet-Run... American Revolution permitting of course. Hope this national enema is short lived!


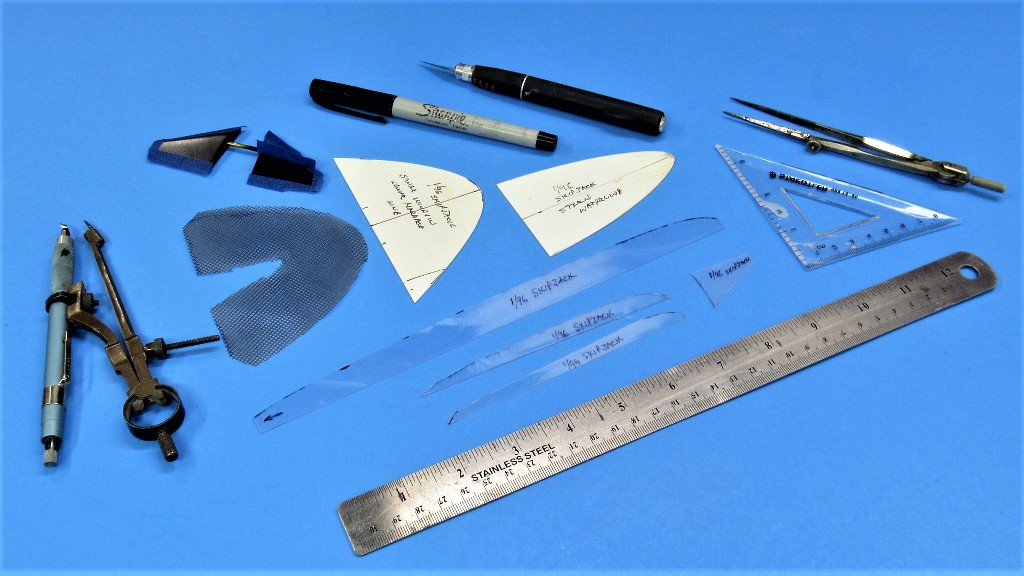
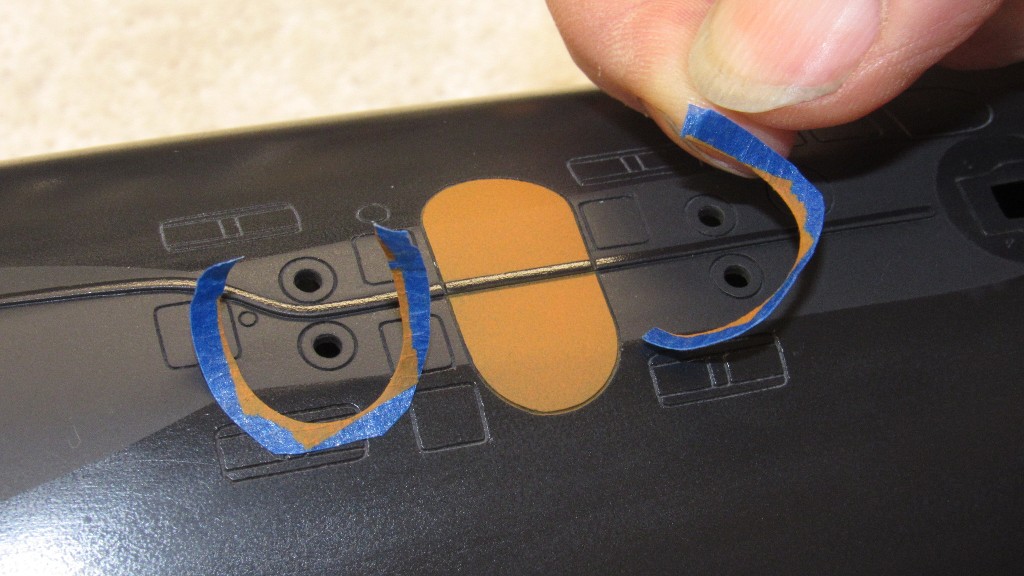
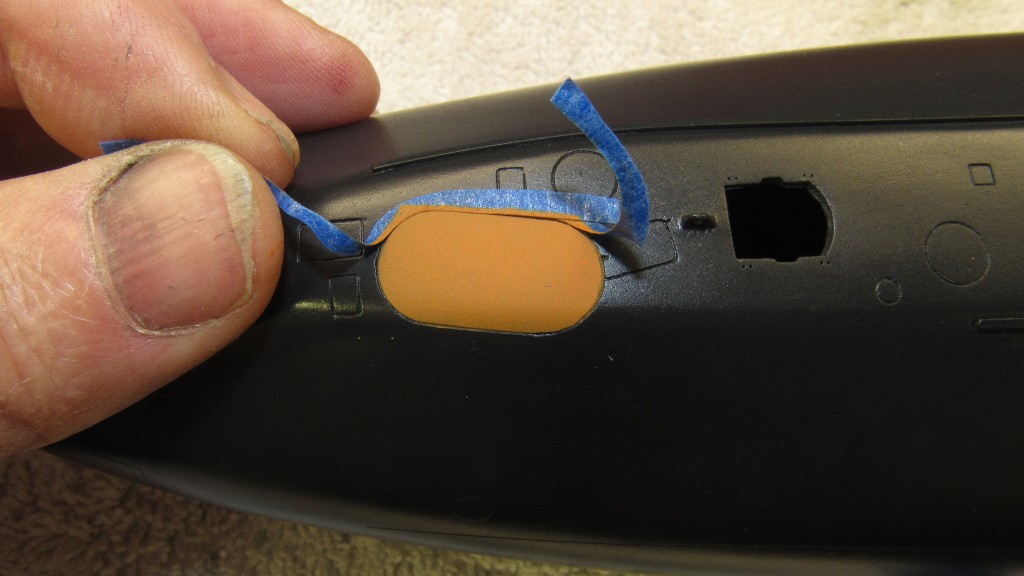
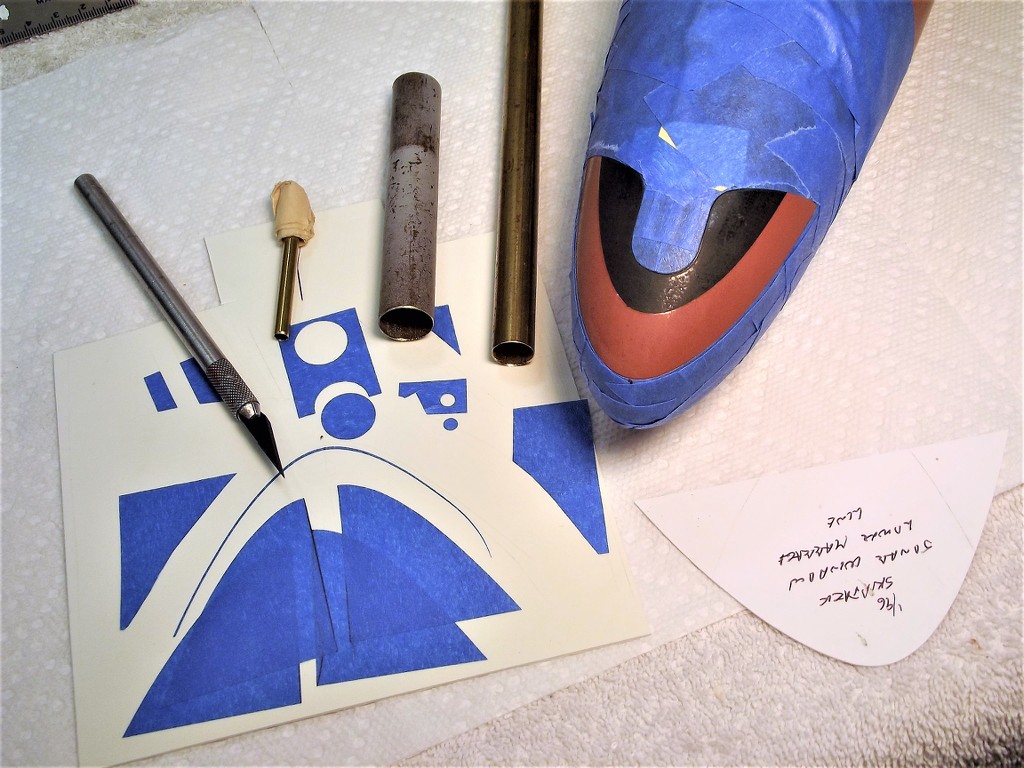
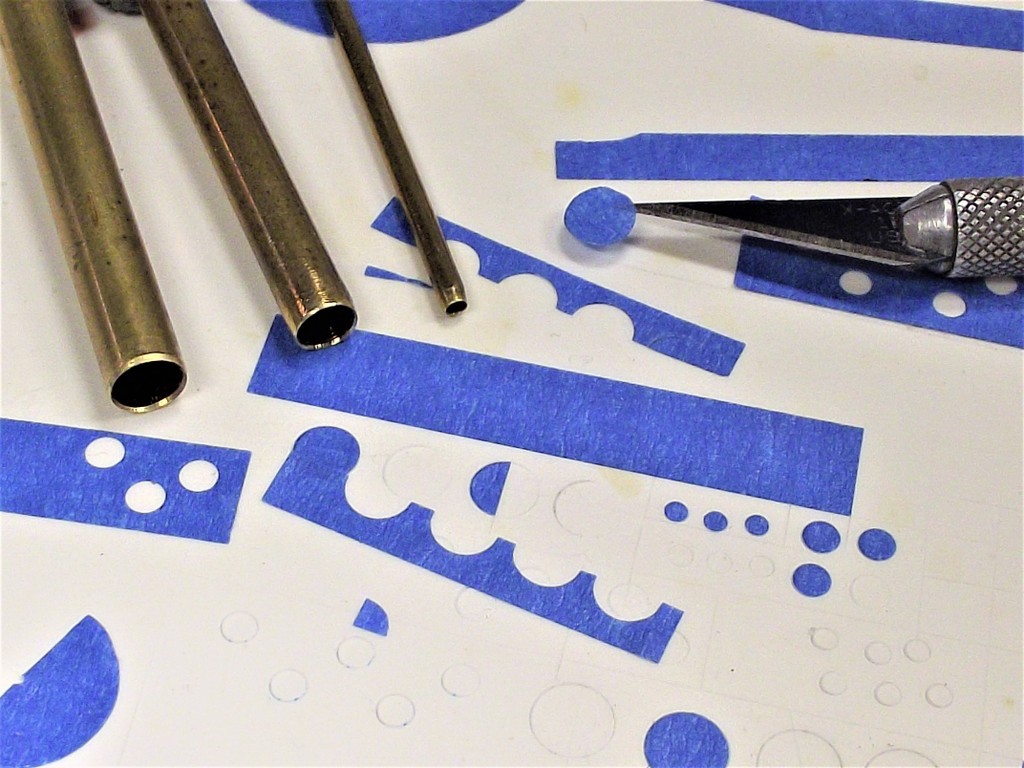
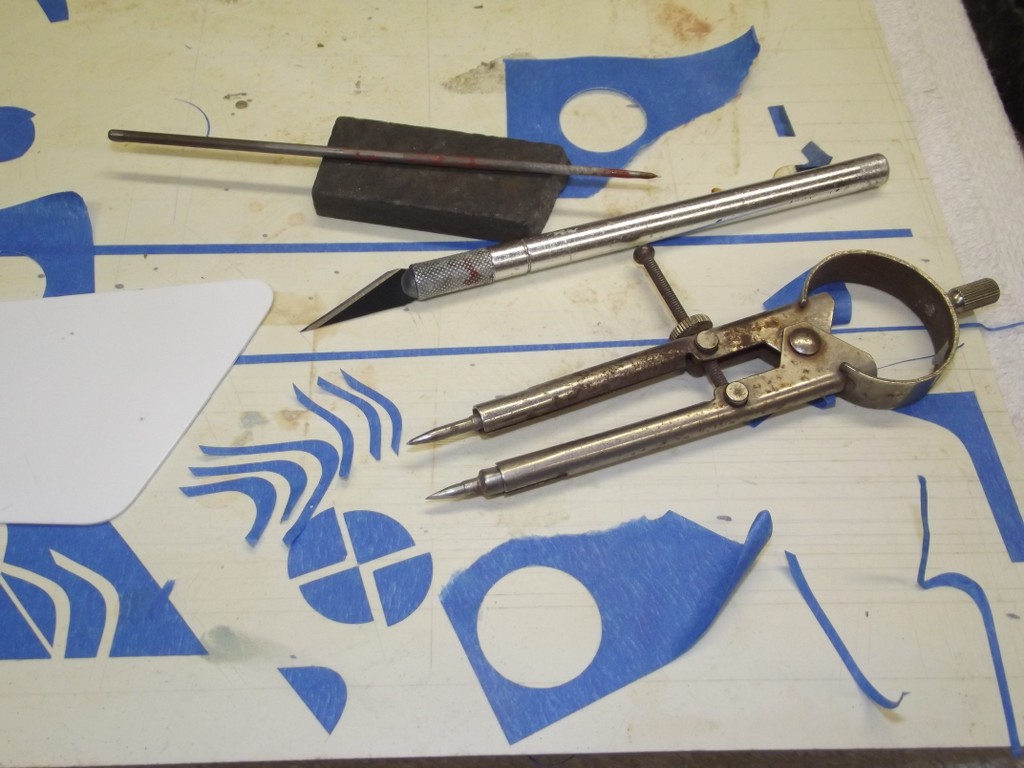
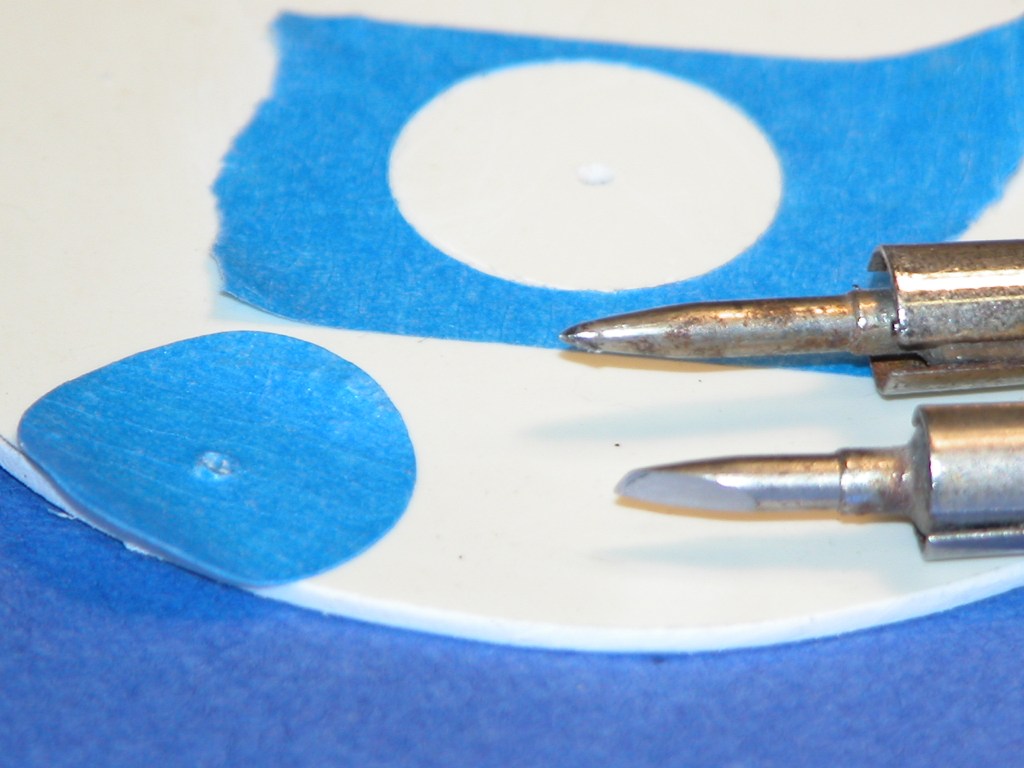
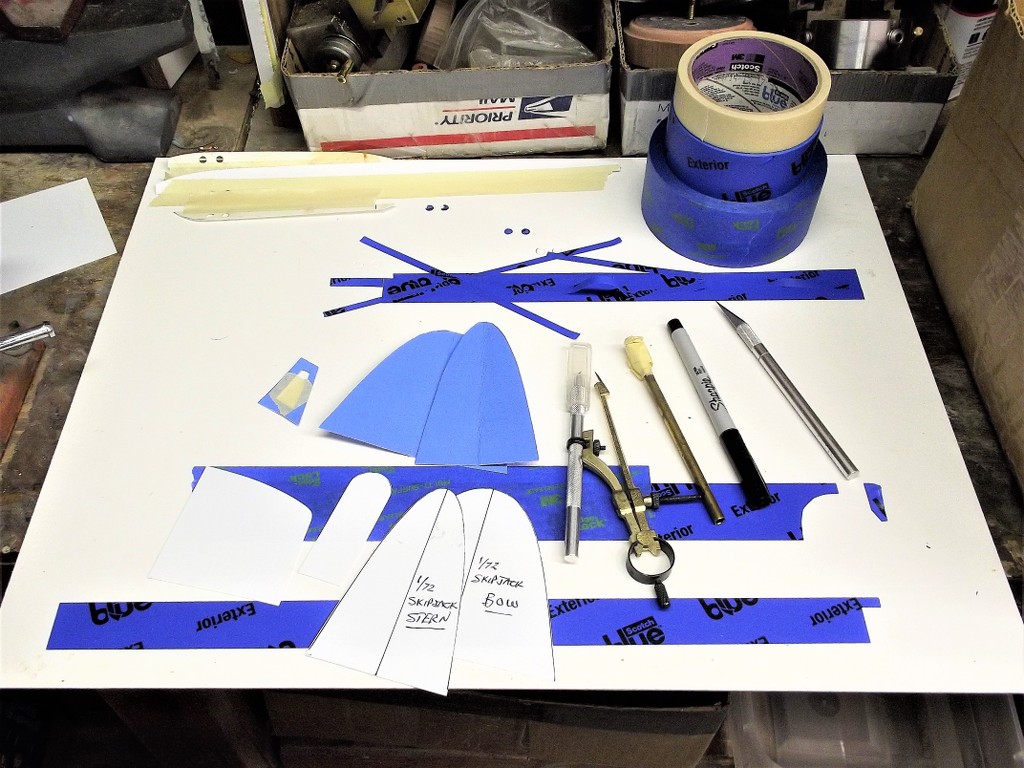
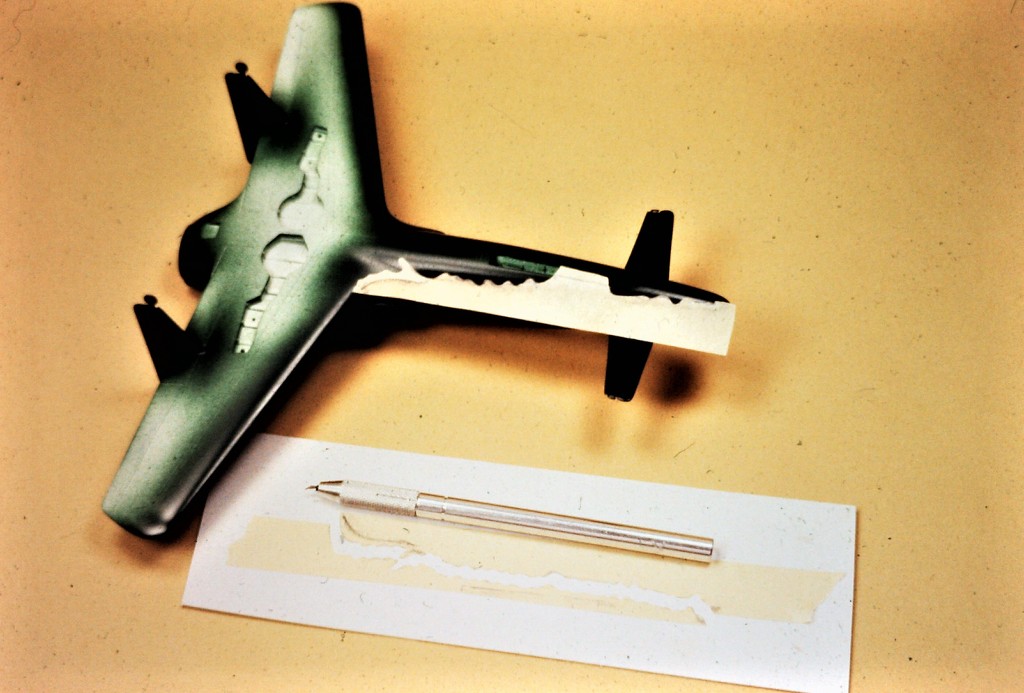
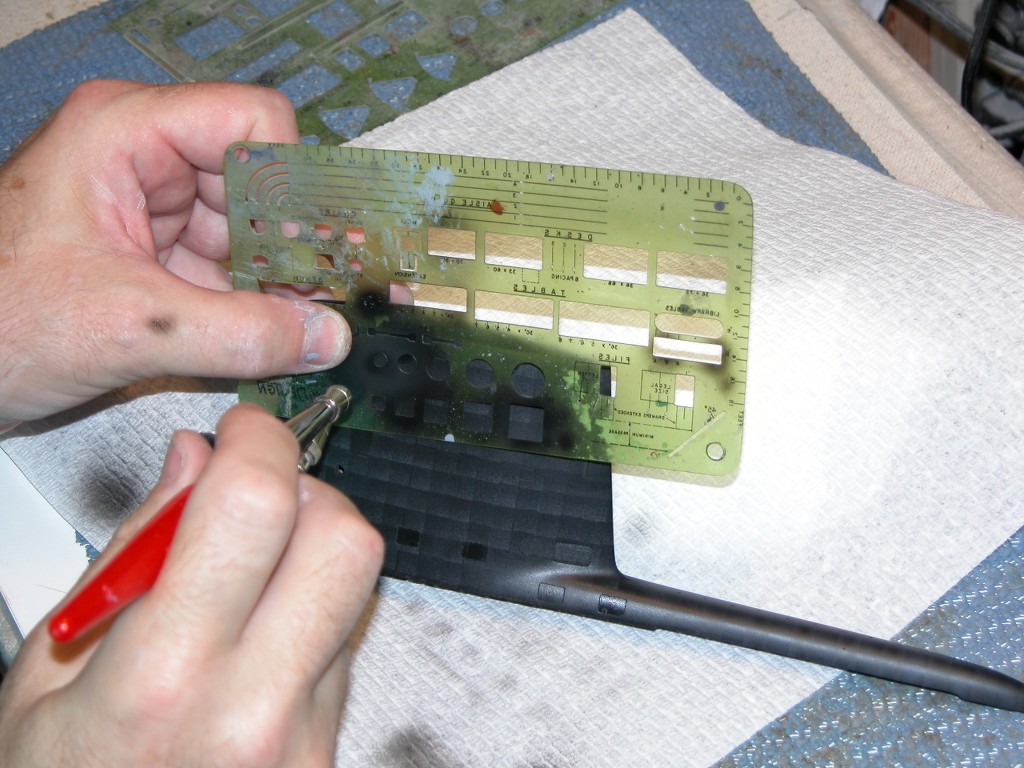
    Off the plans I made templates to guide me as I cut out masks to form the boarders between the lighter shade of gray representing the anti-skid areas and the rest of the hull.


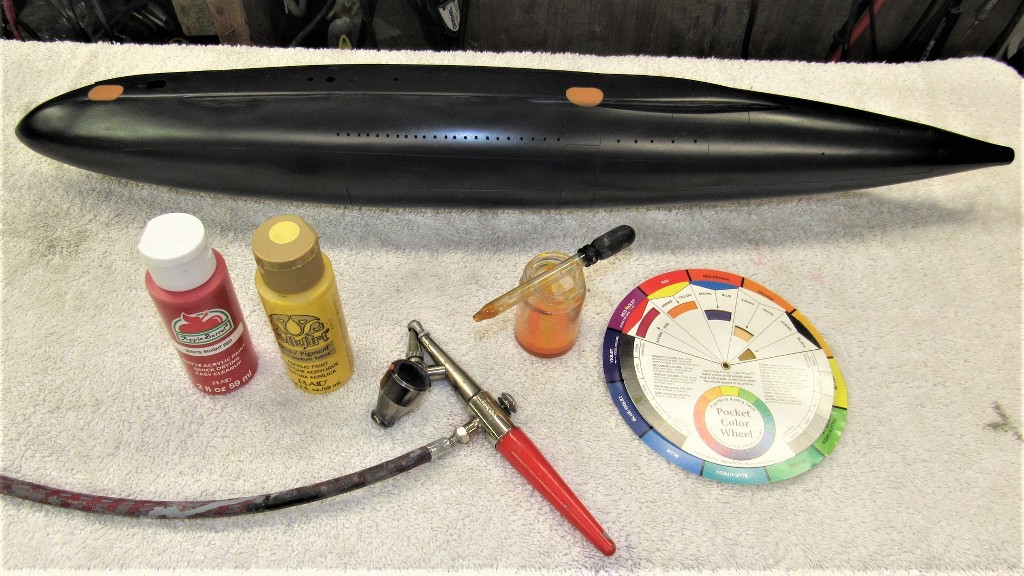
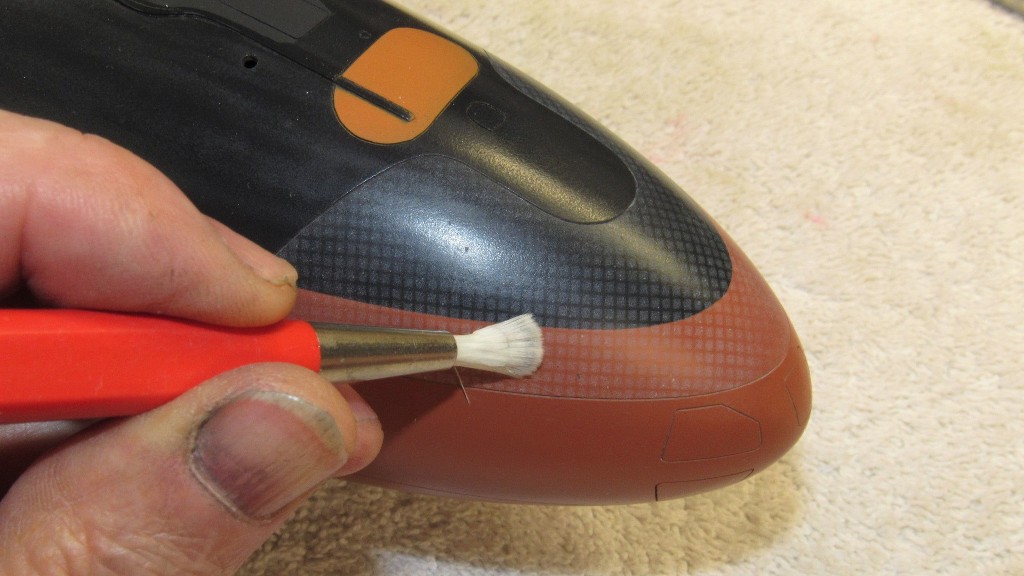
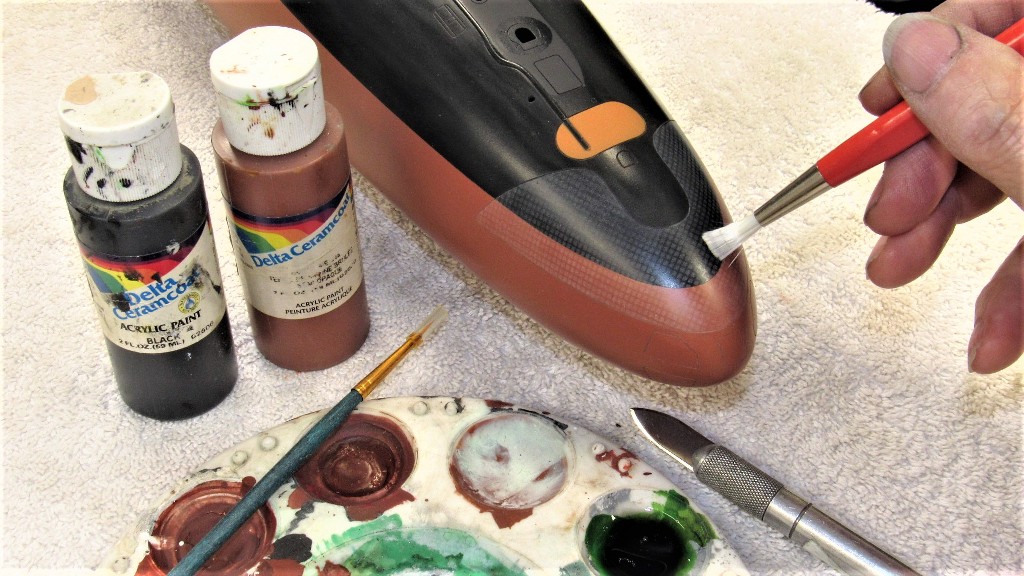
    For small area coverage like this I'll use the cheap and much more easier to prepare and apply water soluble acrylic paints. You get those from Walmart or other such box stores -- these paints are in the 'craft' section next to the sparkle-powder and other such fluff.

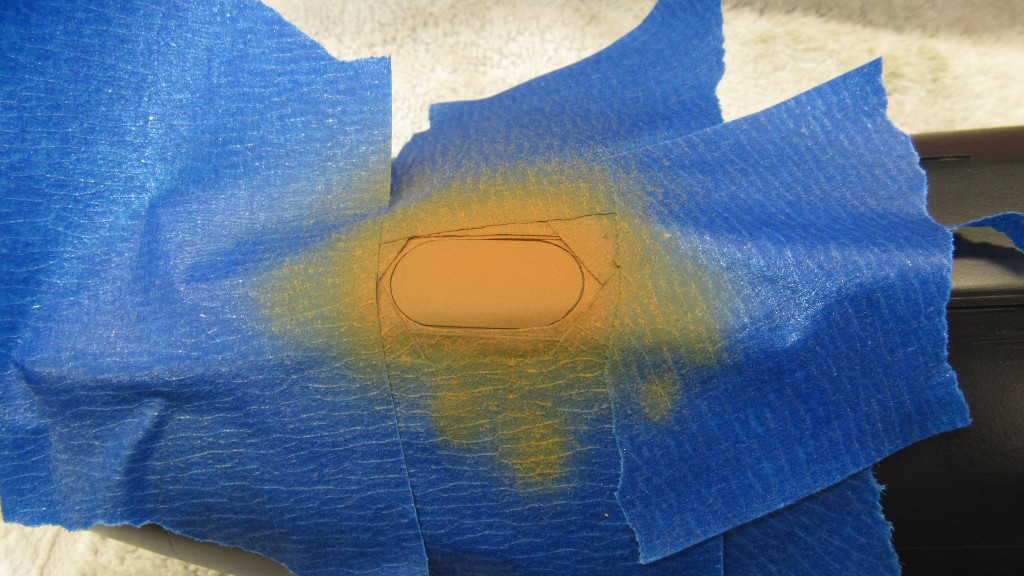
    To prevent fish-eye or runs I make several coats, drying each with the aid of a heat-gun before proceeding with the next coat. Next operation will be to lay down 'international orange' onto the two escape buoys, after which the entire model will be given a heavy clear-coat to protect the paint and form a barrier before I move into the 'weathering' phase of the paint job. That clear coat will permit me to 'erase' any goofs without damaging the underlying paint work.


    Who is John Galt?

    Comment

    • biggsgolf
      Captain
      • Jan 2020
      • 730

      #17
      Love it!, as always thanks for sharing!

      Comment

      • trout
        Admiral
        • Jul 2011
        • 3547

        #18
        David,
        Used those cheap acrylics a lot. When I did competitions and garage kits, they were my staple. Here is my Horizon Velociraptor (painted only with these acrylics).
        Click image for larger version

Name:	Raptor.jpg
Views:	305
Size:	132.7 KB
ID:	146486
        He sits above my desk at work.
        If you can cut, drill, saw, hit things and swear a lot, you're well on the way to building a working model sub.

        Comment

        • He Who Shall Not Be Named
          Moderator
          • Aug 2008
          • 12288

          #19
          Two more things I painted onto the 1/96 SKIPJACK with the water soluble paint: The two marker buoys and a suggestion of the underlying geodetic support structure under the bow upper sonar window.

          From red and yellow I mixed up an 'international orange' color for the buoys. For the SKIPJACK's geodetic pattern I simply shot some acrylic lacquer primer gray. While I was at it I also painted the two buoys atop the 1/96 ALBACORE deck.


          The hard part was masking around the ALBACORE and SKIPJACK buoy tops, this done with medium tack masking tape cut out with the aid of a sharp knife, punch cutters, and swivel-knife loaded compass. Additional over-spray masking was laid down and the paints squirted on with the ever reliable Paasche H-model spray-brush.


          The mask used to represent the geodetic pattern was a piece of plastic window screen. It was secured in place after masking off the outboard outline of the sonar window, and primer gray lightly sprayed through the mask.


          All masking removed I used an adjustable fiberglass eraser brush to scrub away some of the gray to render only a suggestion of the slightly dimpled surface of the sonar window. Such GRP sonar window sagging over time was much more evident on Soviet submarine of the time. Today, almost all bow sonar windows are steel.


          There were some areas on the sonar window that need a little paint touch-up -- that done with the water soluble acrylic paints applied with a 0000 brush.


          Now to protect all that work with a heavy coat of clear. After which I can move on to weathering and application of dry transfer hull and draft numbers.
          Who is John Galt?

          Comment

          • biggsgolf
            Captain
            • Jan 2020
            • 730

            #20
            I have too ask you David, what punch cutters, and swivel-knife loaded compass do you use? Also, how do you use them?

            Comment

            • He Who Shall Not Be Named
              Moderator
              • Aug 2008
              • 12288

              #21
              Originally posted by biggsgolf
              I have too ask you David, what punch cutters, and swivel-knife loaded compass do you use? Also, how do you use them?
              The punch cutter is a distant cousin of the cookie-cutter; it's a die with sharpened edges that when pressed down onto the work -- in this application masking tape adhered to a piece of scrap plastic sheet -- cuts out a mask of the desired size and geometry. Most of the punch cutters I need are perfect circles. The die is made by selecting the appropriate sized brass tube and beveling and chamfering the edge to a knife blade. Beveling done with an X-Acto blade; chamfering done with a wet-stone.


              And you don't have to be a slave to circular shapes, you can make a stencil cutting die from any extruded tube shape: round, square, oval ... whatever's available out there in K& tubing land.


              Here's a punch cutter in action, forming the masks needed to cover the clear circular port-holes on this little TWA Moon Liner model kit I assembled way back in the day.


              I'll typically use a punch cutter for mask diameters less than 1/2". The bigger circular masks will be cut out with the aid of a knife loaded compass. Again, the masking tape is laid on some scrap plastic sheet as the mask is cut to shape.

              This particular circle-cutter is a modified bow compass -- one of the points had been re-shaped to a knife-edge. Most effective for cutting multi-layer masks and heavy material.


              For single ply masks I'll equip a compass with an X-Acto 'swivel blade' handle. Like so:


              Incidentally, that swivel-blade knife is most useful when you encounter a mask of radical and tight radius turns, such as the masks for this little SHINDIN kit I assembled for a client.


              You can negotiate relatively tight radius curves on the model if you keep your initial masking strip of very small width, the shorter in width, the tighter the curve you can lay down without bunching up the tape into wrinkles.


              And don't be shy about pressing your stencils and templates into service as painting masks!


              Who is John Galt?

              Comment

              • biggsgolf
                Captain
                • Jan 2020
                • 730

                #22
                Wow, thanks Daviid, so much learning material! Much appreciated!

                Comment

                • He Who Shall Not Be Named
                  Moderator
                  • Aug 2008
                  • 12288

                  #23
                  Originally posted by biggsgolf
                  Wow, thanks Daviid, so much learning material! Much appreciated!
                  Just passing on what others taught me.
                  Who is John Galt?

                  Comment

                  • HardRock
                    Vice Admiral
                    • Mar 2013
                    • 1609

                    #24
                    I love to see these builds. The detail and the care that you put into these things is amazing. Don't stop!

                    Comment

                    Working...