
Nick, I think that early on you might have seen posts on my trials with the 1/64 torpedoes, but being so small weight was very critical. I went so far as to strip the ground wires bare to save the weight of the insulation .Also what made the biggest difference was to change from the thin wall aluminum tubing to a two layer fiberglass body tube-it actually turned out to be positively buoyant. I am not sure how the printed body tubes do specific gravity wise...I do know that you will get it fine tuned!-Bob
-
-
Bob, Yes sir, early on you shared your 1/64 torpedo build and experiences. Man, I’ve lost count of how many times over the past months I’ve thought back to what you’ve said along the way and your build. Most of the time it’s when I’ve been sitting there staring at the damn torpedo saying to myself, “ great, where the heck can I shave off more weight!” Usually to make up for having to add weight from necessary design driven changes. I often go back to thinking about how you made the center body on your torpedo.
All I can say for myself is, absolute laziness coupled with pure pig headed stubbornness has effectively stopped me so far from stepping away from the much easier, ready made aluminum tube, to do something a lot more logical like you have done.
Getting the balance of factors right in the 1/48 scale torpedoes has been challenging. What you’ve accomplished in 1/64 scale is amazing!
When you changed over from aluminum tube to the custom made fiberglass tubes, did you keep them at the same .014” wall thickness? I need to go back and look at your build posts!
NickComment
-
If you are ok with a little fiberglass work in either polyester or epoxy-it is easy https://www.rcgroups.com/forums/show...91&postcount=6
Comment
-
Definitely comfortable working with fiberglass. Have laid up a number of scale boat hulls over the years. Mostly been fighting it due to laziness and the added construction steps it would take to make these things. Been hoping to make it work with the aluminum tube. So far it has but I’m just hell bent on removing another half gram.
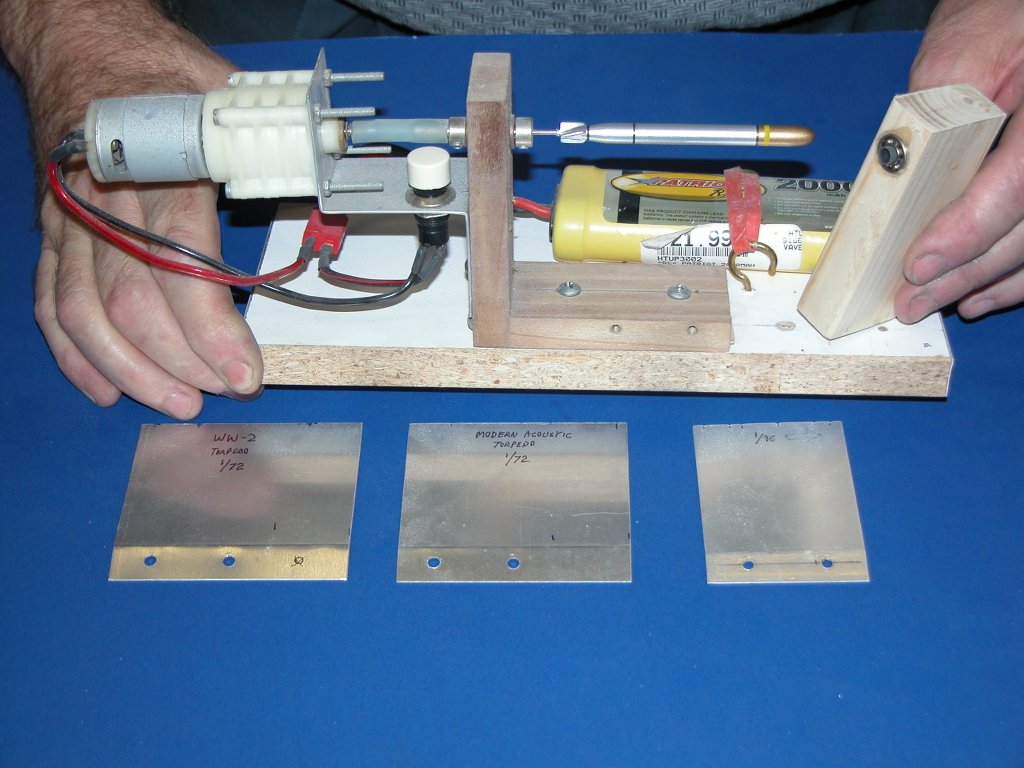
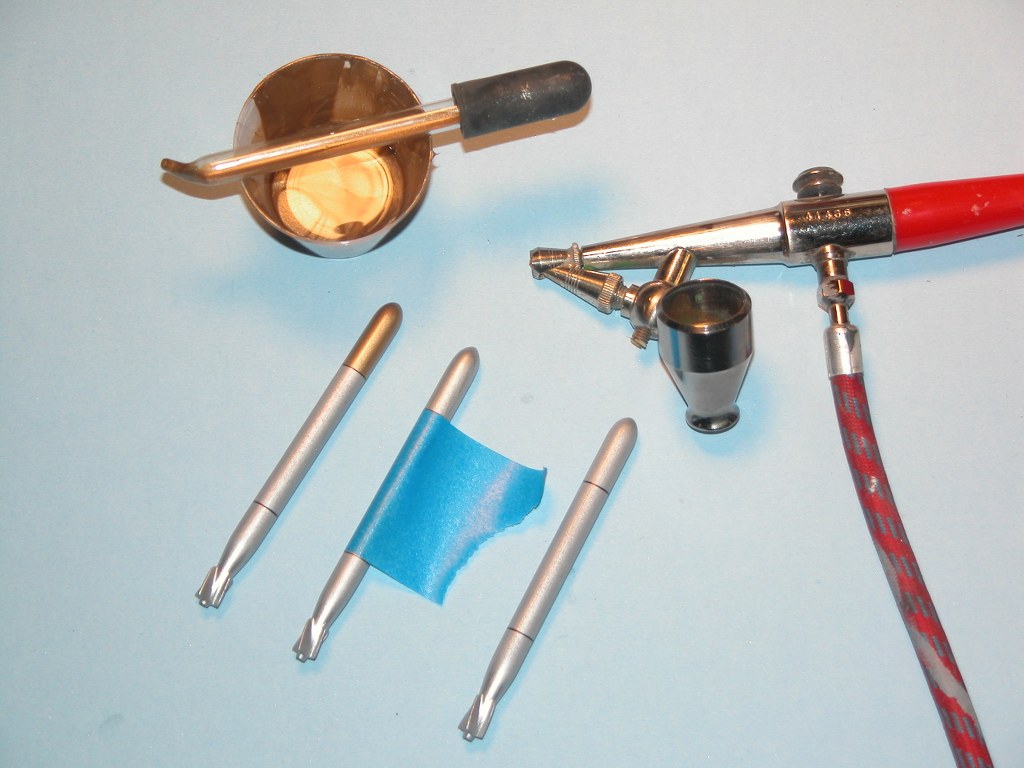
The weight savings are very promising with what you have done. The center body on this torp weighs 3.102 grams. I’d imagine the fiberglass would probably half that figure. Another consideration has been printing the center body with all the correct details but I think the minimum wall thickness would need to be kept at .032 minimum for strength which would be a no go for the width of the timer module unless I redesigned it and had it made narrower. I need a tube ID of .405”. That requirement makes the fiberglass tube a more appealing option than a printed or cast resin version.
BTW, I meant to mention a while ago, I picked up some miniature latching glass reed switches to use with the high Farad capacitors. They’re pretty slick and still compact. Would make for a pretty straight forward running gear set up. The latest capacitors are 3.8v LiPo hybrids ranging in Farad ratings from 10F to 25F. Those were the ones that needed to be shipped ground a while back due to them being stored in a charged state. I’ve since had a couple more sizes of these shipped out in the same ratings.Comment
-
Ha that answers the shipping problem with the caps- Lipo hybrids? I check them out thanks...
all my stuff is STILL in storage(waiting on a new condo build) but as I recall,
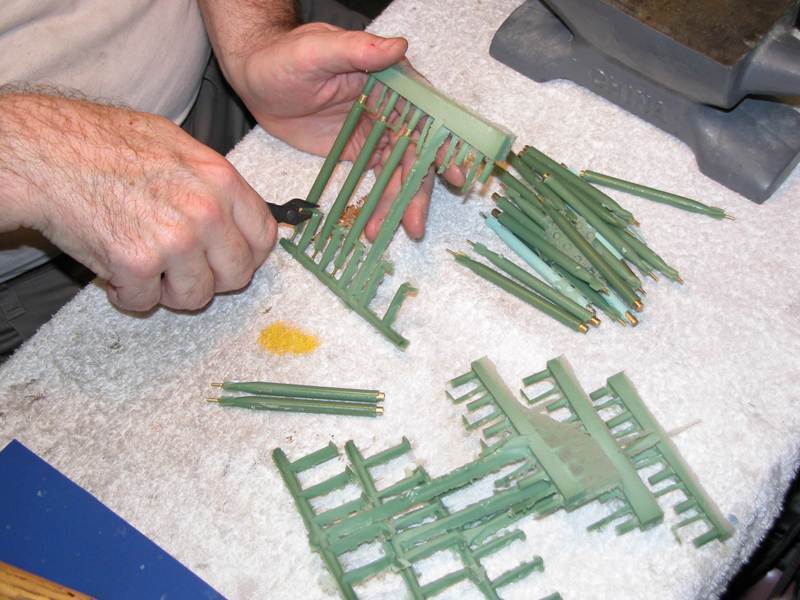
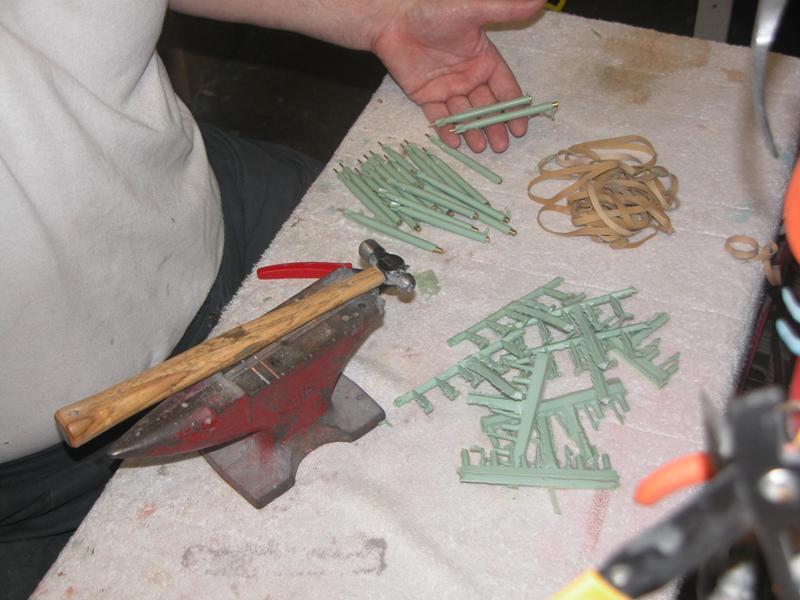
I think the wall thickness of the composite tube is .005" very simple to make -work out the ID that you need and find a brass or any tube that size. I then wrap parchment paper around it(parchment wont stick to anything)-so if the body tube is to be 3 inches-use a mandrel tube at least 4 " and you can wrap tape around the ends 1/2 overlapping the paper and 1/2 overlapping and sticking to the mandrel. Then take more parchment the same size as you used earlier and lay 1/2 oz cloth and resin on the paper such that it will make two turns around the body tube diameter-go easy on the resin. Then roll it like rolling a cigarette-squeeze out the trapped air , tape up the ends then I spiral wrap the whole thing with tape to set-polyester about an hour or two. There will be pin holes that can leak in the cured tube but a cotton swab and some resin will fix that-
The great part about the caps and the reed switch is that a water leak wont destroy the battery, motor or the switch.. nice typing with you, Nick-stay safe-BGComment
-
Bob,
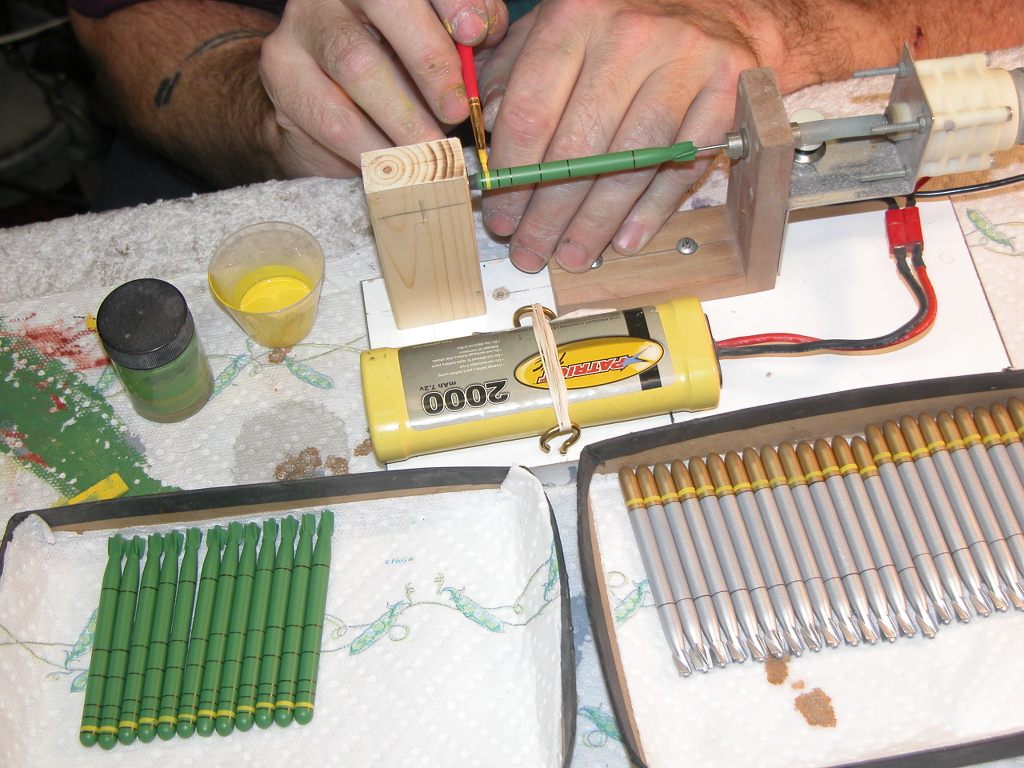
Here’s a couple photos of the 3.8v 25F LiPo caps. I got the from Digikey. If I recall correctly these are 8mm X 20mm.
Thank you for going into further detail on how you created the composite tubes. Makes perfect sense on how to go about making them now. I will have to give it a try. Should have all the materials on hand already. Will just need to find a tube at the correct ID or make a mandrel. Good chatting with you as always.
NickAttached FilesComment
-
-
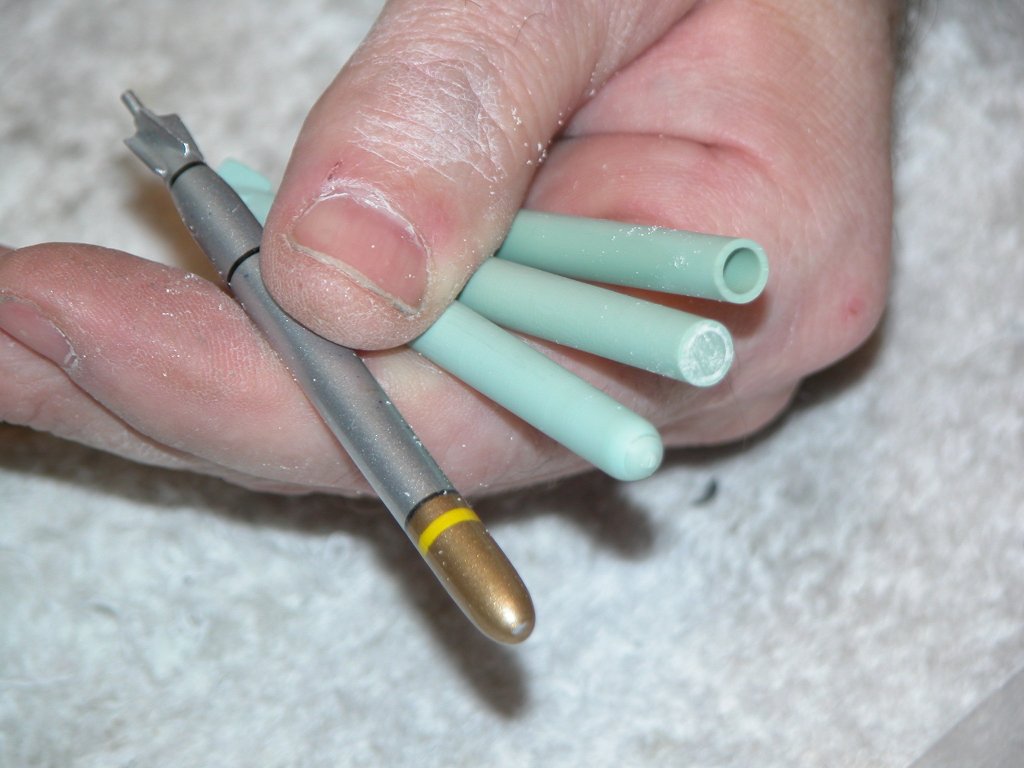
Was able to make the changes that I had in mind to cut the weight down on the torpedo to my target amount as well as get the center of gravity where I wanted it. The target weight I was shooting for was 11.1 grams with a lengthwise CG of .010 just aft of center. What I wound up with after the modifications was a overall weight of 11.044 grams with a CG of .012” just aft of center. To date this is the lightest version yet by about .350 grams with the best CG.
The torp now floats just how I wanted it to with the tail at a slight downward angle. Prior to this the torp would float straight up and down with the nose bobbing out of the water.
The .591grams of weight was removed by swapping the 6mm X 15mm motor for the 6mm X 12mm motor. The aluminum stuffing box was removed and short delrin bushing at the end of the tail section replaced it.
The smaller 12mm motor did much better during bench testing this time around most likely due to the recent machine work that was done to eliminate the last of the noticeable friction in the counter rotating transmission. For the first time in this build everything was going great and according to plan. Even the test with the torpedo submerged in the test tank with the propellers spinning to measure the amp draw went very well. The next test was where the rubber meets the road. Testing it in the pond....
The lighter design did not have the same running characteristics and repeatability as the last version tests had. The lighter design With the CG close to center now suffers from the propellers piercing the surface and causing all sorts of negative running characteristics. Even with the counter rotating props it will sometimes spin the body like the single prop would or take a curved trajectory opposed to straight. It will also sometimes just run straight with barely any breaching the surface with the props.
I find myself in a weird predicament of needing to add weight for the first time since this project began. First order of business was to add the aluminum stuffing box back into the mix. This brought the weight back up to 11.2202 grams with a CG of .0441 just aft of center. Still saw the same negative running characteristics.
The good news is the smaller motor runs great and the new battery never suffered from a early over current shutdown. Now to figure out how much and where to add the weight to make it run like the last version but with the weight and CG better understood.
David,
Thank you for sharing your resin casting production process. Very neat. Casting these parts in resin has always been a goal. Using the rapid prototyping printing process has mostly been for quick turn around and testing of designs. Your post was not showing up earlier otherwise I would’ve responded more quickly. I saw that Bob Martin made a post about changes to the forum hosting platform after recent hacker or spammers did something. I’m wondering if this has to do with your earlier post being not visible until now. Anyways thank you for posting. If I ever get this darn thing totally nailed I’d like to learn from you how we could cast these parts to make production more ideal if others would like to have them to build there own.
Nick
Attached FilesComment
-
-
I'm at your disposal, sir.
DavidWho is John Galt?Comment
-
Nick,
My torps float at a 45 degree angle with the tail down,
you could remove the alu stuffing box and add some lead pieces near the rear of the torp to get this angle right.
Breaking the surface sometimes with your props means you have your CG not far enough to the rear of the torp.
Manfred.I went undergroundComment
-
I am reminded of words from my teenage days in model rocketry which I believe to ring true for water as well as air- "keep the center of gravity ahead of the center of pressure for a stable and straight trajectory" its is a fine balance..Comment
-
Guys, Thank you for the helpful feedback!
Sounds like the mistake I’ve been making has been trying to ballast this thing more like a boat or a submarine. This clearly is a different animal. When I added the aluminum stuffing box back into the design it did increase the weight and move the CG back further. The torp now floats in the test tank like it has in the past in a almost perpendicular position. Main difference is the nose is sticking up much further out of the water than it has in past heavier designs.
Manfred,
Thank you for the heads up! I think you’re exactly spot on with removing the aluminum stuffing box again and trimming it instead with lead weight. This makes perfect sense as it will keep the weight down low and can be moved around to test different CG positions.
Each design revision has always attempted to keep as much weight down low as possible but this current version only has the weight .006” below horizontal centerline. The designs where I dropped the battery and motor down from centerline as low as possible had the best self righting characteristics. The narrower battery that I recently tested (that failed) allowed for a much lower position in the torpedo. Switching back to the higher mAh but same size (slightly wider) battery as used in earlier designs, forced me to place it up higher.
NickComment
-
Nick,
Weight is allways the problem, try not to play too much with the CG, get them tailheavy at 45 degree, keep it simple, if you want to have them lower in the water use some foam in the nose, this will make the airpocket inside the torp smaller, thus less floation.
Perpendicular to the surface of the water you have to avoid, when the torp hits something it will go straight down into the deep and get lost, balancing at 45 degree will cost you some speed, but you can retrieve your torps always, trust me, i know.
ManfredI went undergroundComment
-
Thank you David and Manfred for that input!
Here’s the report from today
I started out by removing the aluminum stuffing box and re-installed the delrin tail shaft bushing. I noticed that I had soldered the main power cable to the top side of the timer board and was routing it over the top of the battery. This was normal when I was still using a full length chassis to secure everything to. I decided to remove and solder the connection on to the underside of the timer and route the cable under the battery to move the weight down lower. The cable and plug weigh .240 of a gram.
I also attached two lengths of .031 carbon fiber rod to the port and starboard topside edges of the timer module. These run forward towards the warhead. When the battery is installed these rest on the top of the battery and keep it from rotating in the center body.
With these changes the torpedo was now an overall weight of 11.1227 grams with a new CG .0083 aft of center OA lengthwise and .0099 below horizontal centerline.
On Manfred’s advice I decided to look around the shop for some small lead pieces to use as ballast. I found a couple shotgun rounds and cut them open to get the lead bird shot. The bird shot pellets were then put in the arbor press and flattened down to .020” thick discs.
I then spent the next hour or so noting each lead discs weight and with the use of thin tape, applied them in varying numbers and positions to the outside bottom of the torpedo. Each time placing the torpedo in the test tank to see how it floated. At this point I was focusing on weight placements aft of the overall center of the torpedo to give a tail down nose up static floating attitude.
I ran a number of tests in the pond to see how each trim adjustment performed. The torpedo would always immediately upon starting raise it’s tail up to almost completely level in the water with the tips of the props breaking the surface. The effect this had on the running was causing the forward travel to stall. It would also cause the torpedo to roll either clockwise or counter clockwise. The travel trajectory also would become curved.
After many different ballasting tests, and while staring at it floating in the test tank, thinking back to earlier designs, I had the first ah ha moment. The earlier designs were heavier overall and were always tail heavy. The tail heavy design wasn’t the main benefit that helped those torps run. They would do the same thing. Raise the tail up upon starting and do what they did through the run. The first key attribute they had was they were not as lite therefore the warhead did not raise up out of the water as far. All of the new ballast tests no matter the weight added would cause the torpedo to want to plane up out of the water due to the centerline of the curved nose warhead being above or just below water level. Of course the tail is lifting on forward movement!
So I went back to focusing on getting the CG neutral for the overall length of the torpedo. After adding weight and moving it around this is when I had the second ah ha moment followed by a instant facepalm when the weight added went way forward of OA center.
It was lunchtime and time to take a break. This is about when I saw David’s post about CG and CP. Bob had also mentioned CP earlier this morning.
Btw, all three of you are correct but the key thing I lost sight of early on was buoyancy force and it’s relationship to CG, CP, BF and what I witnessed in the earlier heavier designs.
Lunchtime ended abruptly early and now it was time to get back to work. Most torpedoes of WW2 were not neutral buoyant. They would sink if they weren’t traveling forward. This brought me back to ballasting this torpedo to float almost level, still being slightly tail heavy but to be just shy of neutral buoyancy for the purpose of recovery and the fact that I have not yet solved the scaled down depth keeping bits.
David is correct that the counter rotating propped torpedoes don’t like the same things the rotating body torpedoes like.
After a few float tests I determined that I needed to add .619 grams to the warhead. Perfect! That will come in handy later... The torpedo now floats just shy of neutral buoyancy with the tail at a slight downward angle. Tested the running characteristics in the pond multiple times and got the repeatability I was after. It always ran straight and if I started it at a downward angle it would run deep and straight and eventually come up to just below the waters surface and continue its run. When the motor stopped it would float at the waters surface.
Nick
Attached FilesComment
-


Comment