
 Tweet
Tweet
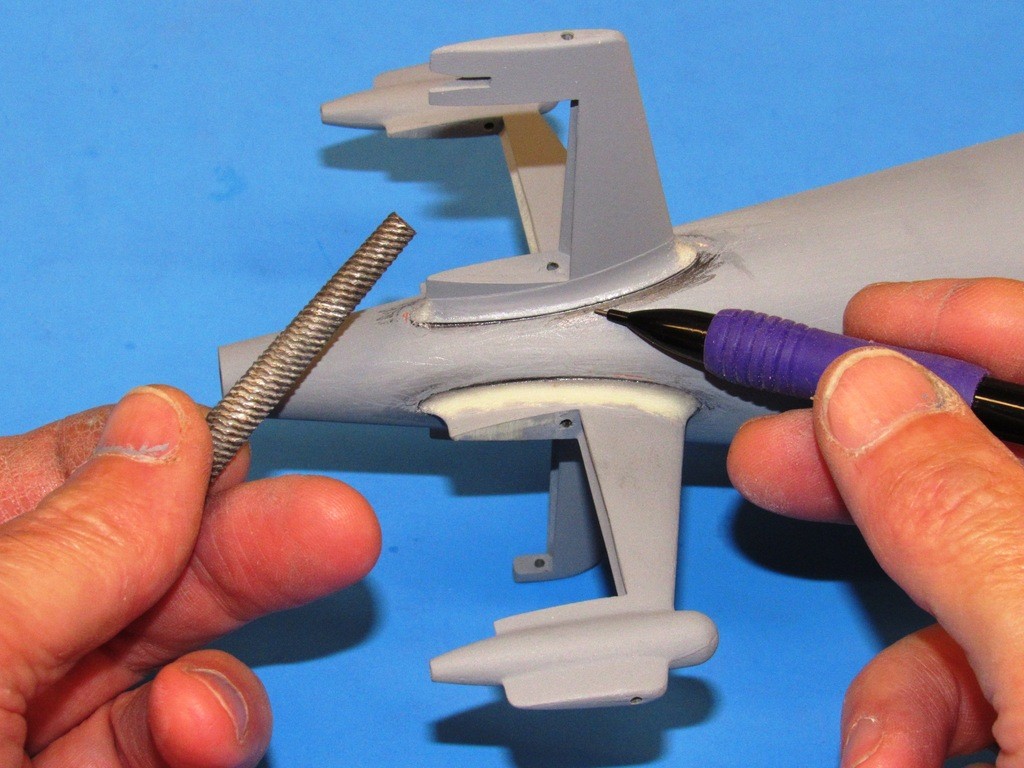
Using a pass-through length of 1/16” brass rod as an alignment aid I suspended a stabilizer over the work, then applied CA adhesive to the deeply roughed-up surface of the hull. The cross-hatching insures plenty of ‘tooth’ and increased bonding surface area.
But before all that I took very careful measures to insure that each stabilizer was oriented about the roll, pitch and yaw axis (in relation to the hulls longitudinal axis) correctly: the pass-through rod assuring roll, my eye-ball working out the yaw and pitch. Alignment established on a stabilizer I marked its outline onto the hull with a pencil – a guide to follow when it came time to grind in the cross-hatching, and gluing things together.
Proper planning prevents ****-poor performance (shop-class, 101).

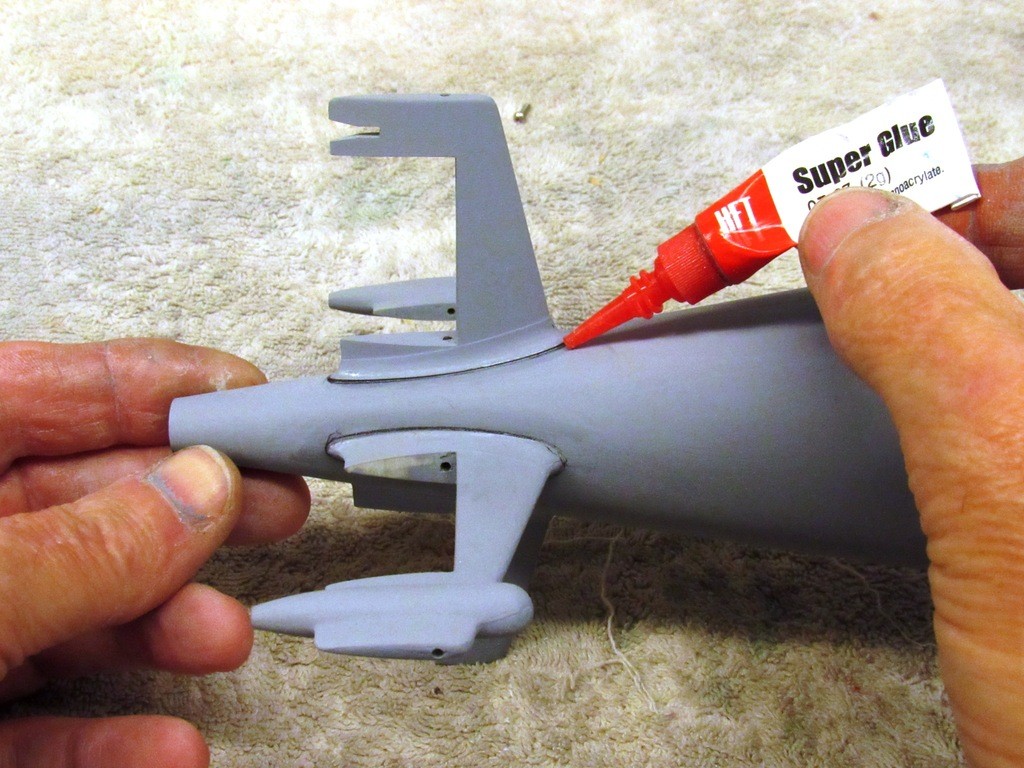
Once an opposed set of stabilizers were glued down, their pass-through rod was removed, and the other set of stabilizers attached to the hull in a like manner.
Though I took great care to get the base of the stabilizers to conform to the compound curve of the hull there still remained a slight gap where stabilizer fillet met hull, I had to address that; not only a gap to fill, but also a slight ‘step’ between hull and where the stabilizer fillet met the hull. Those steps had to be filed down to a feather-edge to the hull. Sure, a time consuming and rather intense operation, but worth the effort.
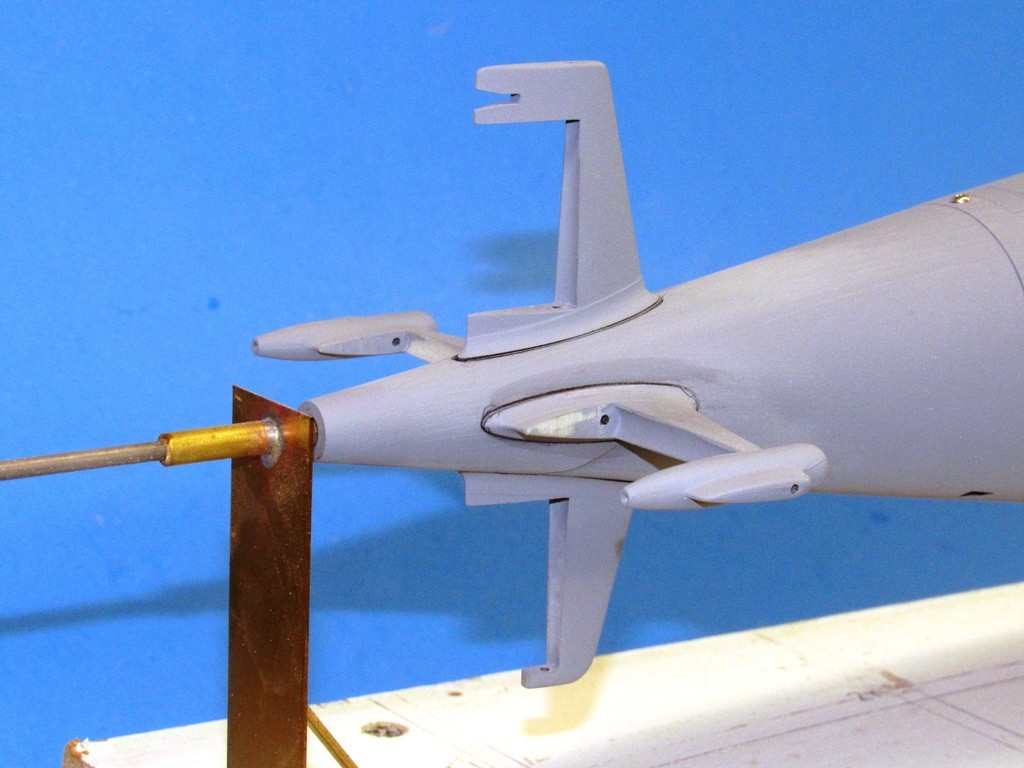
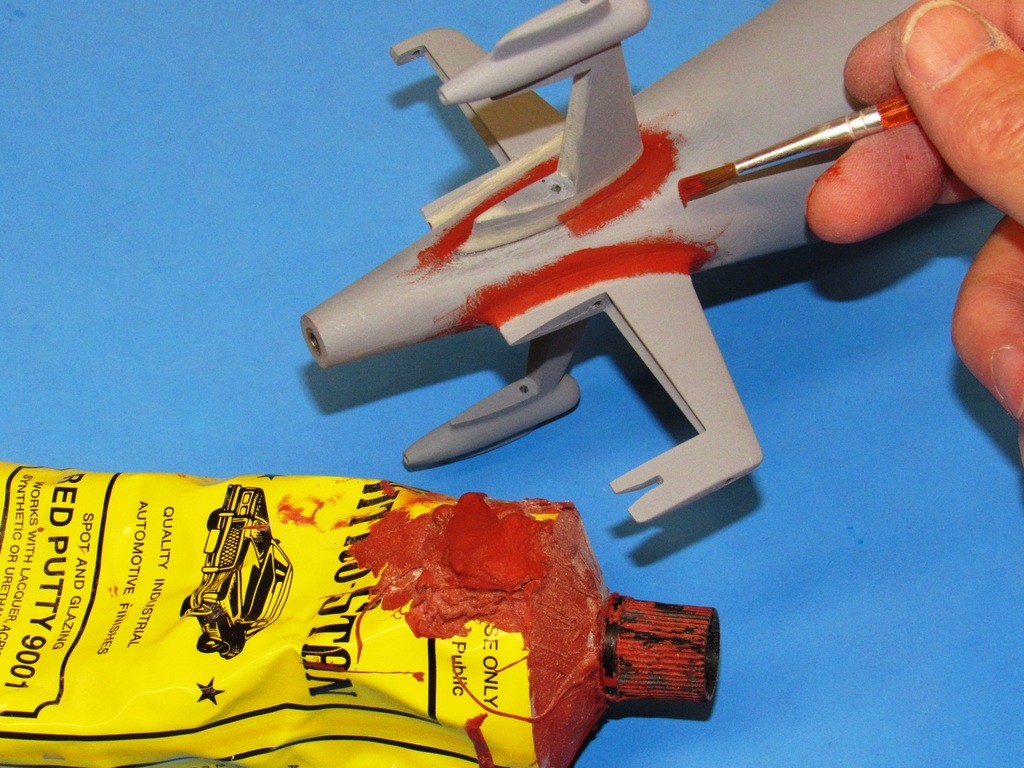
I held back on the CA when I initially bonded the stabilizers to the hull, only providing a minimal drop at the extreme ends where the stabilizer would sit – the objective was to not get any of the glue on the temporarily installed pass-through guide rod; doing so would have presented a nightmare trying to yank the damned thing out!
So, after all the stabilizers were in place and the pass-through rods yanked out I finished the gluing job by applying plenty of thin formula CA to the step/edge, where fillet met hull, and let capillary action draw the glue into all voids between stabilizer and hull. Once cured (‘accelerator’ is our friend!) the additional glue not only enhanced the strength of the bond, but also acted as a filler or ‘grout’ that helped fair stabilizer to hull when I later went at it with round-files.
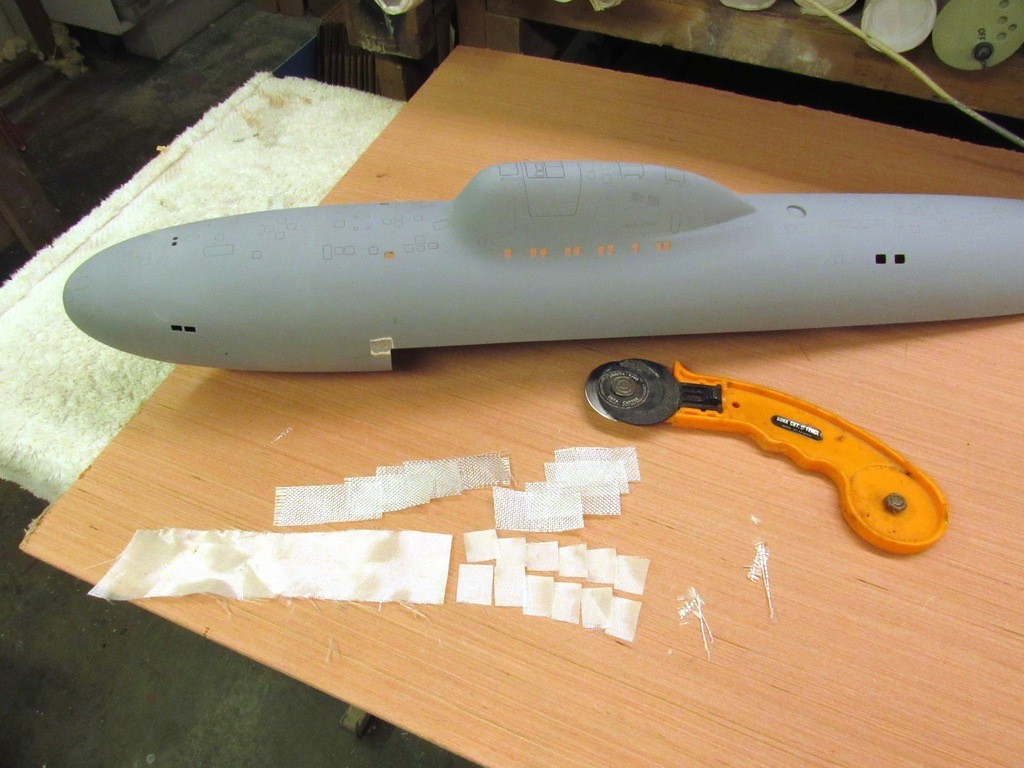
So, I get back to work on this ALFA project after a week of doing other ‘stuff’, and what does it greet me with?! The SOB has developed an advancing crack on the starboard side, originating at the right-angle corner between where I bonded the forward end of the lower hull to the upper hull; the crack running along the joint line between the halves, heading towards the bow. Yikes!
I examined the interior only to find that (for some stupid reason) I had neglected to internally reinforce the bond between the two hull sections with plenty of overlapping GRP tape. Only bonding resin (and not much of it) used way back at the beginning of this project was the only thing bonding the pieces together. No fiberglass tape. Just resin. Idiot!
The only thing to do was to grind away material from the outside where the crack was – and a good ˝” further forward, for insurance, and to laminate reinforcing squares of fiberglass cloth, about five layers. The light stuff first followed by some four-ounce cloth on top. Did the same for the inside seam, both sides; those internal reinforcing strips running a bit farther toward the bow.
This is the outboard GRP repair already filed and sanded to contour and ready for touch-up putty. You can still make out the weave of the fiberglass cloth through the transparent laminating resin. The inboard reinforcement can be seen as well.
Now there is no possibility of crack migration from the sharp corner between upper and lower hull! Better to make the fix now than later. Disaster averted. I would have lost my mind if that crack showed up after I had painted and weathered the model.
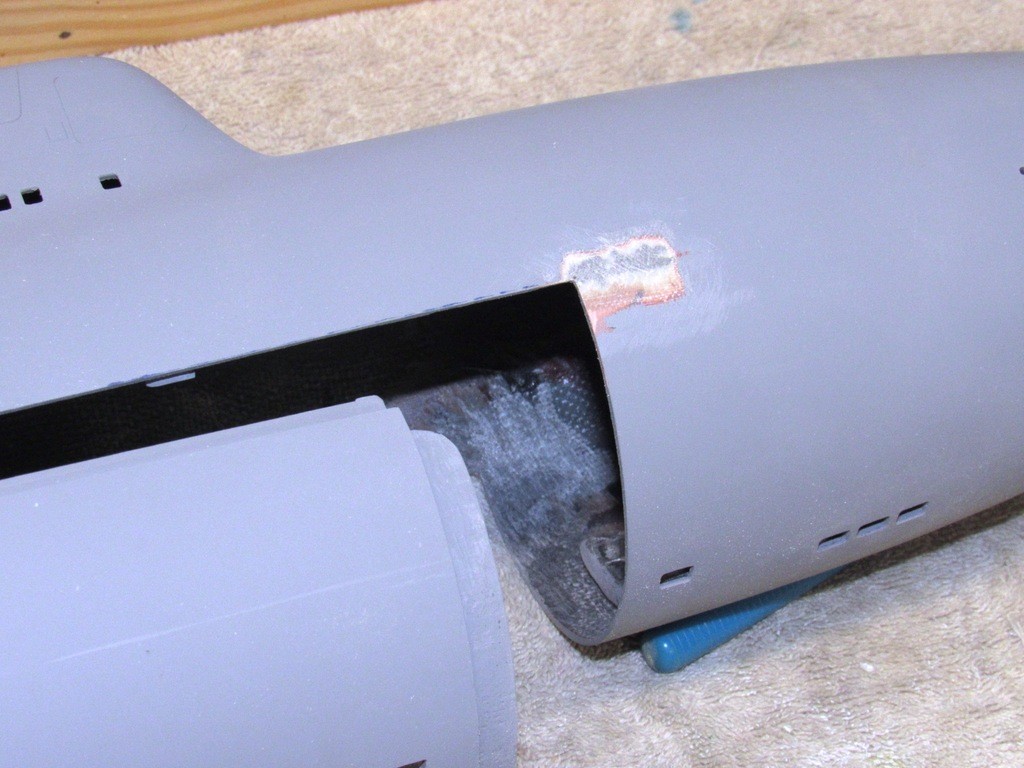
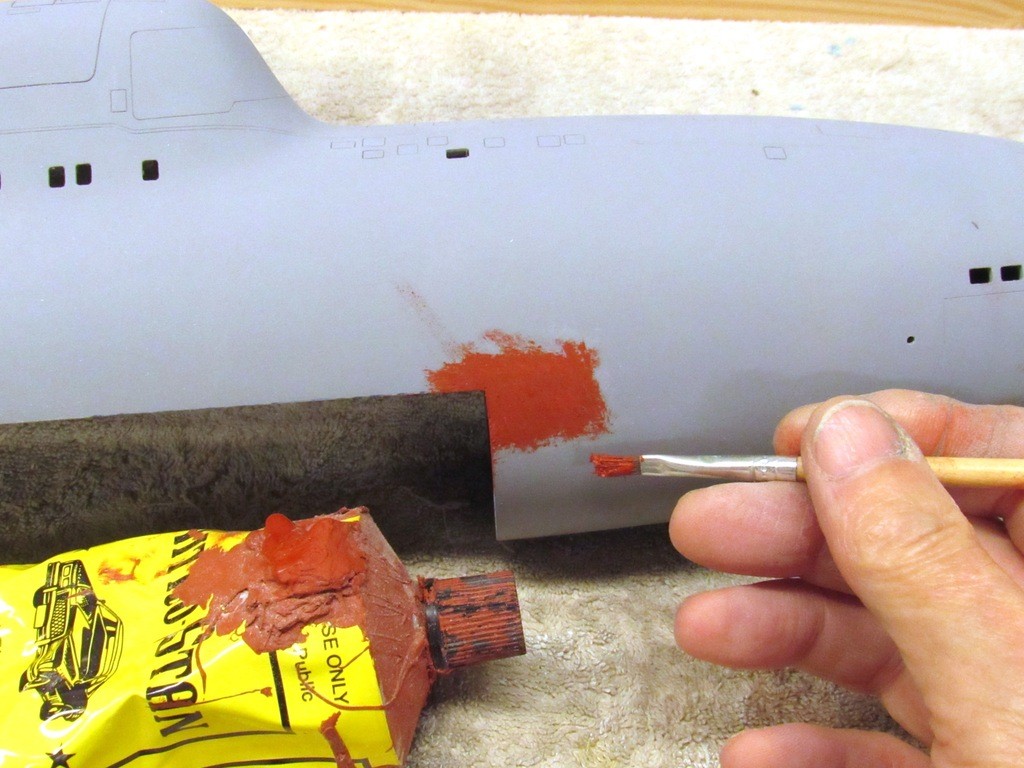
Smooth to the touch it may be, but invariably there will be little voids and tool-marks atop the glass fix. After such work I don’t even bother with primer – I go straight to either a two-part filler or, as in this case, an air-dry touch-up putty. Here, applied neat from the tube to the work with a semi-stiff brush.
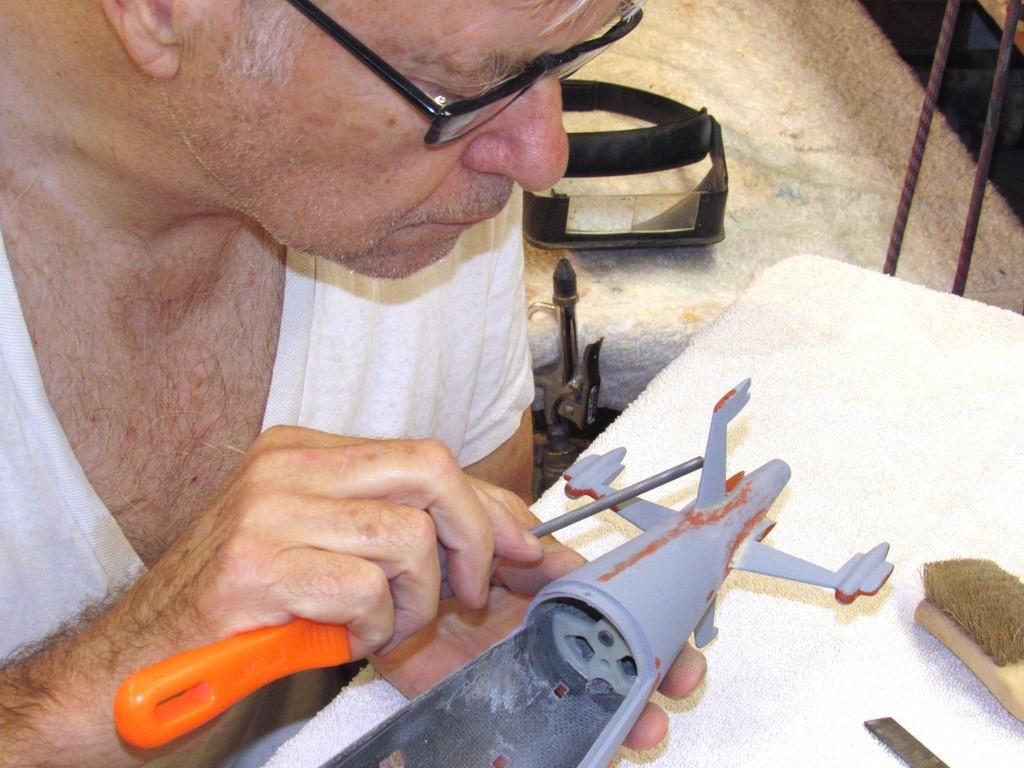
Try as I might to achieve a tight, gap free union between stabilizer fillet and hull I still wound up with a slight gap between the two structures. That slight step had to be knocked down to a feather-edge transition. The best tool for that job is this nasty looking, first-cut, rat-tail file. Course enough to shave off significant hunks of resin, meaning fewer strokes of the tool to eliminate the fillet-hull steps. This of course requires very careful strokes of the tool.
As a canary-in-the-coal mine aid, informing me when I’m getting too close to the adjacent hull was the pencil marking of the hull, from fillet step down about a 1/8” onto the hull.
The rough work with the rat-tail file done I went over the work with brush applied air-dry touch-up putty applied neat from the tube; The putty filling tool-marks and what step gaps remained.
The ideal round-file diameter is, of course, one that is twice the fillet radius. And I found just the right one in my rather massive collection of files – this particular one part of a set of chain-saw sharpening files bought at the local hard-ware store. Using it dry – If used wet it’s harder to see the progress of cutting – I carefully shaved away the excess putty until I had a seamless union between stabilizer fillet and hull. A careful wet sanding with a twist of #400 grit sandpaper and things were ready for a shot of primer.
Comment