Welcome to our forums. For the best in R/C submarine kits, components and accessories, be sure to visit the Nautilus Drydocks
If this is your first visit, be sure to
check out the FAQ by clicking the
link above. You may have to register
before you can post: click the register link above to proceed. To start viewing messages,
select the forum that you want to visit from the selection below.
The aft section of this conning tower looks like the one in the kit.
~~~~~~~~~~~~~~~~~~~~
I just finished reading : There seem to be two subs called IJN I-53 in the book.
This one which the book says is a KD type with the designation I-153 though the tower is clearly painted I-53:
And then there is the sub I thought I am building, the C3 type boat, I-53:
Which is it? Are there any more references out there? There was a great thread here once that had loads of references for the IJN boats but I can't find it today.
Thanks for the encouragement! I'm stuck at the moment waiting for the mailman to deliver some supplies. Like waiting for the Pony Express out here . . .
Filling the holes went fine. "Putty, sand and repeat" did the job. Sure. Your way might have been easier. But I have to work with what I have available. I live out in the country where, as my wife says, "There are more cows than people."
~~~~~~~~~~~~~~~~~~~~~~~~~~~~~~~~
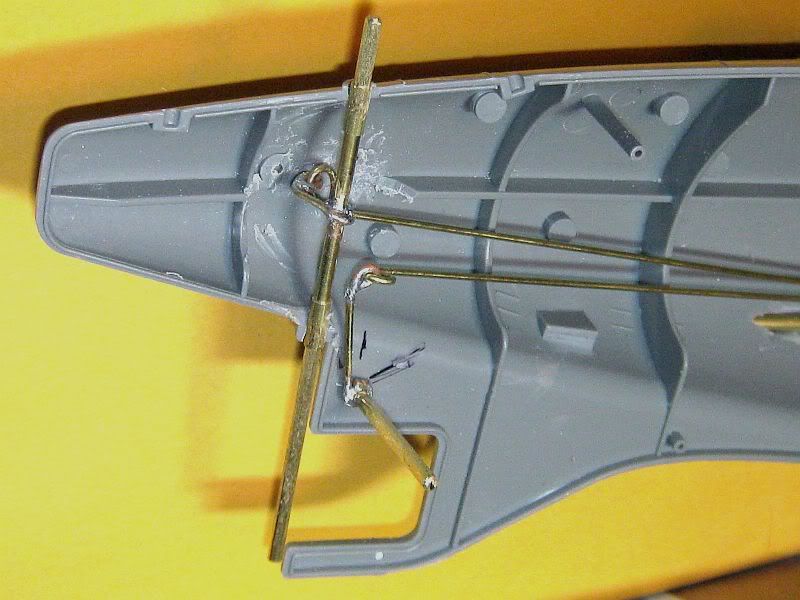
Made enough progress to button up the hull today.
Here are the axes for the control surfaces installed. I used 1/8 inch K&S brass rods and sleeves for this. I roughed up the surfaces that will have to bind with the rudders and planes.
And I have put in the silhouette for the nose-job. I will build up the bow using more plastic sheet --- and two-part putty since Chris suggested it might need to be a bit more robust than if it was just skinned with card.
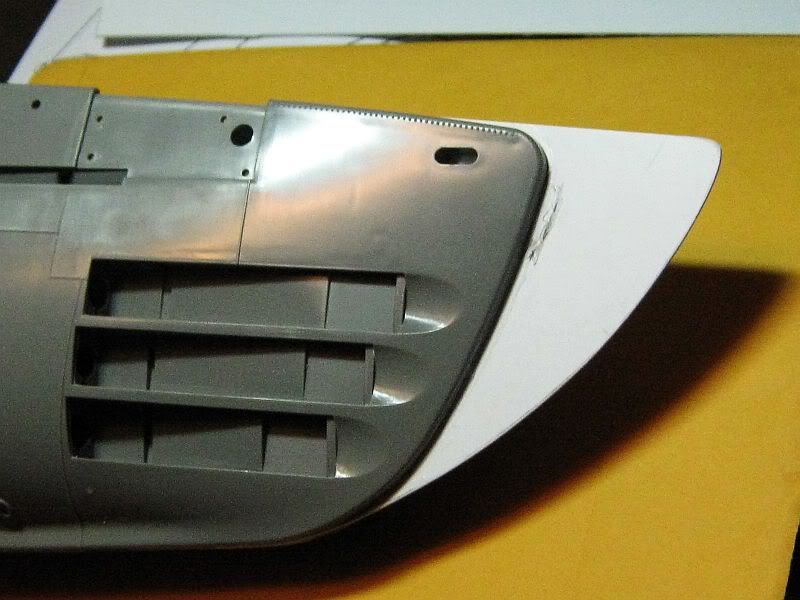
When blanking off holes, slots etc in injection plastic kits, I use bits of plasticard or sprue, and solvent weld them in, and leave them slightly proud of the surface. Once dry, I sand that back to the correct contour, and there you have a repair that's as strong as the rest of hull.
We seem to be on the same page here, except I'm suggesting a two part soft filler (and easy to sand) to bring it up to contour.
"I would have welded the styrene sheets to the inside with Solvent Weld, as this would be a much better bond, then filled the shallow hole with a polyester filler like Evercoat Easy Sand."
Single pack, solvent drying glaze, used as an adhesive to hold the styrene in place is doomed to failure, as it has poor adhesive strength and shrinks on cure. It should only be applied in thin layers, and allowed to thoroughly dry between coats.
It is auto body spot and glazing putty. I've never heard of the stuff that Kazz mentioned.
I'm using stone-knives-and-bear-skins here. I have a two part putty, Magic Sculpt. But I don't have much. I'm saving that for areas that need more complicated putty work.
I've got some extra thick plastic card to fill in the dang blasted voids where Lindberg wanted the nine-foot-wide personnel hatches. The sheet I have is big enough that I can use it when it comes time to build the keel for my boat and cut continuous strips instead of laminating or plating with smaller strips.
The plan is to get to work on the rudder and aft planes. Once they are sorted I will get the keel figured out and join the hull halves together. Once that is done I will set her belly up and cut in a set of proper drain holes. In between steps I will continue to work on correcting the conning tower while letting whatever work I've done on the hull dry or set up.
Honestly. The more I look at this kit the more I wonder what recreational drugs were they on when they designed it. The Titanic
When blanking off holes, slots etc in injection plastic kits, I use bits of plasticard or sprue, and solvent weld them in, and leave them slightly proud of the surface. Once dry, I sand that back to the correct contour, and there you have a repair that's as strong as the rest of hull.
.... and doing it Andy's way --filing holes with like material, a material with much with the same physical properties as the surrounding substrate -- insures a seamless union between filled holes and hull, even after the finished models is exposed to extremes of temperature and UV. Most important of those properties is that the filled areas will have a coefficient of expansion very close to that of the surrounding polystyrene.
John Slater can tell you all about what happens when a model part composing many different substrates are subjected to the, Real World!
When blanking off holes, slots etc in injection plastic kits, I use bits of plasticard or sprue, and solvent weld them in, and leave them slightly proud of the surface. Once dry, I sand that back to the correct contour, and there you have a repair that's as strong as the rest of hull.
Looks more like single part red spot putty to me- very easy to sand.
Are you suggesting he glued those styrene parts in with a single pack material? That's worse than using dog poo to putty in your windows. And anyway, why leave it all gooped up like that, when a simple scrape would remove most of it and it would dry ten times quicker. Anything that dries (solvent evaporation) is going to shrink.
I'm not sure what this is you've use to fill these holes, but it looks like an epoxy putty. I reckon you have a lot of work to do sanding these dollops down flush.
I would have welded the styrene sheets to the inside with Solvent Weld, as this would be a much better bond, then filled the shallow hole with a polyester filler like Evercoat Easy Sand.
Another trick - Use a thin sheet of styrene as a scraper and fill the hole proud with Easy Sand then scrape over the hole flush to the hull, to remove excess material before it sets, thne let it set. It's better to fill and scrape twice than spend much time beating on great dollops of resin, and Easy Sand sets in a few minutes, so its actually quicker to fill and scrape several times.


 There seem to be two subs called IJN I-53 in the book.
Leave a comment: