
Attached Files
-
These are 'proof is in the pudding' photos. Finally have a location to run the Nautilus without any interference. It ran very well and some of the concepts actually worked. As a late response with no lighting, I stuck a chem-light in and ran it for night shots. I was at the mercy of limited video equipment and in-spite of running and taking a lot of photos and video, didn't get a lot, but was thankful I got some. I tried Go-Pro for the first time, and it didn't work well for what I was doing, so I defaulted to an I-phone which took okay photos and video. Driving and taking photos and video really sucks, so Casey helped out, but my phone didn't cooperate and nothing came out. Then Fred had the drone taking video and it didn't come out. Finally Merriman took some superb underwater video and I'll get that this week. See the event page for event photos, this is just Nautilus photos. -
For Dave Merriman and me, this weekend was the 'proof of the pudding' of the work of the last year doing the Nautilus. We had bench-tested, and went to a pool that was highly chlorinated that only partially proved the systems, walking away with more questions than answers, but we had no idea what was really going to happen until this weekend. Overall, it worked superbly, and we were both happy with the performance. There are some items to work on, but it performed very well. Got some great video hugging the bottom of the deep end at times. As a result of running out of time, I stuck a glow stick inside the wheelhouse for lighting, and was pretty bright when it finally got dark. Low tech, but it worked.Attached FilesLeave a comment:
-
-
Somehow looking through all this, I missed the final painting photos that I took outside (except the tape is still on the windows). Here they are.Attached FilesLeave a comment:
-
-
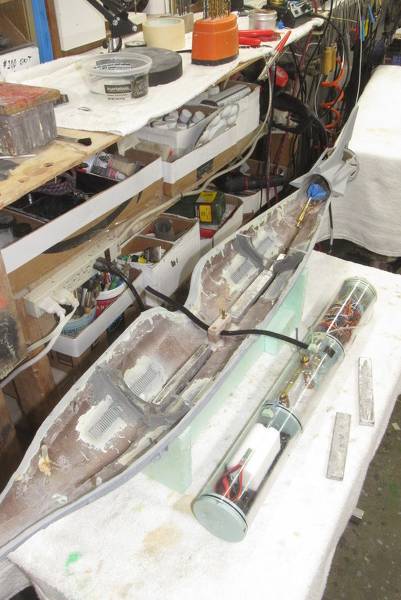
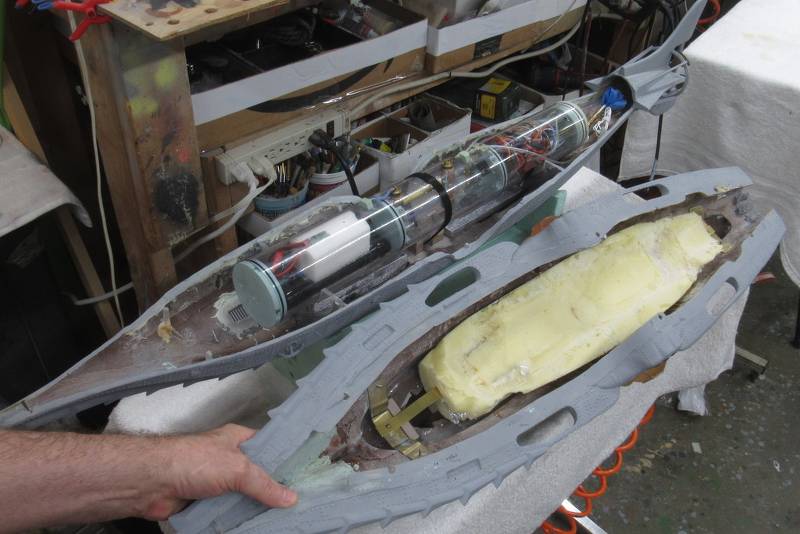
Thanks to Dave we got access to a pool. Great pool, but this one is heavily chlorinated, so you only get about 20' of radio reception, surface or submerged. When you're running at a flank bell, the wash interferes, so you get reception back when the wash subsides. Sounds worse than it is, and really had a great run. The Nautilus ran superbly. We didn't have the dive planes functional, as the operating rod coming out of the WTC was deflecting, so Dave didn't want to run it, as it would create a leak (and did). I had left the sub with Dave last Saturday and he re-trimmed it and it was dialed in very nicely, running both submerged and surface very well. Runs like an old MOPAR, all speed, hell on turns, but there's enough rudder to navigate large areas...not tight pools, so we did a lot of 3-point turns. Dave is going to get the dive planes going and then I get it back next week for some cosmetic work, then it'll be ready for COHUTTA!!! Yeah, Dave has that 'Dirty Deeds Done Dirt Cheap' look on his face, but I did bring him coffee :)Attached FilesLeave a comment:
-
-
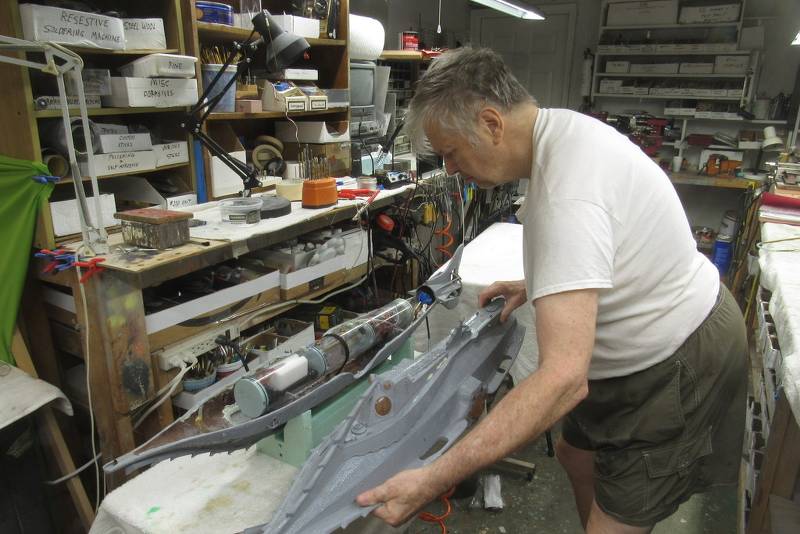
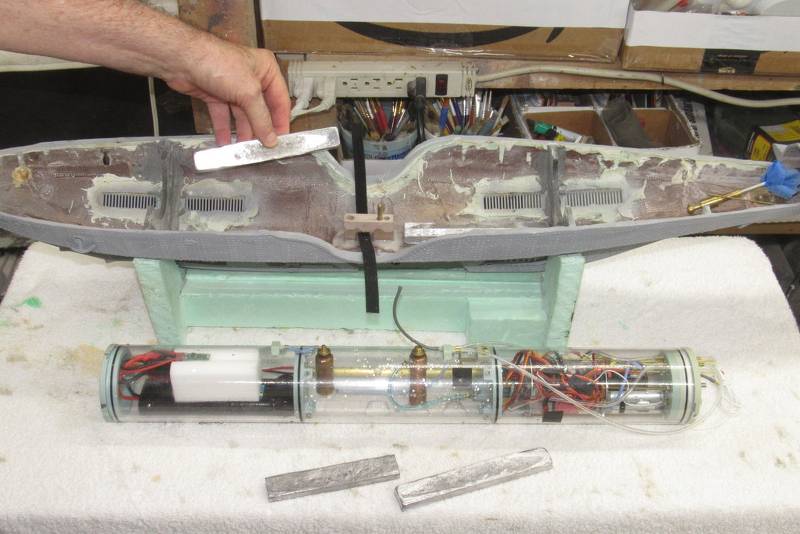
This morning bright and early went to Merriman's shop to start getting the internals back in order in preps for a re-dunking to verify trim and then to get it to a local pool Dave has access too. Virginia Beach has over 3000 miles of canals in it (no kidding), lakes, and whatnot, but most of them you'd not want to put a model in and they're pretty rank. Case in point, there's a video of Dave running a Seaview in one of these canals, that's pretty rank. The city closed off the park lakes from running which really sucks as there are some nice ones so we are at the mercy of local pool access. Anyway, we got the rear interfaces in order to hook up to the WTC, then dunk-tested the WTC to check for proper operation, pressure, vacuum, and leak checks, then spent a few hours doing electrical gymnastic hurdles that seem to always come up. Much closer and should be getting some serious photos and video soon. Here's some photos of today's flail-ex.Leave a comment:
-
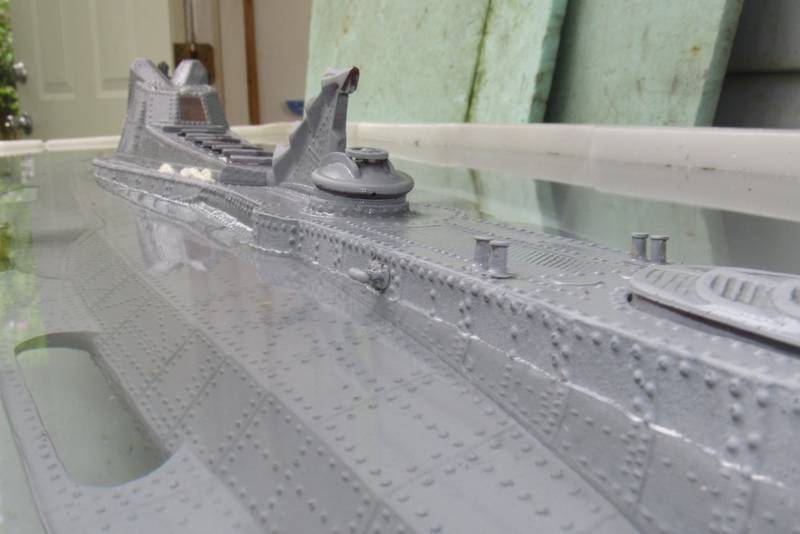
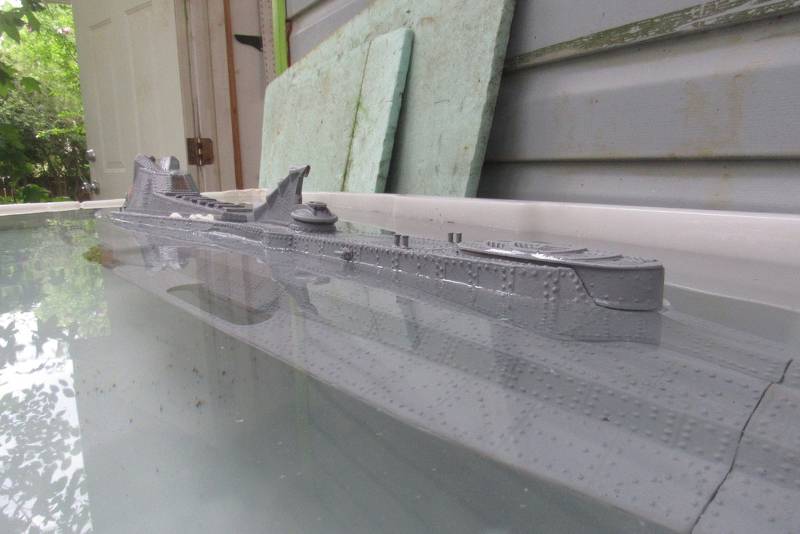
Finished the Nautilus a few days ago. Not sure what happened to these photos, but had to load them manually and not sure how they're going to show up. I'd retake them but the model's away getting some work done to the internals.Leave a comment:
-
Stunning, Jake. You've taken us all back to school. Wow!
DavidLeave a comment:
-
Now it's time for detail-painting. I'm currently as of this post only partly through it, hence why I'm up at 4am posting on here right? I've got a granddaughter's birthday party to get to later, so I wanted to get some posts on and get out knocking out some painting. Since I've already completed the major dry-brushing, here I'm starting to do chipping and rust effects. Since during the week I've only got about an hour and half per day to work on it, it took about four days to lay down light chips, followed by four days of dark chips. Yes, it sucks, and I'd rather create rivets or shovel dog crap out of the yard, but it's a necessary effect that will hopefully pay dividends at the end. So with that out of the way, I also started addressing the painting of the rakers. This was a perpetually perplexing task to think about how I was going to go about it. Initially I was going to dry-brush, but then wound up applying to chipping color layers, then two metal colors. As high-carbon metal rusts in a nano-second, I want the effect that it had just occurred, so I can paint a little 'bling' onto the sub. I remember back on the real sub, even if you had a primer coat on top, the superstructure of the sub would start to rust within a couple hours. So my test canary in the coal mine was the bottom raker to see if it'll come out with the effect I wanted. It did so proceeded to the other three (no photos yet of those). I'm currently using powders and oils to create the remaining effects, then get to sit and look at it and take care of all the offending items and when satisfied, it's going to get a couple coats of flat clear and dry for a while. Hopefully by next weekend. Enjoy.Attached FilesLeave a comment:
-
-
So after the dark wash/ filter and letting the model sit for two days, it got a gloss coat and sat another two days. The gloss coat will allow the following paint detailing to be applied without spider-webbing all over. The next order of business is to do a grey wash, this will contrast effectively over the dark color of the sub. The photo of the bottom of the hull you can see the left side completed with grey wash and the right side bare. You want this very faint, as it's going to be part of many effects, but not overpowering. You're kind of staying with panel lines, but doing it subtlety. You don't want to over-power seam lines. It looks unnatural and doofy. I also addressed the topside grates with a thick oil wash of lamp black. I subsequently went over the top edges with a paper towel repeatedly until the top edges were pretty clean. The top edges will subsequently be dry-brushed to increase the contrast. Lastly here, I dry-brushed the lighter of the rust color across the whole sub to give an added dimension to the existing colors. After two days it will be time for detailing.Attached FilesLeave a comment:
-
-
Now it's time for the first oil wash. I mixed raw umber with Turpenoid to where I have a medium color and go to town coating the whole sub, then let it sit for a couple days and dry. In the middle photo you can see the contrast between the 'washed' upper hull in the foreground and the 'unwashed' lower hull in the rear. Next photo, they're both done and sit for two days.Attached FilesLeave a comment:
-
-
Now it's time for the initial color coat. This is one single color and modulating it to get different effects over the dark basecoat.Attached FilesLeave a comment:
-
-
After getting the Nautilus back from Dave over a month ago after the sub was trimmed for surface/ submerged, I proceeded to do the final painting, then we'll get it back to finally do a sea trials with it to get it dialed in. Last time, Dave said it was heavy aft, so we've got that dialed in and that's the only foreseeable change. Anyway, into my shop it goes for painting. My shop, I built it about 5 years ago to get all the smelly hobby stuff out of the house as it was really bothering my wife to the point where I'd have to spray or do chemical work outside...which royally sucks as the weather or dewpoint doesn't cooperate. Inside the shop prior to painting, I turn the AC way down to get the dewpoint very low, and I also run a water separator, so everything's so bone dry I don't get any water in the separator except in winter when I'm not running the AC. My spray booth is set up for large scale tanks...not large submarines, so I have to be creative and stick one end in a time. The booth also doesn't have enough extraction with the stock fan, so I have an additional in-line blower installed. Now it works just fine. First order of business is to remove all the moveable surfaces, then base-coat with a very dark brown/ black. I've used an automotive lacquer-based primer, so I can put whatever on it, so I'm going with Tamiya acrylics as they're pretty durable (as I use them on tanks) and have an idea about mixing them and what I can add to them without recreating the world with new paint mediums which always lead to recipes for disaster. My test subject to try colors on is the 1/48 scale Nautilus I got from Bob earlier this year. So I spray what I think will work and dial it in from there. This is all easily removeable with a can of oven cleaner (don't use the cheap dollar store stuff!). My shop is a mess right now, as I'm trying to get Nautilus finished and ready for Cohutta.Attached FilesLeave a comment:
-
-
Lacquer paint/clear-coat solvents melt underlying enamel coats, producing a God-awful mess, no matter how 'dry' the underlying enamel is. And enamel paint takes longer to harden. Your mileage may vary. Paint chemistry preference is pretty much a matter of what's available to you and what you were brought up with.
Start with lacquer-based chemistry and stick with it all the way up to and including the primer and touch-up putty (Nitro-Stan preferred). It's OK to apply lacquer-based consumables over the polyester based 'fillers. Other than that, lacquer-based stuff all the way to the primer. After all that you have the option of going with a polyurethane, water-soluble acrylic, or epoxy chemistry for pigment and clear coat. After the clear coat, go nuts with any weathering medium that strikes your fancy.
NEVER trust a rattle-can primer as outfits such as Rustolium and Krylon change chemistry just about as often as the sun-comes up -- you never know from one can to another what crap will squirt out of the nozzle, and if it will/will not ruin previous coats of paint.
And don't trust hobby-shop paints (other than the water-soluble acrylics) -- they are formulated to be safe, not good. Hobby shops are only good for glue and bad advice from some kid with metal fitting punched into his face.
And get your acrylic paints from Walmart -- why pay a premium for the same stuff, rebranded, sold from the local Hobby-Town?
DavidLast edited by He Who Shall Not Be Named; 06-25-2023, 02:49 PM.Leave a comment:
-
It's fun watching you two work on this model. Now that you're beginning to talk about paint, why acrylic versus enamel? I've always used enamels on models I've done so I'm wondering what I should use on my Tucson display model.
Will Rogers
SSBBN659Leave a comment:


Leave a comment: