1:72 Seawolf

Collapse
X
 
  • Time
  • Show
Clear All
new posts
  • ManOwaR
    Lieutenant Commander
    • Jul 2009
    • 217

    1:72 Seawolf

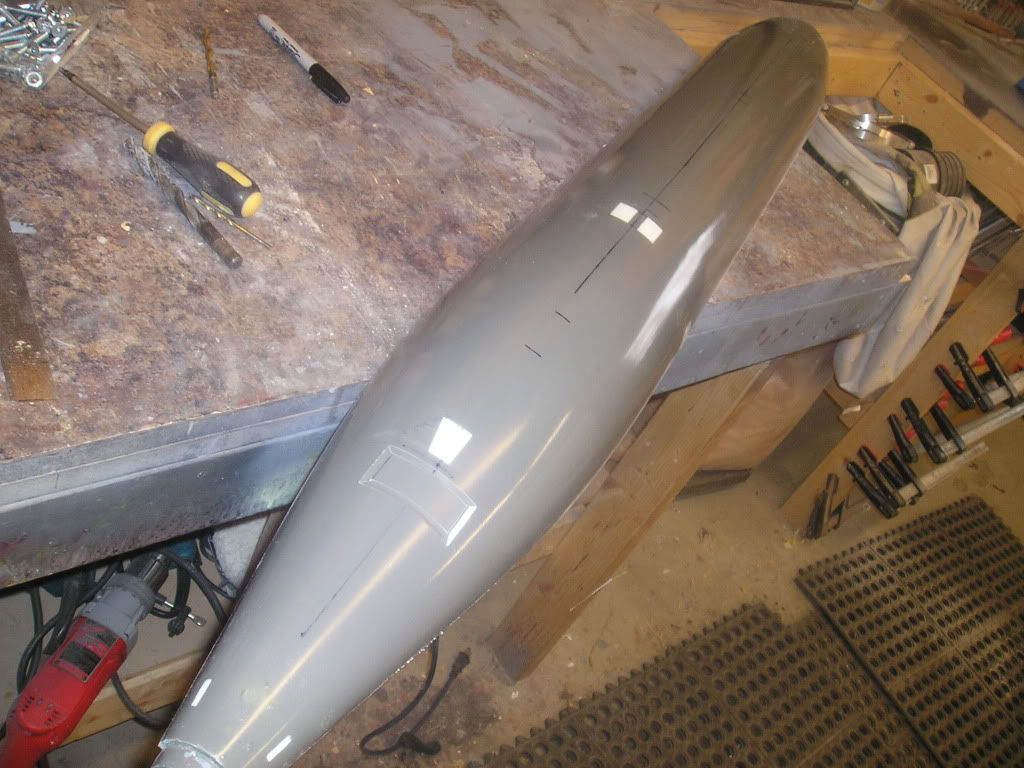
    Do you ever get to the point where in a large project, you kind of lose sight of what the final goal is and become a zombie and just go through the motions? That’s where I was at before I started in on the topic at hand, redoing the hull intermediate moulds over again.

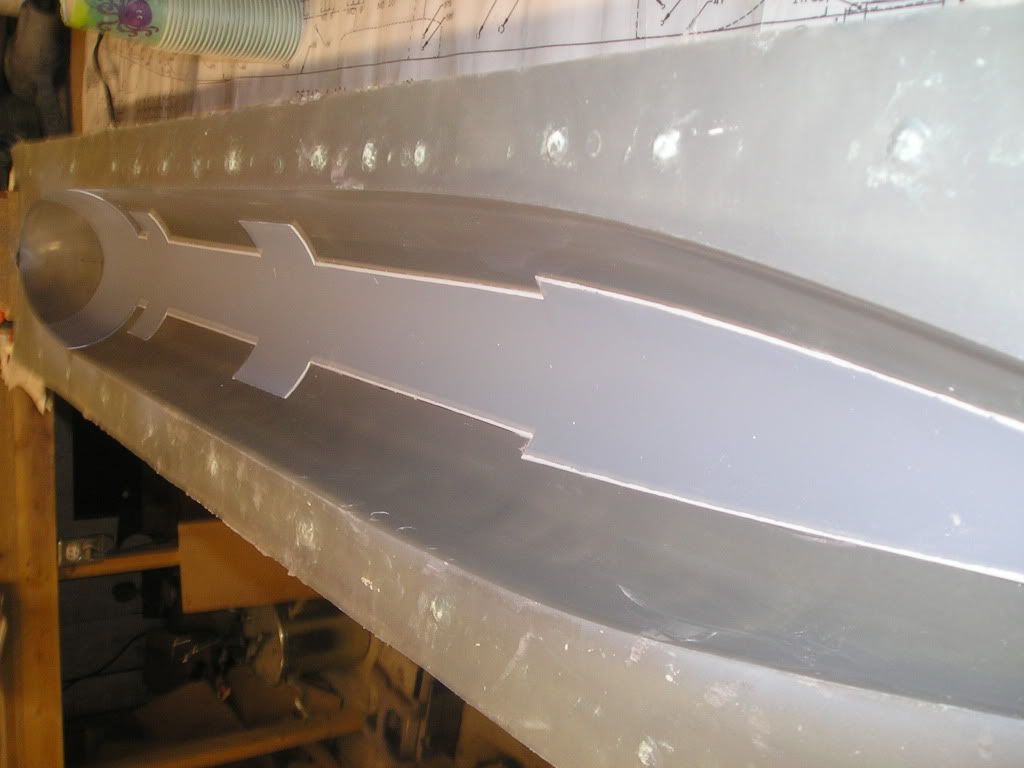
    The Seawolf has so many fine details, and I want to include as many as these as possible on my 1/72 replication of it. Included in this list is the bevelling effect produced where the thick anachoatic coating reaches a place where it can’t cover and hereby has to faired into the spot, hence the bevelling. This is such a visible detail that I feel it undeniably has to be on my boat in order to be faithful to the real thing. Also, the more detail the better. So here we go, now we’re going to be negative and make a positive thing from that...if you know what I mean
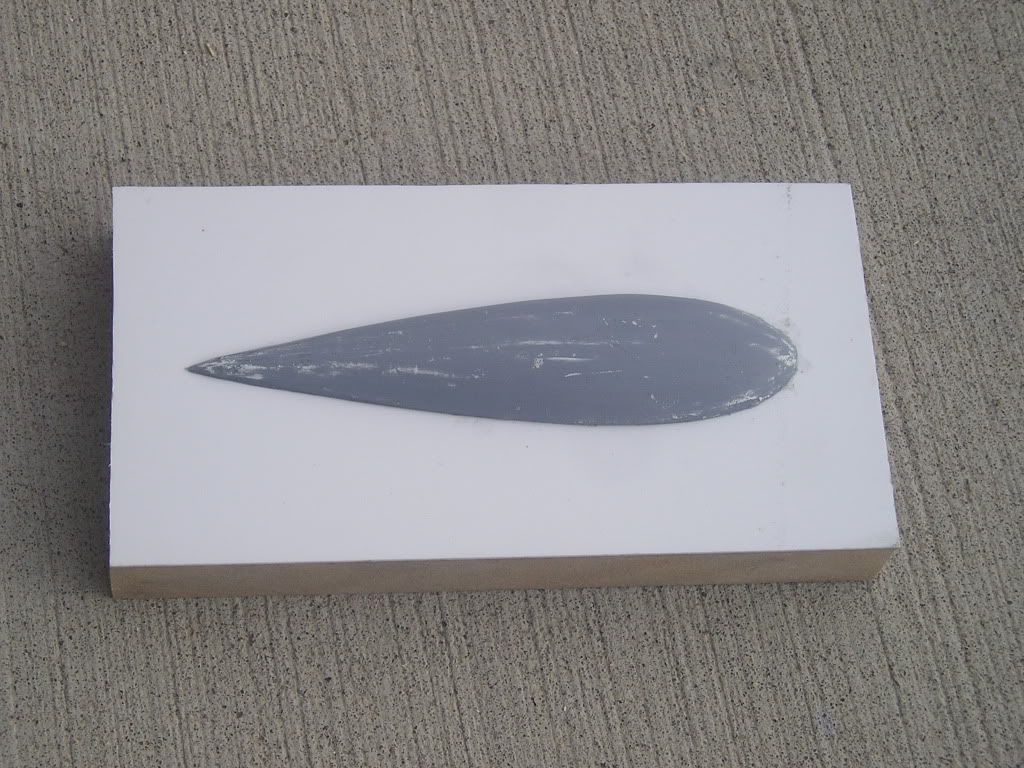
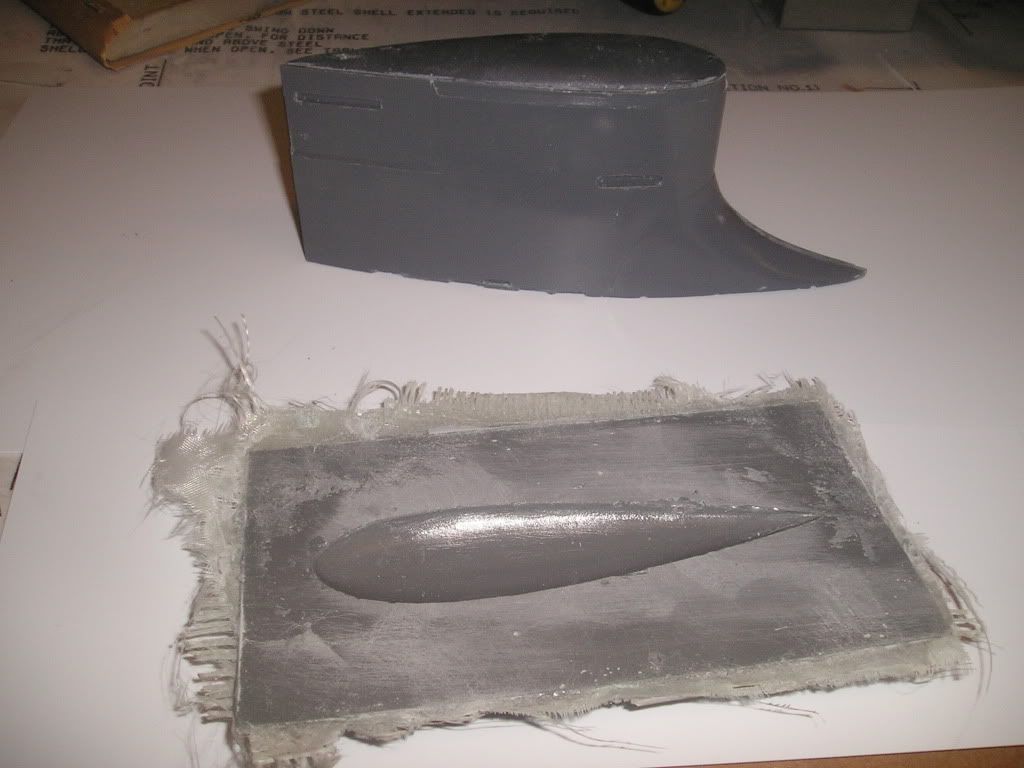
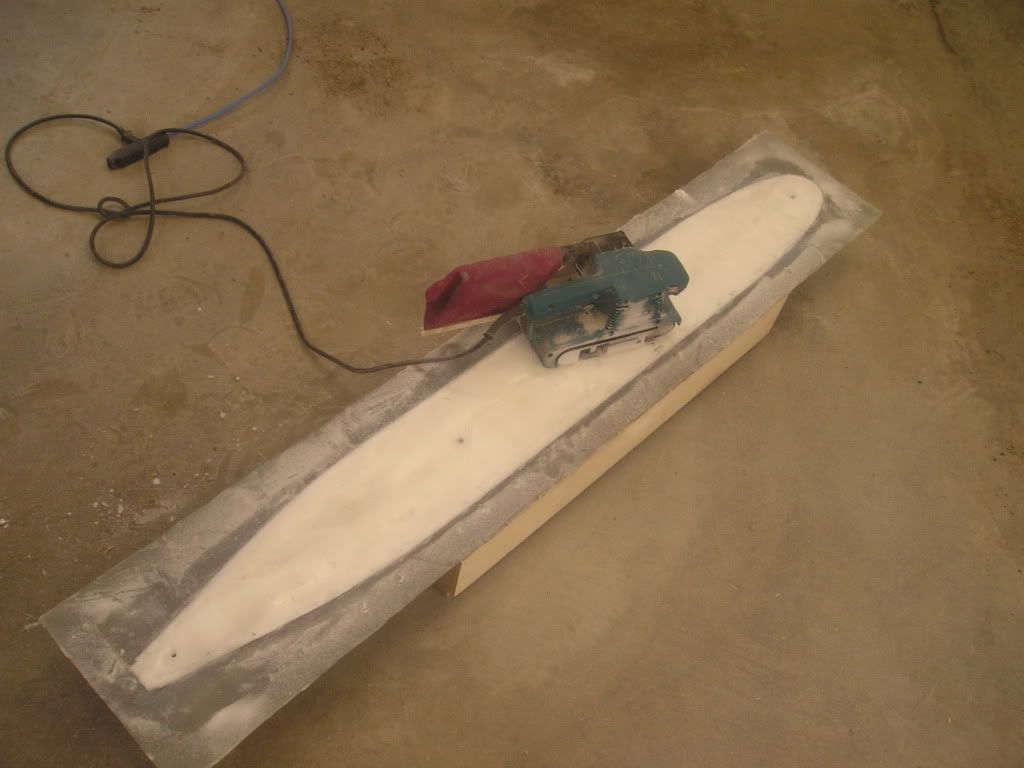
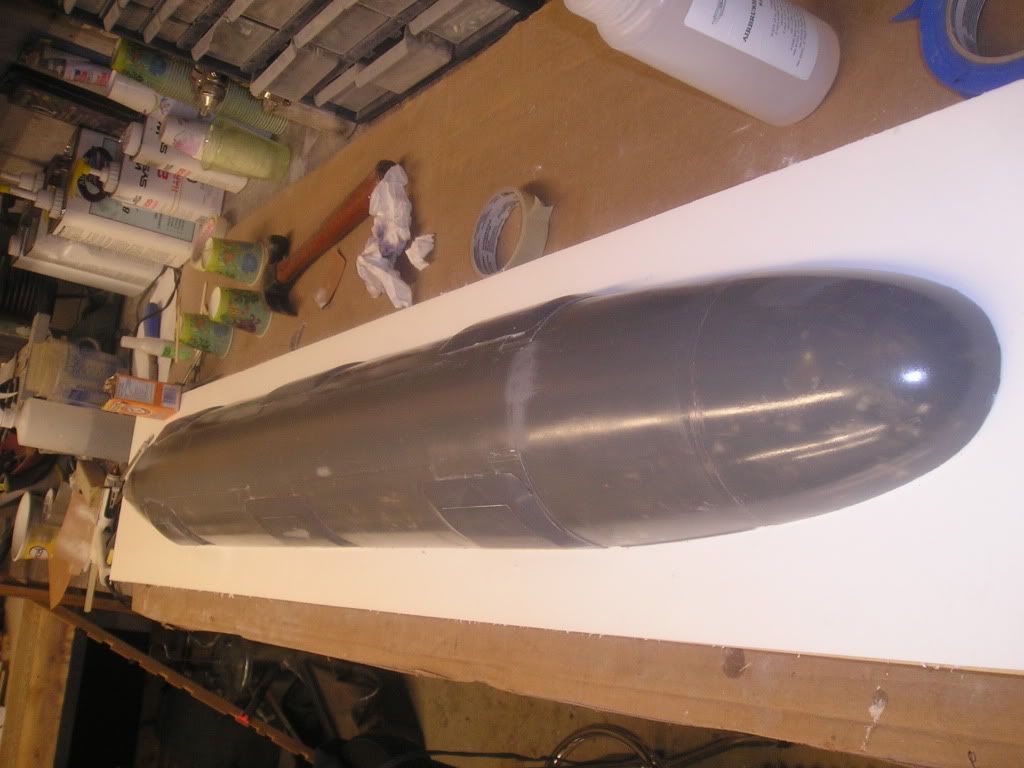
    So, I guess we’ll start with the concept. I had to figure out how I was going to do this. I could make a solid hull plug, gouge away material and then somehow build bevels there; a concept that never really grabbed my interest in the slightest. All it would mean is a lot of work and I’m not guaranteed a great finished product. I could also build out from my already finished hull, but then that wouldn’t be scale. My last option, and the one I chose is by using some quick and dirty intermediate moulds so I could make negative detailing within them and then make two hull half master patterns from those.

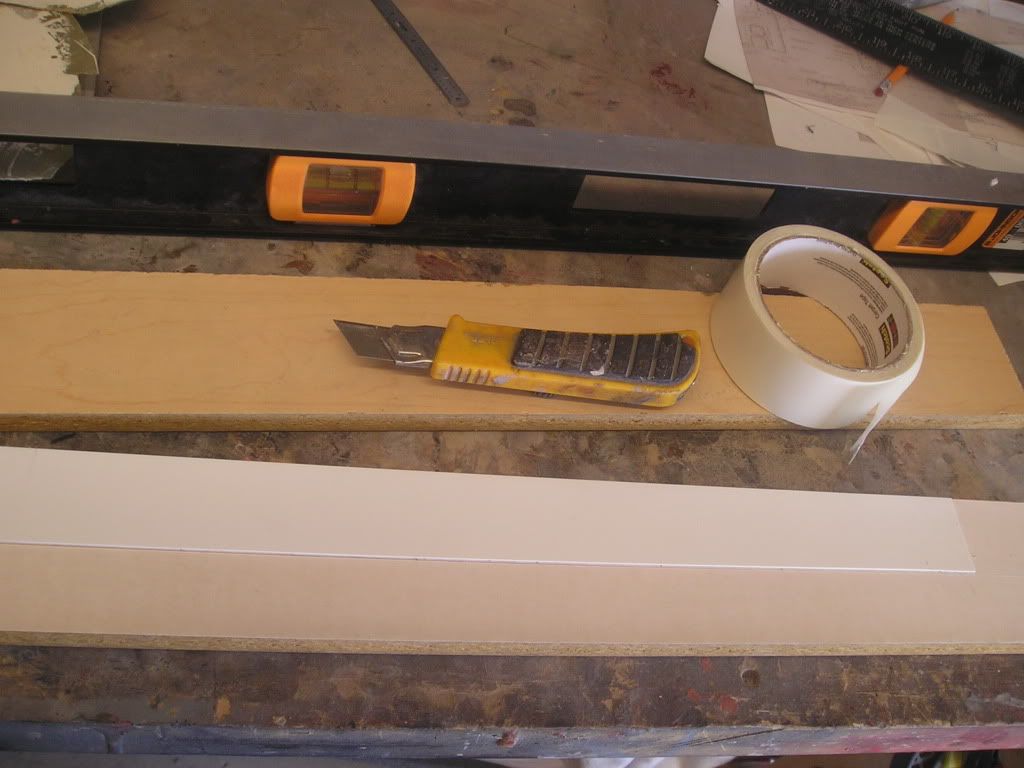
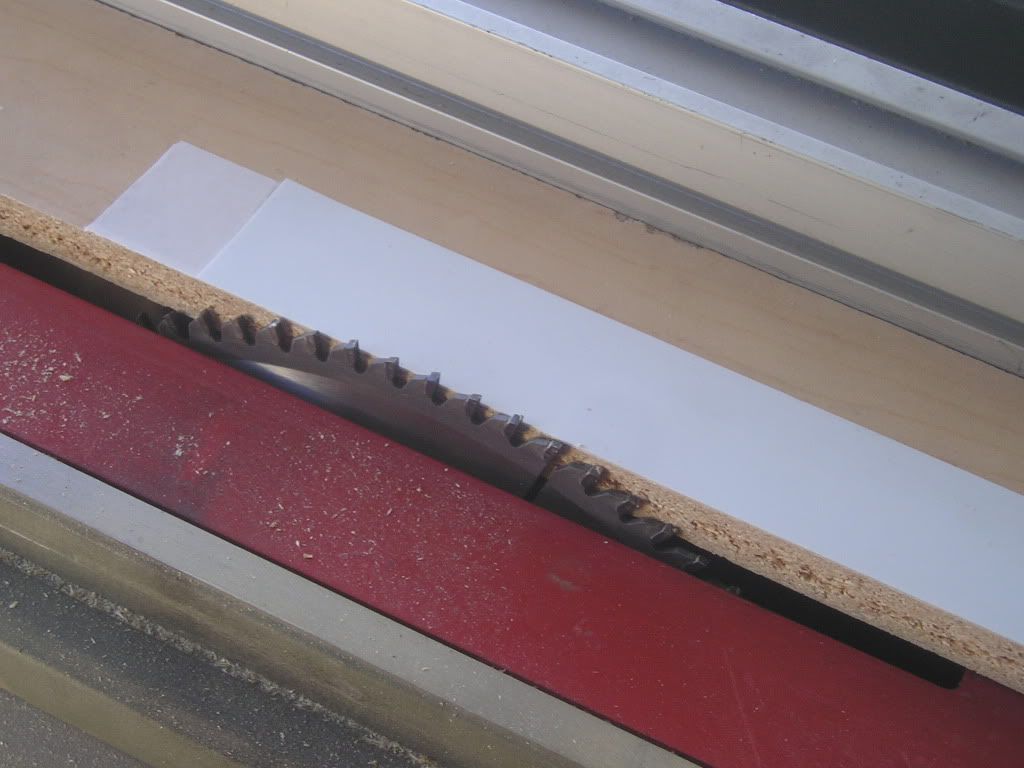
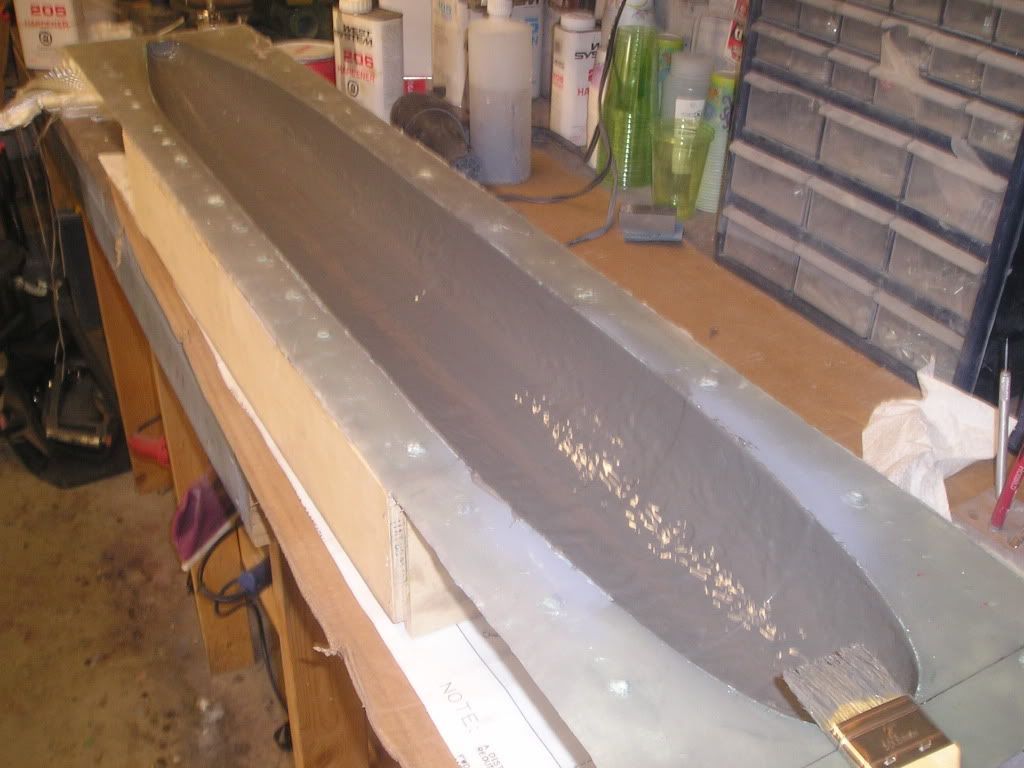
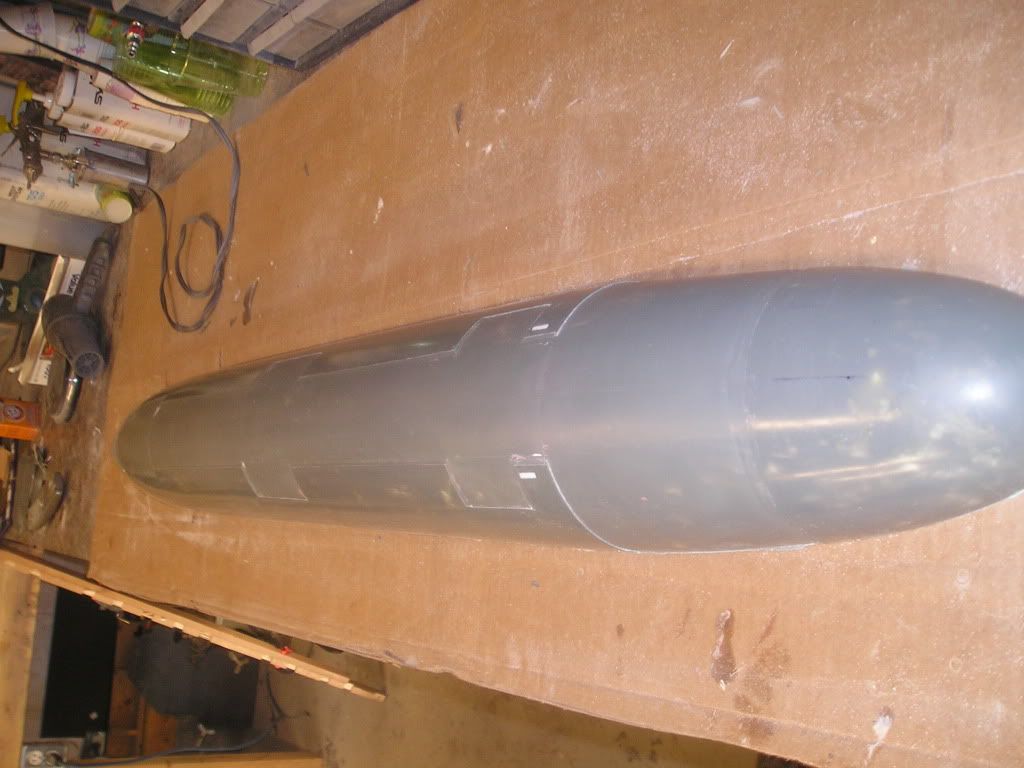
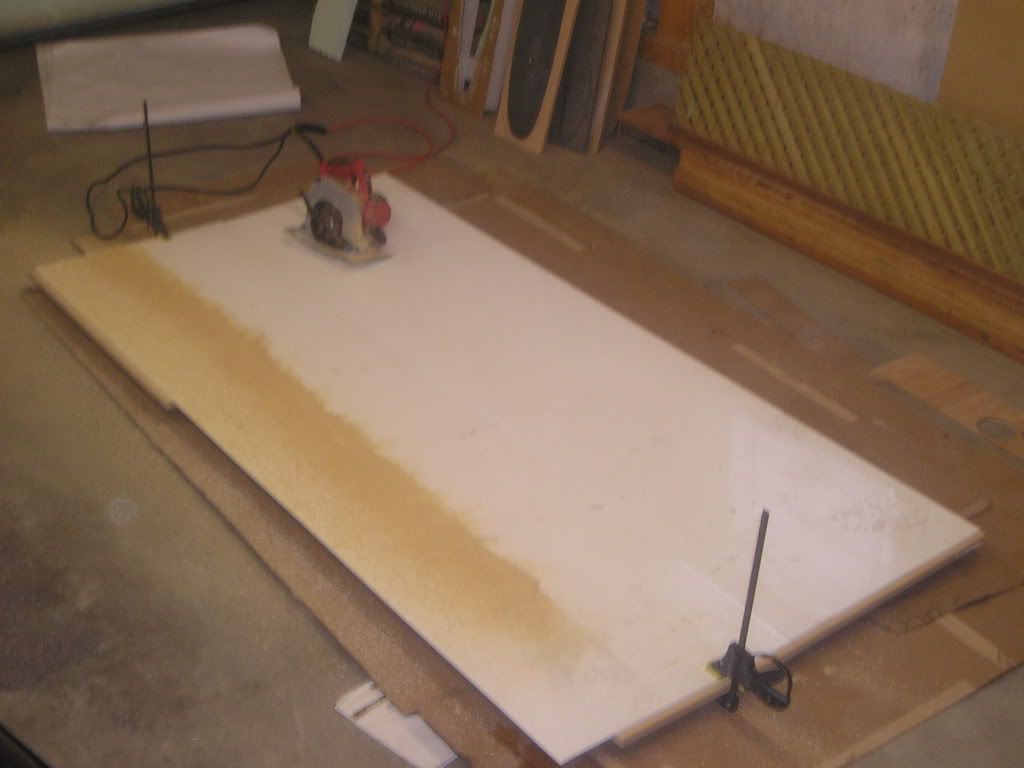
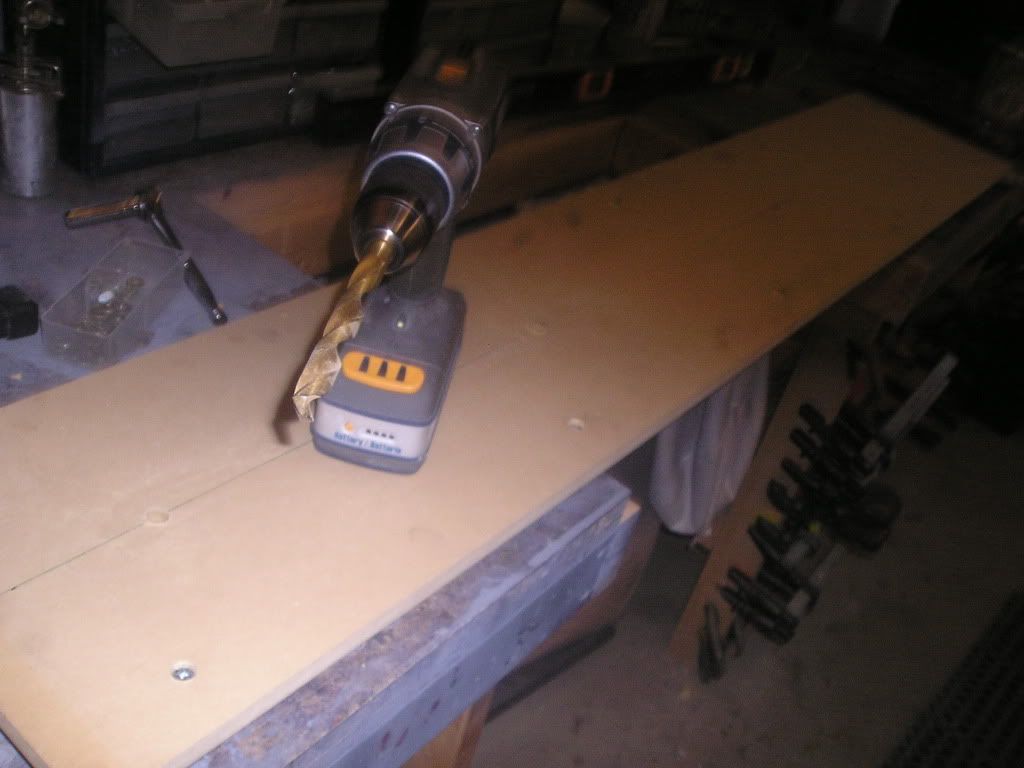
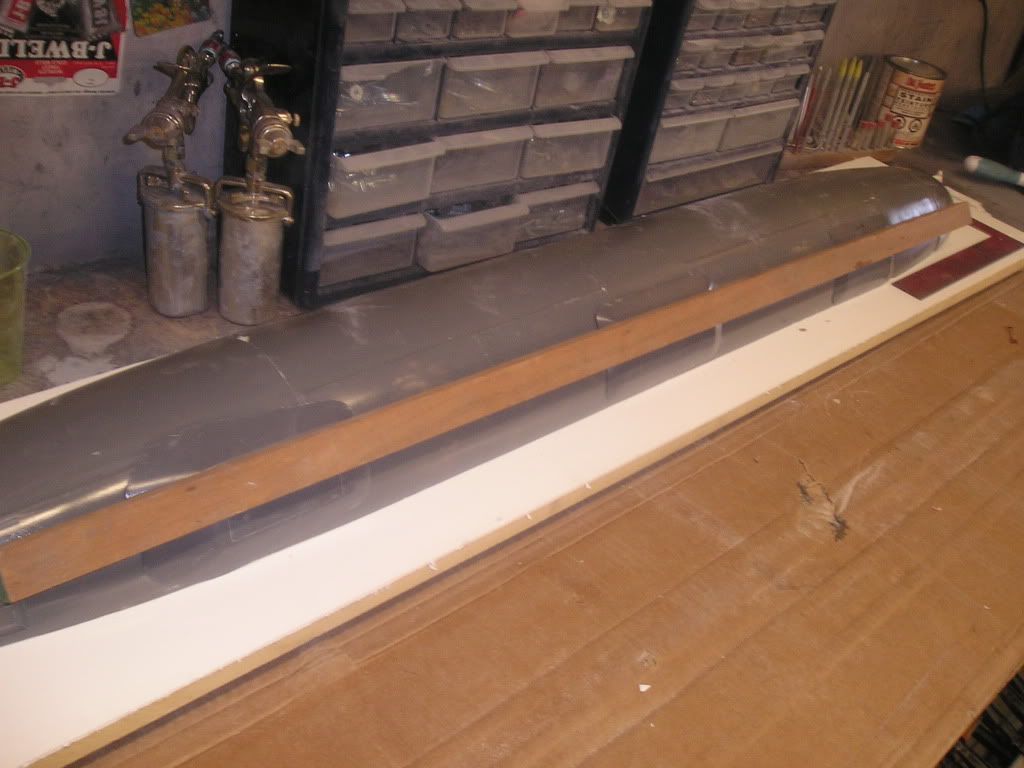
    My work so far with this has been on the sail first because it smaller and will give a good feel as to how things will work out when I get to the hull. The sail’s coating thickness and the hull’s are different, but the following description works for both. I started out by sticking some of my new best friend (two sided carpet tape) onto any scrap wood I had kicking around the shop, leaving the release paper still stuck to the back of the tape. I then stuck another layer of tape on top of the release paper and this time I remove the release paper from this second ply. From there I applied styrene of the appropriate thickness onto the tape. Both sides of the wood are run through the table saw to get perfect flush edges. With the saw I’m using a fine tooth melamine blade to ensure against any kind of plastic chipping that might come about.


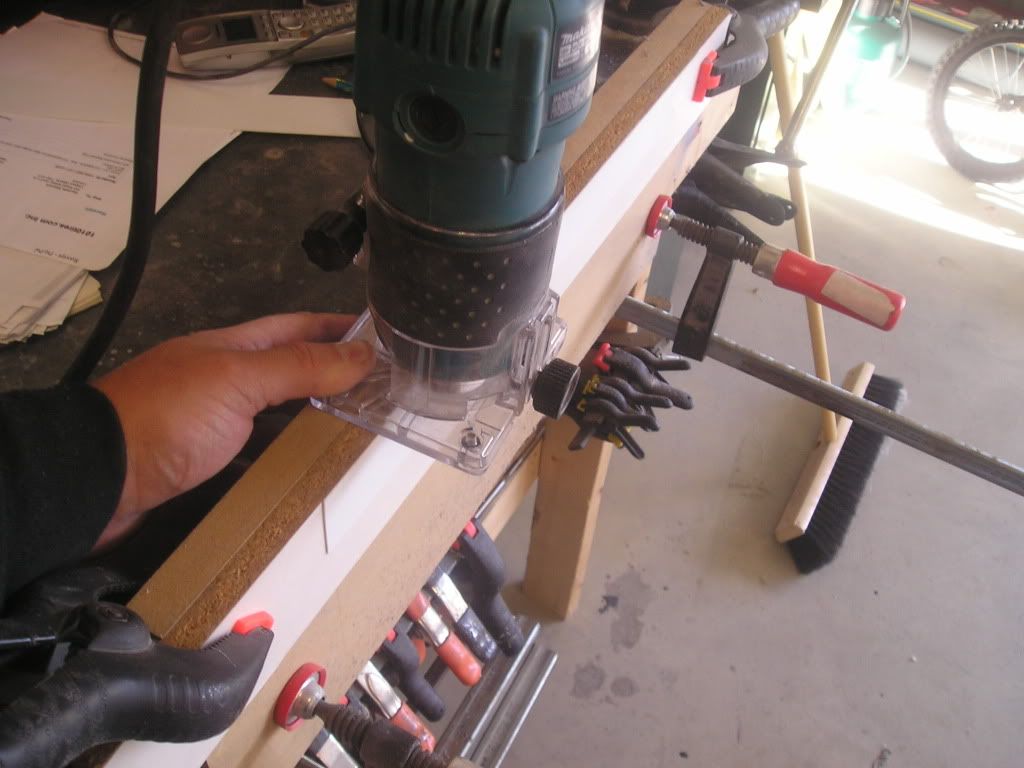
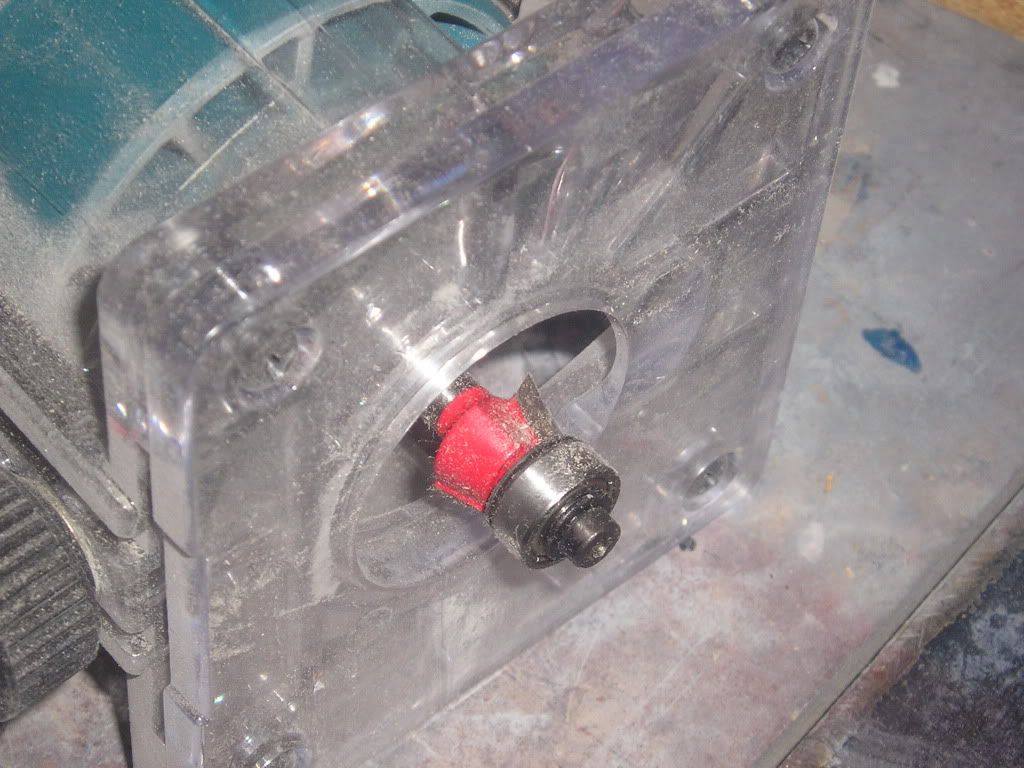
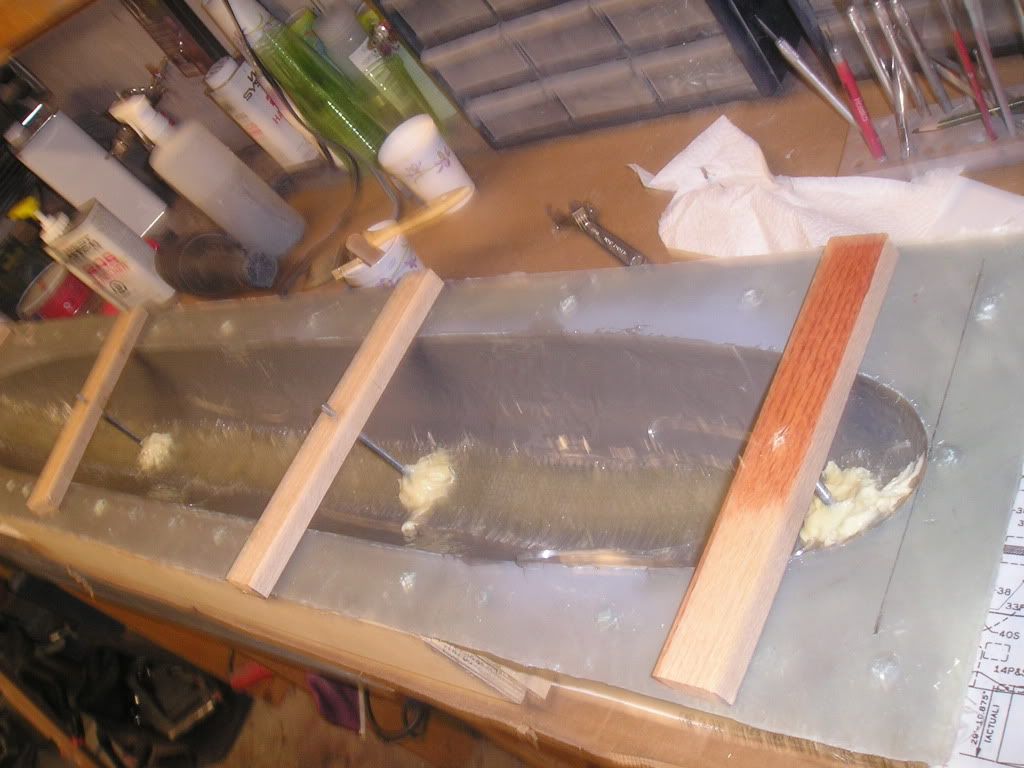
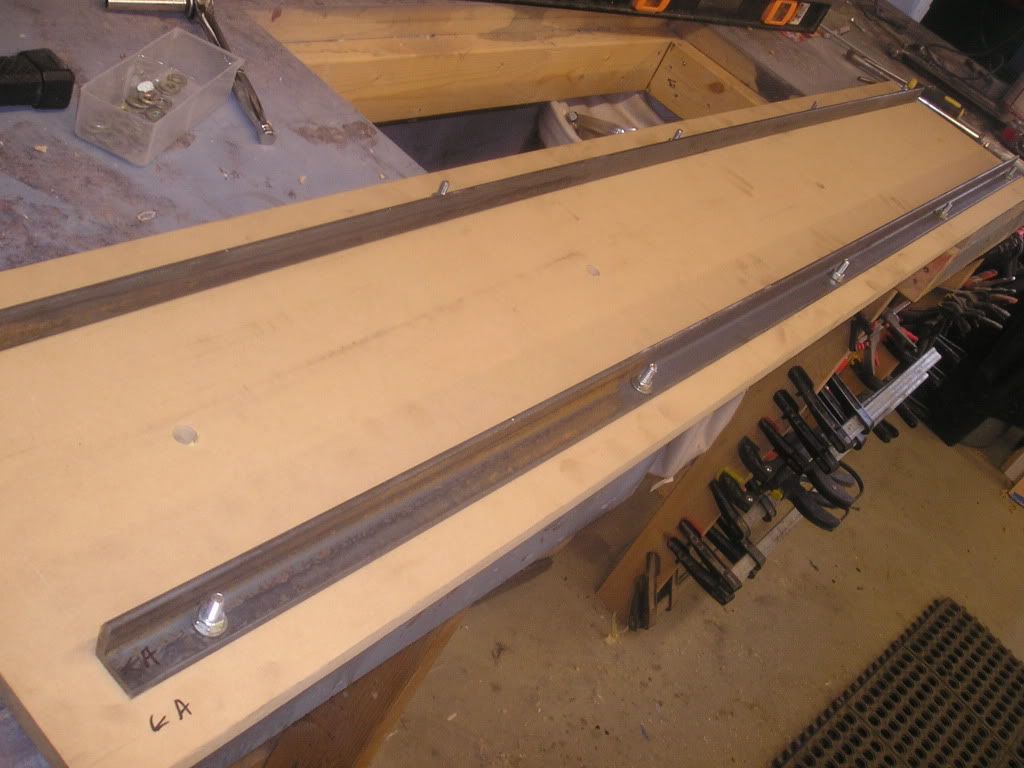
    The laminated wood is taken over to my bench, where I clamped another wider piece of wood (this was run through the saw to ensure straightness) to my bench that was also around the same length as the laminated one. I then clamped the laminated board to this other board ensuring both top surfaces were perfectly flush with each other. This provided me with a flat surface in which I could run my little laminate trimmer (router) along and shape the styrene plastic. I do have a router table, but it would be too much of a pain in the rear to dig it out and set it up, so I settled on this other contraption which worked just fine anyway. Some notes here, the router bit with the angle I wanted was special, it was extremely hard to find in town here, and when I did find it, they wanted a special price for it! Also, I found that for better, cleaner results the bit had to be run backwards, meaning the router was pulled towards me, not pushed as per the norm.


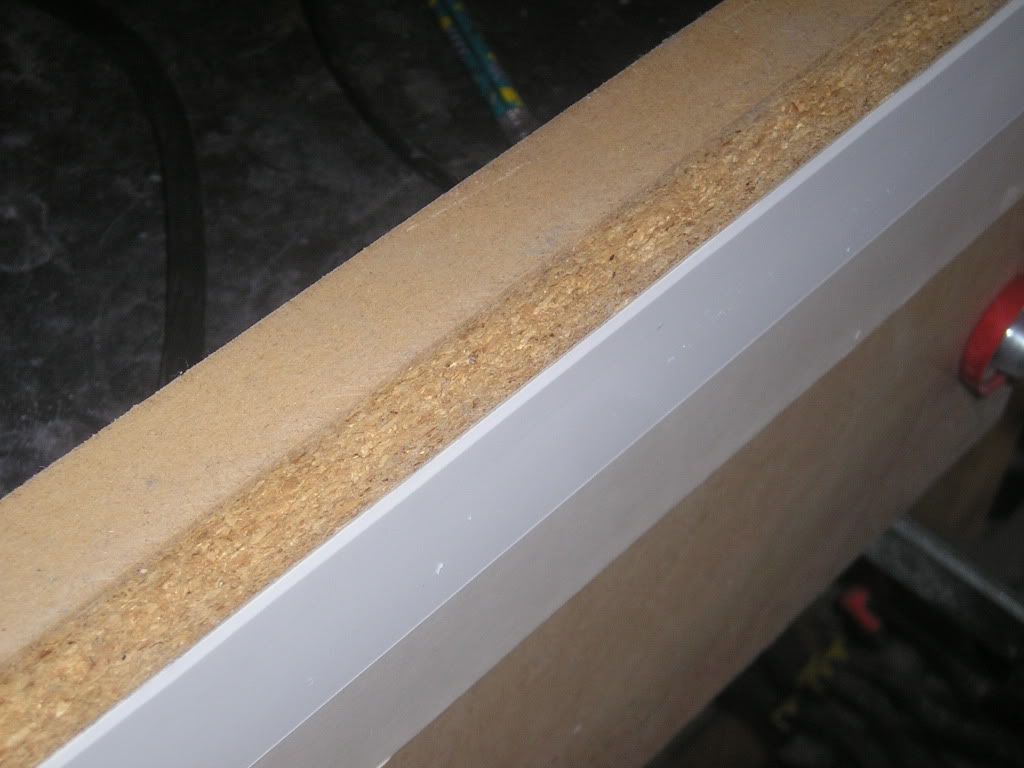
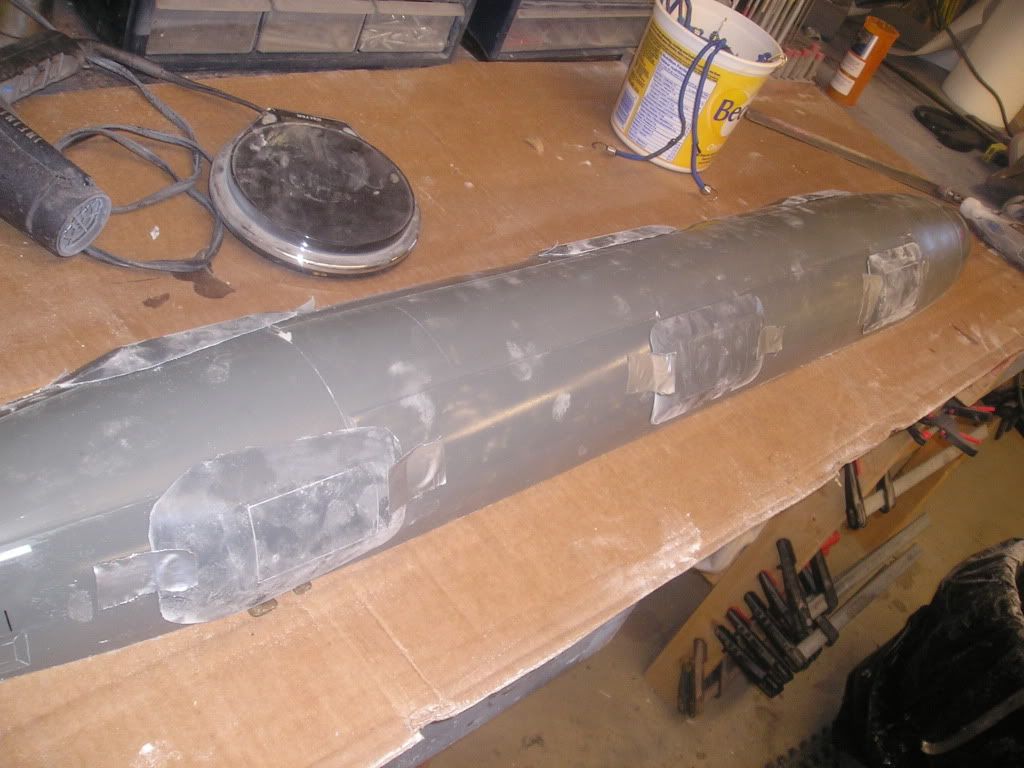
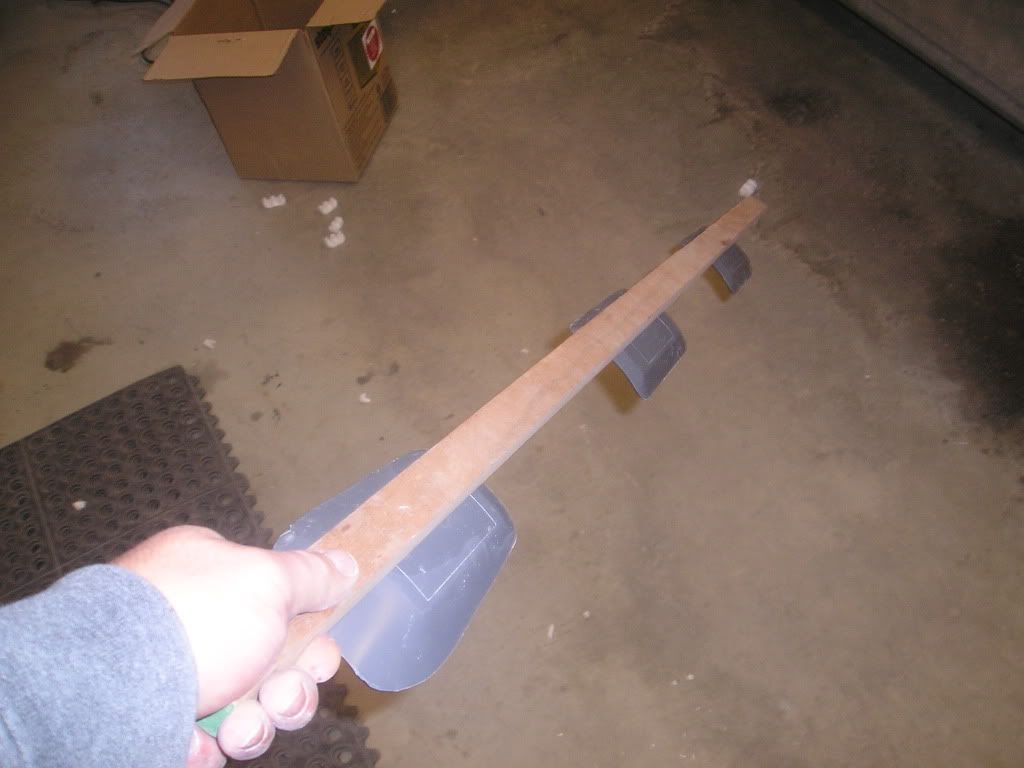
    After each length was routed, I took the board back over to my saw and cut the bevelled plastic and its wood that it is stuck to, and then took the board back over to the router. This was repeated until I felt I had far more bevel strips than I needed, which probably means not enough! Also, the plastic remains stuck to the wood until which time that it is needed.

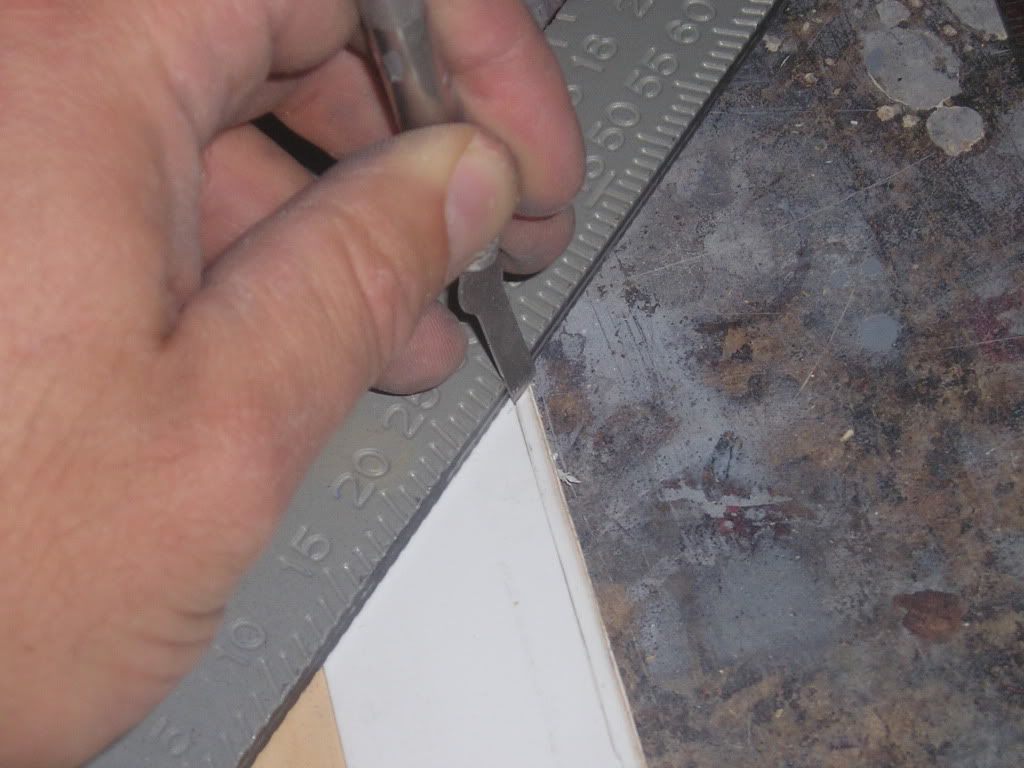
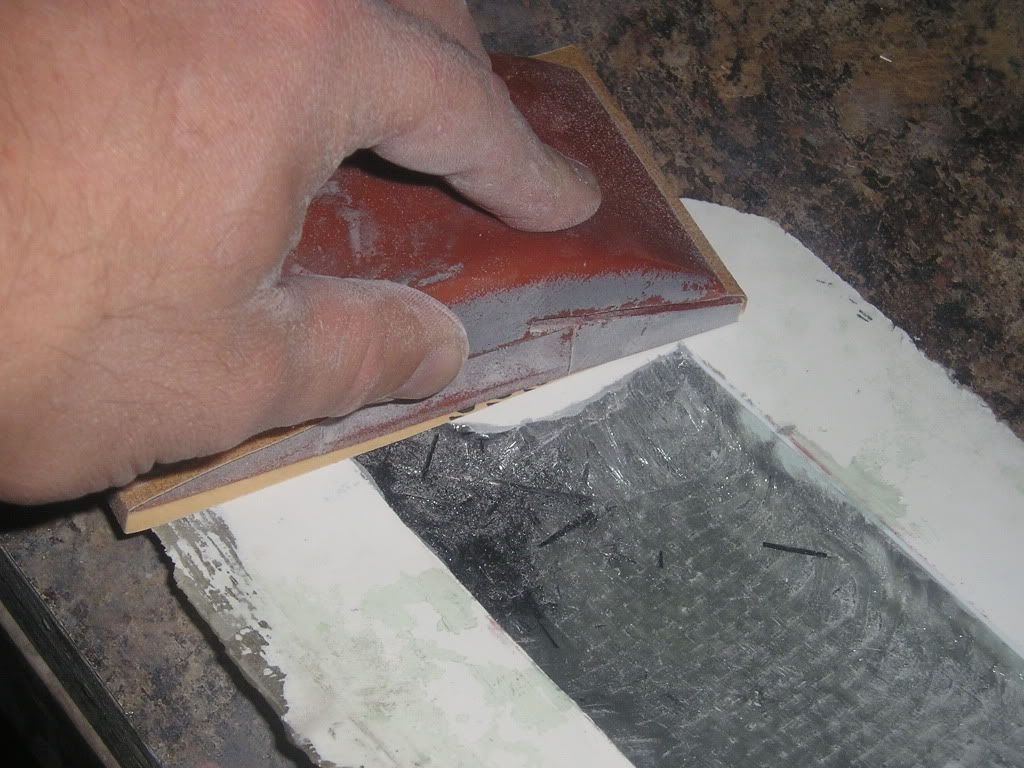
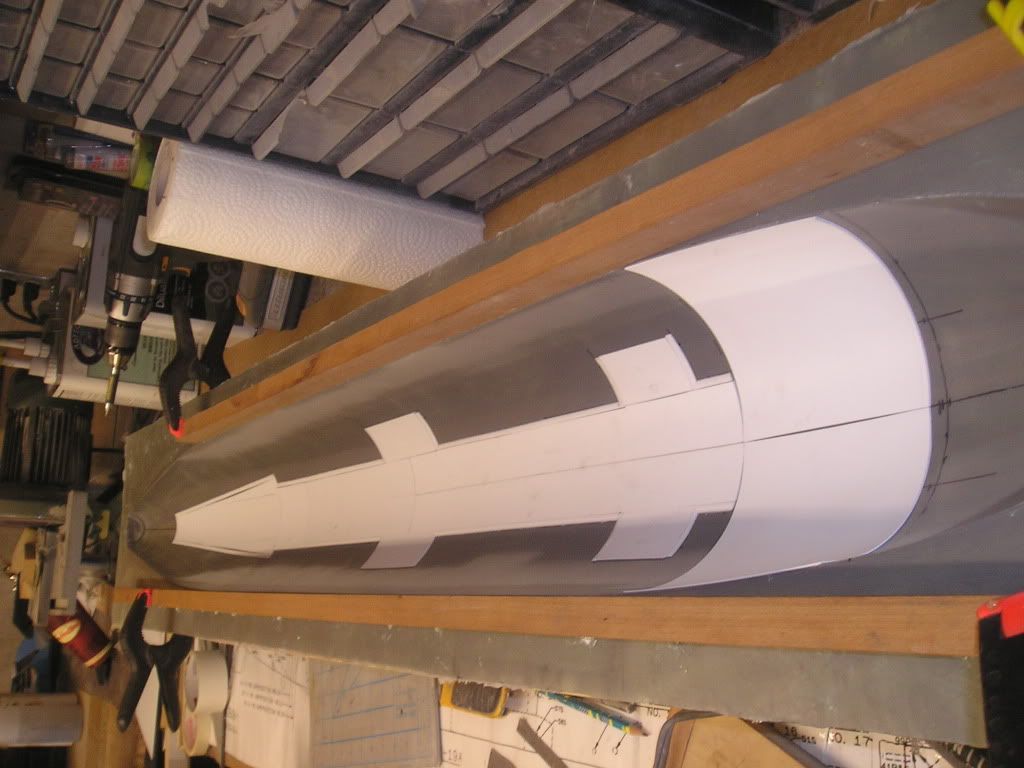
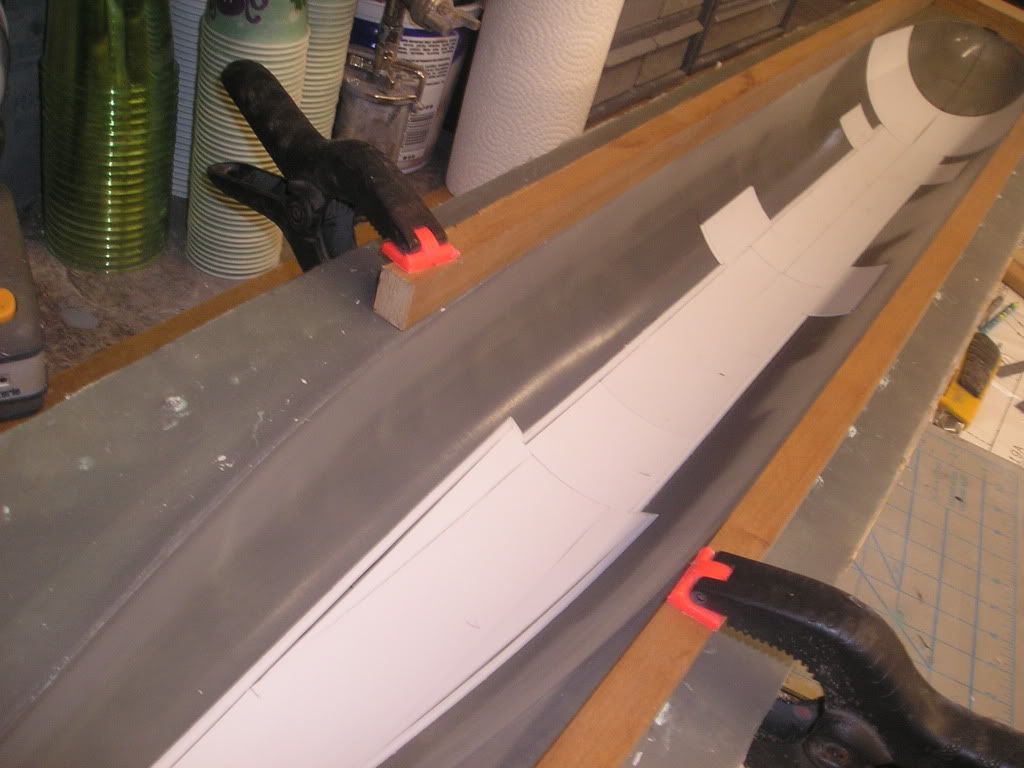
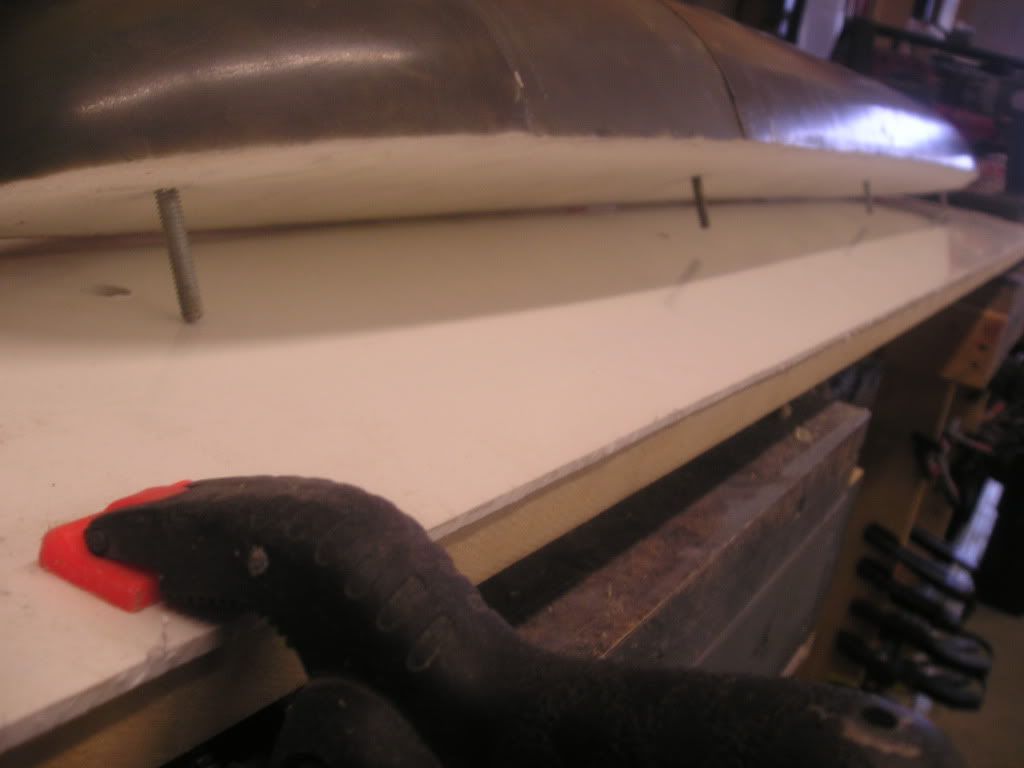
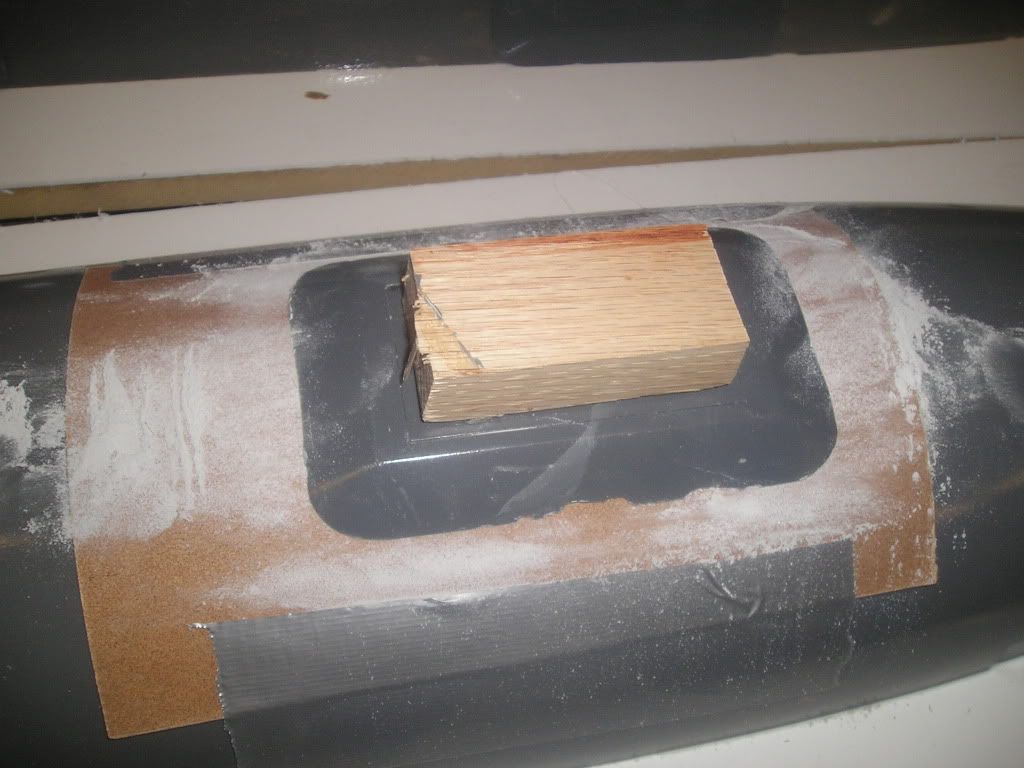
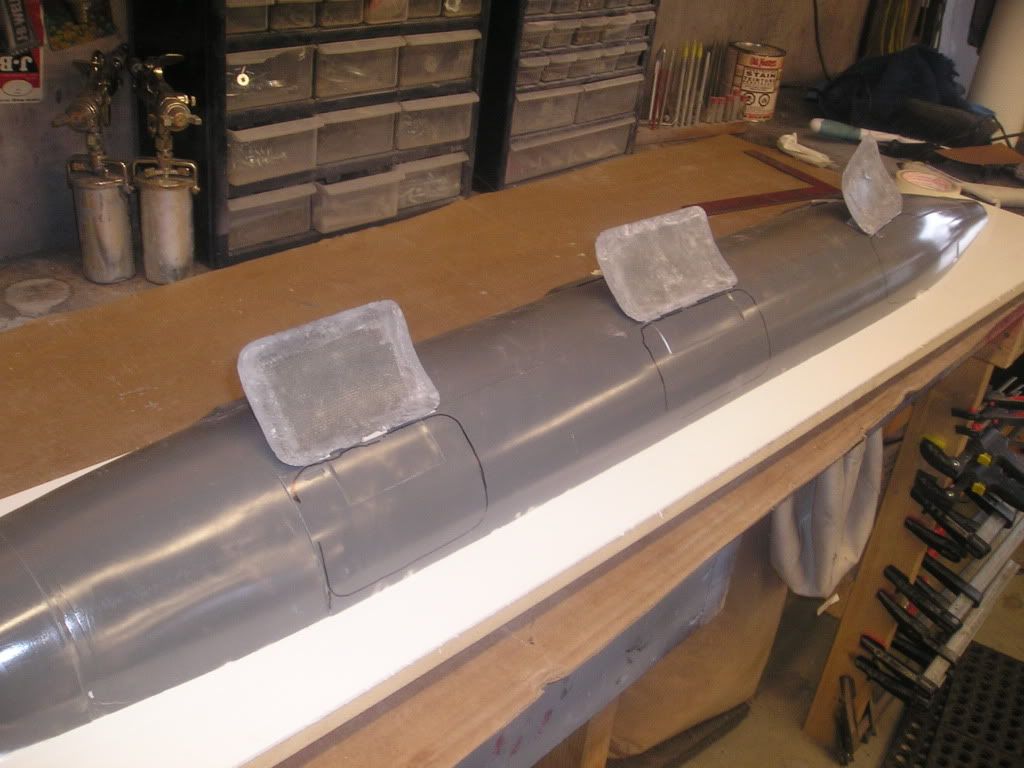
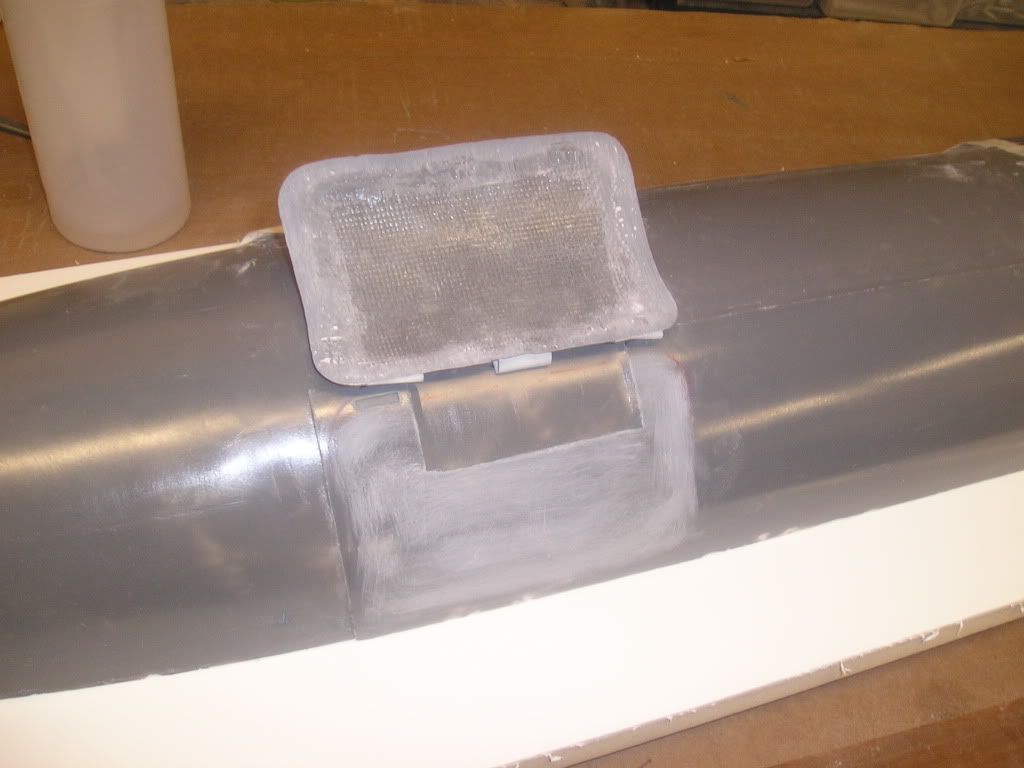
    From here, it is now a matter of applying my plastic to wherever it is needed. The hard part for me on this is getting my mind to work in a mirror image, negative world to apply this stuff correctly. Sometimes I get confused and make things wrong he he. Simply peel the plastic off the separation paper on the board and then apply where needed. The carpet tape is more than adequate at holding down whatever needs to be secured. I love this stuff; I have big plans for the future for it! Bevelled corners are a matter of using a knife to cut the styrene, and even if they don’t match perfectly I just use a touch of red putty. This is nice for me because hardwood doesn’t have this kind of error factor when doing trim on houses or countertops.


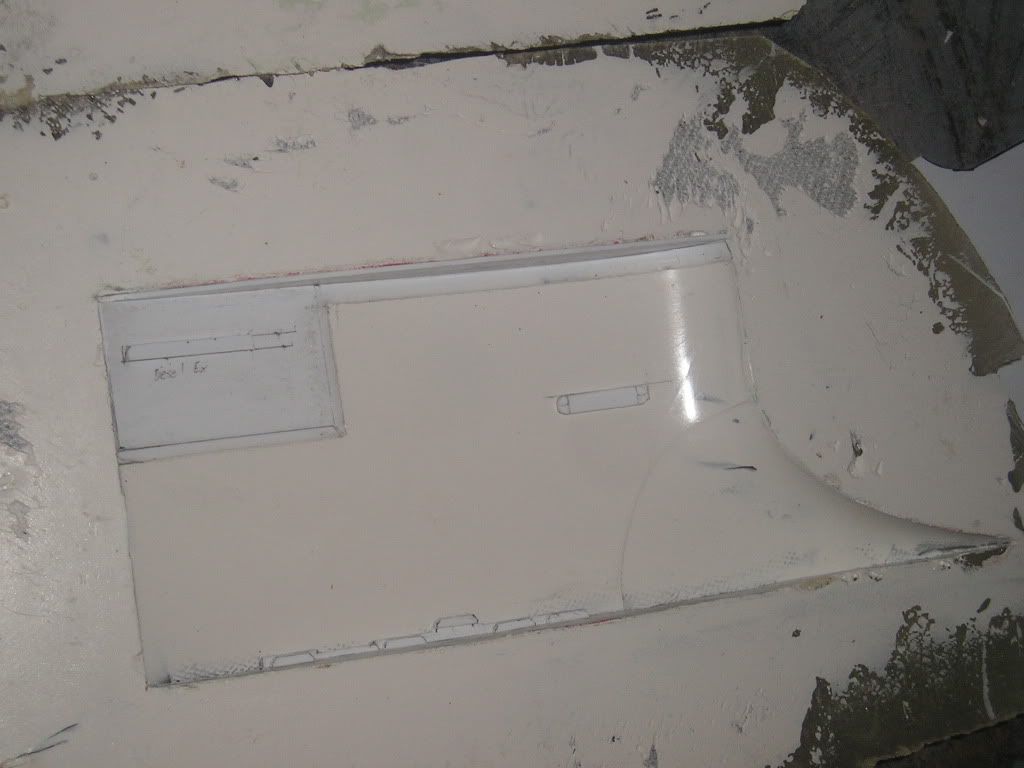
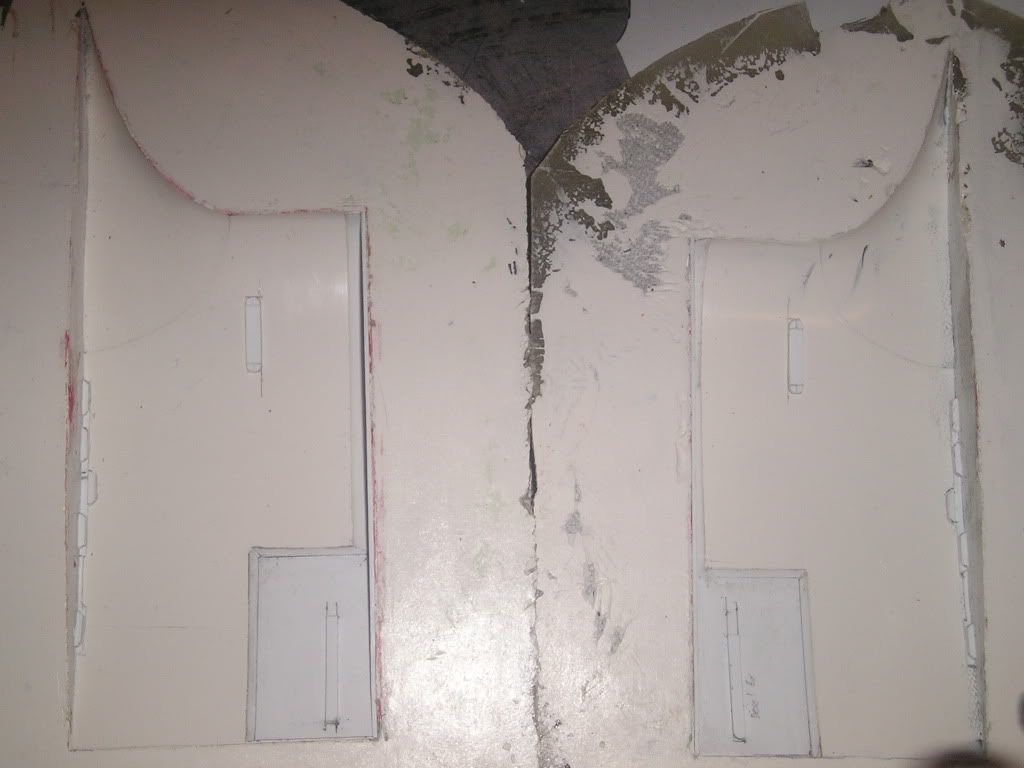
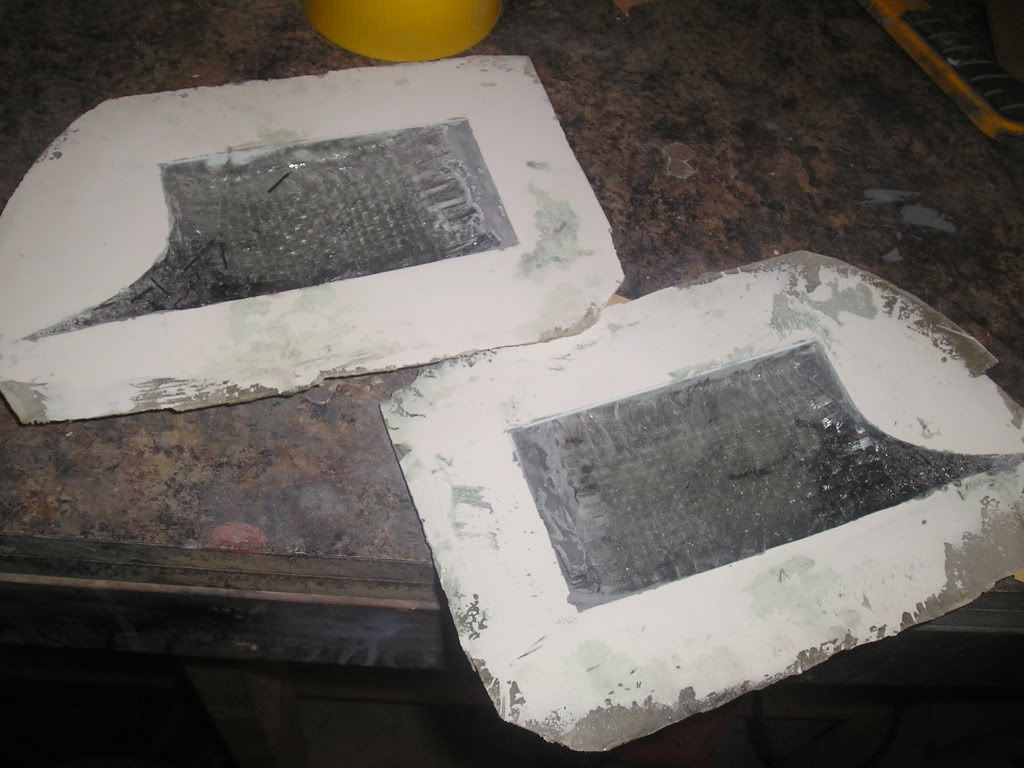
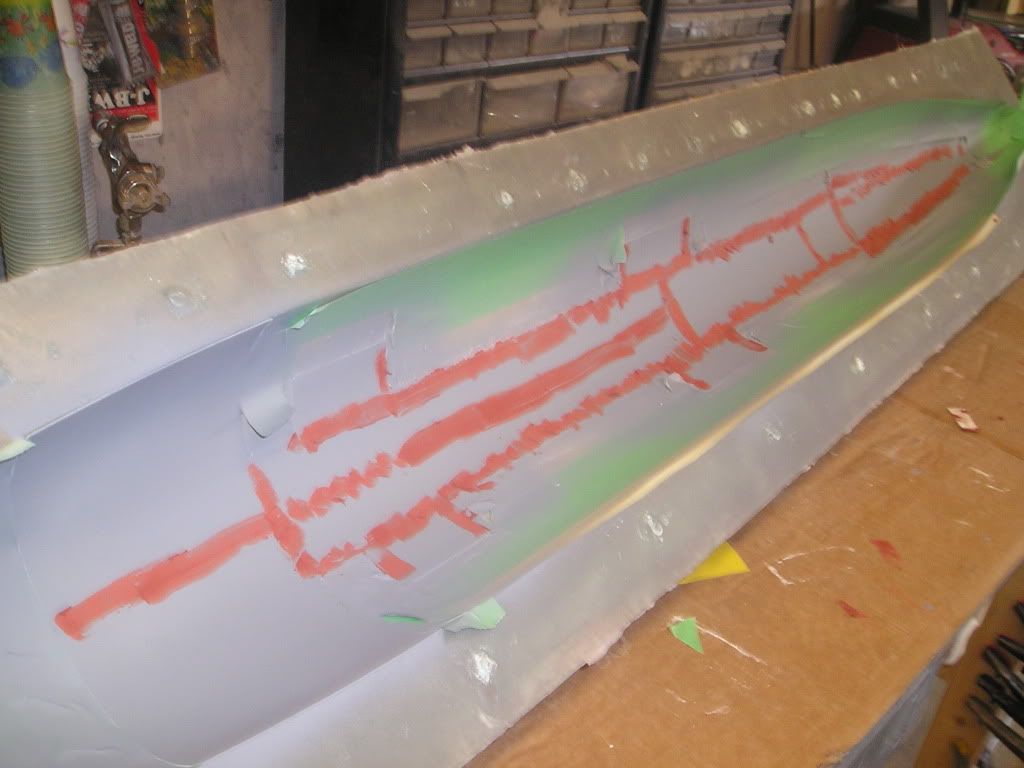
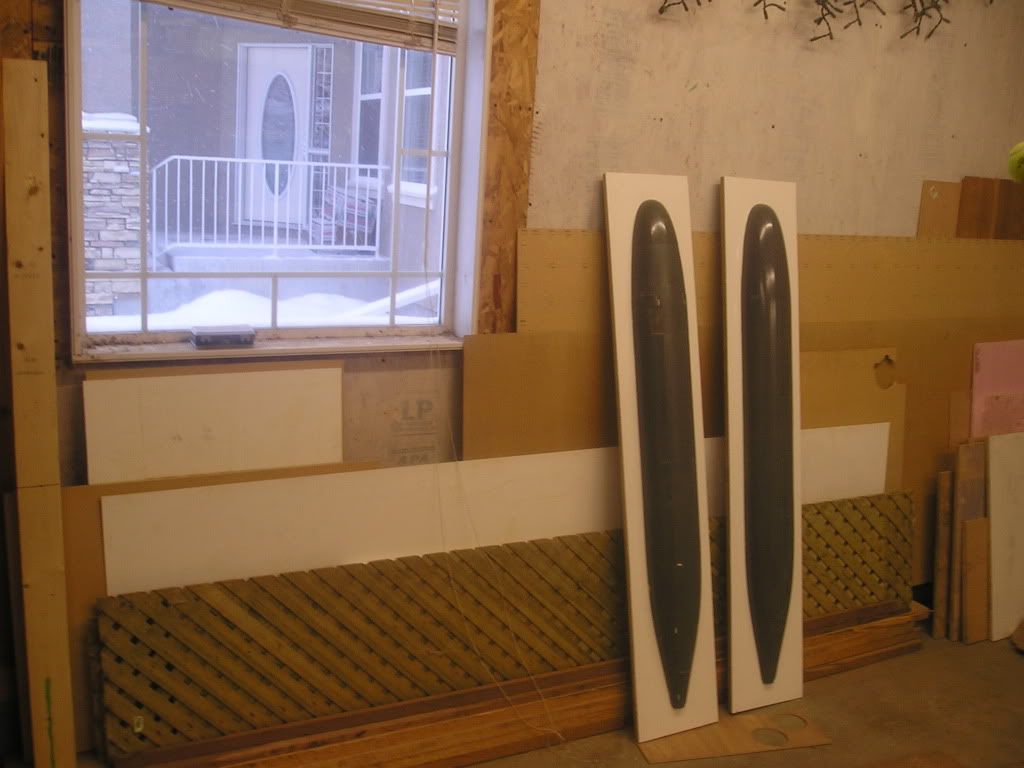
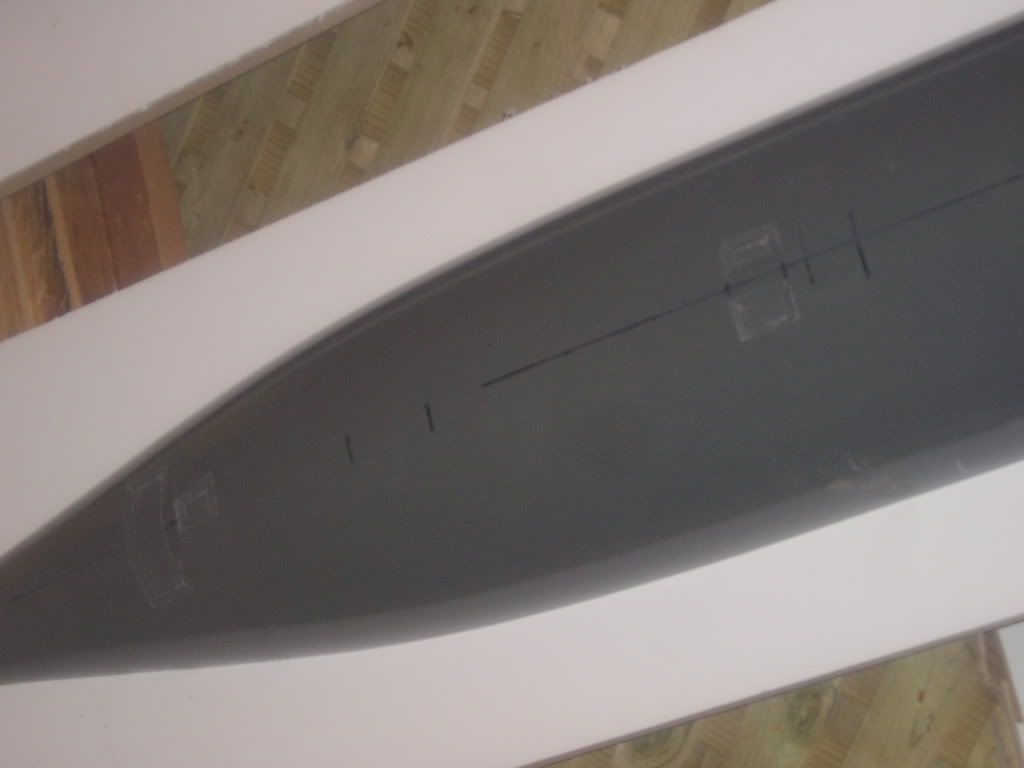
    Now, this is cool. I can do more than just bevelling on these negatives, in the sail’s case I added drain holes at the bottom, and troughs in which the sidelights and diesel exhaust louvers can be put into the final master. This means there are some major possibilities and potential on the hull to take that even further than originally envisioned!
    https://www.facebook.com/HMKcreations
  • ManOwaR
    Lieutenant Commander
    • Jul 2009
    • 217

    #2
    A thick heavy coat of heavily talc-filled epoxy (with scribing in mind) is laid down and then glassed.


    Once cured I block sanded so that the edge of the sail halves were exactly flush with their moulds, thus providing perfect fit when removed


    Once pulled from the moulds most of the styrene stayed on them with the exception of a few stubborn pieces. An important thing to remember here when using sharp utensils to dig stuff out is to use sound safe procedure when doing so. I forgot to and ended up stabbing my left hand with a sharpened scribing tool when it slipped...Ha!

    Anyways, here’s the beginning of the sail master and its cap that is ready for mould glassing. I’m pretty darn happy with these rough results turned out! I’m thinking this is going to worth the extra time taken to go the intermediate step.


    Joel
    https://www.facebook.com/HMKcreations

    Comment

    • Slats
      Vice Admiral
      • Aug 2008
      • 1776

      #3
      Simply fantastic work Joel. The quality that your building in here is exactly why I pre-purchased this kit quite some time ago. This submarine will be the hand built Aston Martin - the top peg for a long time to come I'm sure.
      Best

      John
      John Slater

      Sydney Australia

      You would not steal a wallet so don't steal people's livelihood.
      Think of that before your buy "cheap" pirated goods or download others work protected by copyright. Theft is theft.


      sigpic

      Comment

      • ManOwaR
        Lieutenant Commander
        • Jul 2009
        • 217

        #4
        Why, thank you John...
        https://www.facebook.com/HMKcreations

        Comment

        • ManOwaR
          Lieutenant Commander
          • Jul 2009
          • 217

          #5
          Continuing on with the bottom half of the hull, here is a bit of progress to show.
          Going with the same technique as on the sail, I’m going with the thin strips of bevelling inside my markings, then filling in afterword with large area strips of styrene cut to the appropriate shapes.


          I wasn’t going to at first, but I decided to do a bit of filling to get the major gaps between the styrene strips out. At this stage of the game perfection isn’t necessary (later it is) and I could always sand the resultant upraised lines off when I do the final master plugs, but this now will help alleviate a little work down the line. My goal was not to get a “class A” flawless finish, just something that would give me the base I needed.

          Before I filled, I taped off the bevelling on the plastic so that it wouldn’t get corrupted by the filler and primer, and to also protect the rest of the negative mould finish.


          ...And with the masking removed:


          Notice at the front of the boat I installed a large amount styrene plastic around where the torpedo shutters are going to go. There will be so much detail in this area that I decided that it would simpler and be easier to take off my 2” coating on this step, and then build it back out when I have torpedo shutter details in place on the positive hull half mould. The percentage of eliminating possible errors increases here as well...

          A quick look at the sail with its rough cap...I won’t install the cap permanently until all detailing is completed on it. Let’s say that that is a lesson learned from when I was working on the permit’s sail.
          https://www.facebook.com/HMKcreations

          Comment

          • ManOwaR
            Lieutenant Commander
            • Jul 2009
            • 217

            #6
            Once I was happy with the negative detailing and its finish, it was time to make the final plug hull halves. Bear in mind here that the decision was made to do all fine finishing on the final plugs as opposed to try and transfer it from the intermediates. Experience tells me that I would have to do it twice, and who wants to do that much extra work for nothing?

            As per usual when prepping fibreglass moulds for fibreglass reproductions several coats of release wax were applied and then a couple coats of Poly Vinyl Alcohol (PVA) were sprayed on using my designated gun. For my PVA gun, I use a touch up gun with my air set to around 50 psi (at the gun) and disperse as fine as possible to allow for atomization. The finer the spray you can lay down, the less orange peel you’ll get from this stuff. Oh yes, I forgot to mention that before spraying I’ll wipe the first light coat using a clean rag onto the surface and into the details. You can cheat and not have to wait for drying by using a hair drier set on hot, but be careful of dust and the wispy PVA hairs that come out of the gun when spraying and just hang in the air...these have a terrible affinity for falling onto the freshly coated surface and can cause blemishes!

            With my 2 part release combination applied (I’m making the Wolf mould from rubber so I don’t have to do this **** all the time in the future) I mixed up a very heavy epoxy batch using talc, anti-sag filler and some grey colouring and got most of the air out by putting it in vacuum chamber. I added a little heat to reduce viscosity and then applied the mixture to the mould with a brush. I waited until the coat was just tacky so I could add a couple of thick layers of woven roven to the “keel “of the plug only...of which is only there to support the hold down anchors.


            For hold down anchors I am doing the exact same thing as I did with my Jack moulds by using ¼” threaded rod cut to lengths, have a nut threaded on the end and then encapsulate it in an epoxy and reinforcement material, in this case was Kevlar chop that I wanted to try out for kicks and I just happened to have some kicking around. These rods were held in place by simply sliding them through appropriate sized holes drilled in some sticks.


            Next up, I had to add structural support to the whole plug, because after all it only has a thick coating of epoxy with a small strip of fibreglass down the spine. Just like my Jack, I’m using rigid foam again. This was applied in a few stages. The first was to mix up a batch and spread it around the mould surface, especially under the top edges where I used duct tape as sort of a barrier. From there, I mixed up several batches and worked my way up, only pouring when the last batch was getting hard and was a little tacky.


            This stuff is very tough when cured, so i had to use my belt sander to get the overflow foam down flush with the edges of my mould. I knew I was flush when I heard the sound of the belt hitting the mould, of which very resistant and wasn’t damaged. I knew I used aluminum powder in my mould surface coat for some reason, I just didn’t know what it was until know hehe.

            https://www.facebook.com/HMKcreations

            Comment

            • Slats
              Vice Admiral
              • Aug 2008
              • 1776

              #7
              I can see my wolf in there already
              John Slater

              Sydney Australia

              You would not steal a wallet so don't steal people's livelihood.
              Think of that before your buy "cheap" pirated goods or download others work protected by copyright. Theft is theft.


              sigpic

              Comment

              • ManOwaR
                Lieutenant Commander
                • Jul 2009
                • 217

                #8


                WAAs taped on for inspection. They were taken off and the plug put back in the mould. On to the top half!

                https://www.facebook.com/HMKcreations

                Comment

                • ManOwaR
                  Lieutenant Commander
                  • Jul 2009
                  • 217

                  #9
                  On to the parting board construction now so I can attach the hull halves and start to make them look beautiful!
                  Construction materials used for this part of the project is:

                  • 5/8” MDF board
                  • ¼” Ultra-high-molecular-weight polyethylene board (UHMWPE or sometimes shortened to UHMW)
                  • 1 1/8” by 3/16” angle iron
                  • Various nuts and bolts

                  These materials are what I have lying around in the garage, but if I had to build these boards all over again I might be compelled to use these same materials over again. In the case of the UHMWPE I am especially pleased. This stuff is used in arenas to repel 100 mph hockey pucks, is used as skid plates on the bottoms of 4x4 trucks to help slide over rocks, and I’ve even heard of people skating on it when there is no ice...This is pretty much as tough as plastic gets. I kinda fluked out when my son needed our 4 x4 sheet cut down to make more manageable for practicing his slap shot off of. I decided to try using the rest that was left over for my parting board instead of having to go out and buy melamine or something. I’m glad I did as this stuff is impervious to chemicals, is very resilient to sanding, and is very slippery...nothing sticks to it!

                  Anyways, I clamped both boards together and roughly cut them up with my circular saw. Final trimming was done by running all the cut boards through my table saw.


                  The MDF and 5 foot lengths of angle iron were clamped together and holes were drilled through both materials at the same time. The top of the MDF was counter sunk to allow for bolt head flushness to the surface. The poly sheets were then placed loose on the board – no glue, no screws.


                  Next the threaded rod studs (cut down to proper size with the ends filed) were installed back into the hull halves. The halves were placed on the poly sheet and the hole locations were marked. An oversize hole was drilled for each mark through the wood and plastic. The rods were placed through the holes and wing nuts and fender washers were used to secure the whole thing tightly from the other side. Now I can easily adjust the whole plug on the board if needed with the puck board being sandwiched tightly between wood and hull. I’ll screw in some sort of mould keys later, but I want to be left alone from obstructions on the flat surface for now.


                  Just over 5 feet in total length, here are the halves ready for some beautification


                  Here are a few shots of the top half pulled from the intermediate mould:


                  Now its time to clean up these parts, install major details, then start applying some of this ton of photoetch that I'm currently preparing on my pc for this beast!
                  https://www.facebook.com/HMKcreations

                  Comment

                  • Slats
                    Vice Admiral
                    • Aug 2008
                    • 1776

                    #10
                    Inspiring - got to get cam fixed and get back on track with Pogy and Plunger.
                    J
                    John Slater

                    Sydney Australia

                    You would not steal a wallet so don't steal people's livelihood.
                    Think of that before your buy "cheap" pirated goods or download others work protected by copyright. Theft is theft.


                    sigpic

                    Comment

                    • ManOwaR
                      Lieutenant Commander
                      • Jul 2009
                      • 217

                      #11
                      Now, on installing major equipment on the bottom hull, this meaning the WAA blisters.

                      First task was to do the fine shape sanding on the bottoms of the WAA blisters. Heavy sandpaper was taped to the location where each part was to be mounted. A wood block was hot melted to the top of the blister to give me a good grip and control as I sanded down the bottoms of these blisters. Hot melt is a great temporary adhesive and usually comes off fairly easy with a little manipulation, and this was pretty much the case on every WAA except for one, where the majority of the sonar window tore out with the wooden block. No big deal, just a little more to fill later.


                      The trick here is to make sure that all the blisters line up to each other, in my books they would pretty much have to - to triangulate data properly. I couldn’t see the system working with all the arrays firing off at different angles because the computer would need a basis in which to have reference. The one dimension that all three arrays have in common is the width of the blister before the tapers. With that being said, my reference point to make sure these line up properly is the upper top edges of the arrays before they start to taper down. I used the straightest stick I could find in the shop and double-sided taped the arrays to the edge of the stick.


                      The stick was placed into position onto the hull where the blisters were to be. I don’t know if it was a fluke or not, but the blisters fit perfectly into place mating to the curves of the hull. Usually things aren’t supposed to be this easy for me, but in this case they were and I’m extremely happy about it, let me tell you!


                      The shapes were traced out using a Sharpie, the blisters taped to the hull and the stick was then removed. The area on hull underneath was roughed up and cleaned and the blisters could then be glued down permanently. From here, it’s a matter of filling and fairing as per usual as these on the real boat are completely blended in because of the rubber coating.


                      In primer awaiting final filling and an epoxy primer seal-coat
                      https://www.facebook.com/HMKcreations

                      Comment

                      • Slats
                        Vice Admiral
                        • Aug 2008
                        • 1776

                        #12
                        Joel - looks like its coming on leaps and bounds. Got a feeling it will be done soon?
                        J
                        John Slater

                        Sydney Australia

                        You would not steal a wallet so don't steal people's livelihood.
                        Think of that before your buy "cheap" pirated goods or download others work protected by copyright. Theft is theft.


                        sigpic

                        Comment

                        • ManOwaR
                          Lieutenant Commander
                          • Jul 2009
                          • 217

                          #13
                          I'm gunning for a spring release on this puppy, John. Currently, I've started on the bottom half detailing of which, has so far come out really nice. Next, detailing topside, the sail, masts, then to make all the mechanical goodies. Lots of reports are coming, its just a matter of getting the desire to do them!

                          Joel
                          https://www.facebook.com/HMKcreations

                          Comment

                          • Slats
                            Vice Admiral
                            • Aug 2008
                            • 1776

                            #14
                            Thank Joel for the update, having two of your hull's already that go together so well this will be a beauty.
                            Your spring - wow that is not too far away, would be cool if I can take mine (albeit un-built) along to our Subregatta in early June. The guys here would love to see it.

                            re the Mechanical goodies, with the steering yokes, can I suggest that the yokes allow the rudders and planes to have their connected push rods on opposing sides of the prop shaft. The Permit and Jack use the same side, (which is not an insurmountable problem), but I think it would be neater if a push rod could be on each side of the shaft.

                            Best
                            John
                            John Slater

                            Sydney Australia

                            You would not steal a wallet so don't steal people's livelihood.
                            Think of that before your buy "cheap" pirated goods or download others work protected by copyright. Theft is theft.


                            sigpic

                            Comment

                            • ManOwaR
                              Lieutenant Commander
                              • Jul 2009
                              • 217

                              #15
                              John,

                              I'm going to make the stern plane connections as a user's choice in regards to what side they want to attach the push rod. I am also going to make it an option in that the stern planes (outer and inner) can be operated independantly of each other just like the real boat. There was actually a time when I was pondering just making straight connecting shafts for the rudders and planes and then offset the PJ drive shaft off to one side to a geared setup on the tailcone. However, forsight tells me that although it would be cool, it would just add one more little pain in the butt on the production side of things and I want to eliminate that kind of stuff to speed up the process.
                              https://www.facebook.com/HMKcreations

                              Comment

                              Working...