Dave,
Tried to PM you, it says you've exceeded your PM quota (whatever that is)!
Want to give you address details etc.
Rob
-
Send me your mailing address and I'll fix you up. Just send back the shipping charge.
DavidLeave a comment:
-
-
Prop Shop are ace for propellers- investment cast rather than fabricated, and supplied in either silicone bronze, stainless steel or aluminium, tapped to a thread of your choice, balanced and polished. A huge range available, and I believe he does a 1/72 Skipjack prop. https://www.prop-shop.co.uk/prop-shop-store.phpLeave a comment:
-
Not going to do the full 'Manfred' on this one, just enough to lift it out of the ordinary.
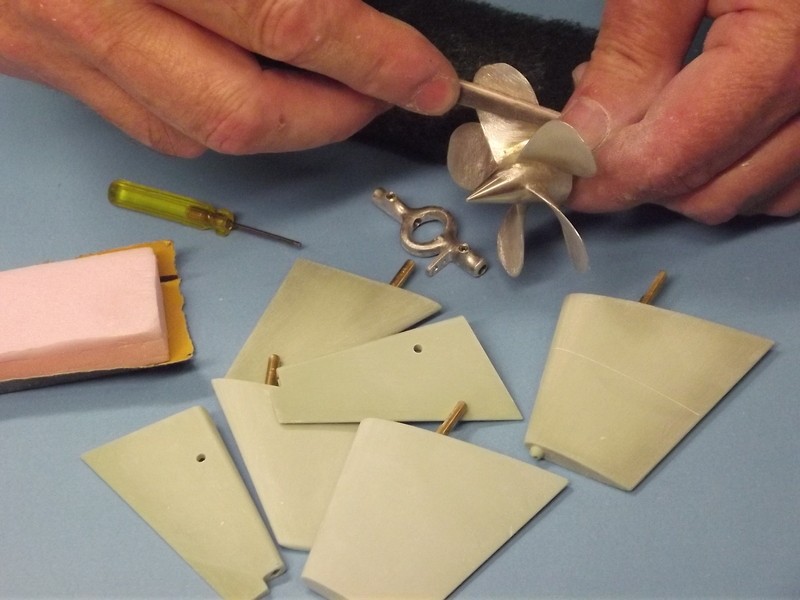
The prop is from Raboesch:-
Raboesch 45mm M4 Threaded 3 Blade R/H Brass D-Type Propeller


Supplier is Cornwall Model Boats, my favourite supplier, if I lived in the UK, I'd have the place haunted!
Speaking of props, I'm going to do another 1/72 Revell Skipjack, anyone got a spare prop, very unusual design, willing to pay all charges, postages whatever to get one.
RobLeave a comment:
-
Thanks guys.
Not going to do the full 'Manfred' on this one, just enough to lift it out of the ordinary.
The prop is from the supplier below, Raboesch do all kinds props and types.

Speaking of props, I'm going to do another 1/72 Revell Skipjack, anyone have a spare prop (very unusual design), willing to pay for postage and any other charges required.
Rob
Raboesch 45mm M4 Threaded 3 Blade R/H Brass D-Type Propeller
Leave a comment:
-
A term we have used here is to Manfred something, which means detail the heck out of it. Like manfred asked, tell us about your prop!Leave a comment:
-
Rob,
so you started with the XXIII, making some nice progress, like Tom said, it's a nice kit, fairly accurate to the original, as for the details, you can go wild or keep it moderate.
One question, where did you get that prop?, looking forward to the rest of your build.
Manfred.Leave a comment:
-
Rob,
I think the Bronco is a great kit. For a beginner or a detail crazy nut such as yourself :-) it can beamed into a working sub. Plenty of hull room. I am just enjoying the details you are putting in!Leave a comment:
-
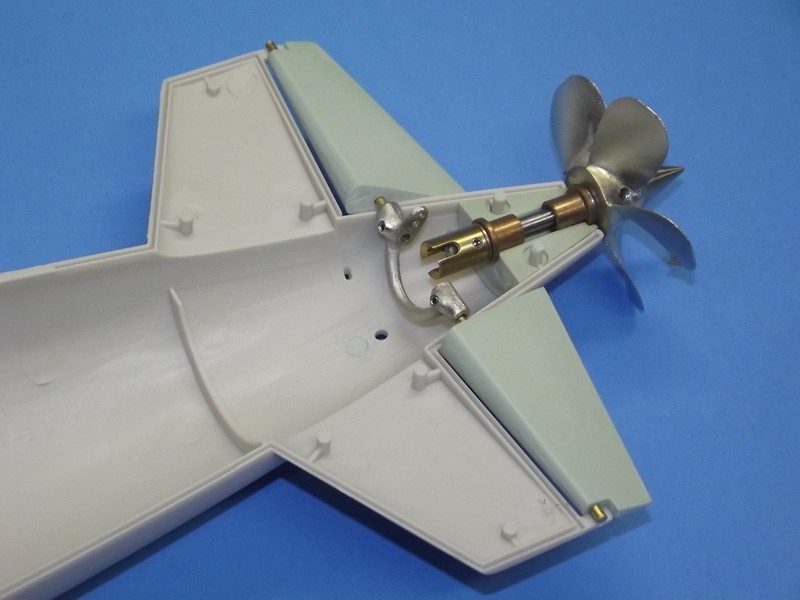
By coincidence the torp tube was the same diameter as the section of hull where I needed to set the connection bolt.
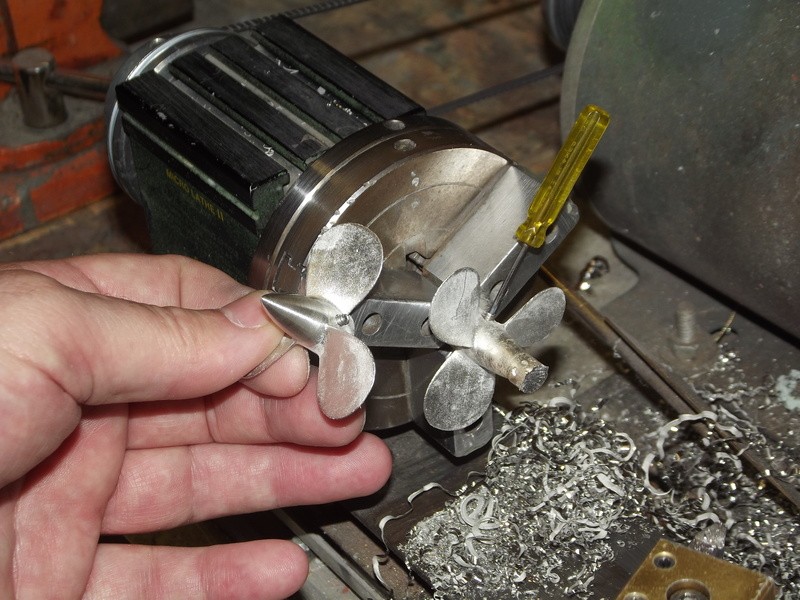
Here is the power train, 45mm prop, through hull tube, thrust washer, 4mm mini shaft and the larger 4mm prop shaft with couplers at each end.
To set the through hull tube, I ran a 4mm brass rod through the centre of a bulkhead and glued the shaft in place.
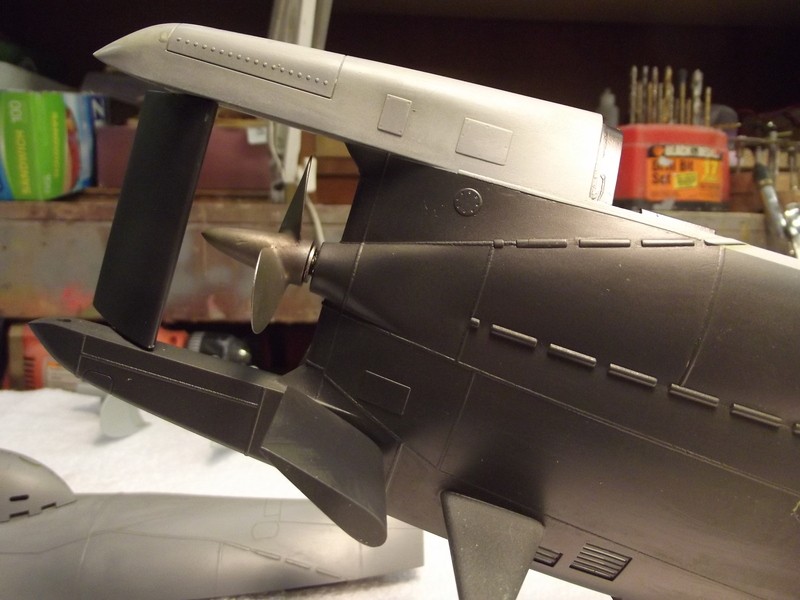
I extended the prop boss a bit to meet the diameter of the prop, not prototypical!
Then I added alignment strips and strenghtners from 1.5mm styrene to the upper hull, it's very flimsy until this is done.
The BoattrainmanLast edited by The Boattrainman; 04-14-2019, 04:38 PM.Leave a comment:
-
Just a comment on the idea this is a 'beginners' project.
It's def not a complicated sub, just a bit fiddly as it's under a metre in length, however one of it's strengths is also a weakness and in my view will need experience to sort.
All the nice surface detail, some of it very fine, tends to get damaged during the build and will require a lot of remedial action to fix later. Def not for a Beginner as some of the seams and weld doublers are incredibly small.
Rob
Leave a comment:
-
Here's the front of the torpedos and tubes finished, with holes to let air/water circulate.
Here's what I want, just a hint there's something lethal behind the door.......
The Boattrainman
Leave a comment:
-
I decided to open the hull just cutting it with a craft knife, using the horizontal weld seams and masking tape as a guide. The four bulkheads I made earlier.
By using a knife and lots of patience instead of a rotary drill, there's less plastic removed so less filling after.........got it fairly straight.
The cranks for the dive planes are standard 3mm items cut down and wedded together...............
.......here they are in place...............
...................and broken down.
The BoattrainmanLast edited by The Boattrainman; 04-14-2019, 04:37 PM.Leave a comment:
-
One slight problem with sealing the hull is that I need to add the torpedos and torpedo bay fully painted, as I want to model the sub with one torp door open.
To do this, I just need the front section of the torps and tubes, the rest of the hull is needed for my WTC.
I replaced the timer props on the front with brass for rigidity and the styrene strips around the bodies are so they will 'centre' in the tubes.
Painted from photos of the G7e torpedo in the National War Museum in London.
Leave a comment:
-
I've improved the bollards by drilling out the originals and adding the lifting bars, and the hatches get a makeover.
The snorkel is probably the key feature on the sub so the improvements were crucial, I've done the basic shape of the handrails in 1mm brass rod, a bit flimsy, but the tower will be permanently attached to the upper hull so I'll manhandle that instead!
The BoattrainmanLast edited by The Boattrainman; 04-10-2019, 03:10 PM.Leave a comment:

Leave a comment: