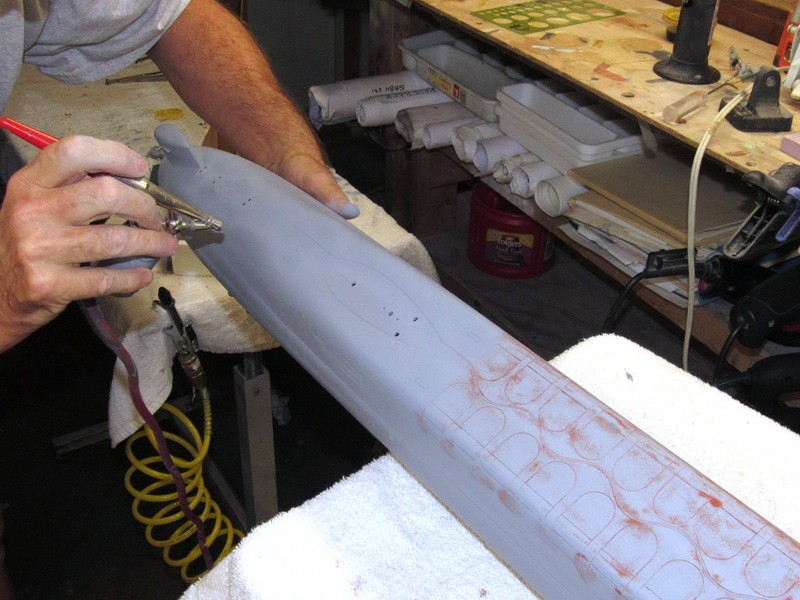
Assembling a 1/96 WEBSTER kit

Collapse
X
 
  • Time
  • Show
Clear All
new posts

  • He Who Shall Not Be Named
    replied


    Two steps forward. One step back!

    Well, even the greats -- like me -- make mistakes.

    Such is the case with the stern vertical stabilizers I, as it turned out, erroneously mounted at the tips of the horizontal stabilizers on my 1/96 scale model of the DANIEL WEBSTER, a unit of the LAFAYETTE class of SSBN’s produced in the early 60’s.

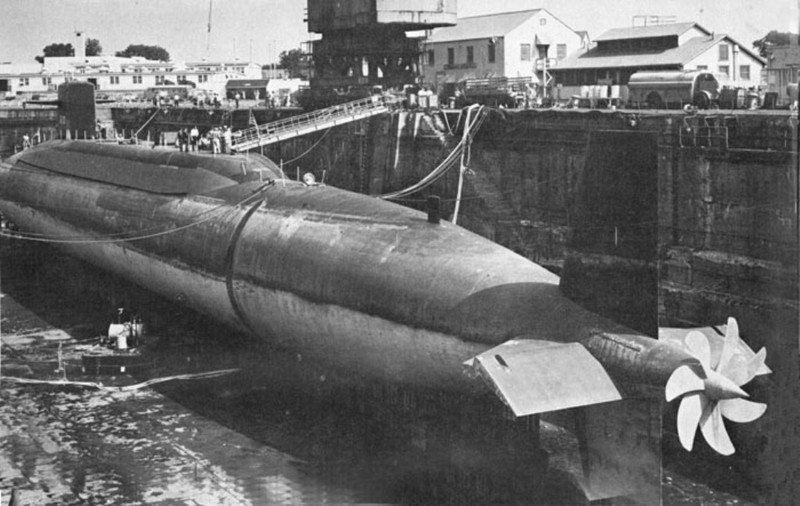
    Below is a dry-dock photo of a LAFAYETTE class SSBN, clearly showing the absence of vertical stabilizers and the distinctive split upper rudder, classifying features of the class.

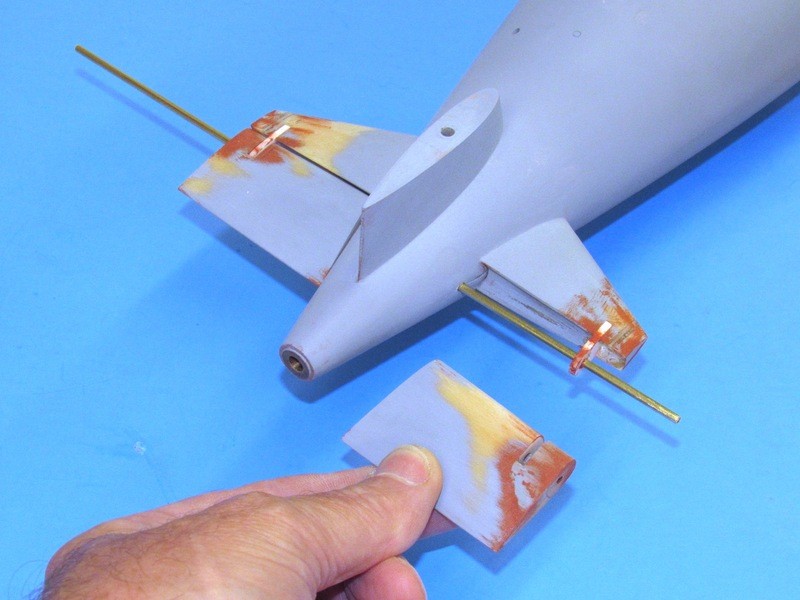
    Note that the outboard stern plane operating shaft bearing is near the outboard tip of the planes. As the stern planes on most modern American submarines are of the ‘balanced’ type – a significant fraction of the plane surface is in front of the center-of-rotation – the inboard and outboard operating shaft bearings are situated well aft of the control surfaces leading edge. To achieve that, some boats, the LAFAYETT’s specifically, employ an outboard bearing support arm, or post, fixed to the horizontal stabilizer, that extends aft into the stern plane and engages its operating shaft. That arrangement well illustrated here.


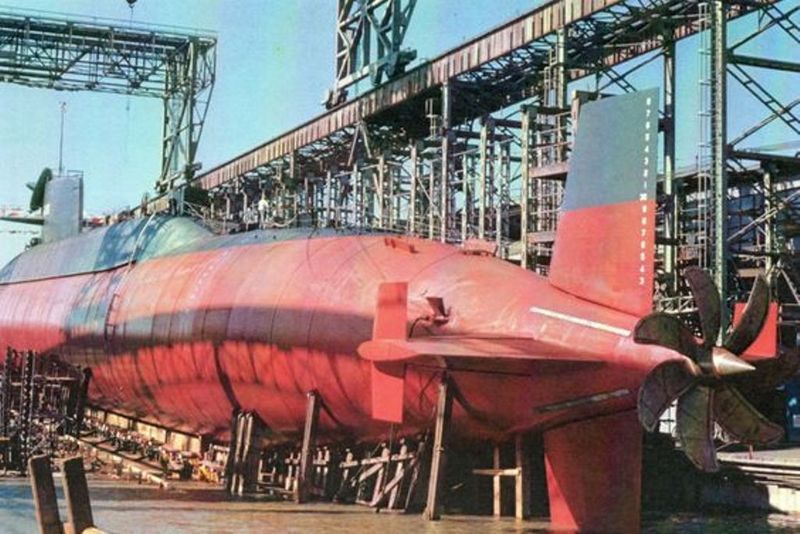
    The location of the stern plane outboard operating shaft bearing is the big difference between the LAFAYETTE and BENJAMIN FRANKLIN class boats – the much wider, tip located operating shaft bearing structure on the BENJAMIN FRANKLIN class boats providing the foundation upon which the vertical stabilizers are affixed. I’m not sure if the vertical surfaces were employed as housing for sonar elements (early PUFFS?) or not, but they did greatly improve the dynamic stability of the submarine about the yaw axis – meaning less work for the helmsman!

    The Scale Shipyard 1/96 kit I’ve had all these decades therefore represents the BENJAMIN FRANKLIN, not the LAFAYETTE class SSBN, as I had mistakenly assumed. The three major physical differences between the two classes is the location of the planes on the sail (a moot point on my DANIEL WEBSTER model, as it had those planes mounted over the bow); the use of a fixed vertical stabilizer under the upper rudder, and the absence of vertical stabilizers on the LAFAYETTE class boats.


    It was all there in my documentation: my qualification notes, dry-dock planes, booklet of general planes, and several photos of the DANIEL WEBSTER and other LAFAYETTE class SSBN’s in dry dock. If I only paid attention to that I would not have found myself chasing my tail as I fell down the rabbit-hole of, ‘gee! … looks neat, let’s stick those on the ass-end of my toy submarine!”


    As a closer look at my documentation revealed, those vertical surfaces were a feature of the later BENJERMAN FRANKLIN class of SSBN, not the LAFAYETTE class of which my DANIEL WEBSTER was a member.

    I erroneously assumed (NEVER assume!) that some boats, including my boat, got these as a yard-period retrofit. I have found nothing to substantiate this assumption. So, the damned things I worked so hard to install had to come off!
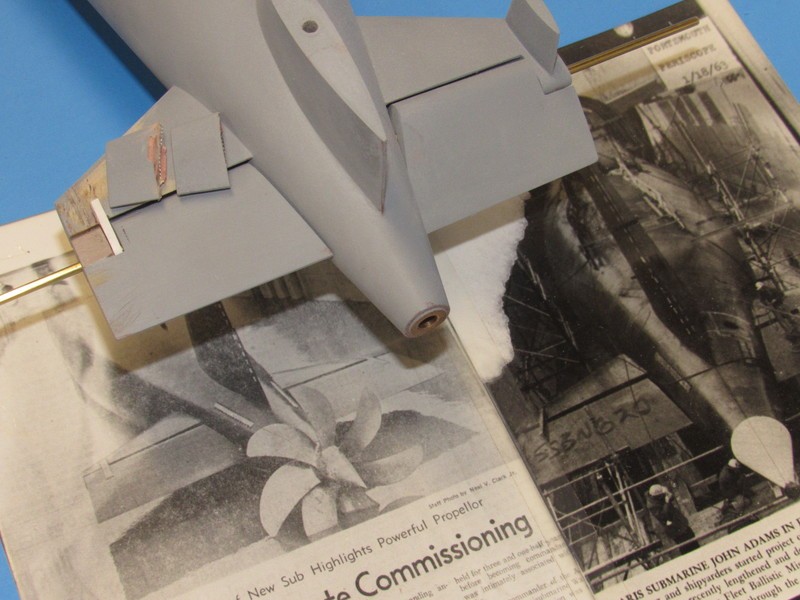


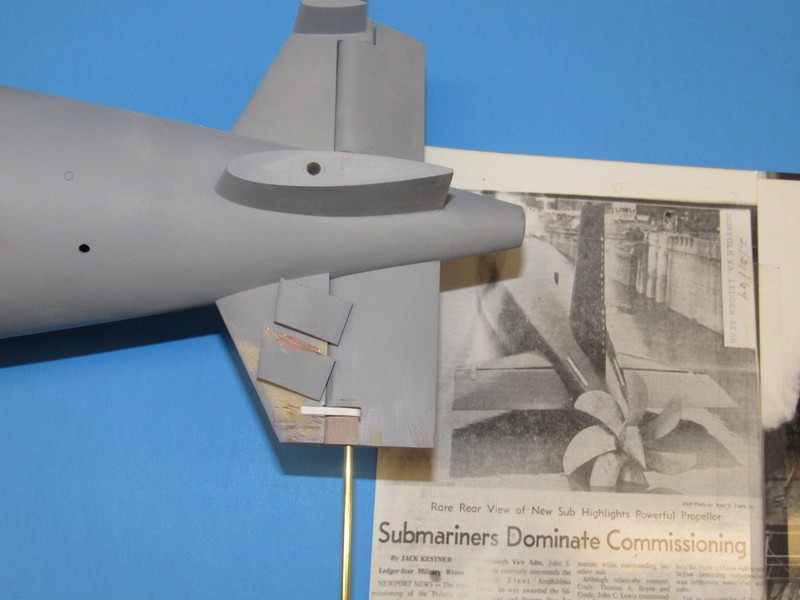
    So -- to better illustrate the difference in how the outboard stern plane operating shaft bearings were situated between the two nearly identical classes of SSBN’s -- I halted the work after most of the change was done on the port side, but not yet done to the starboard. This illustrates the difference between the two configurations.

    Note the two snipped off vertical stabilizers in foreground (sob, sob … sniff, sniff).
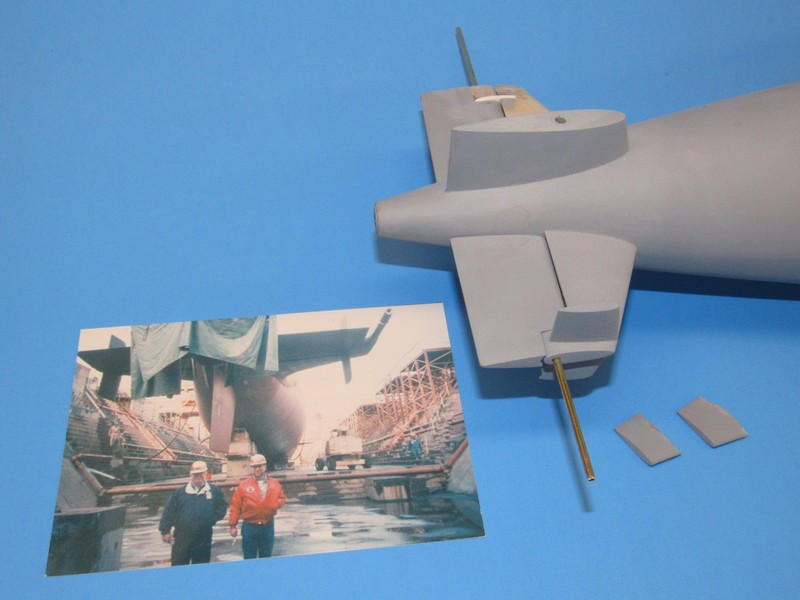


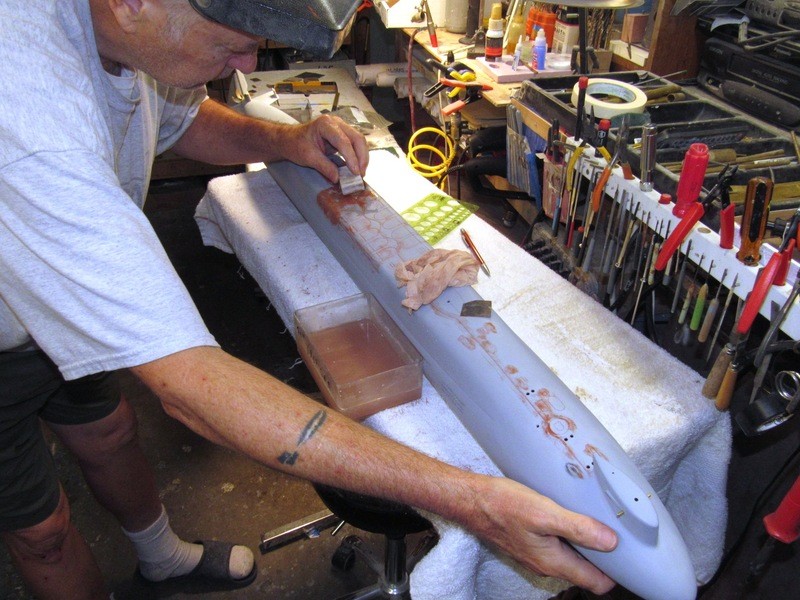
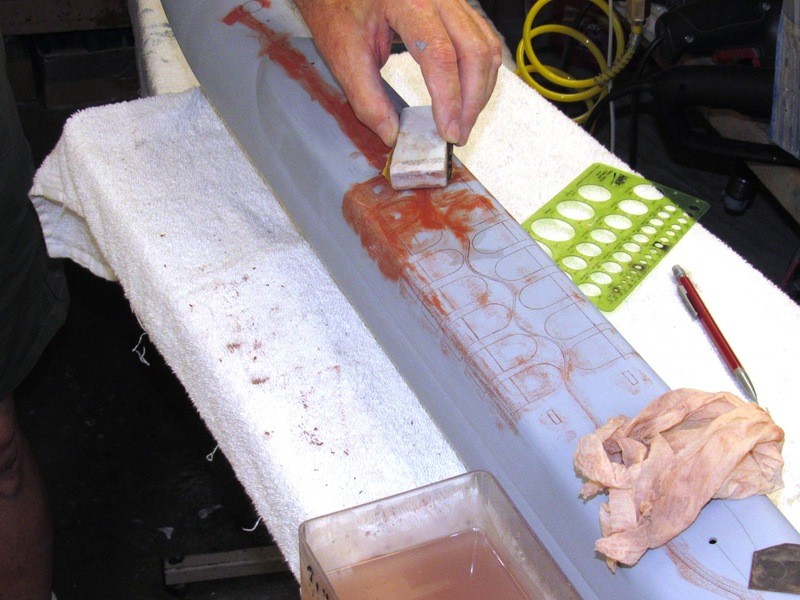
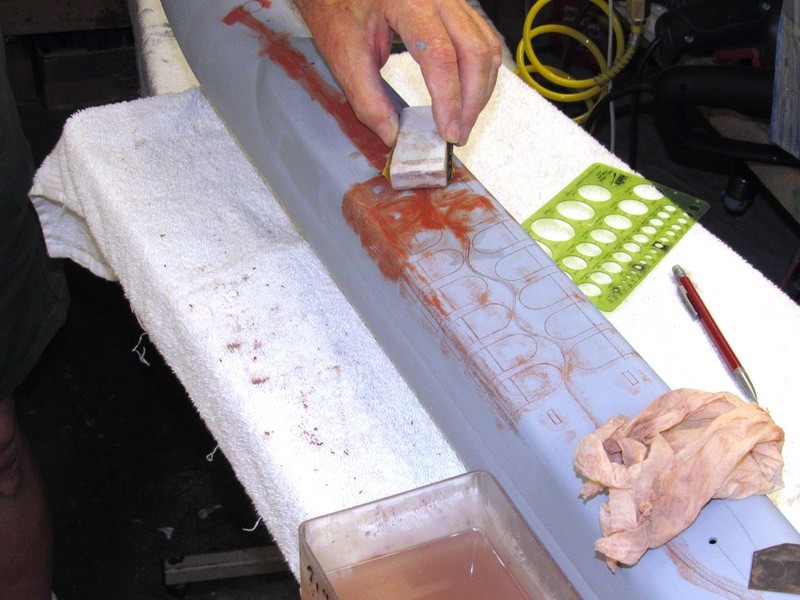
    As the vertical stabilizers featured a G-10 fiberglass core that ran through the bearing foundation I found the best tool for removing them was a thin-blade, un-reinforced carbide cut-off wheel. The rough work done, the roots of the vertical stabilizers were ground down with carbide burr, flat files and a sanding block.

    It’s so much easier to destroy than to create.
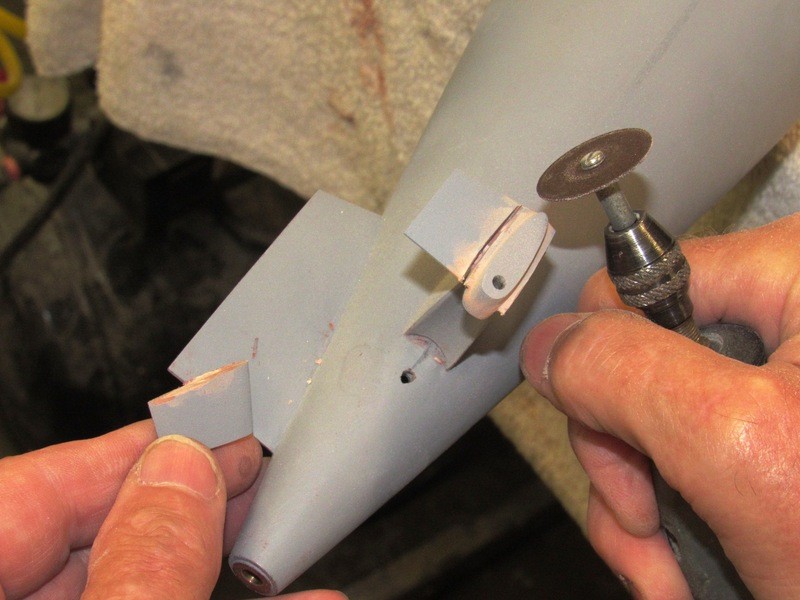


    When kerf is our friend: The width of the stern plane operating shaft outboard bearing posts at this scale came in at a bit over 3/32”. To achieve these slots in the horizontal stabilizer and stern plane I found that taping two hacksaw blades together and using this tool to saw the slits was the best solution to the problem. The bearing post itself is a piece of Sintra plastic sheet cut to shape and drilled at its end to pass the stern plane operating shaft.
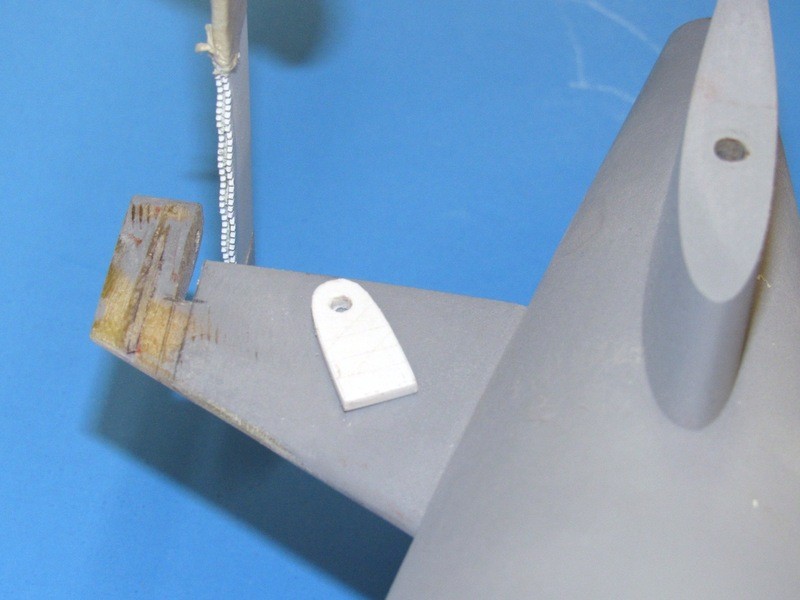


    The vertical stabilizer foundation was cut back to the trailing edge of the horizontal stabilizer and the concave trough that nested the leading edge of the stern planes was roughed out with round files. The void at the tip of the stern plane was built up from RenShape and worked to shape.

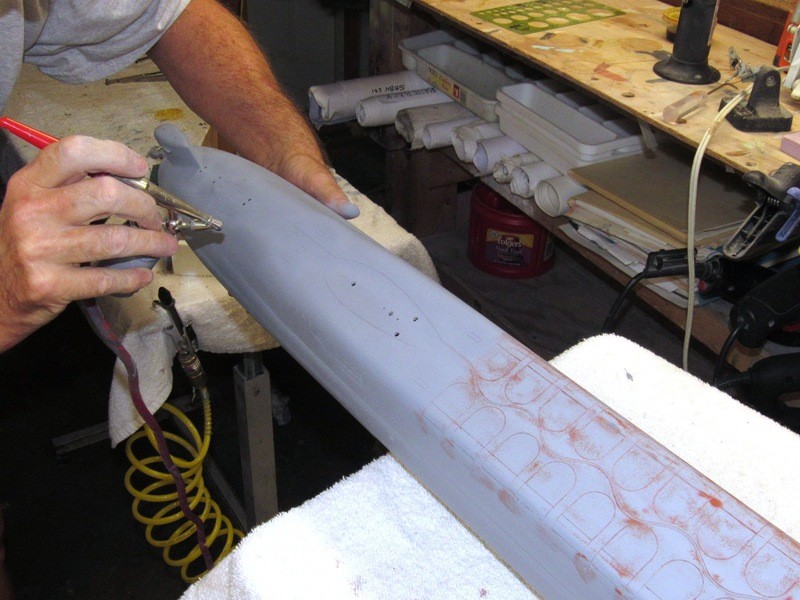
    The gross filling and contouring was done with Bondo, followed by air-dry touch-up putty, and lots of sanding. Only then did the fist coat of gray primer go down to check the work. You see how the stern plane operating shaft slips through the two bearing points – one bearing point at the hull, the other at the outboard bearing support arm. A set-screw in the stern plane makes it fast to its operating shaft, the torsion force to move the stern plane is through an internal yoke that makes up to both operating shafts and affords clearance of the centrally running propeller drive shaft.


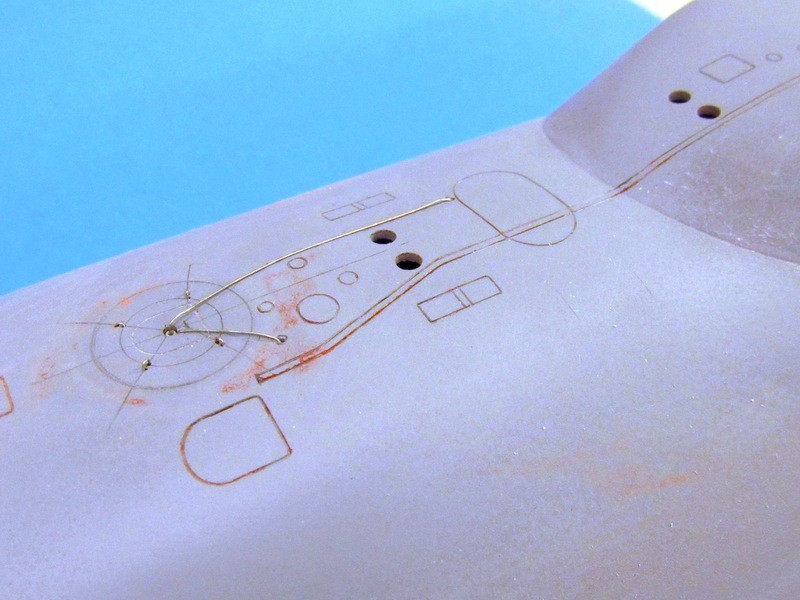
    All modern American combat submarines up to the LOS ANGELES class featured one or more escape marker-buoy systems. In the event the submarine is grounded at a survivable depth (in reality that means pier side, or just well within the continental shelf) the marker buoy is released and rises to the surface, as it does so an attached ‘down-haul’ cable is paid out, the cable running through a ‘bail’ or fairlead situated over the escape trunk hatch, dead center of the surrounding seating ring that would be used to make the water tight seal between McCain rescue bell or DSRV skirt and the stricken submarines escape trunk.

    The down-haul cable is wound on a drum set in the superstructure near the escape trunk upper hatch. On the model I represent the short length of down-haul cable running from the drum, up through a fairlead hole in the deck, straight to the escape hatch down-haul cable bail. Another wire, coming out the top of the bail runs to the escape buoy marker.

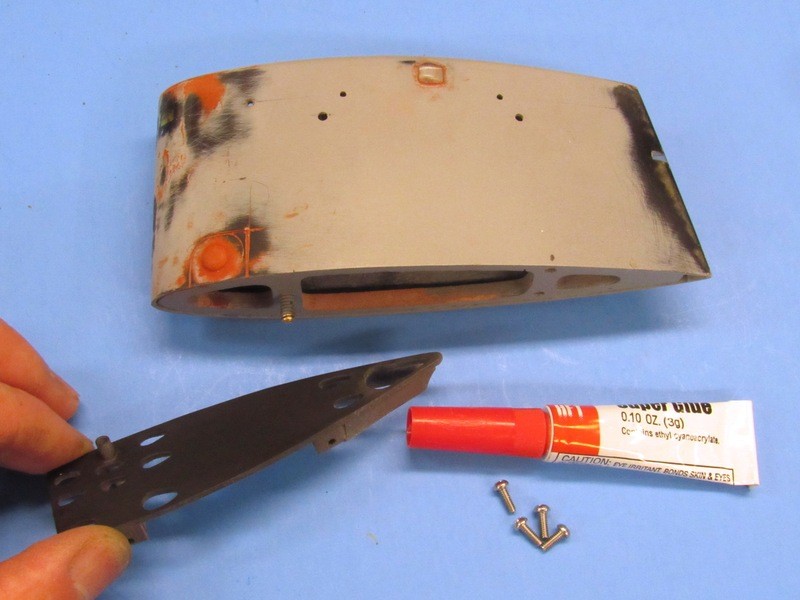
    While I was at it I inserted the four hold-down padeyes that circled the escape hatch and sat within the seating circle – these artifacts from the old McCain rescue chamber system. All the required holes drilled, wire fitted and checked, it was all taken apart and set aside until all painting and weathering had been completed on the model.
    Leave a comment:


  • DMTNT
    replied
    Top notch, David. Speaking from experience, the "screw on" attachment method for the sail allows for easy access to the float valve / painting & finishing / repair work on the sail / etc.

    Leave a comment:


  • He Who Shall Not Be Named
    replied

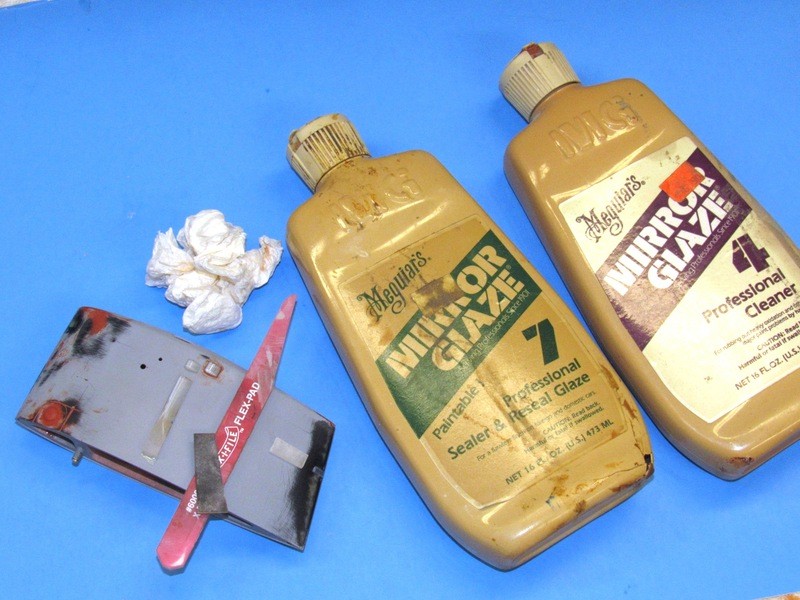
    The three deadlights were sanded with descending grades of sandpaper and sanding sticks till I got to 2000 grit. I then switched to paste type fine abrasives. My favorites are #4 and #7 Mirror Glaze water-based polishing compounds. By time I had finished rubbing down the clear parts with the #7 they had assumed an acceptable level of opacity … little bubbles and all!

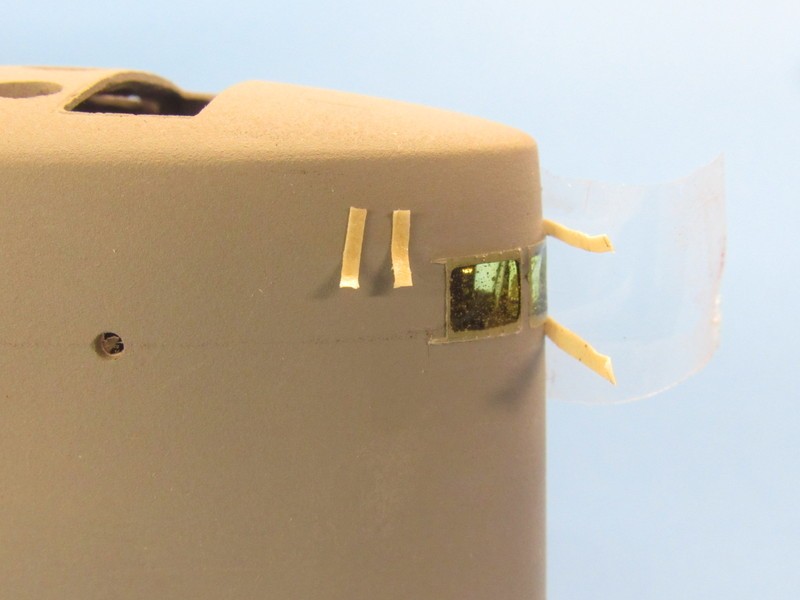
    The two streamline-shaped port and starboard running light fairings were cut from a piece of clear acrylic, which you see sitting on the sail in this shot. These items also received the sanding-polishing treatment till they were optically clear. Note that sitting near the trailing edge of the sail is another piece of acrylic that will be narrowed and inserted into a slit. That item becoming the lens of the emergency stern light.


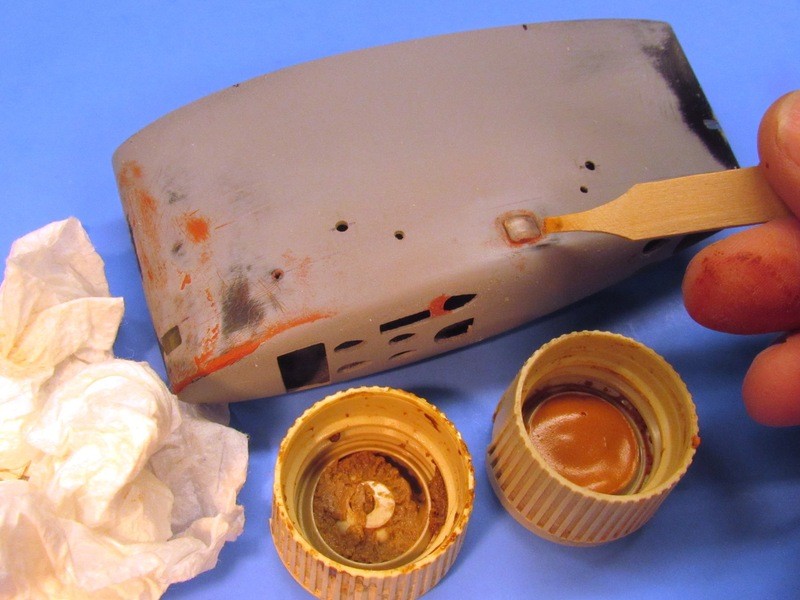
    For small polishing jobs like this I simply remove the caps from the containers of the two grades of polish and take what I need from within those -- the very gritty #4 to the left, next to it the fine #7. I had to re-polish the installed running light fairings after fairing them to the sail with small amounts of putty – sanding back the dried putty scared them a bit.

    A trick I learned from the model aircraft guys: Precision application and rubbing in of the polish over clear parts is best done with the end of a modified popsicle stick. The wet polish causes the wood fibers to separate into a sort of stiff-brush at the tip, soft enough to evenly rub the polish over the work, yet hard enough to permit exacting control over the areas that need the elbow-grease.


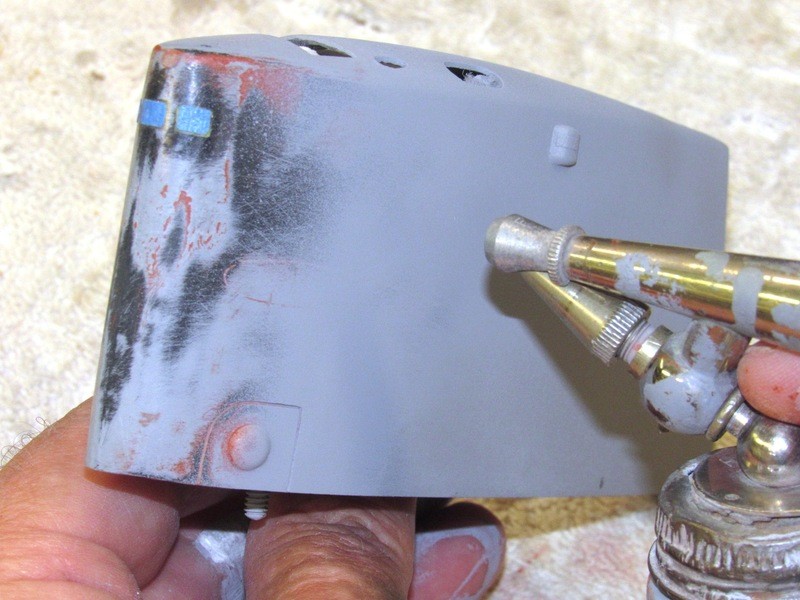
    Before I could address the alignment and screw holes marring the sides of the sail I first had to permanently mount the internal mast foundation piece by CA’ing it in place; removing the temporary alignment pins and securing fasteners; filling the holes with CA and baking soda; grinding that down; applying putty and sanding that down; and then FINALLY! moving on to priming the entire sail structure.

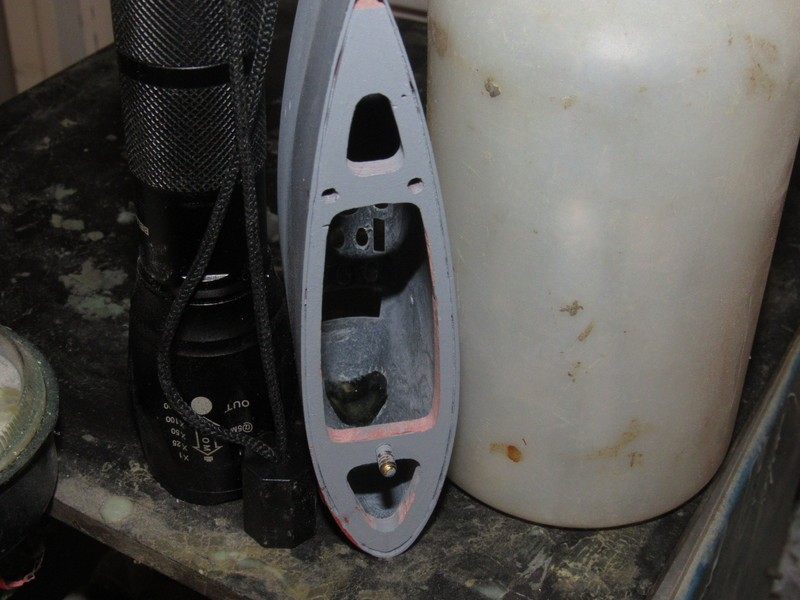
    Note that I first painted the mast foundation piece black before installation as once it’s in place it would be hard to paint.


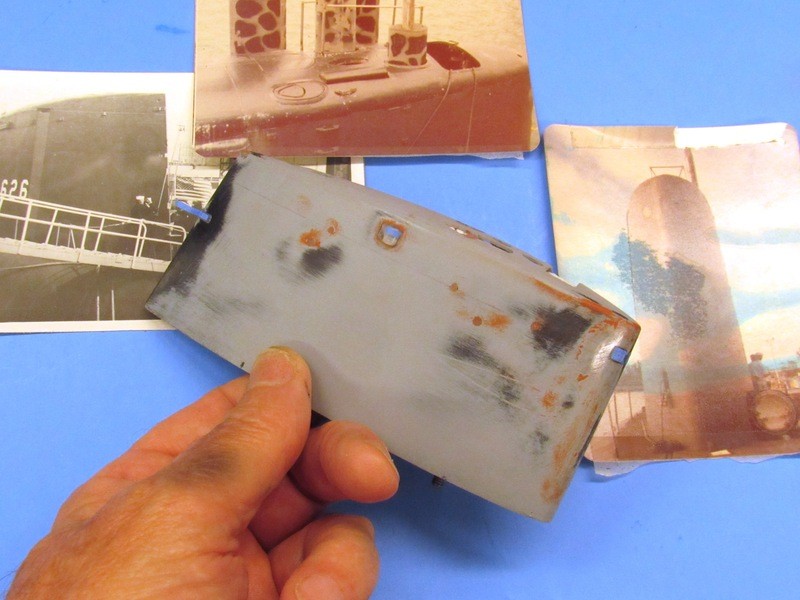
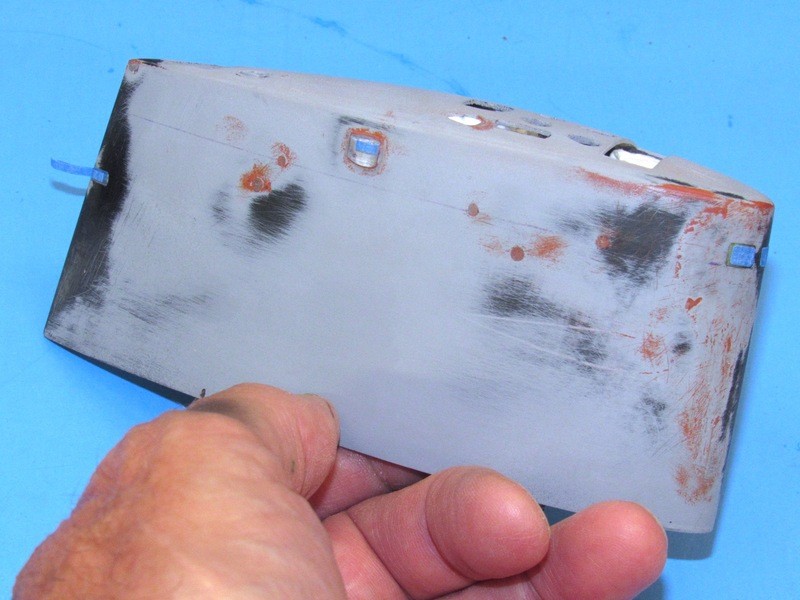
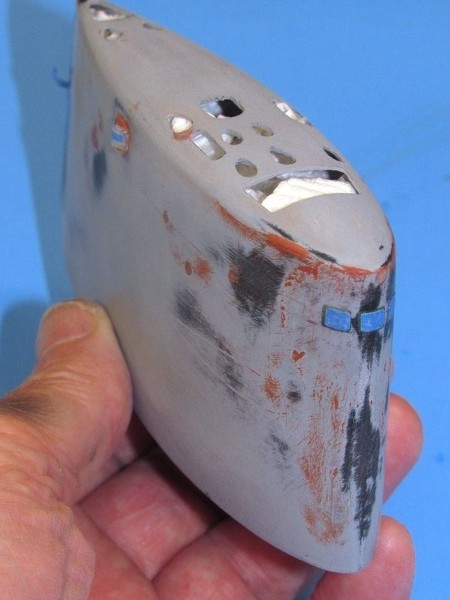
    Ready for primer. I’ve applied masking tape over where I want to preserve the clear deadlights, running light lenses, and emergency stern light lens. Note some of the photos I used to fine-tune the placement of detail items on the sail.


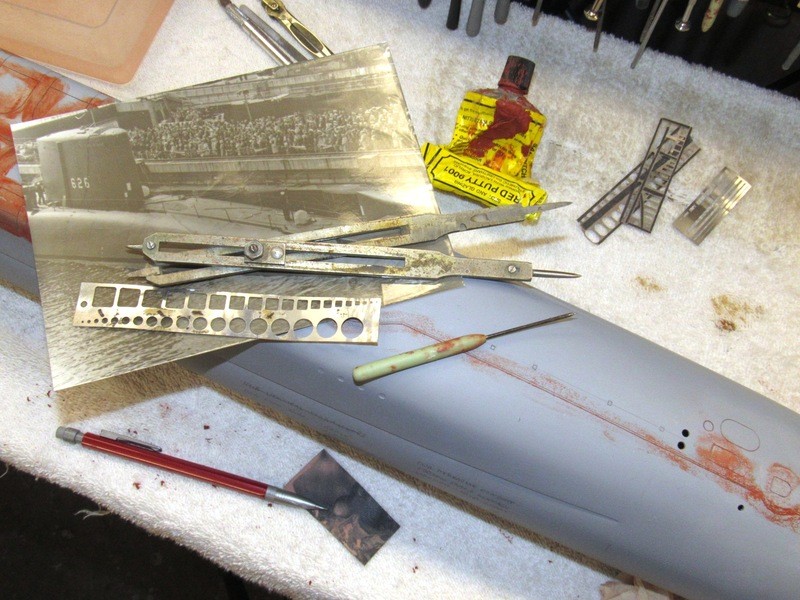
    Primary documentation that supported this project included my personal copy of the training aid booklet (TAB), issued to each crewmember as part of his qualification/re-qualification package when reporting aboard (my copy issued me nearly half a century ago). I also made use of released ‘booklet of general plans’, and dry-docking plans specific to the LAFFAYETE (SSBN 616) class -- documents de-classified and available to the general public for several decades now.


    To prevent overspray of primer and paint from getting onto the internal mast foundation and inside surfaces of the deadlights I stuffed the upper portion of the sail with paper towel shreds.

    Note how I made the actual clear parts of the deadlights a bit larger than they had to be – this insures no structure can be observed through the deadlight framing of the painted model – the masked portions of the deadlights cover exclusively clear lenses.


    Primer gray: the great EQUALIZER!


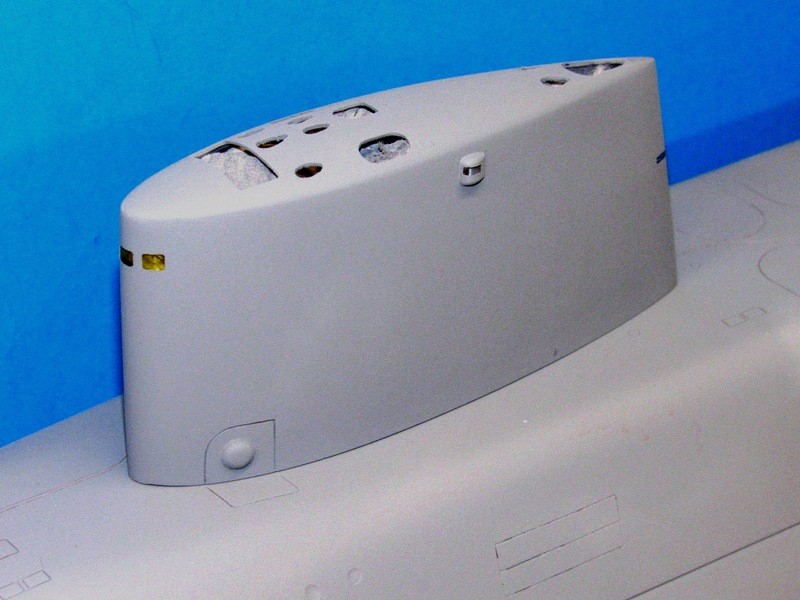
    Primer down and the masking removed (which will be re-applied when it comes time for painting, weathering and clear coats). Sitting atop the hull, things are starting to shape up!

    Still some scribing to do on the top and sides of the sail, but most of the work on this structure is done – if you discount all the fiddly stuff remaining on the fairings, periscopes, and antennas. Groan!

    Nothing to do with scale, but I still have to fit a practical float activated snorkel within the sail. An element of the SemiASperated (SAS) ballast sub-system I employ on almost all my r/c submarine models. More on that later.


    Leave a comment:


  • He Who Shall Not Be Named
    replied

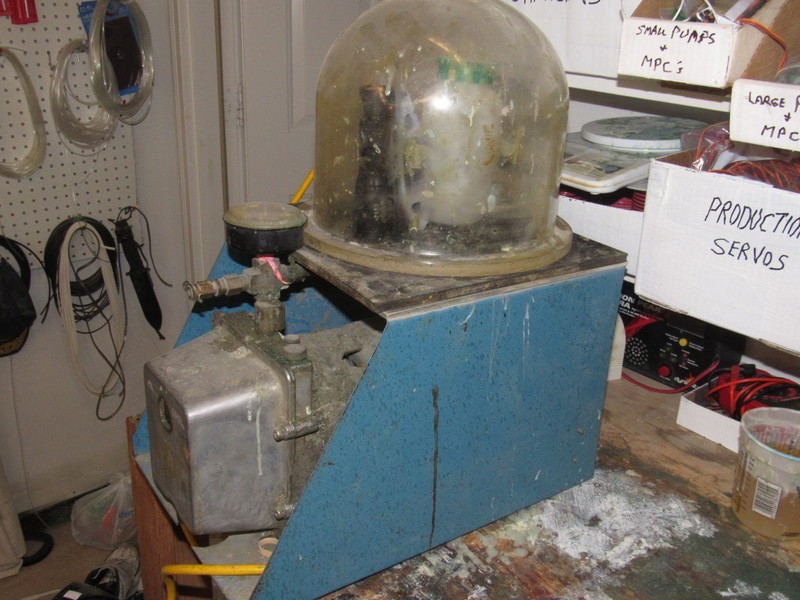
    The vacuum tables bell-jar removed you get a closer look at the little puddle of cured epoxy glue that gave form to the clear lenses of the three sail deadlights.

    After the epoxy glue cured as hard as it was going to get I removed the big piece of clear packing tape from around the leading edge of the sail and then pulled off the masking tape strips used to put the outside face of the raw deadlight lenses a short distance off the face of the sails leading edge. And this is what I got.

    And now … let’s back light this thing: WHAT A MISERABLE JOB!!!! Just look at all the little bubbles captured in the epoxy glue deadlight lenses. God Damit!
    Clearly, pulling a vacuum on the glue before it changed state from liquid to solid did not de-air the mix any at all. It must be the thickness of the glue: even though the vacuum increased the size, and hence the buoyancy, of the entrapped gas, the viscosity of the glue overcame the buoyant force of the enlarged bubbles that would have pushed them upward to the surface, breaking, and giving up the entrapped gas to the vacuum.
    Here’s what I think happened: As I only had ten-minutes to hold vacuum it clearly was not long enough to get those bubbles to migrate from mix to surface. The obvious fix is to use a thinner formula adhesive – one where the bubbles can travel the required distance in the given time. And/or use an epoxy of much longer pot-life. I’ll kick this thing. Maybe the next project will benefit from these findings?

    I’m going with this as is, tiny bubbles and all. One must, from time to time, be pragmatic and accept things as they are and move on. Otherwise projects never get completed. You rivet-counters, procrastinators, and project quitters know exactly what I’m talk’n bout!


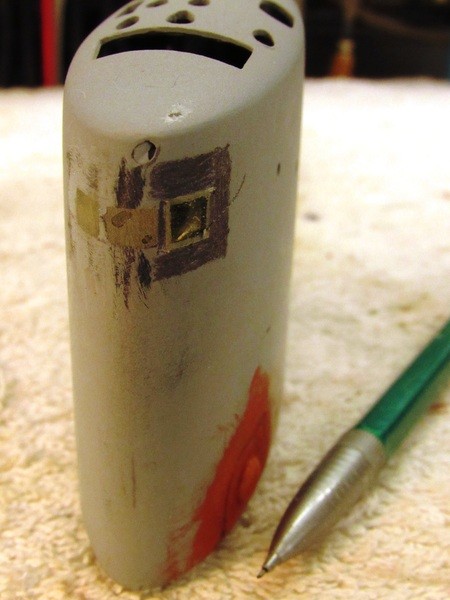
    Even though I took the precautionary measure of building up the epoxy deadlight lenses a bit proud of the sails leading edge surface I still failed to completely build a height of epoxy tall enough to avoid a few divots, like those you see in the center deadlight lens. This was fixed by a few drops of epoxy glue applied to each divot and, once that had cured hard, filing the repaired areas flush.

    To guide me – keeping the file from digging into adjacent work as I took the lenses down to conform to the sails leading edge – I marked around the epoxy areas with a pencil. When the file got the lens almost even with the surrounding sail structure I would observe the start of file-marks on the penciled areas, telling me to stop with the filing and continue the work carefully with descending cuts of sandpaper backed up with a sanding block.

    Leave a comment:


  • He Who Shall Not Be Named
    replied


    At 1/96 scale the bridge windows – more correctly described as, ‘deadlights’ – on submarines are worth the effort and time required to make them transparent, or at least as transparent as can be reasonably expected.

    You can go with vacuformed inserts, or a slug of clear solid acrylic, but in this case I went with the David Manley method of making the deadlights from clear epoxy adhesive. I’ve had moderate success achieving what I would call ‘acceptable’ transparency, but this being my third submarine model to feature these type deadlights, I’m still zeroing in on what to do, as well as what not to do, when employing this technique. Hopefully the big 1/96 SIERRA-2 deadlights will see an improvement over this and previous work.

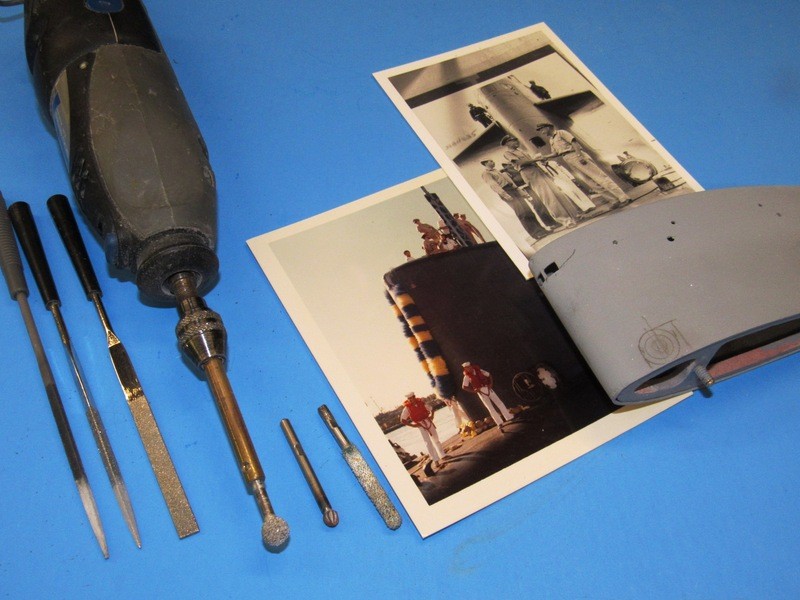
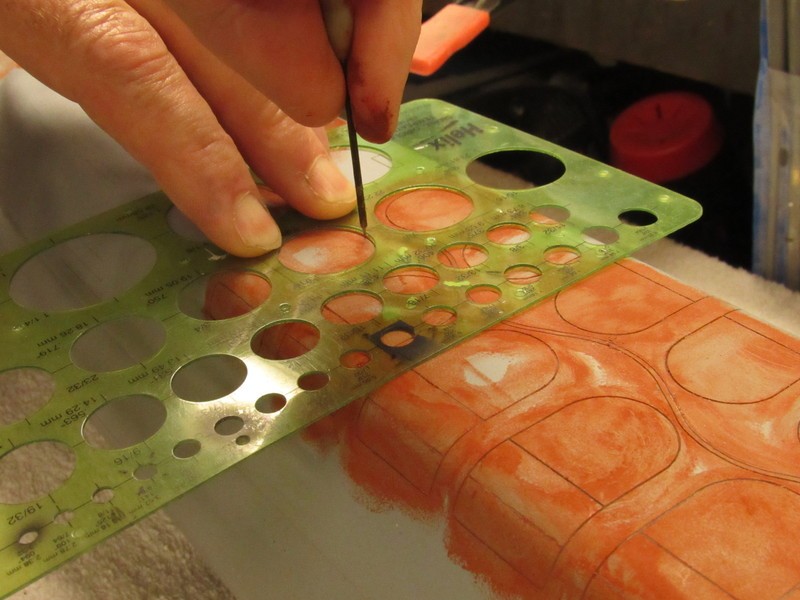
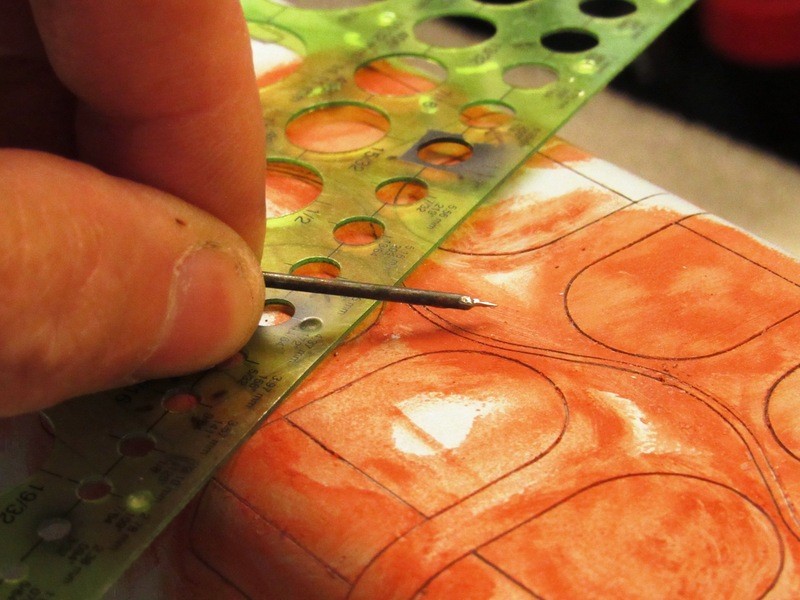
    First task was to identify where the deadlights would go at the upper leading edge of the sail, mark their outlines with pencil – a bit bigger than they will eventually be – and cut open the three opening, ‘frames’ if you will, that would be back-filled with clear epoxy glue. Note just some of the reference photos used to guide me as I opened up the deadlight frames. The job entailed not only grinding the three openings, but also grinding away excess laminating resin from within the sail. It would not do to have clear deadlights only to let them reveal a way out of scale thickness to the deadlight framing.

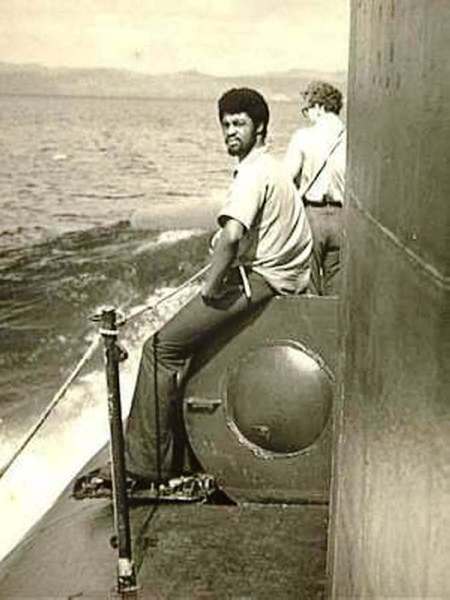
    (The color photo is our stop-over at Oahu before completing our transit to New London for Poseidon conversion. My ninth and last patrol on the Pig-Fish. Spent the rest of my career in the diving community; ships husbandry, salvage, security swims, training, and chasing Filipino gal’s around bar-stools).


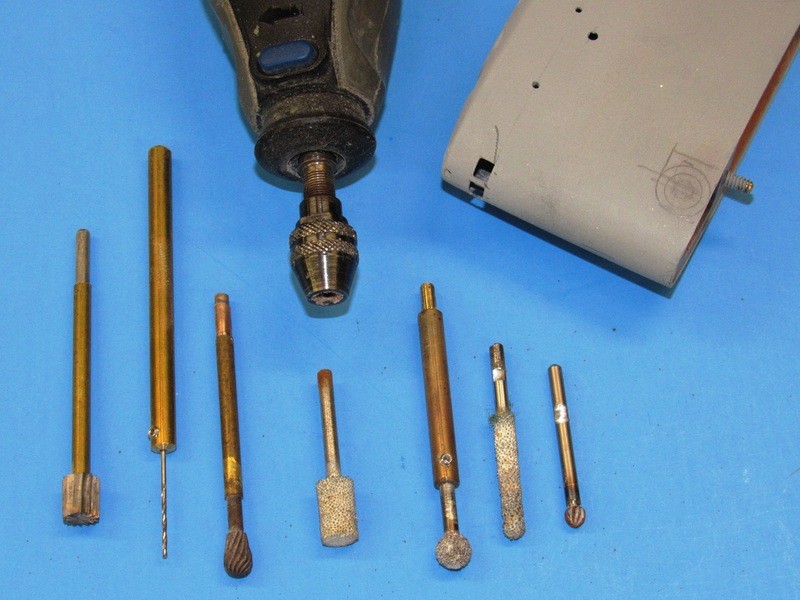
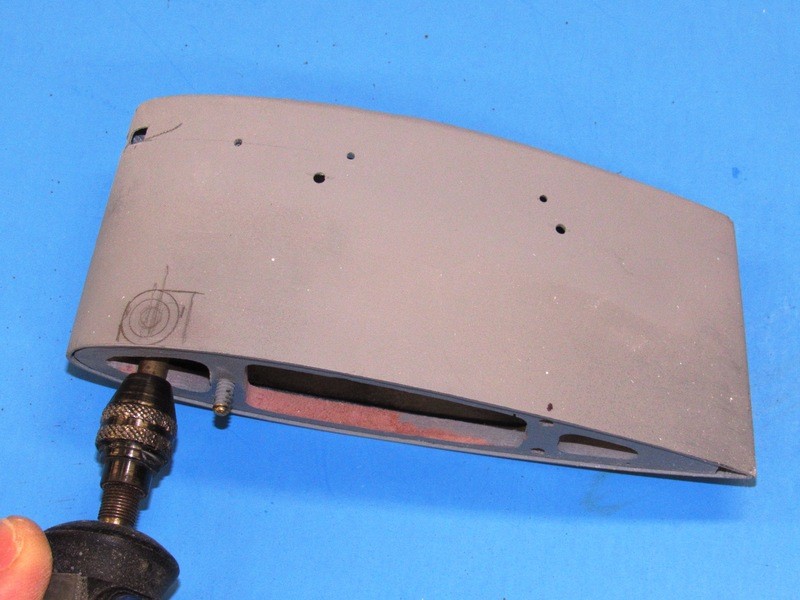
    I’ve developed shank-extensions for my Dremel moto-tools. The objective of that accessory is to increase the reach of a rotary tool much farther from the chuck than the typical tools shank length of two-inches will permit.

    The shank-extensions are turned from 3/16” diameter machine-brass that is reduced to the 1/8” diameter at the chuck end to fit the moto-tool, and bored .128” at the tool end to accommodate the 1/8”shank of the typical Dremel rotary tool. Note that tools to be used with the shank-extension have a flat ground in, this to fit a set-screw that keeps the cutting tool from rotating in the shank-extension when serious torque is applied.


    Using the shank-extension to get the rotary burr up and behind the deadlight openings, thinning the frames to a more scale like thickness.

    Those holes in the sides of the sail will soon go away. They are for alignment and temporary fixture of the internal mast foundation piece – made removable to facilitate establishment of the registration between top-of-sail mast openings, and the openings in the mast foundation. That work done I’ll glue the foundation within the sail permanently, fill the holes, and proceed with another coat of primer to the sail, but only after I’ve masked off the deadlights, emergency stern light lens, and two running light lenses with little strips of masking tape.


    The door outline on the port side of the sail denotes where we got access to the control room and bridge from topside. A RenShape hemispherical ‘bulge’ would be added to the port base of the sail and around it the outline of the door fairing would be scribed in.

    You can just make out the WEBSTER’s unique bow planes in the background of this shot. As the guys in this picture are in dungarees I assume this shot was taken as these guys were either underway on a pre-patrol shake-down or swapping piers at Apra Harbor.


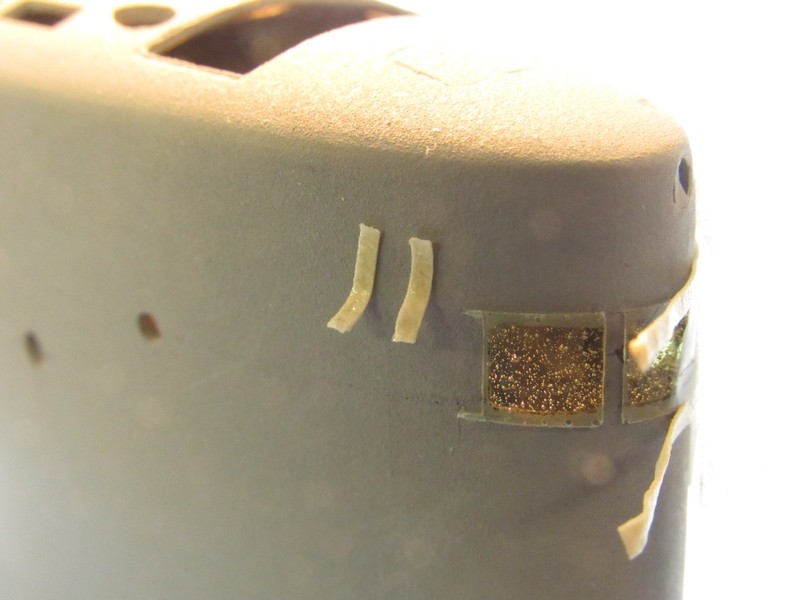
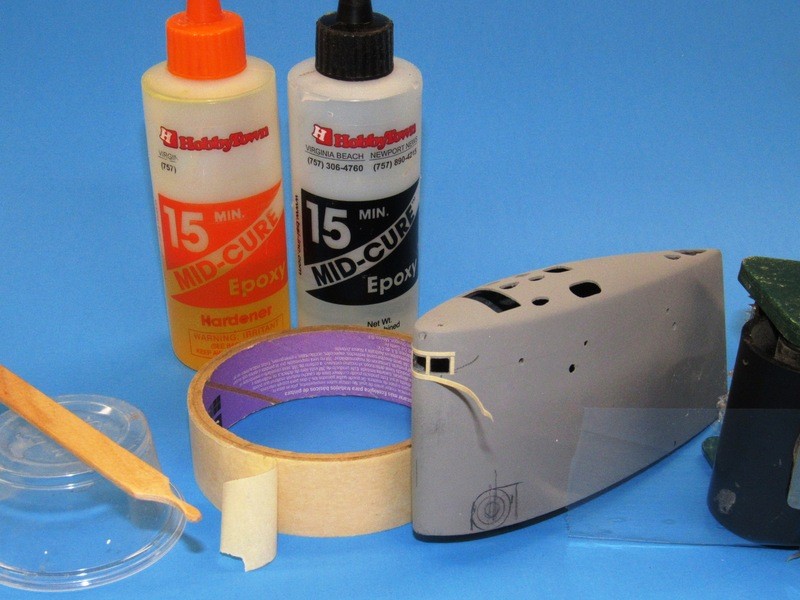
    The David Manley method of representing practical clear deadlights is to open up the frames, back the front end of the sail with tape (the clear packing tape you see to the extreme right of the shot), and from the inside of the sail apply some catalyzed clear epoxy, laid on as two or three coats, permitting each to cure hard before laying down the next. You leave it to capillary action to draw the glue into the edges of the frames and over the backing tape.


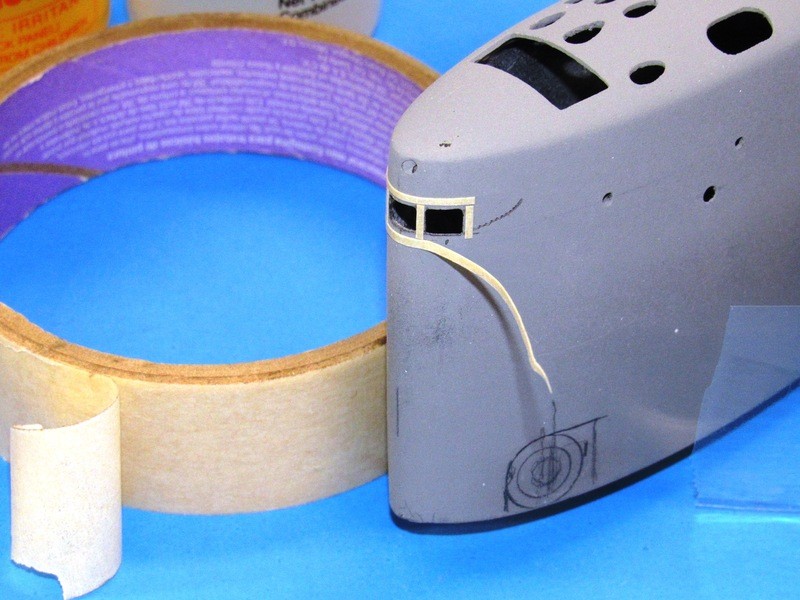
    The tan masking tape was used to make a two-layer thick strip of tape, pieces cut and used to build up a raised edge around the deadlight openings – this producing a void above the surface of the sails leading edge that would accommodate the epoxy, insuring that there will be epoxy to shave away, not add, when it came time to abrade the clear epoxy deadlights into conformity to the surface of the sails leading edge. Well … that was the plan, anyway!


    Over the stand-off masking tape strips and leading edge of the sail was placed a piece of clear packing tape – this being the means of giving rough form to the outside surfaces of the eventual epoxy resin deadlight lenses.

    15-minute epoxy glue was mixed up, applied within the sail and shoved around with a little stick to get it to fill all the deadlight openings. The sail was then set atop my vacuum table, leading edge down, and subjected to a hard vacuum for ten-minutes. The hope was that the expanded entrapped bubbles within the glue (a consequence of mixing and exothermic reaction frothing) would expand, pop at the surface of the glue, and the gas evacuated. That was my hope. (The same process applied successfully all these years to resin tool making and some forms of resin casting).


    Leave a comment:


  • He Who Shall Not Be Named
    replied


    David

    Leave a comment:


  • He Who Shall Not Be Named
    replied
    Originally posted by HardRock
    A forrest of antennas! What a great job you're doing on this boat.
    Yeah, doing the model work, some of it based on my old Qual notes, is sometimes surreal: I study the masts and antennas as I make my model-building moves, and I remember questions from my Board (final qualification test that if passed, certifies you 'qualified in submarines') about the function and operation of those retractable antennas and optics. God! That was nearly half a century ago!

    I've got some production work to knock out for Bob, then after that I jump in on your NOVEMBER sail: straighten that up a bit, and outfit its bridge and work out the scopes and antennas unique to that boat. Looking forward to that. And I'm lov'n what you've done with the hull. You do good work (ass-kissing mode: off).

    David

    Leave a comment:


  • HardRock
    replied
    A forrest of antennas! What a great job you're doing on this boat.

    Leave a comment:


  • He Who Shall Not Be Named
    replied


    David

    Leave a comment:


  • He Who Shall Not Be Named
    replied


    David

    Leave a comment:


  • He Who Shall Not Be Named
    replied


    David

    Leave a comment:


  • He Who Shall Not Be Named
    replied


    David

    Leave a comment:


  • DMTNT
    replied
    Originally posted by He Who Shall Not Be Named
    If I had not been such a stuck-up, know-it-all little **** I would have learned a whole lot more! Many an opportunity lost.

    David
    Click image for larger version

Name:	Untitled power.jpg
Views:	123
Size:	89.9 KB
ID:	131767

    Leave a comment:


  • He Who Shall Not Be Named
    replied
    Originally posted by trout
    The screeding I helped Sam with on the small Skipjack. What was the ah-ha moment is the scopes and understanding why you did what you did with the brass and plans. it is simple and I dod not think I would have ever thought of doing what you did. Thank you!
    My Dad was the Comptroller at the McCord Radiator Co. and sometimes I would travel with him to Detroit for a work-day. He was an executive 'upstairs' and he would leave me with the pattern-makers and foundry guys on the first floor. I was not yet ten. Bunch of tough old *******s, but they knew their **** and let me watch and play in the sand-pit. Learned a lot of neat things there. Screeding green-sand was one of them. Most of their work was producing prototype stuff, and they all had a flair for 'invention'. If I had not been such a stuck-up, know-it-all little **** I would have learned a whole lot more! Many an opportunity lost.

    David

    Leave a comment:


  • trout
    replied
    The screeding I helped Sam with on the small Skipjack. What was the ah-ha moment is the scopes and understanding why you did what you did with the brass and plans. it is simple and I dod not think I would have ever thought of doing what you did. Thank you!

    Leave a comment:

Working...