-
Continuing on I cut out the upper areas in the bow as described in Daves video instructions. Also I got the stern and rudder and rudder bearings prepared.
-
You are right. It does work great. I have one in my Oscar and I can tell you that having fiddled around with THREE different Engle modules (none of which actually worked as advertised), I discovered Kevin's bow plane retract module. Its easy to programme and it works. Flip the switch; it brings the bow planes to zero angle and isolates the bow plane servo, then retracts the planes. Wonderful.Leave a comment:
-
I think Kevin can do just about anything. Glad Hes onboard. Ill be getting one on the way.Leave a comment:
-
I had been thinking about the bow plane retracts and how I was going to control them. Somewhere I was reading about Kevin Mcleod having a device to control your retract mech. I think it was in Toms Gato build thread. I contacted Kevin and he sent me a link to a vid that demonstrates the device. Its very inexpensive and it looks like it works great. WHERE HAVE I BEEN? you say. Somehow I missed all this but here is the link:https://www.youtube.com/watch?v=a8BB...be&app=desktopLeave a comment:
-
Yes you did! Shes very impressive.................to put up with you. OH! I dont believe I said that. LOOK! the edit button isnt working right now. At any rate I also managed to get the bow together, getting ready to start the retract mech. section. Boy, if I keep going like this , Ill be done Thursday week. What happened to the "Emoticons"? I could be putting a smiley face in here somewhere......but NO......No emoticons.Leave a comment:
-
-
I was watching the first of the five DVD series of instructions on putting this thing together. I have watched them before, but that was eons ago. I suddenly, inexplicably, became motivated to get started. So I pulled out the two main hull halves and following the suggestions in the video, I plastic welded the two halves together. I then reduced the parts off of the trees and got rid of that great big box. Believe it or not I put up some additional shelves in my room to make room for this one and some others that I have been storing out in the shed. It gives my room a more.................Hobby look. And that is as it should be in a single mans home. If I had a wife........then Im sure it would not be allowed.............Unless...............I had a Hobby wife. I think I will advertise for one.Leave a comment:
-
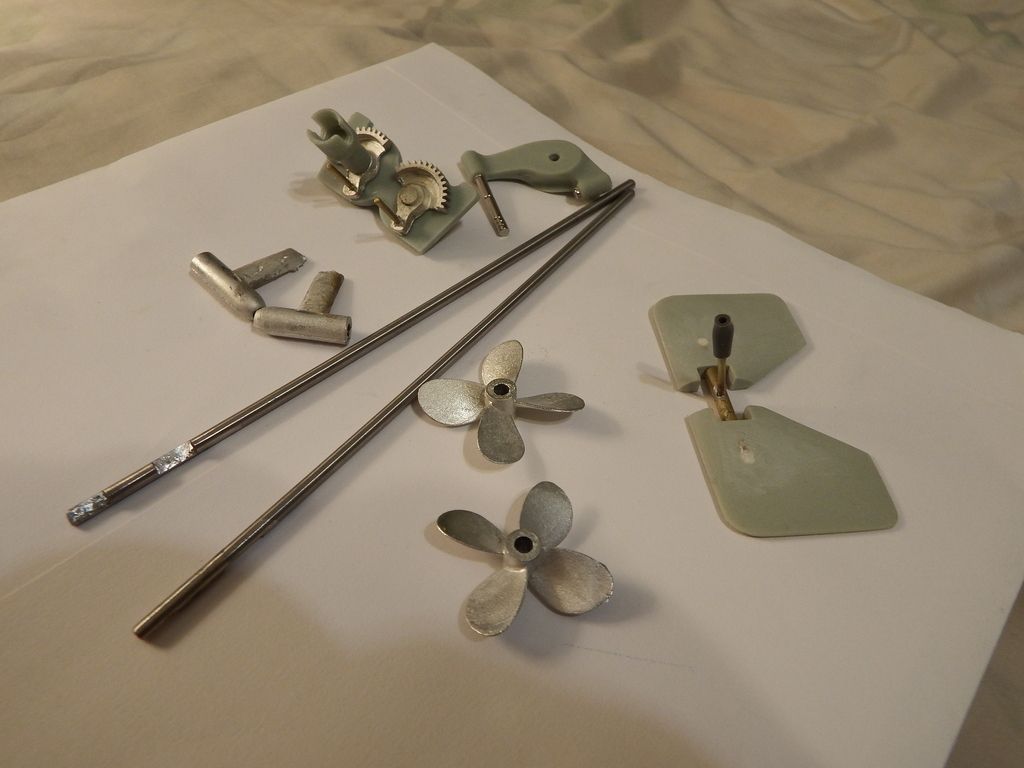
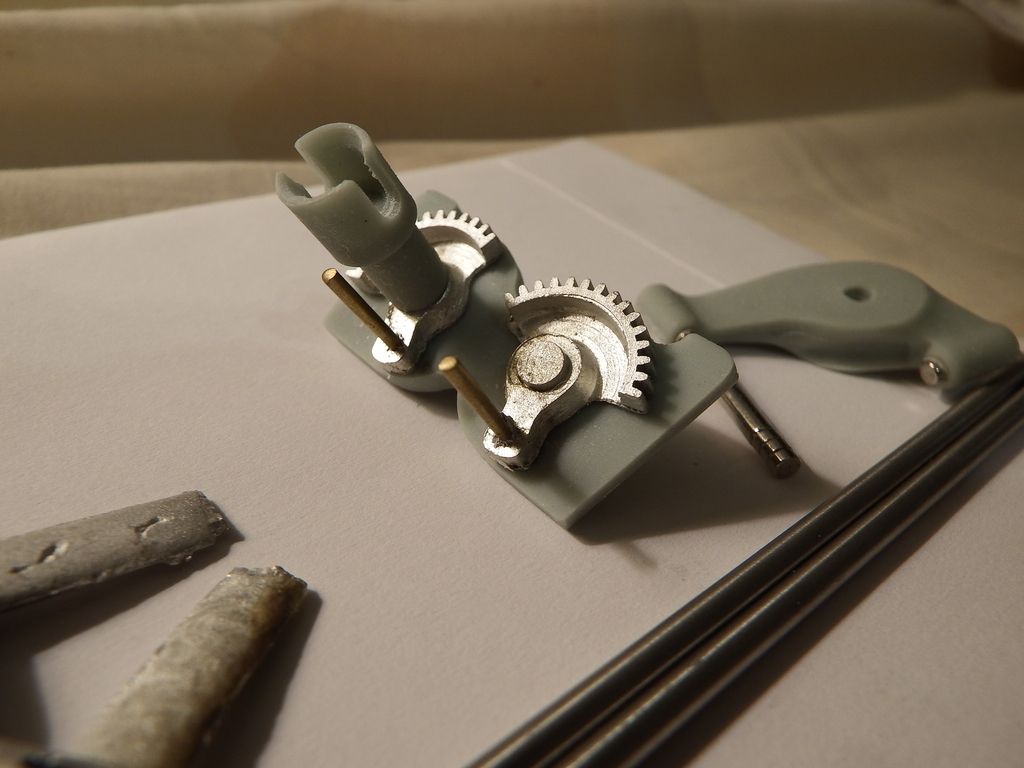
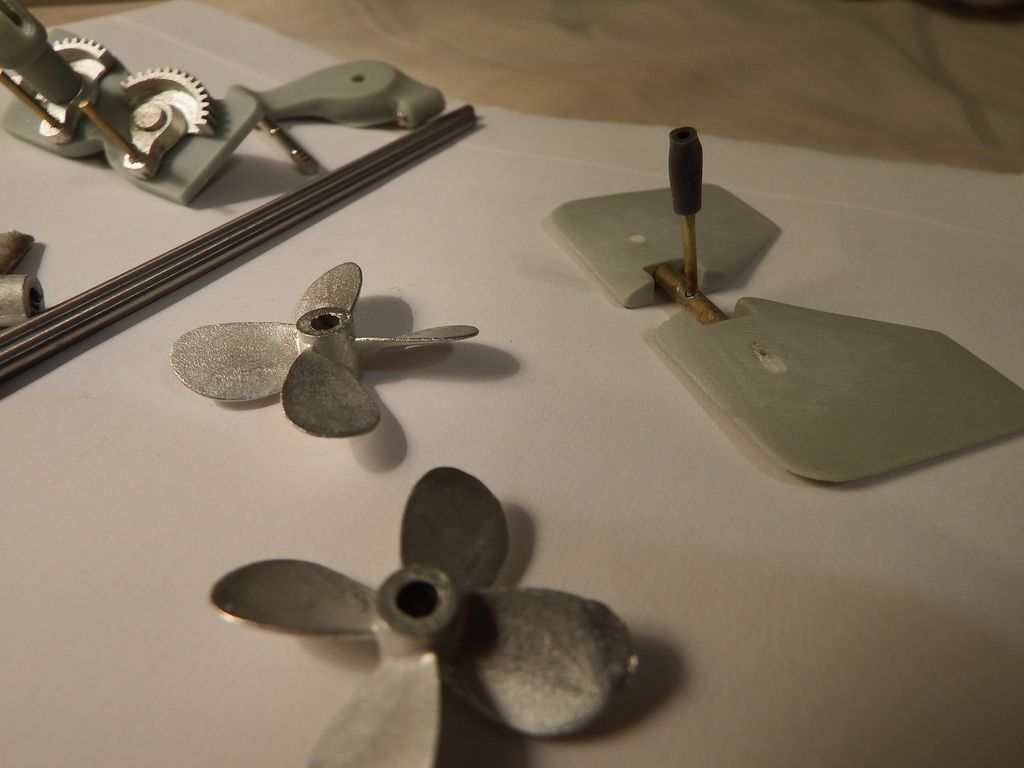
I received all my goodys except for the photo etch deck....which is in process. I took some pictures of some of the impressive pieces found in the fittings kit. The excellent quality is evident in these photos. I shudder to think how much time and effort it would take for me to make these pieces. In fact, a piece like the bow planes drive mechanism pictured in the upper center would be beyond me, and thats a fact. So the successful completion of this project will be due to a great extent to Dave and Mikes excellent range of products.
Leave a comment:
-
Just received word that everything is shipping today from Caswell except the photo etch deck which will take a couple of weeks. OH GOODY GOODY GUM DROPS! I love to get new stuff! I will show you everythingLeave a comment:
-
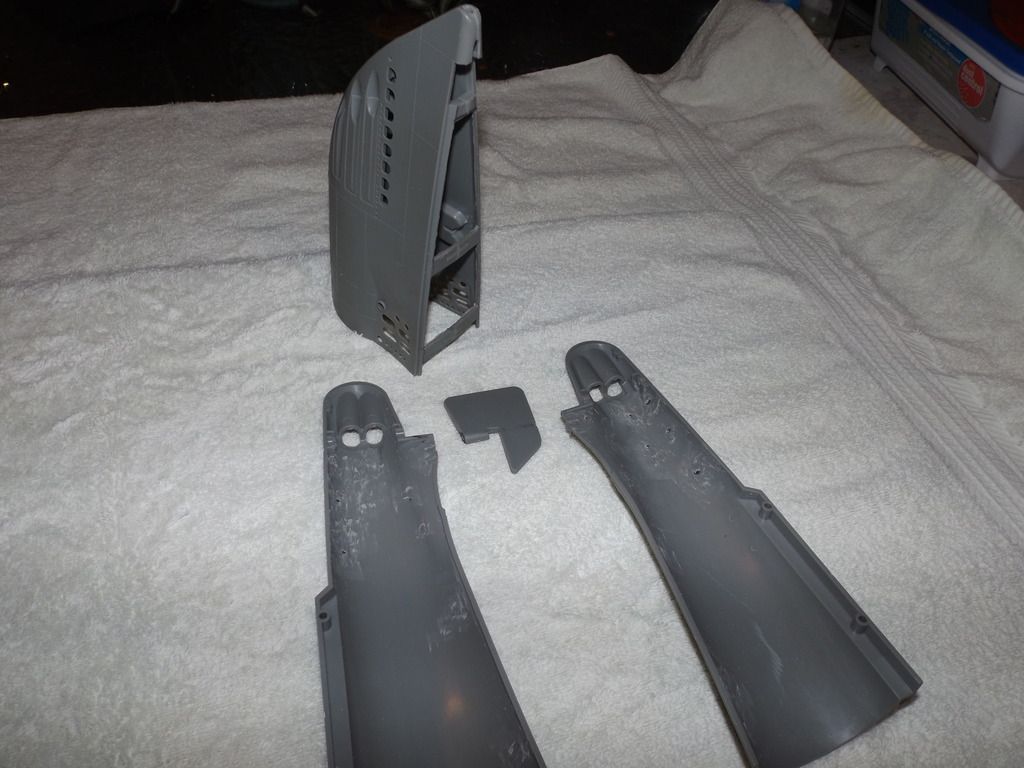
Today I continued on with the conning tower rebuild. I finished hollowing out the main body using a cutting tip on my Dremel with a flexible wand. The dust created by the cutting operation is chocking and is such a mess. Im glad thats over. I then took a sanding block to the sides to straighten up and true the supposed to be flat surfaces. Now I can see the areas that need some body filler. Im confidant that we will have a Silk Purse out of this Sows ear when Im done. It is now noticeably lighter in weight. I think thats important.Leave a comment:
-
Just a little mini update. I placed an order with Caswell for the instructional DVDs, as well as the pre-made ballast weights, the templates for the drain holes, and the photo-etch set and the fittings kit. As far as the conning tower goes I started hollowing out the interior from the bottom to reduce weight as it comes solid and feels like a brick. Once that is done I will true up the bottom surface with a long sanding board, then on to sanding it down to true it up and then on goes the Evercoat to fill in the depressions. The portholes on the front face of the conning tower are a mess! They will have to be filled in , properly located and marked and then drilled out. If I fill them in with body filler, then they will be more difficult to drill. So Ill fill them in with a gel epoxyLast edited by greenman407; 01-21-2016, 09:13 PM.Leave a comment:
-
Thanks The sail comes with plastic or resin masts. They will be light enough me thinksLeave a comment:
-
Personally, I wold keep the scopes light, aluminum tube and plastic top.Leave a comment:

Leave a comment: