Looking good, Rob! I saw you started a message on my site, but there was no content. You cool? Need anything?
Bob
-
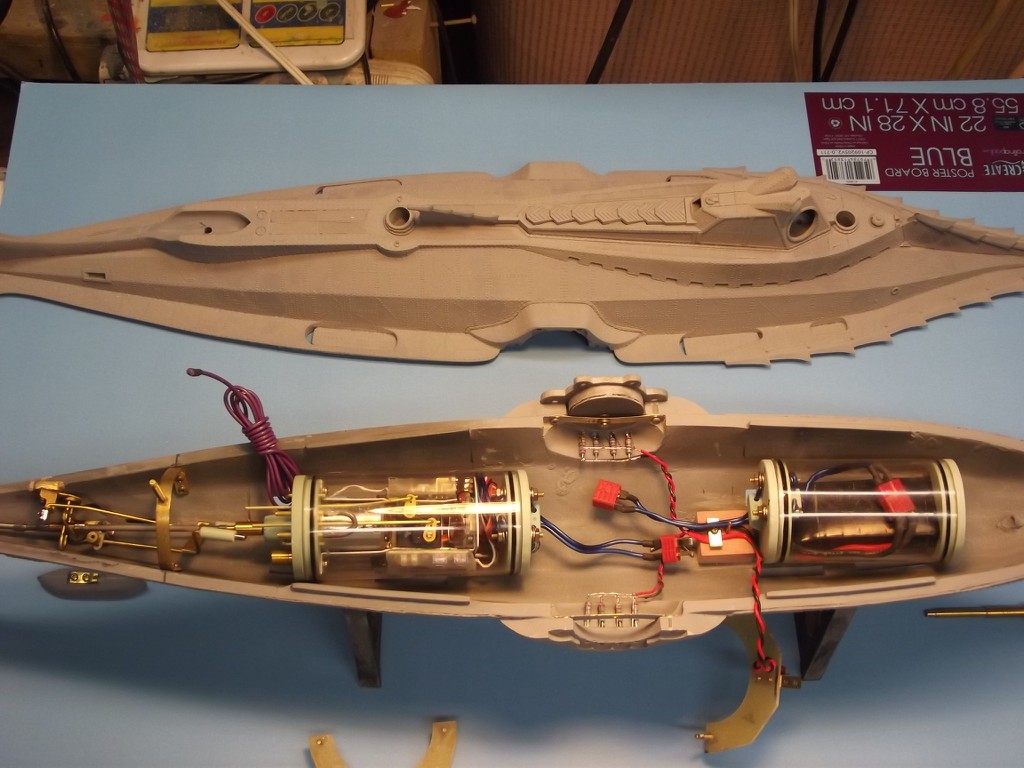
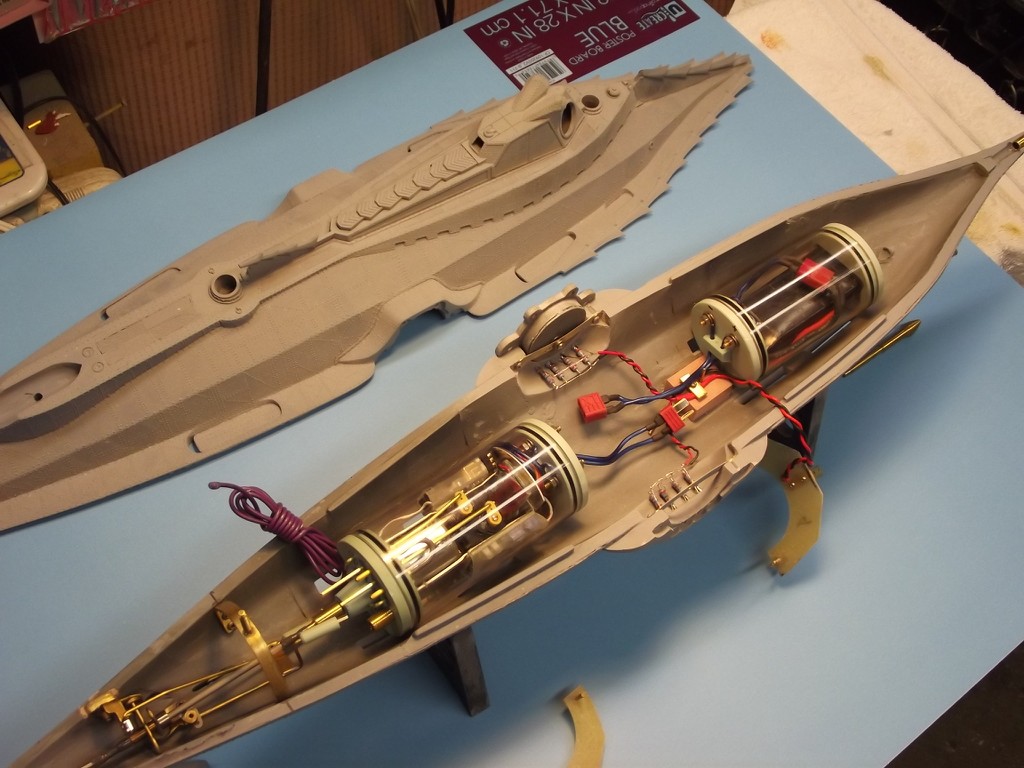
Now that my HL Hunley is complete, I can now my resume the Disney Nautilus build! I Have the stern cut off and the mounting system complted!
I have also completed the bow hold down assembly as well! I am trying to follow Bob Martins 5 YouTube assembly videos on the Disney Nautilus, as well as David M's photos and suggestion on this build!
Thanks to both Bob and David for all the great building information they have for this Nautilus build!
More to come!
Rob
"Firemen can stand the heat"Last edited by rwtdiver; 04-13-2021, 04:17 PM.Leave a comment:
-
Now that the HL Hunley project is finished, I will be giving my FULL attention to the 1:77 scale Disney Nautilus build!
As you can see, the Nautilus is on my work bench and ready for some serious work!! But along the way I wanted to share with you my precious (Sunhokey) Pursa i3 printer is back with me again! I built this printer from a kit 8 years ago! Perhaps some of you that are into 3D printing remember this kit from the past! Just had to share with you what a beauty she is! OK! Enough! On to the Nautilus build!
I am going full out on this build in every respect! And with some needed help along the way, it will be a full diving sub with some lighting and special effects.
Rob
"Firemen can stand the heat"Leave a comment:
-
-
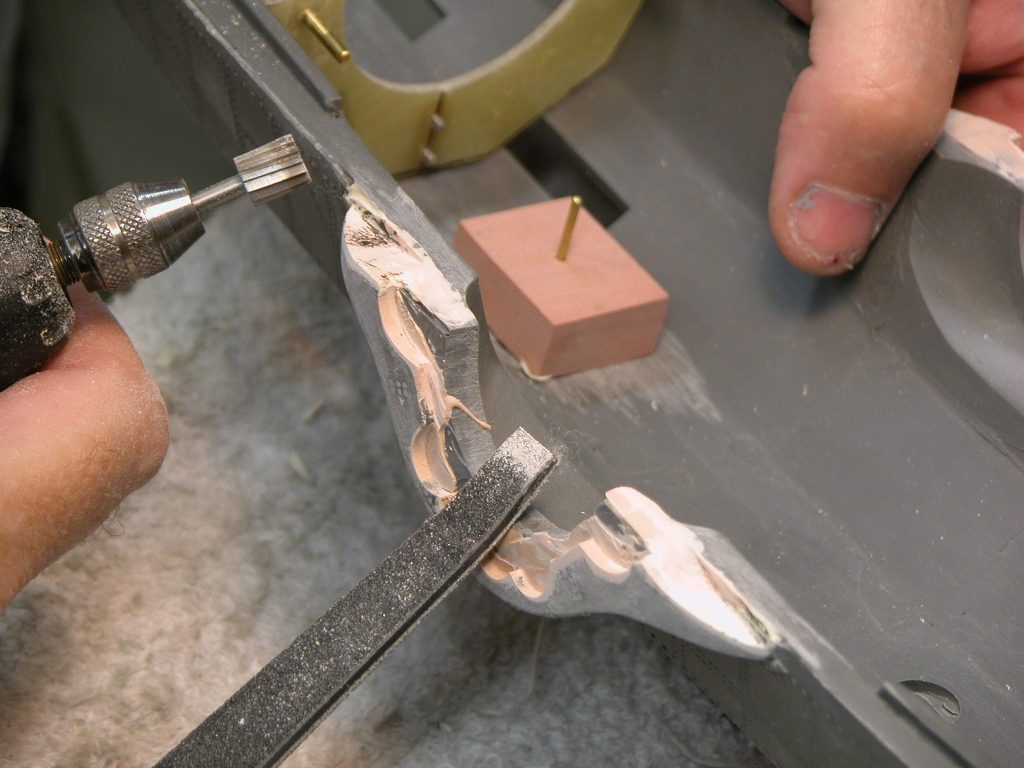
Some thoughts on the salon structure and how to fair it into the lower hull:


Leave a comment:
-
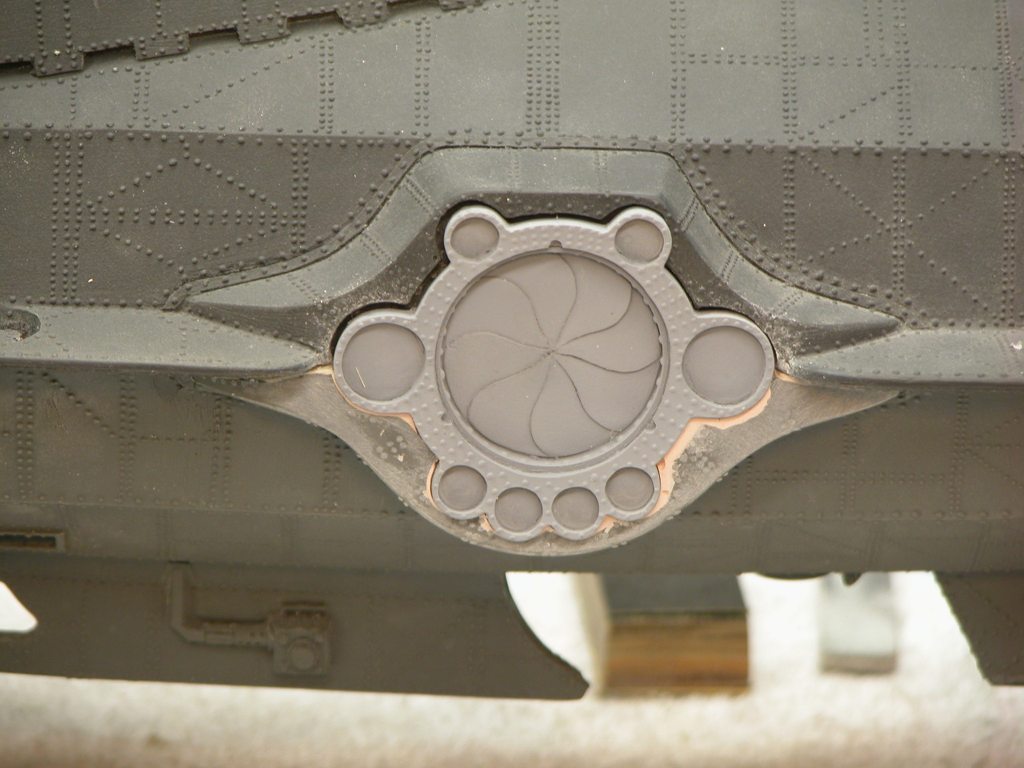
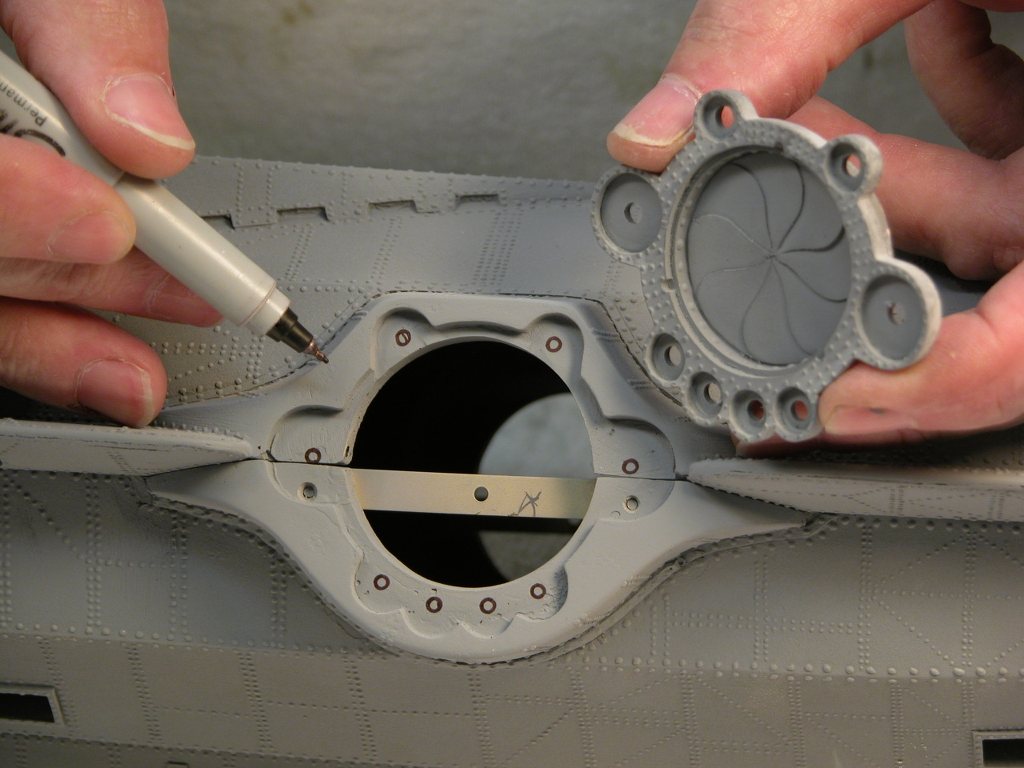
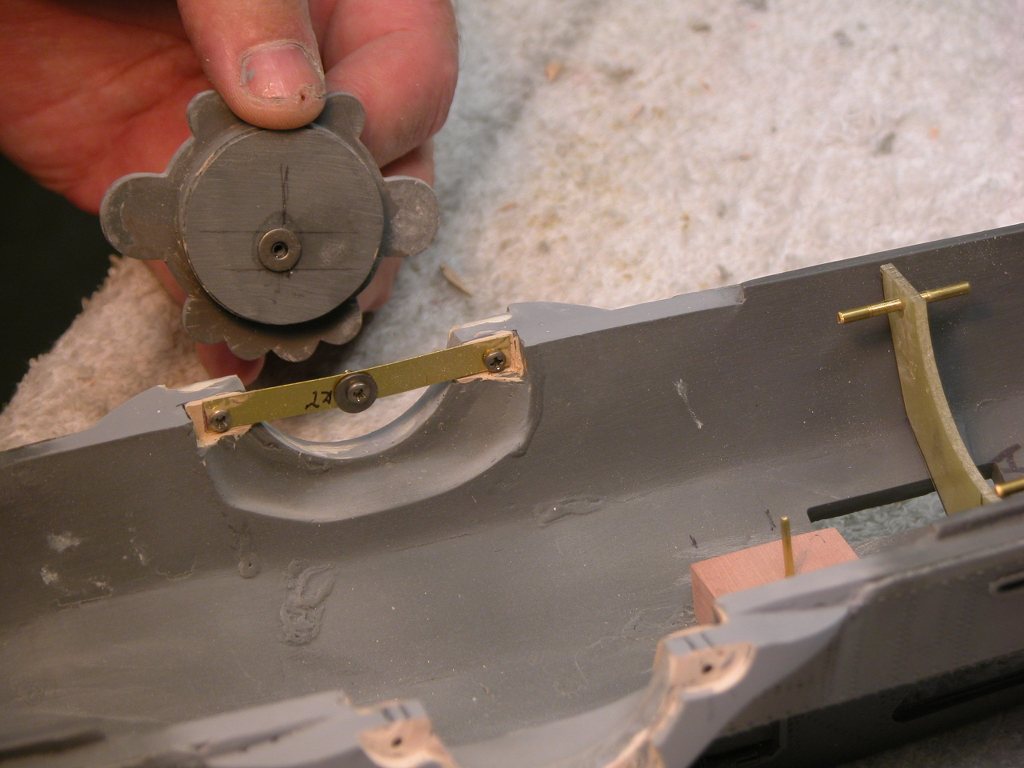
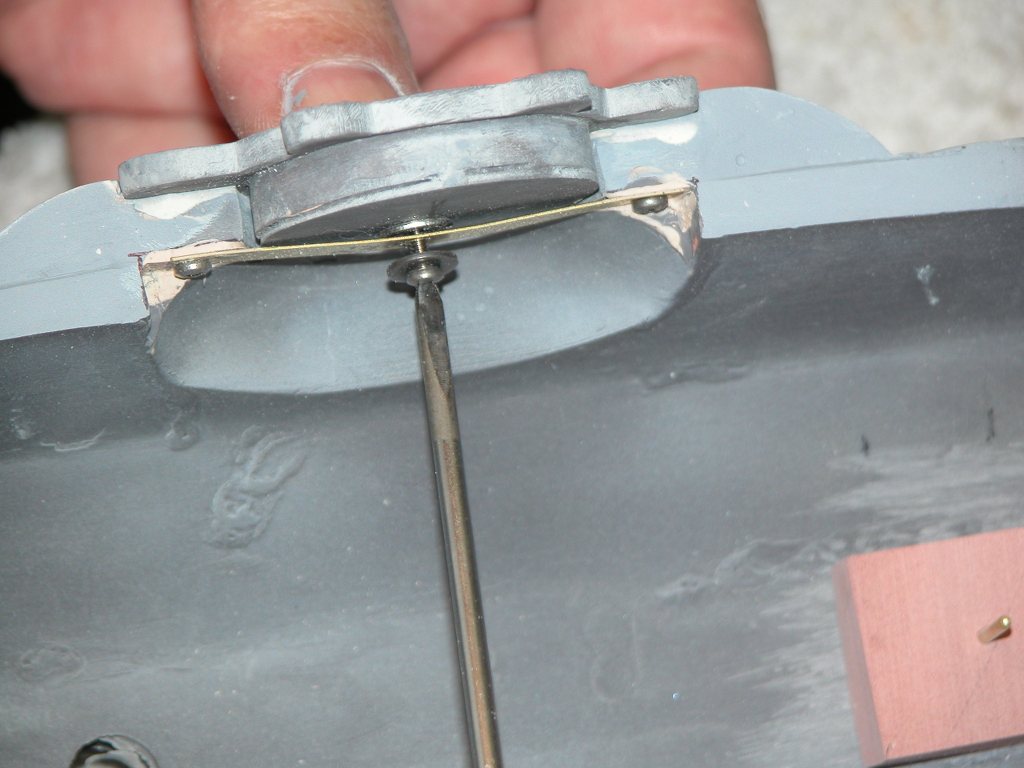
Today I am working on the salons and cleaning up the area where they are to be installed!
Rob
"Firemen can stand the heat"Leave a comment:
-
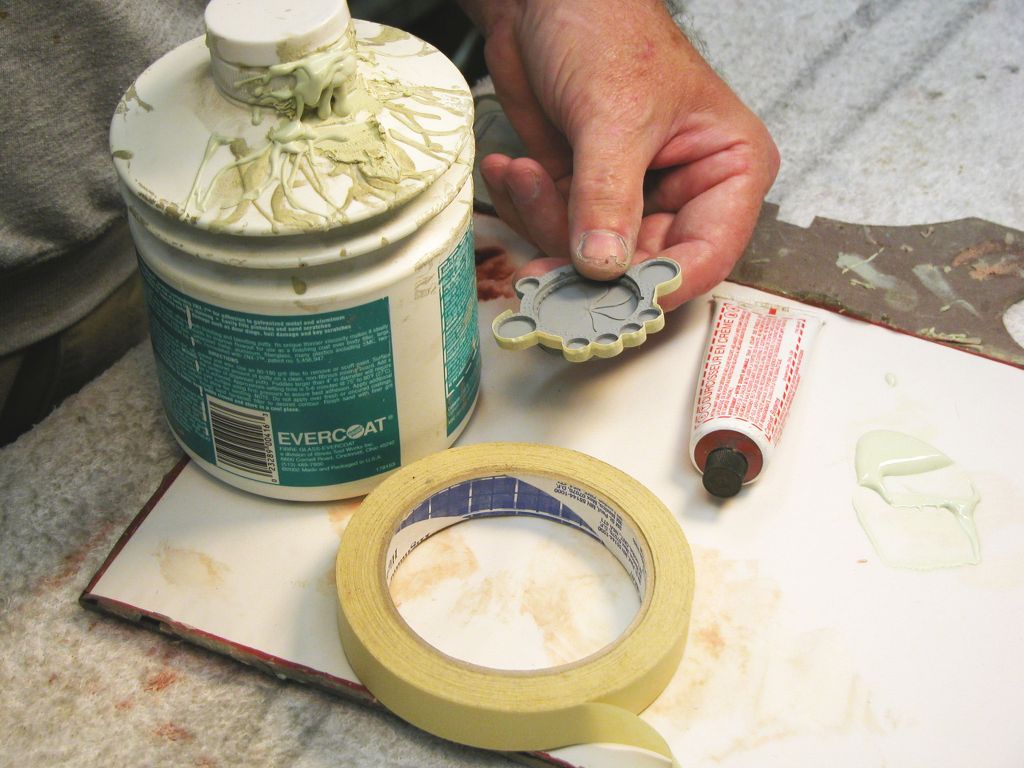
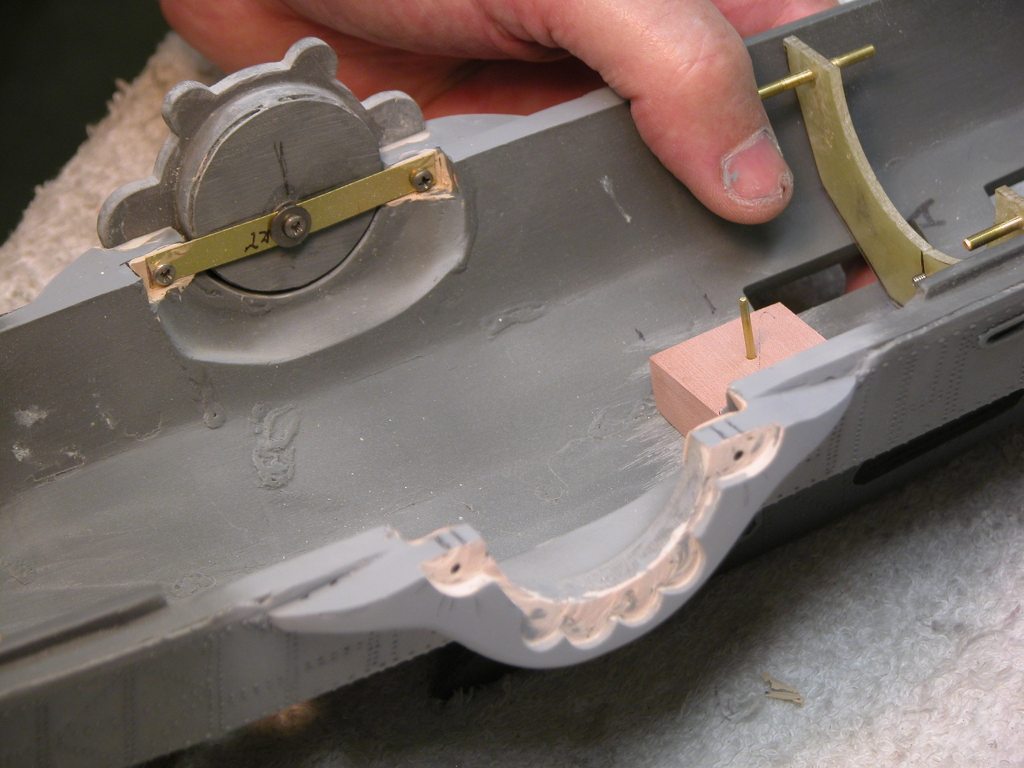
Today I cut the salon frame work and re-glued back to the upper hull!
I also drilled out the opening for the salon panel lights. I did a little fill in work around the salon frame. All in all the cut and drilling went great. I am using Bob martins (Nautilus Drydocks) videos that he has put up for doing the sub build! They are and will be a great help as I move along.
Rob
"Firemen can stand the heat"
Leave a comment:
-
David & Andrew,
The ONLY place the Nautilus will get wet will be in my pool, and my run times normally are only 10 to 15 min. at the most! I fill secure in what David says, and if does pop it will be very easy to retrieve and at that point I may look into installation of an additional BEC! David thank you for sharing Andrews name with me!
thank you guys!!:-))
Rob
"Firemen can stand the heat"Leave a comment:
-
The BEC built into the installed and tested ESC has all the limitations Andy pointed our, Rob. But, as this will be a pool toy, never operated in a body of water you won't go into to retrieve the model, you're OK burdening the existing BEC with the load. If if pops, you go swimming. No big deal. I'm so cavalier in this matter owing to the fact that there is little room in your little 2" SD for a dedicated BEC device, no matter how small it is. But, if you wish, we can cram one in the forward dry space next to the battery. Your call.
As a side note, Andrew Lawrence has, on more than one occasion, pulled my nuts out of the fire with timely, sound advice and actual hardware of his own manufacture. He's the real deal and a voice to be reckoned with. He knows his ****!
DavidLeave a comment:
-
Subculture (sorry I do not have your name)
Thank you for chiming in on my build! I am not sure what size BEC is in the ESC that David used on this 2" SD!? Your information makes good since, and is greatly appreciated! I am sure David can give me some information on the BEC that is incorporated into the ESC, if there is one!?
Thank you again!
Rob
"Firemen can stand the heat"Leave a comment:
-
I'd fit a separate BEC. The built in items are really only intended to power one servo, two at the most with modest friction.
What do you have in that cylinder, thee SG90 servos? They can pull up to about 0.7A each on stall, that's the best part of 2A for all three. Bearing in mind that servos work harder in subs through shaft seal friction, with constant movement from a leveller on the rear planes, and that little built in linear BEC is going to be earning its working very hard, probably too hard. Then also remember it's inside a sealed container with no air flow.
If the BEC expires, the controller goes with it too. A separate BEC costs a couple of quid, and even modest ones are rated at 3A, which is plenty for a boat that size.Leave a comment:
-
David,
Thanks for the great photos showing the mechanism required to gimbal the propeller! A challenge it will be, but i do intend the Nautilus to be my very first FULLY functional r/c submarine! After viewing the video you sent me, I believe it will be a good sub for my swimming pool! I am really looking forward to this build!:-))
Thank you again for all your help and expertise David! I most likely will be asking for more help with my Nautilus project!
Rob
"Firemen can stand the heat"Leave a comment:
-
Excellent! I can now wipe the sweat off my brow.
Everything was Certified workings before it went off to Bob, so it should be a simple plug-and-play deal for you. If you're going to make this a fully functional r/c submarine let me recommend you gimbal the propeller in pitch and yaw -- that will make an otherwise unruly submarine a great performer on and under the water.
A short video showing how will this thing behaves submerged when vectoring the shaft for yaw and pitch control: https://youtu.be/cwS6o4jsxoU
DavidLeave a comment:
-
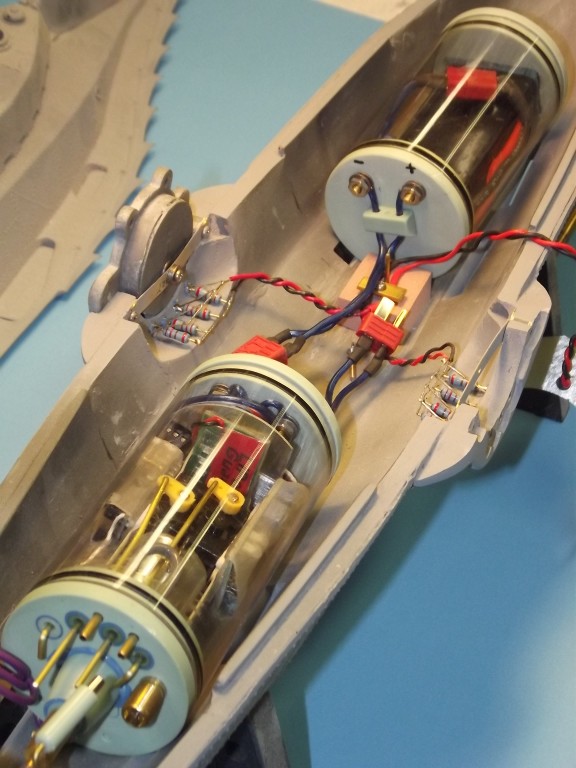
David! Thank you very much! This is certainly one of your stock Sub Drivers! After taking a closer look at the motor compartment of the SD, I see what I believe to be the ESC that you installed that is attached to the underside of the pump with black friction tape.
I also located the correct 2 cell 7.4 volt 850 MAH battery that Bob sent with the kit! My question answered, and the issue with the battery solved, we are ready to move on!
David! Thank you for being here for all of us!!
Rob
"Firemen can stand the heat"Leave a comment:
Leave a comment: