-
If you stood watches on the planes, they were a roaring success. If you were from the wardroom, they were a noise source and a liability to the boat's survival should things get out of hand. At speed they clanked a bit which not only partially masked our own passive gear but put out a big fat 'kick me hard' sign on our backside for all to hear -- bad ju-ju. As soon as the boat went to Groton for her yard-period the planes were put back on the sail where they belonged. -
Yes, ALL of the US missile submarines received the "Buick Roadmaster" launchers through various overhaul and Selected Refit Availabilities through the 1970s, into the 1980s. Control panel was located on the Conn for operation by the OOD. HWSNBN- :PLeave a comment:
-
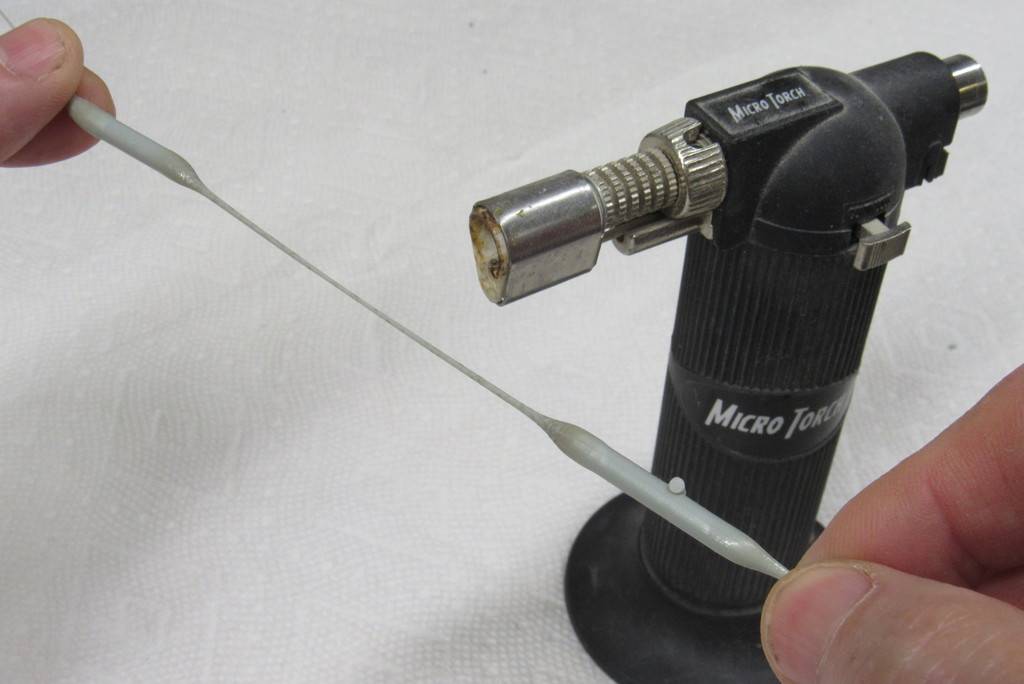
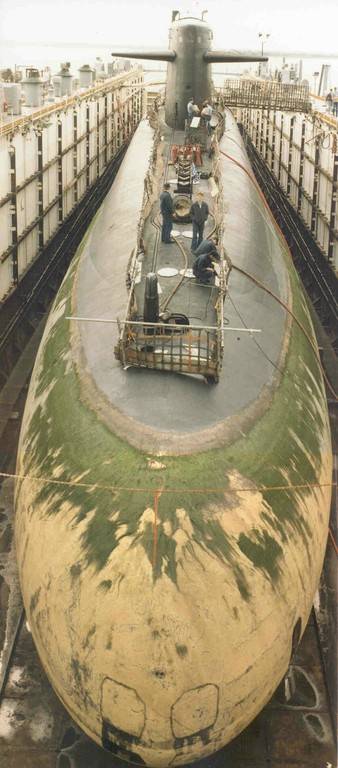
Just the two 3" signal ejectors. One in the bow compartment (torpedo room, where I was assigned most patrols) and one back in the engine room. The signal-ejectors were used to launch smokes, rockets, bathythermograph bodies, and evasion devices (Alka-Seltzer pucks and adaptive sound repeaters).Leave a comment:
-
Did the Lafayette class have external countermeasure launchers?Leave a comment:
-
-
Excellent clear 'in close' photos as usual David. You answere dmy questio too...'annealed .020” diameter K&S brass wire' 0.20 diameter. .Thank you.
Are any 1/96 hulls of this class still around if I decide ot build a static model and donate to the Vallejo Museum?
Steven
Last edited by Albacore 569; 08-12-2023, 01:28 AM.Leave a comment:
-
I keep seeing all this artistry you put forth to recreate the boat in her original beauty! Then I remember all the mental pain and frustration this same boat caused when I was a baby Nuke...Leave a comment:
-
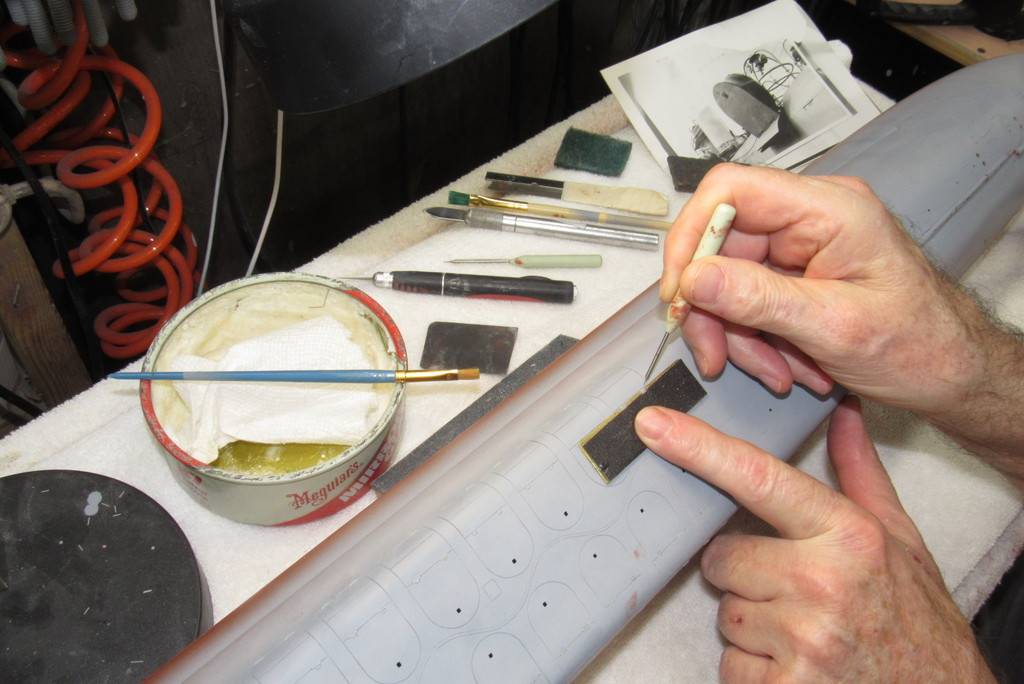
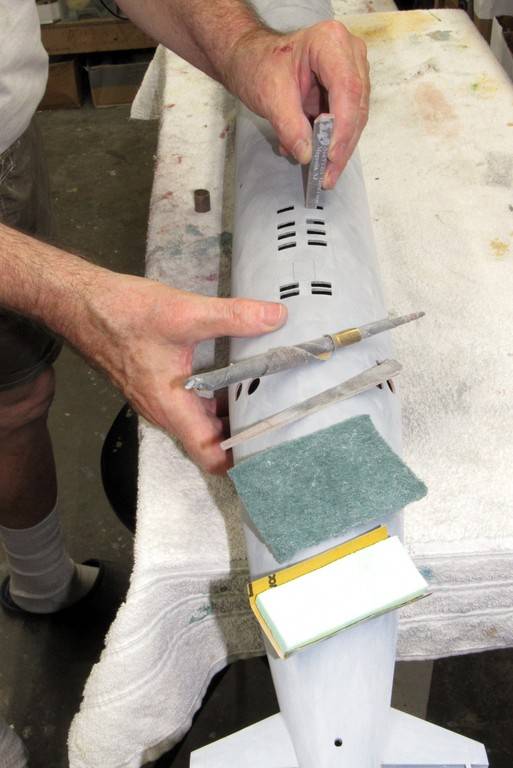
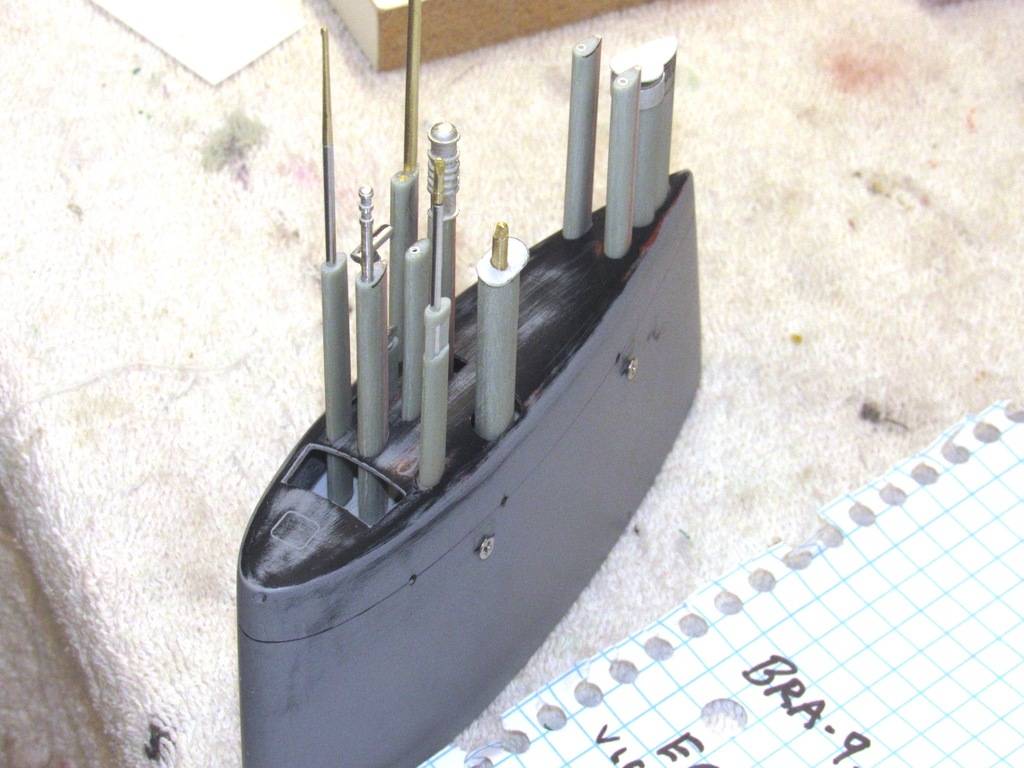
This big model demanded all the little details I could apply to it. That included the many ladder rungs that ran up from the waterline to the top of the sail. It's the small stuff that turns a toy into a proper display piece.
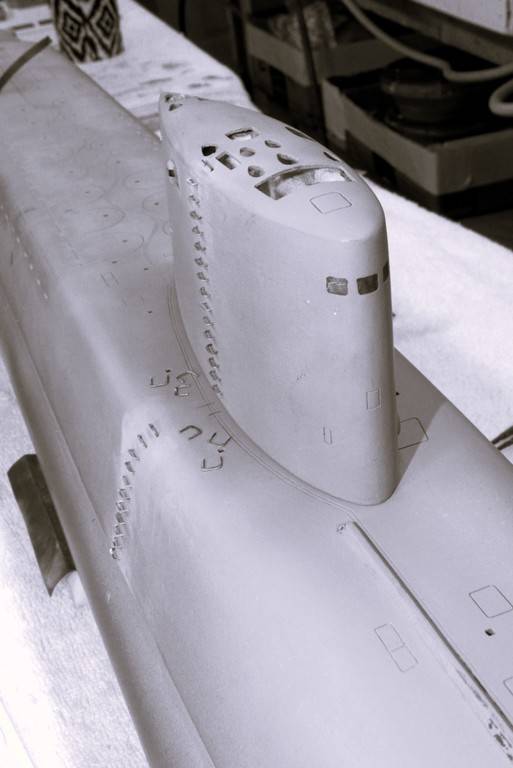
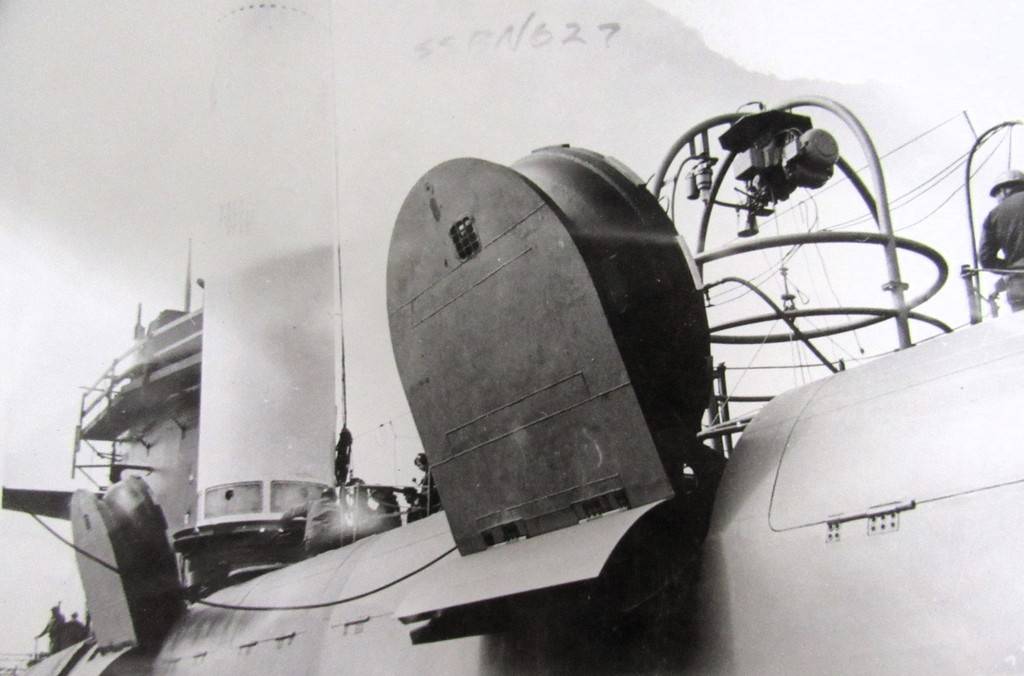
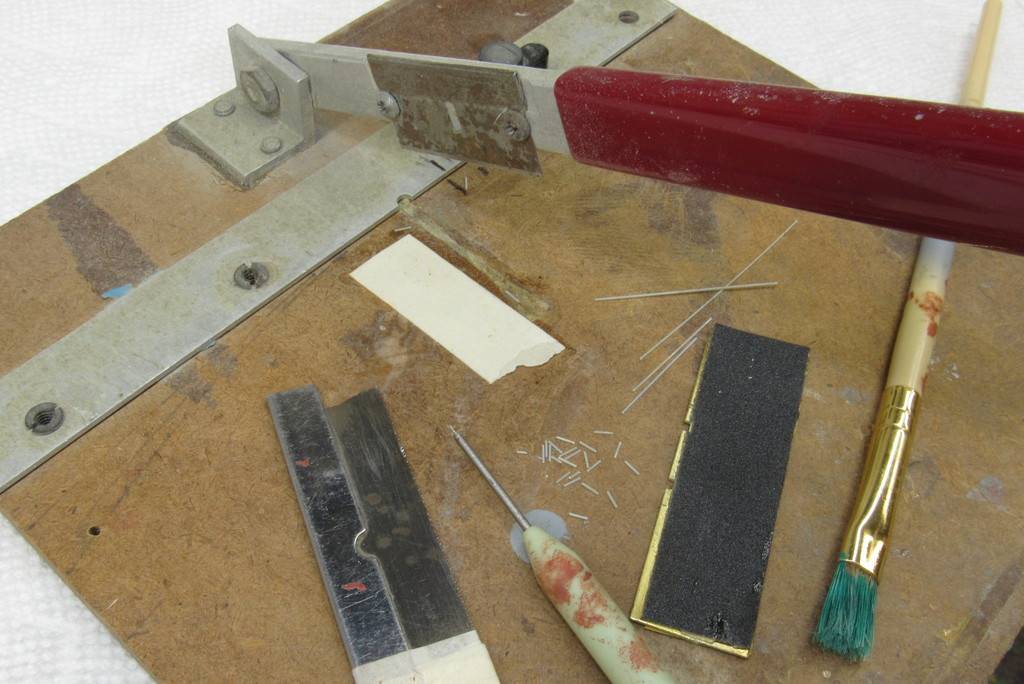
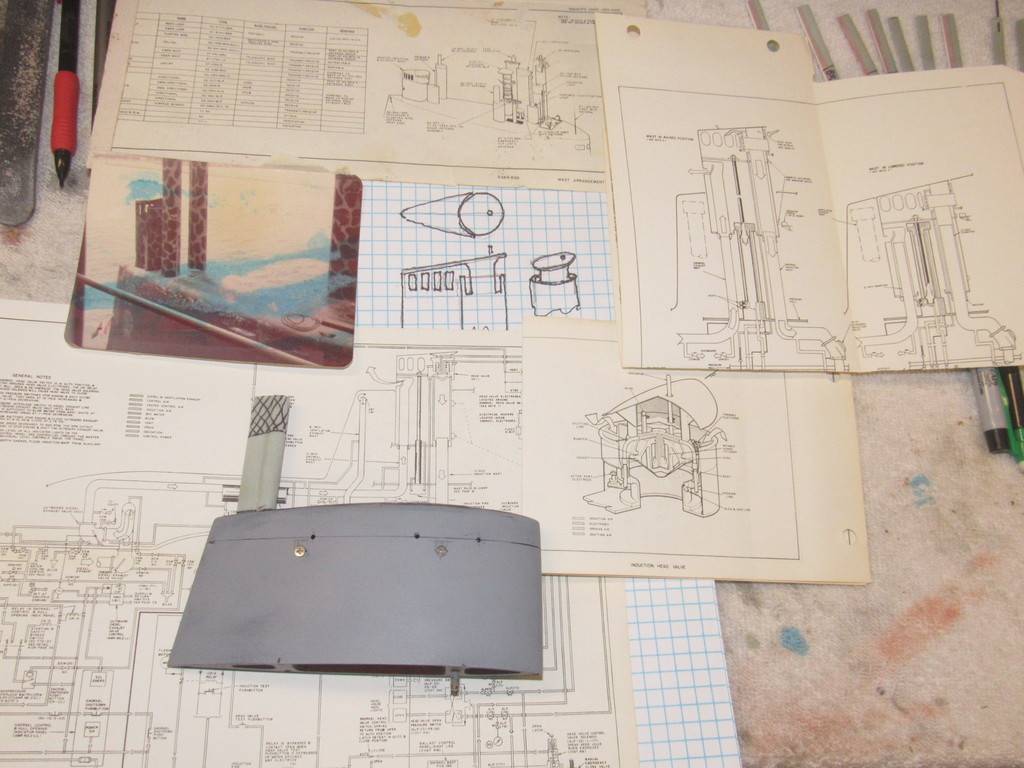
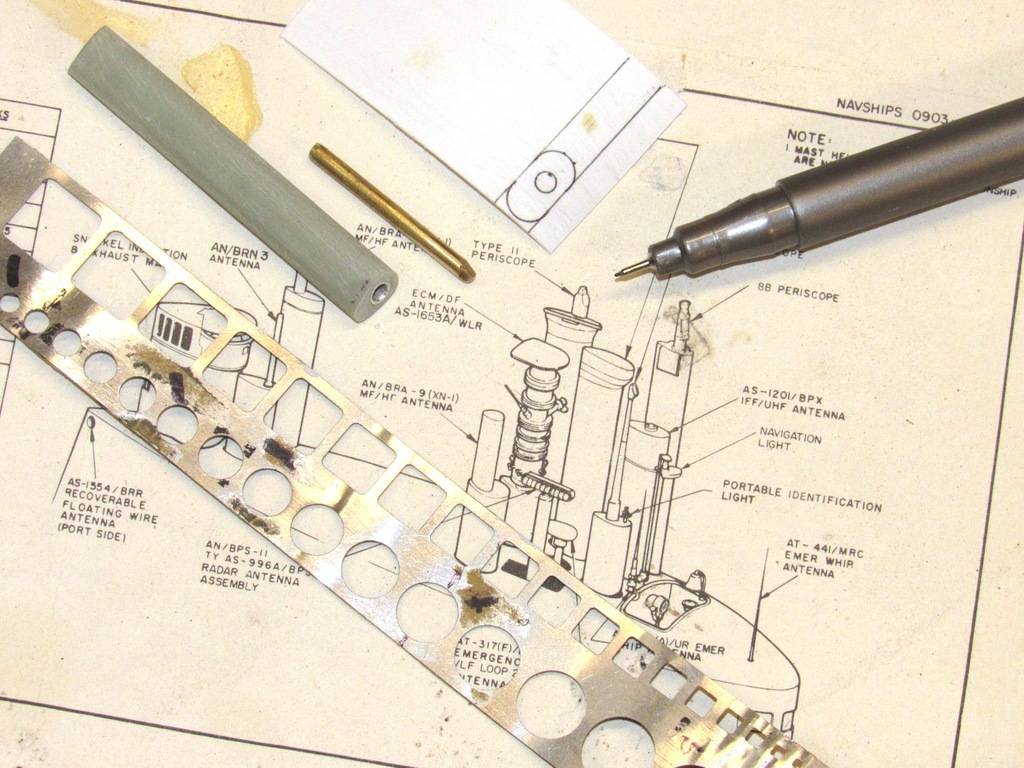
Some of the documentation and layout tools used to position the ladder rung stem holes. The two rather faded color photos were taken by me of the boat during one of her re-fits in Guam, as we worked the boat up for another patrol.
... Hell, I snapped those over a half-century ago. Sobering.
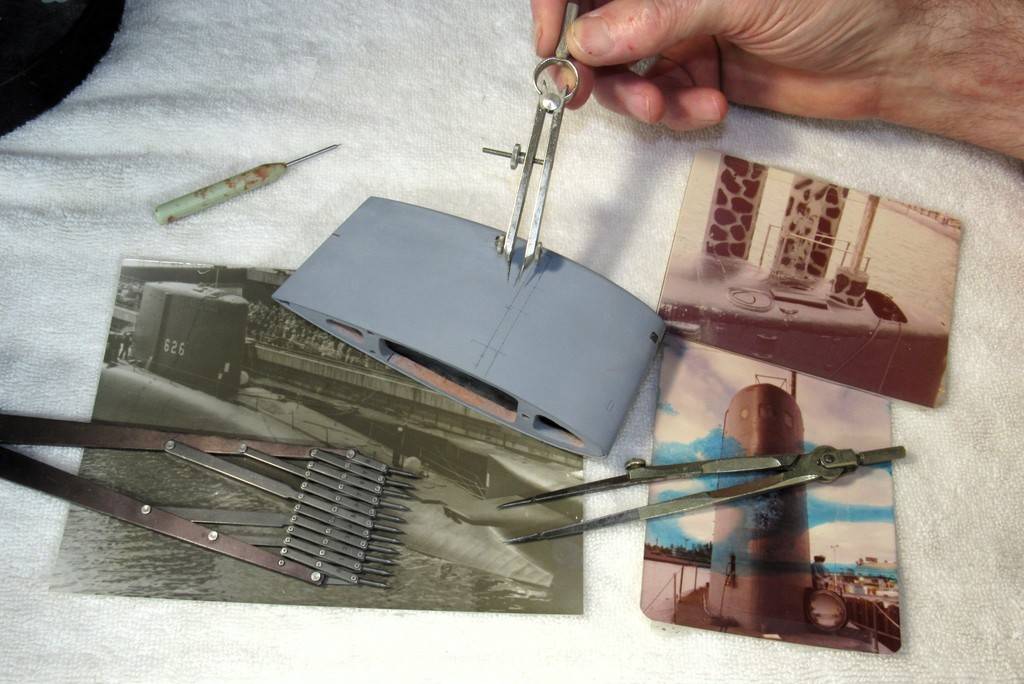

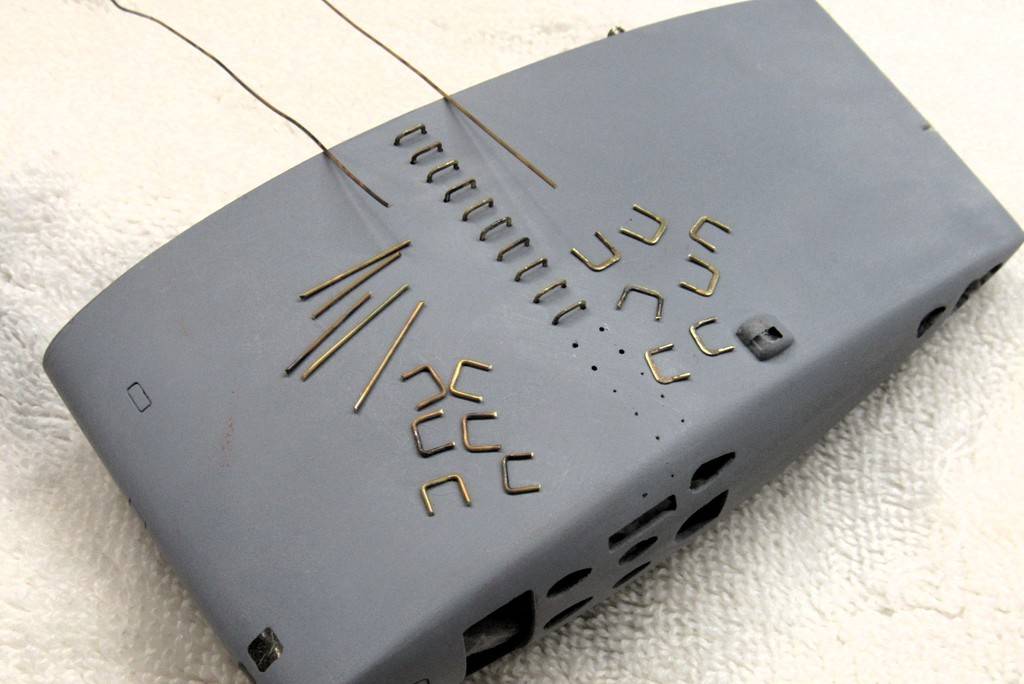
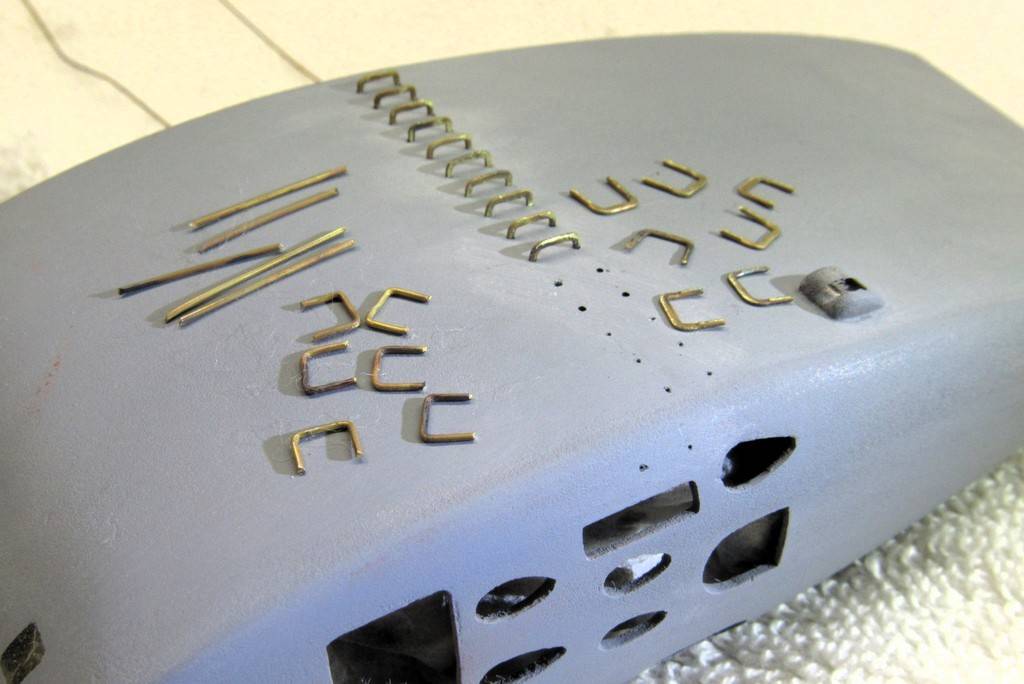
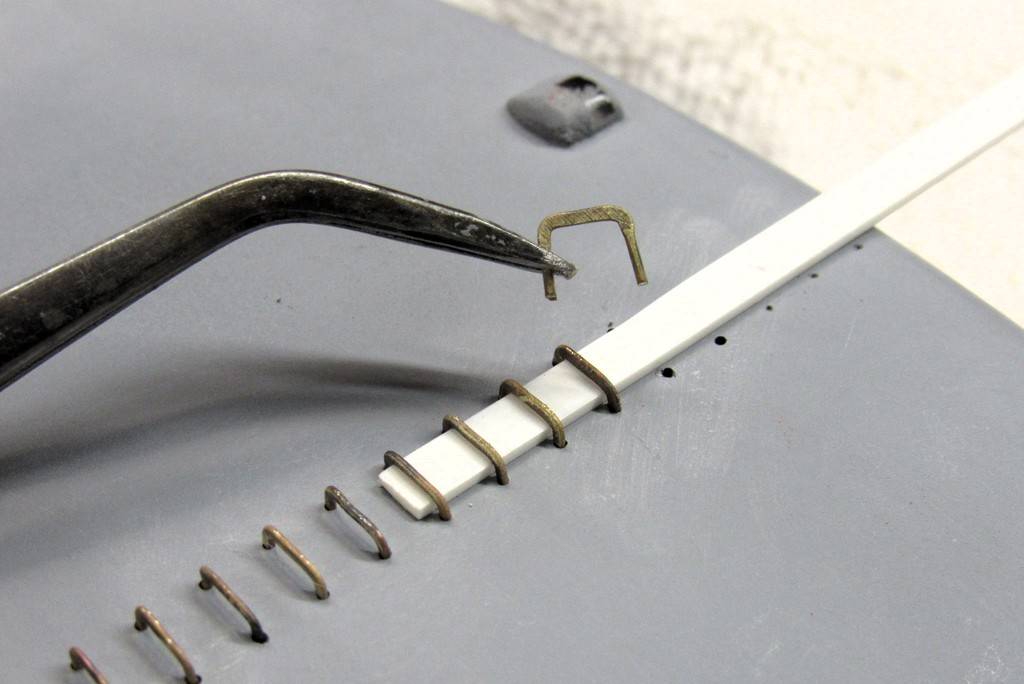
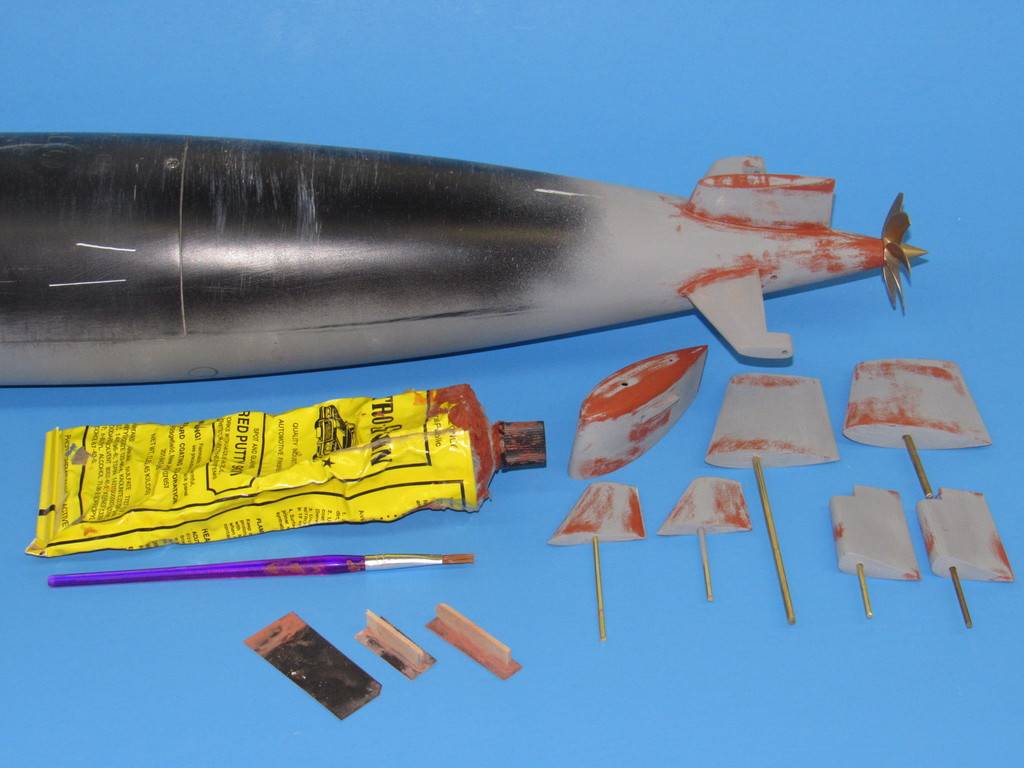
To the left are raw ladder rung blanks, still in the round. To the right are properly flattened ladder rungs ready for installation onto the model. These were made from annealed .020” diameter K&S brass wire.
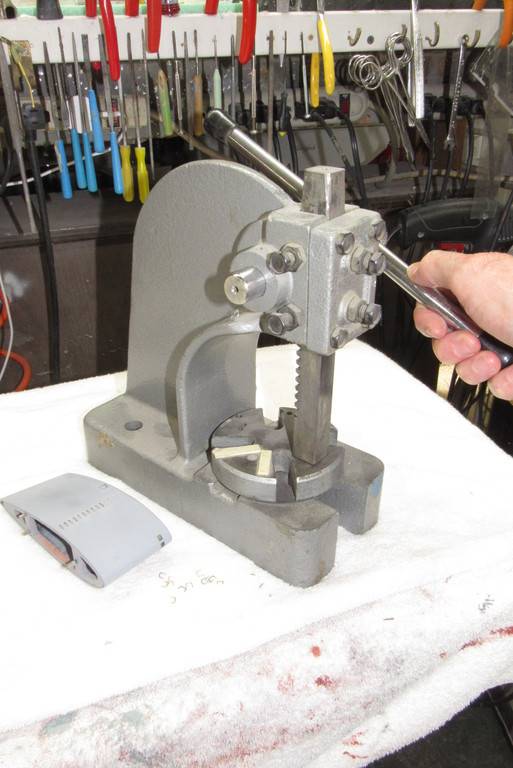
A hand-press was used to flatten the annealed brass rung blanks.

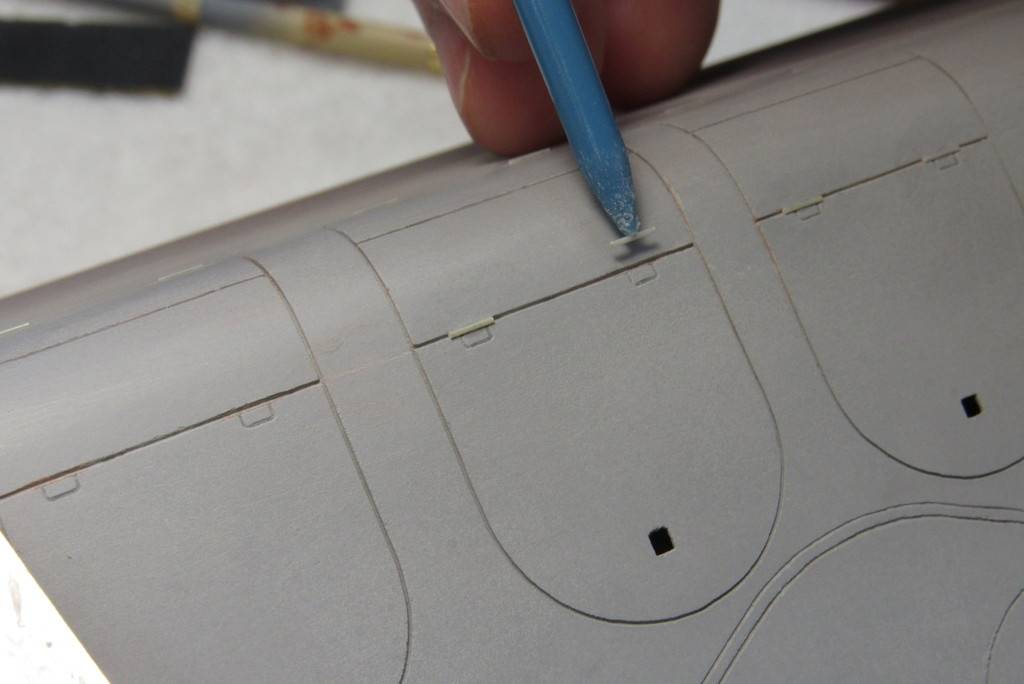
This length of plastic strip was used to set, exactly, the height of the rungs off the surface of the models sail and superstructure.
The drafting compass insured equal vertical spacing between rungs and the temporary strip of masking tape insured correct horizontal spacing between the holes that would secure the stems of each ladder rung.

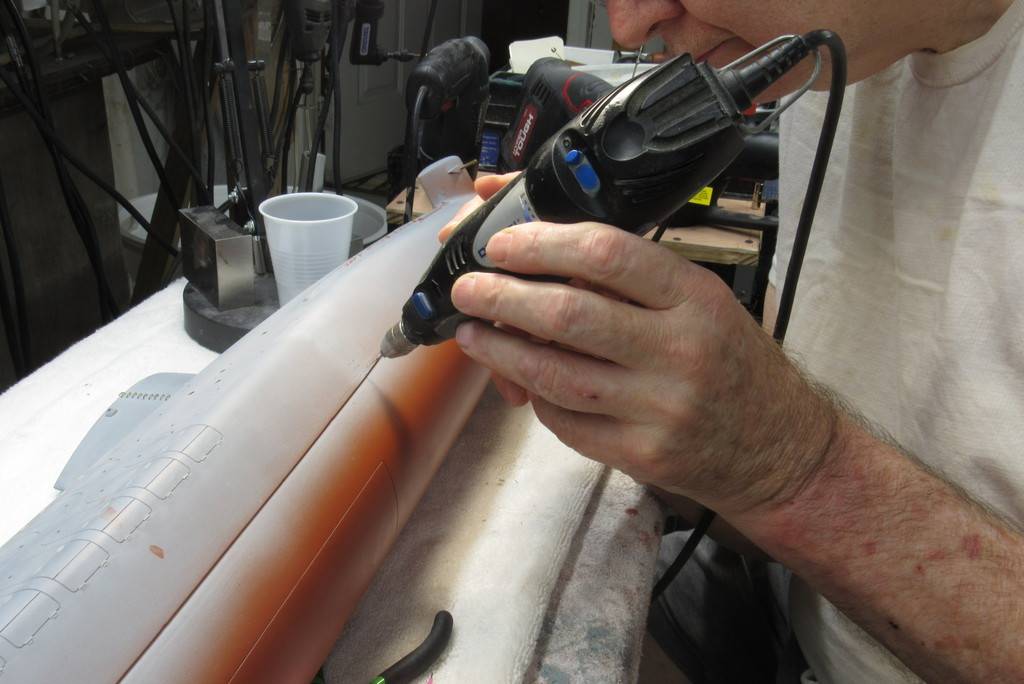
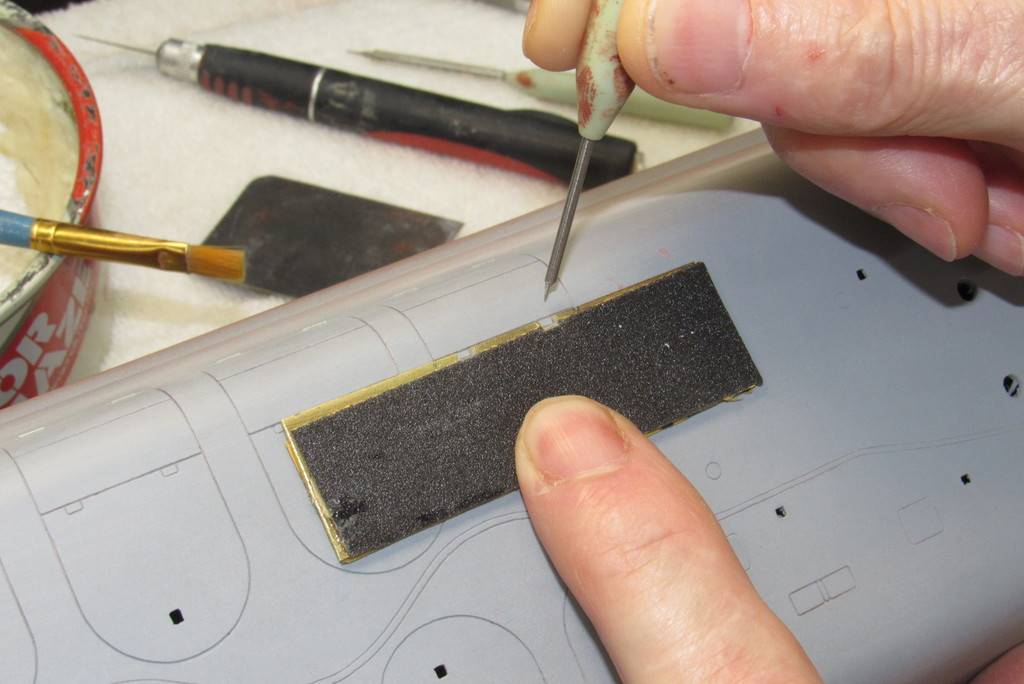
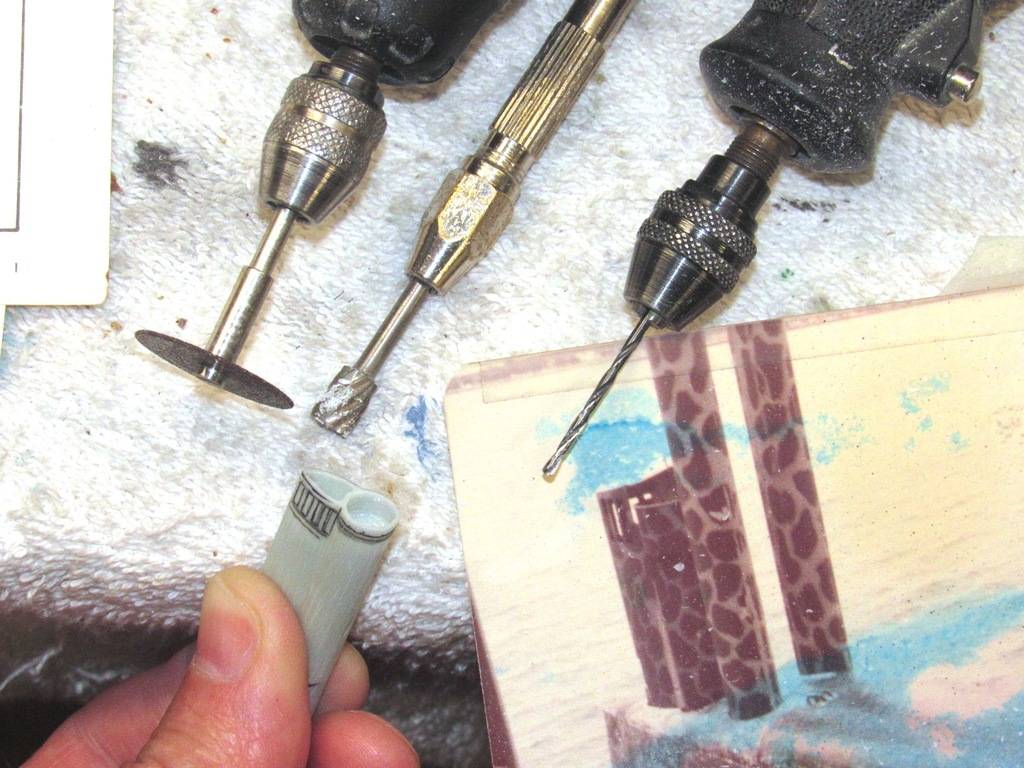
The moto-tool equipped with a .020” diameter bit drilling holes that will accommodate, via an interferrence fit, the stems of the ladder rungs.
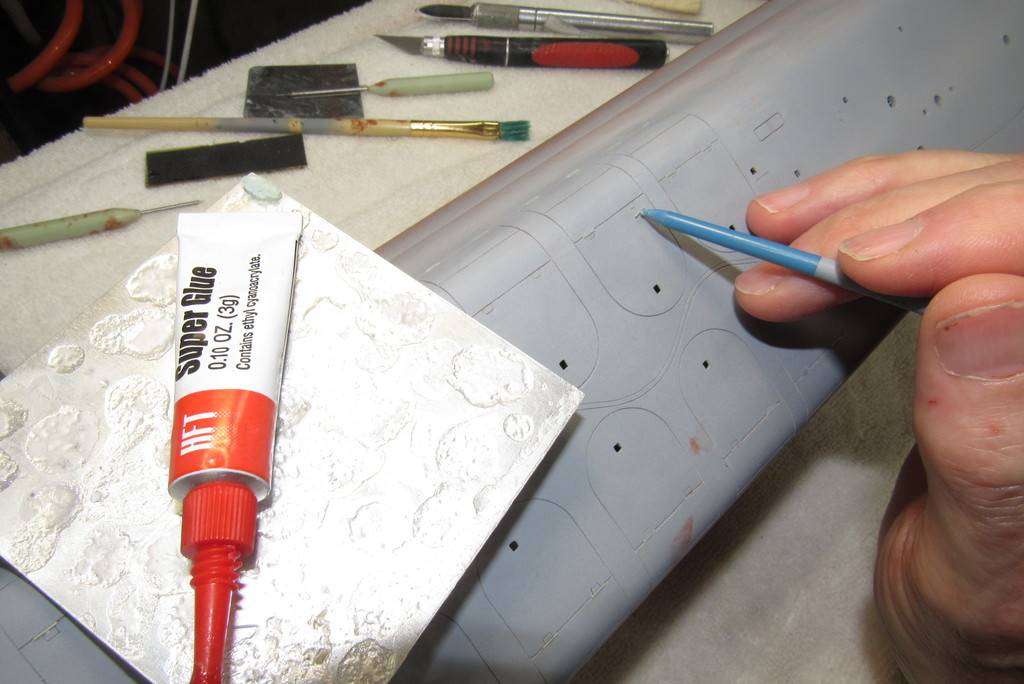
Note the use of a modified set of pliers here – they started life as a common needle-nose type but were truncated and the tips ground back to better hold a rung yet not make contact with adjacent rungs as a rung was installed/removed from the sail and superstructure.
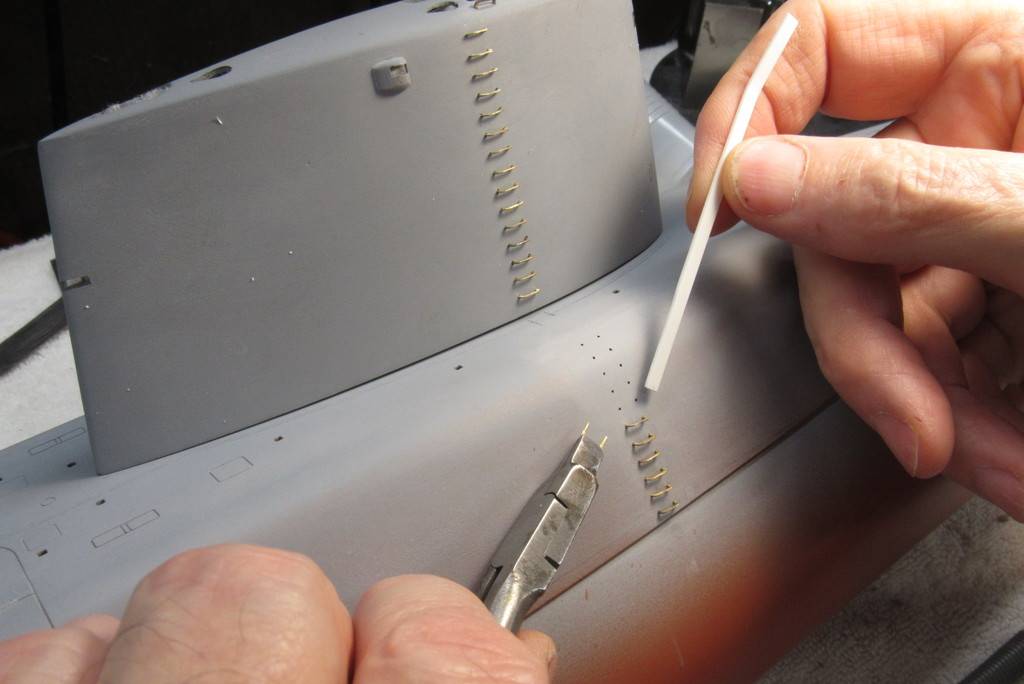
All of the ladder rungs are tight friction fits to the sail and superstructure, so no glue is required to retain them in place. This permits me to now remove the rungs and carry on with the painting and weathering of the model without the rungs getting in the way. The rungs will be painted separately and installed before the final flattened clear-coat goes down.
Leave a comment:
-
Could be, Bill.
But what really blows up my skirt is the purity of purpose, and sense of self of her Howard Roark, and Hank Rearden characters. True representatives of the best characteristics of man; virtues that could only be grown in the America of years past (not today). Today, the great American experiment has failed. Socialism has won (the tool of our defeat: regulations and no term limits).
David
John Galt, call your office...Last edited by He Who Shall Not Be Named; 08-10-2023, 12:06 PM.Leave a comment:
-
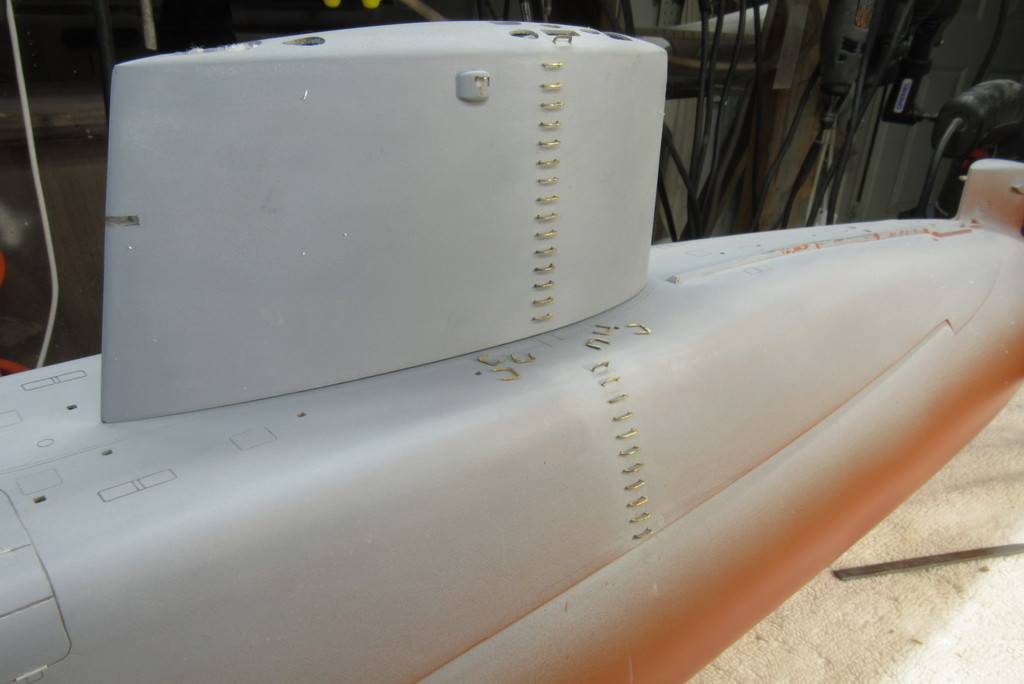
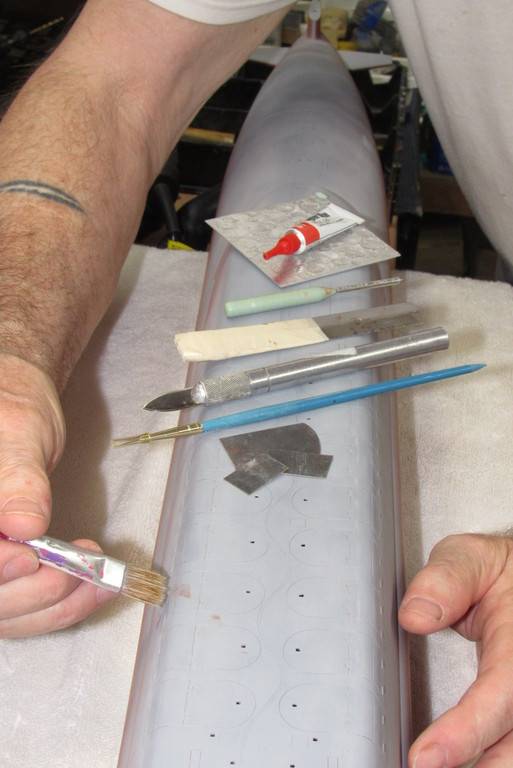
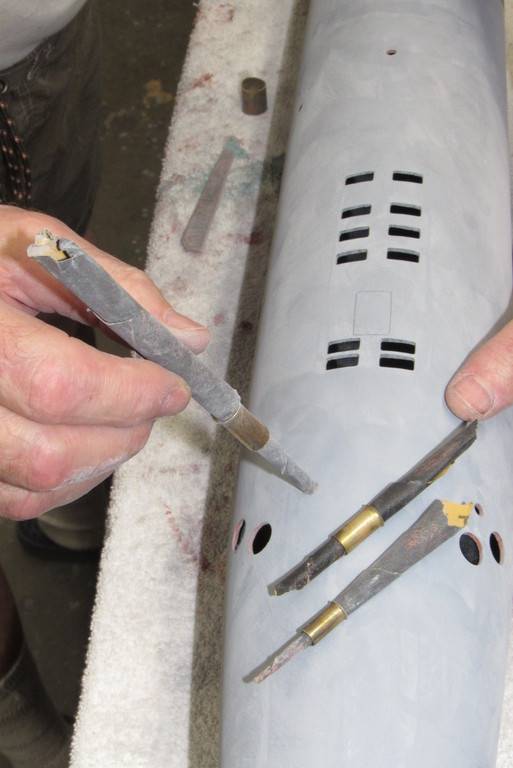
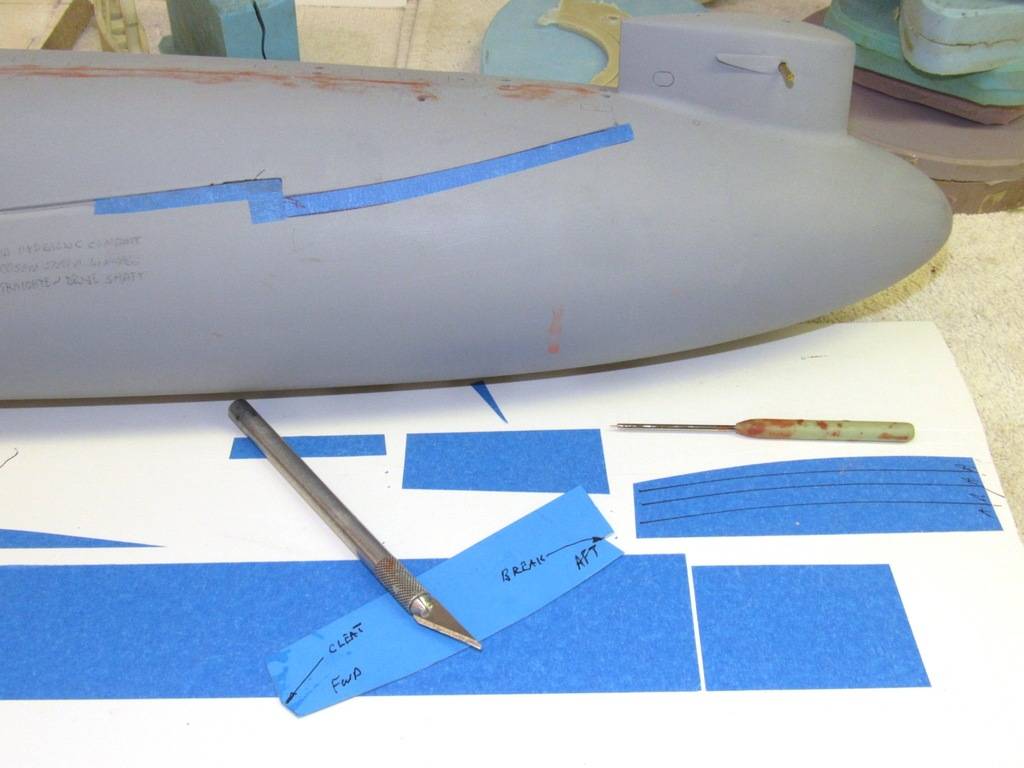
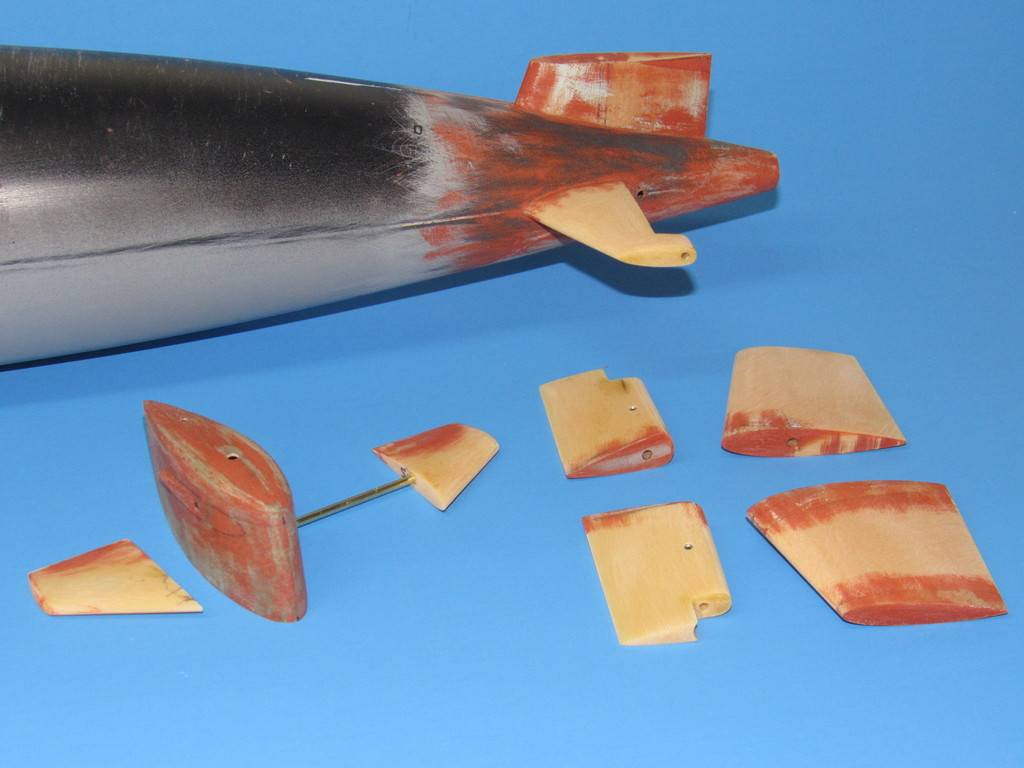
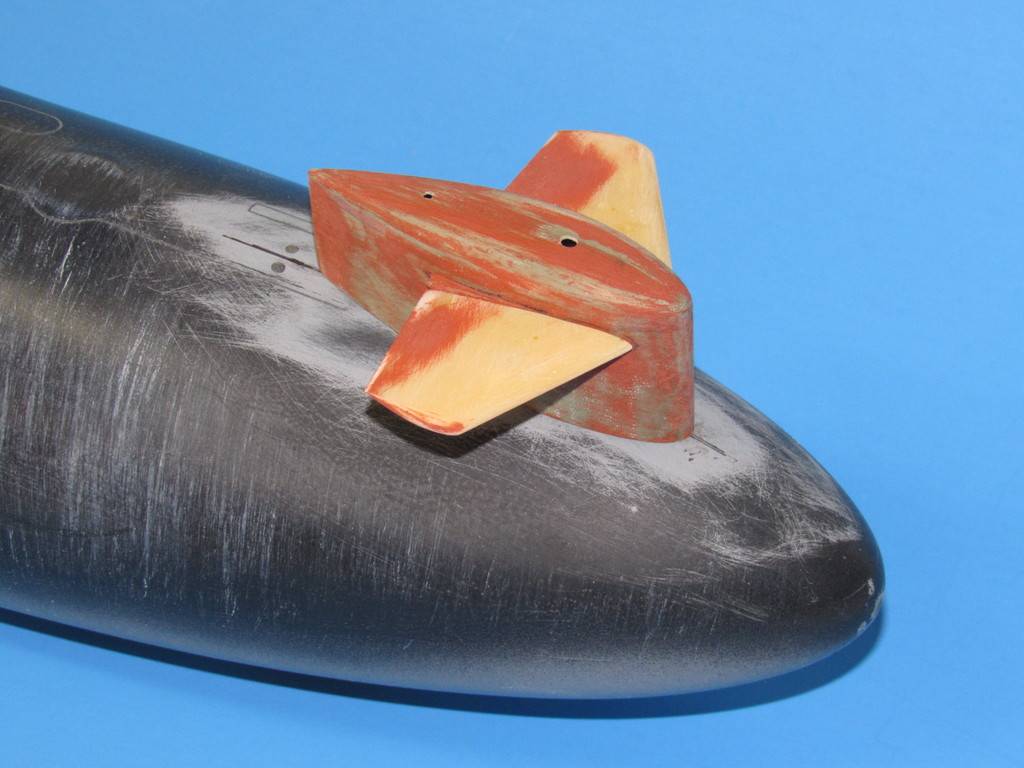
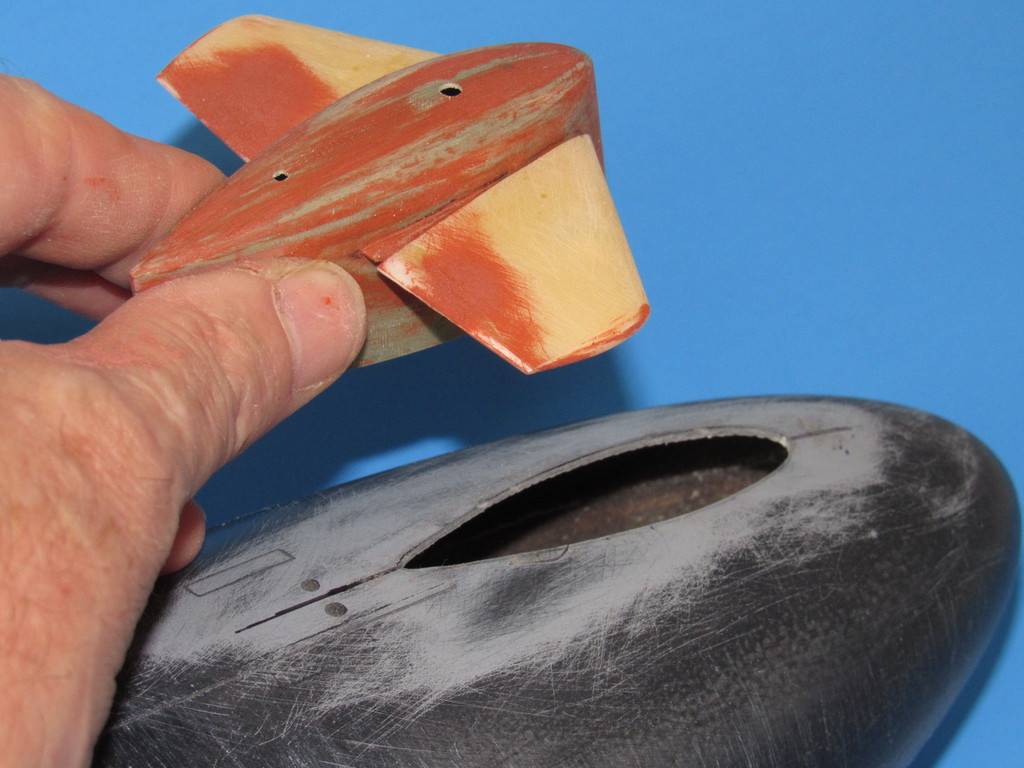
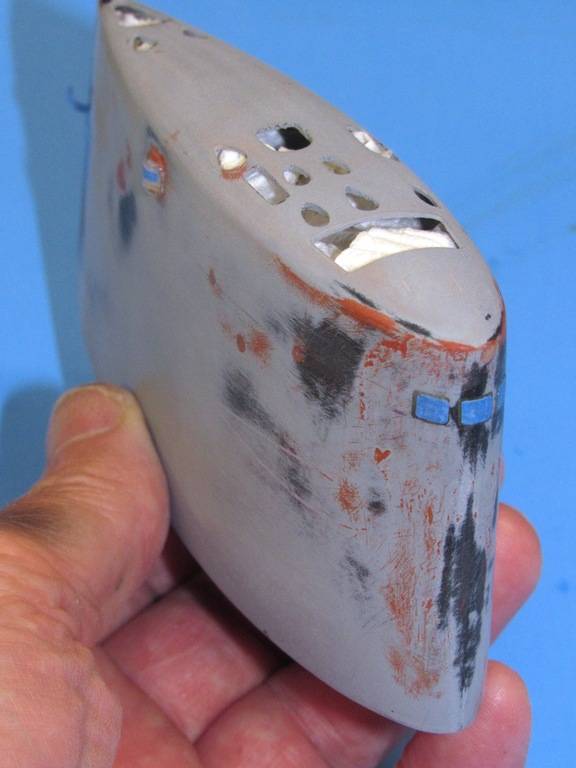
It's often the 'little things' that makes an otherwise fair model to become an interesting and appreciated display. Little things like the projecting hinge pins employed to permit travel of the three-piece missile tube muzzle hatch fairings.


Missile tube fairing hatch hinge securing brackets were represented by engraved rectangular shapes scribed in with the aid of this purpose built stencil.
Stretching sprue to derive the correct diameter, round of section fairing hinges.
I found that the ideal hinge diameter was .015”. So, with the aid of a micrometer I found those lengths of stretched sprue that fit the bill and cut them away for later chopping to length.

A very useful tool for slicing thin, soft plastic sheet and extruded shapes is this commercially available 'chopper'. Here I'm using it to cut to length stretched sprue missile tube fairing hinges. Uniformity of length is assured through the use of a masking-tape fence.

I used a bit of spit to hold a 'hinge' piece at the pointy end of a paint-brush handle. Just enough stick to permit me to transfer a hinge from the chopper to the engraved line of a missile tube hatch fairing engraved line.
A very small drop of CA was placed on the engraved line and a hinge placed into position and pressed down hard with a finger for about five-seconds – long enough for the glue to take hold.
Careful blade scraping and sanding with #600 around the slightly raised hinges cleaned up any excess glue. Here I'm chasing out sanding dust from the engravings with a stiff paint-brush.
Leave a comment:
-
Well...
...Finally!
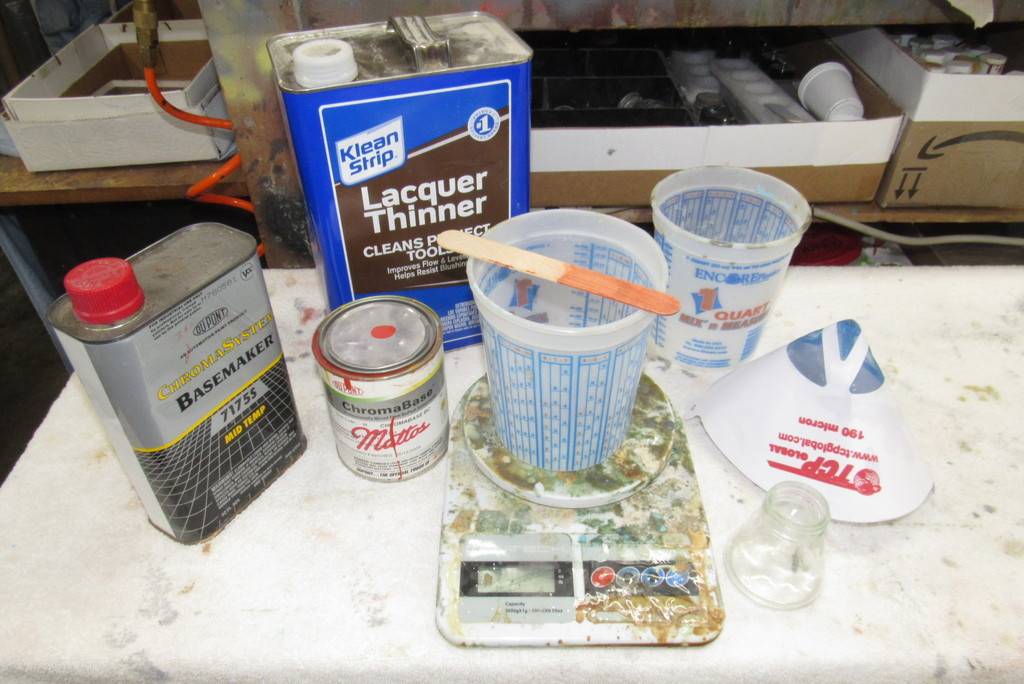
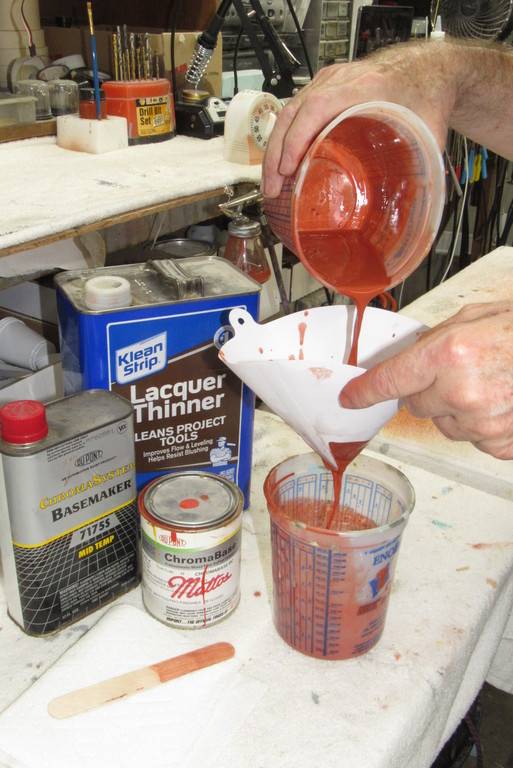
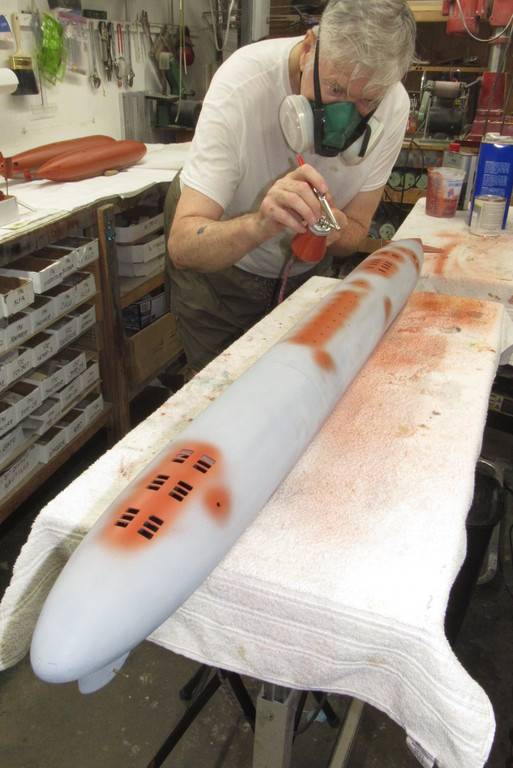
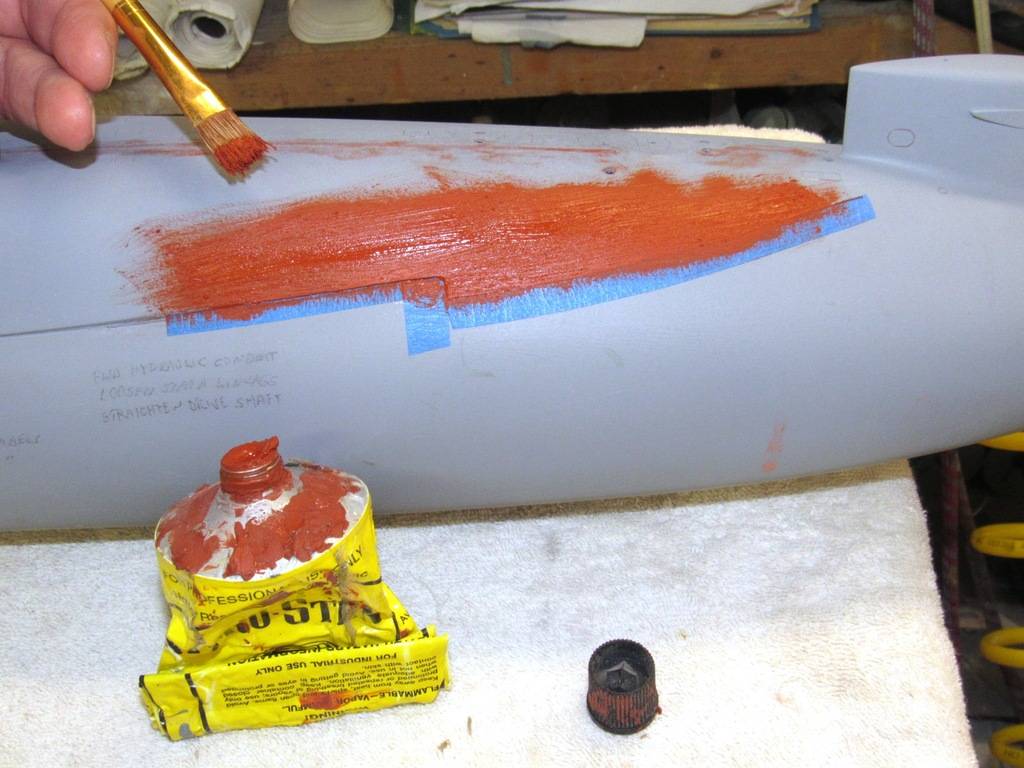
Time to splatter some paint on these three suckers! The paint chemistry is my old friend: two-part, polyurethane DuPont ChromaColor. This automotive paint is tough, quick curing and can be reduced significantly without losing its opacity, which makes shooting it with small air-guns like my trusty Paasche H-model, single-action a very easy proposition.
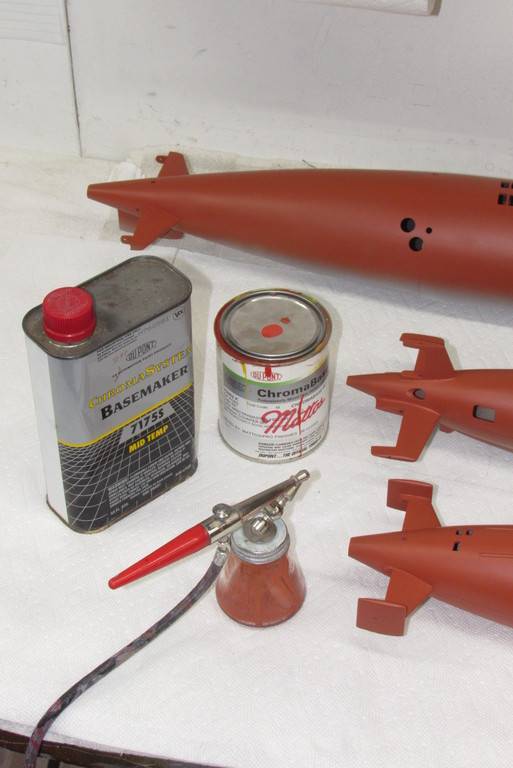
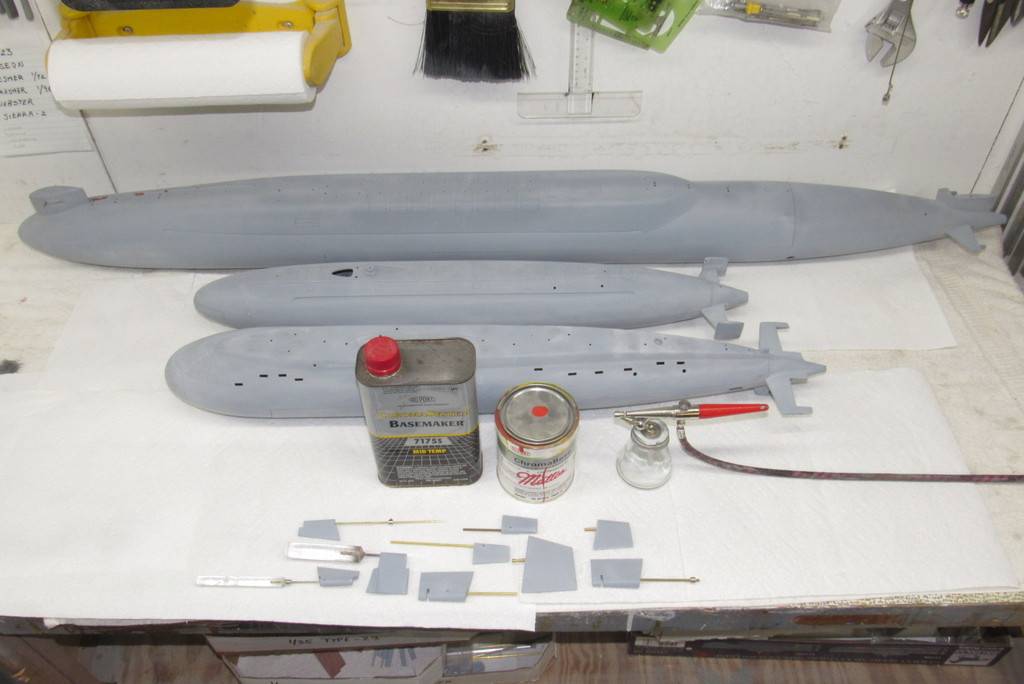
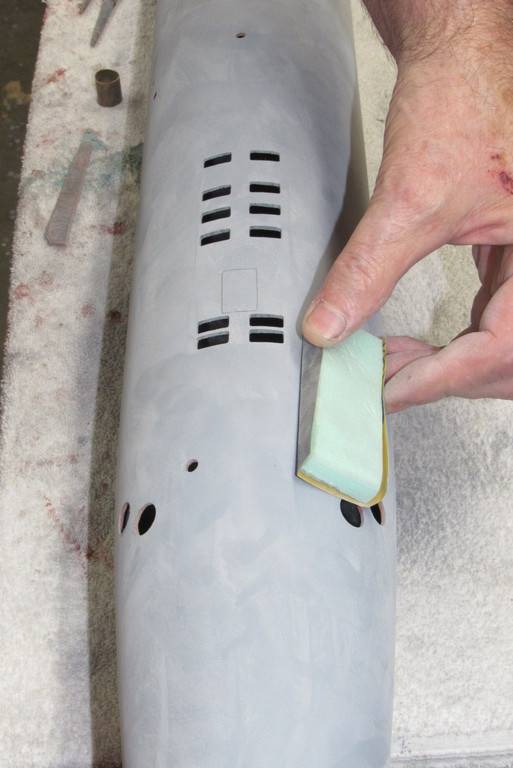
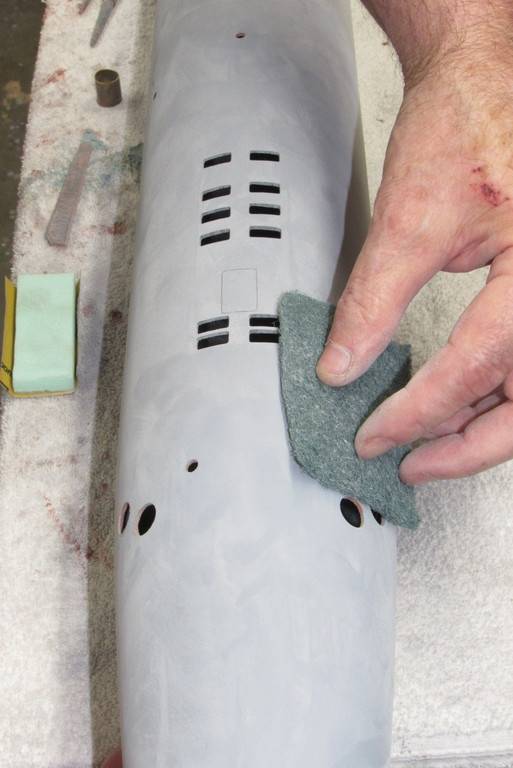
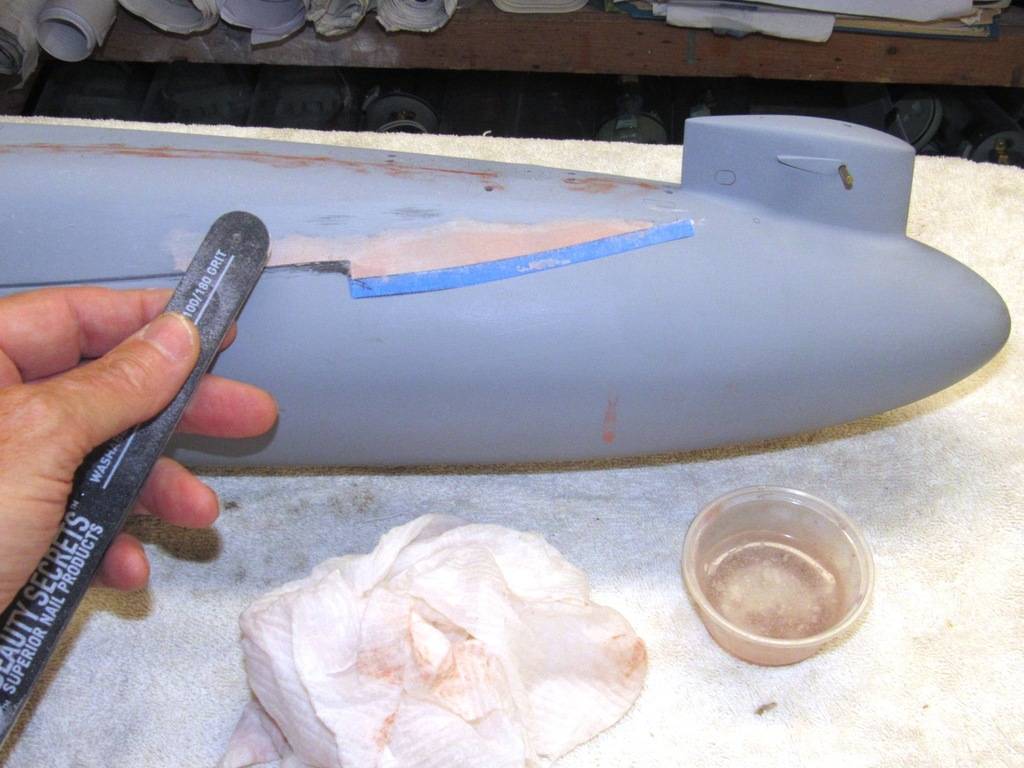
The 1/96 WEBSTER, KILO, and BLUEBACK – all at this point in their final primer gray – had their hulls and appendages given a final dry sanding with #600 grit abrasive; a polishing with an abrasive pad; blown-down to get any sanding dust trapped into the engravings; and everything wiped with a tack-cloth to remove the last little bits of sanding dust from the surfaces to be painted.

The first color to go down was anti-fouling red, applied to all hull and appendages that would either be below center line, or below water line. The demarcation line between red and black would be center line on the WEBSTER and KILO, and waterline on the BLUEBACK.


Leave a comment:
-
Who is John Galt indeed? Some of us know David. Great work as always and I'm so glad to see it. I nearly had to leave the planet recently but thanks to good doctors and medical science I have a stay of execution.Leave a comment:


Leave a comment: