Robbe Seawolf V2... Nothing static- just dynamic...

Collapse
X
 
  • Time
  • Show
Clear All
new posts
  • alad61
    Commander
    • Jan 2012
    • 476

    Robbe Seawolf V2... Nothing static- just dynamic...

    I decided that I'd like to have something that works dynamically in my little fleet. So for me the most obvious and readily available choice was the Robbe Seawolf V2. I scoped, trawled, scanned and read many forums and articles on the web about turning this from a dynamic to a static sub. as well as many build threads on others assembling one of these. My only regret was finding the German site that did the bayonet locking rings after I had started and assembled the tech rack!! But what is done is done. One of the other reasons I decided to have a crack at this kit is to gain more experience in how assembling things such as its wtc, linkages, running gear etc. I'm no stranger to ABS or vac-formed kits so I wasn't to stressed over that side of it so it seemed like a little challenge as my funds grow to procure the Skipjack and parts from Caswells.

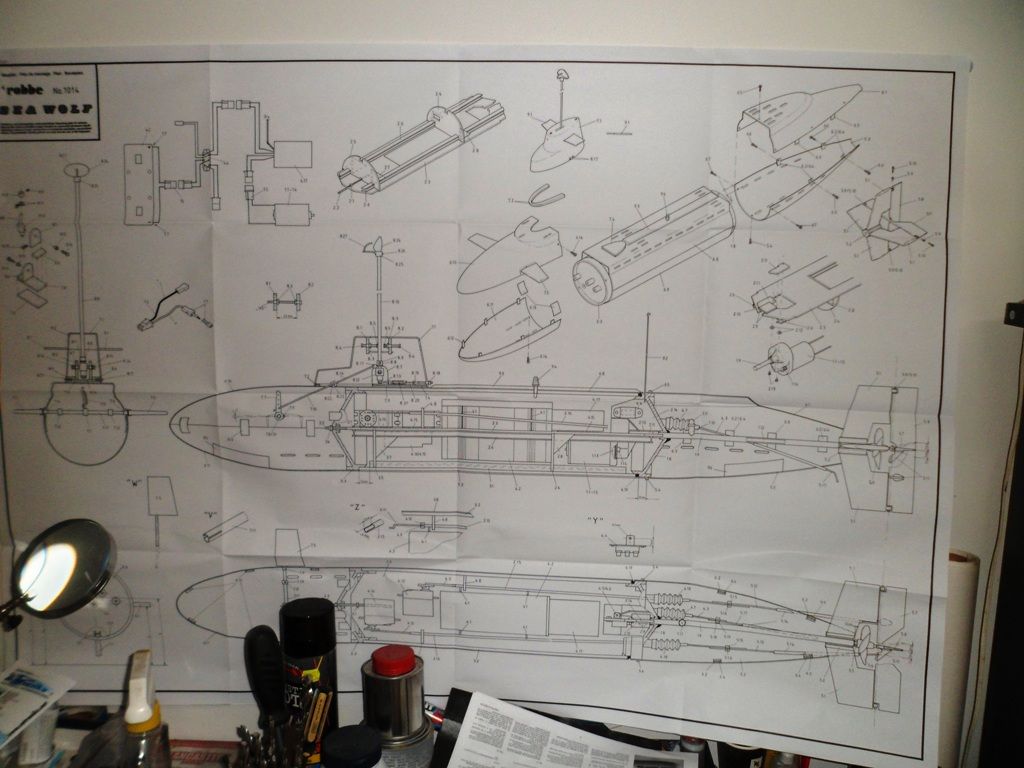
    I read enough to be aware of things with the kits plans and instructions. Even so I decided to study the written instructions over a couple of nights, nothing different than usual now, unlike all those years ago as an eager junior modeler who just scanned them and started tearing things off spues!! I'll be honest and admit that this the first of any project that I have had pretty much one to one scale plans. Not a bad thing as my eyes aren't what they were twenty years ago...


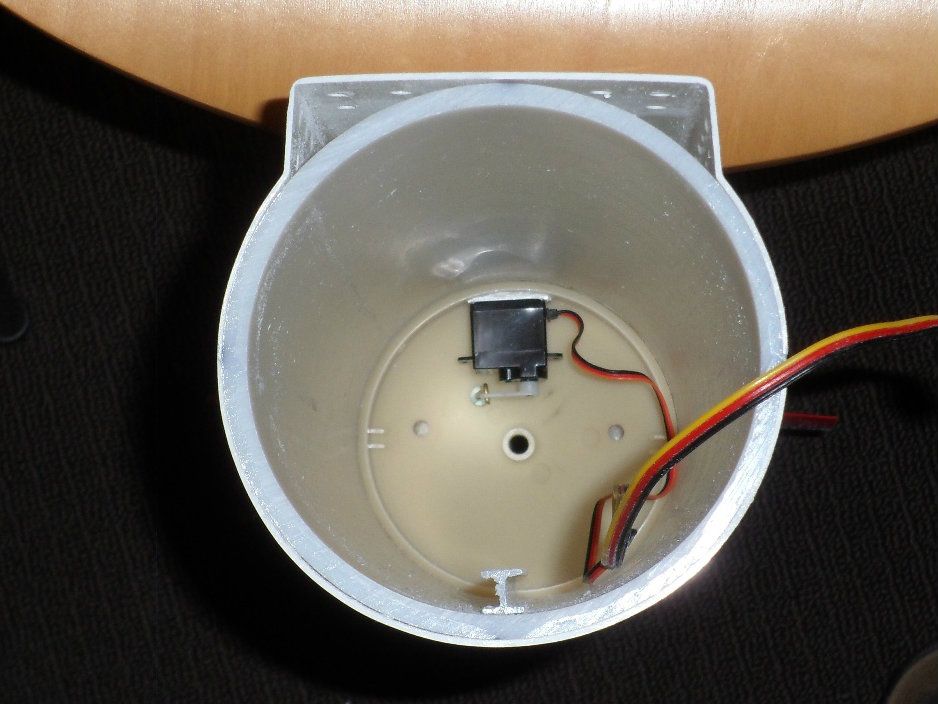
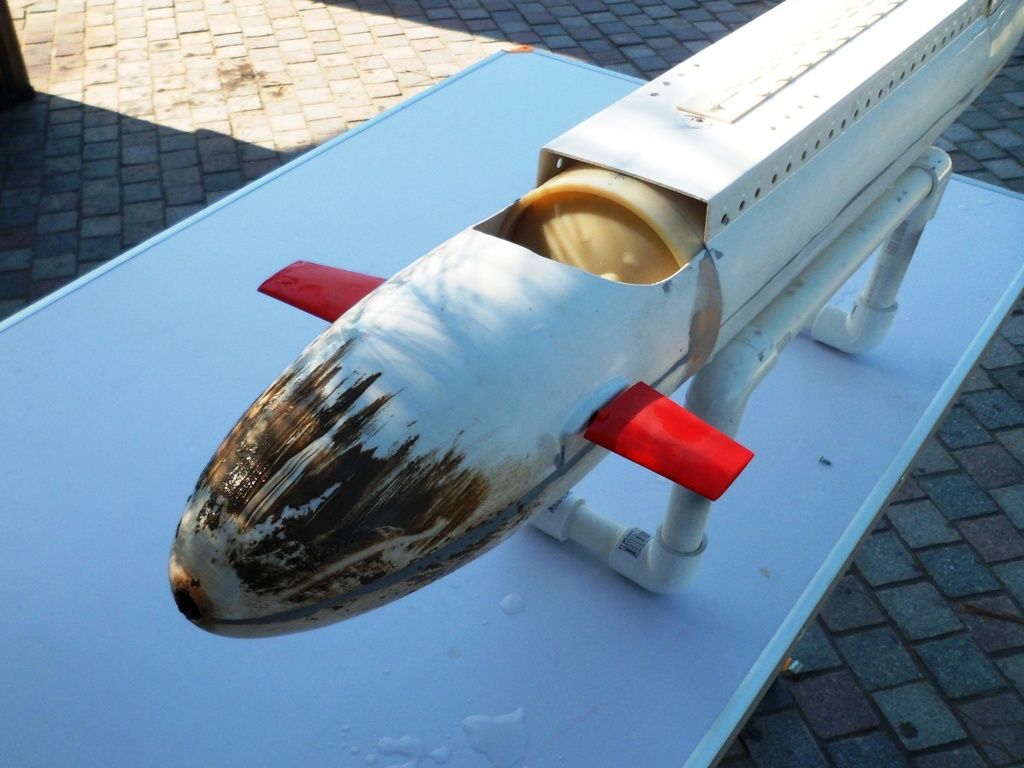
    To date I have pretty much followed the instructions with just a couple of variations. I decided from get-go that I would operate the forward planes via the tx so I installed a micro servo ito the forward pressure hull cap and used one of the extra bearing seals from caswells to run the push rod through.... otherwise the tech rack is pretty much as per the book except for some mods to accommodate the non Robbe battery. Behind the klik-on you can see the tube that guides the rod that threads over the threaded rod fixed in the front of the tech rack. I think this could be a weak link but time and field testing/running will tell.


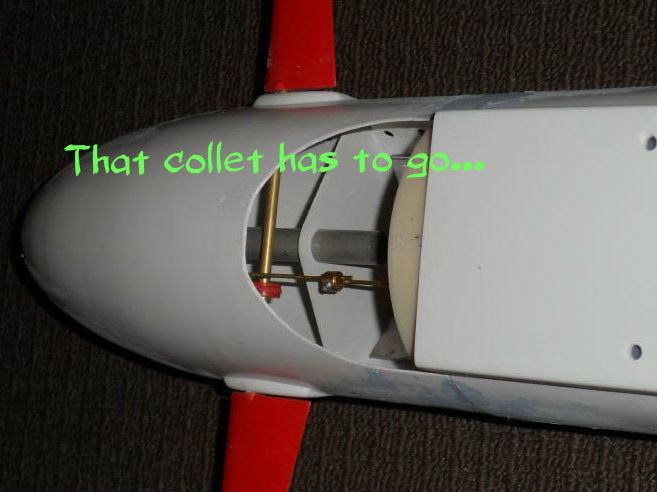
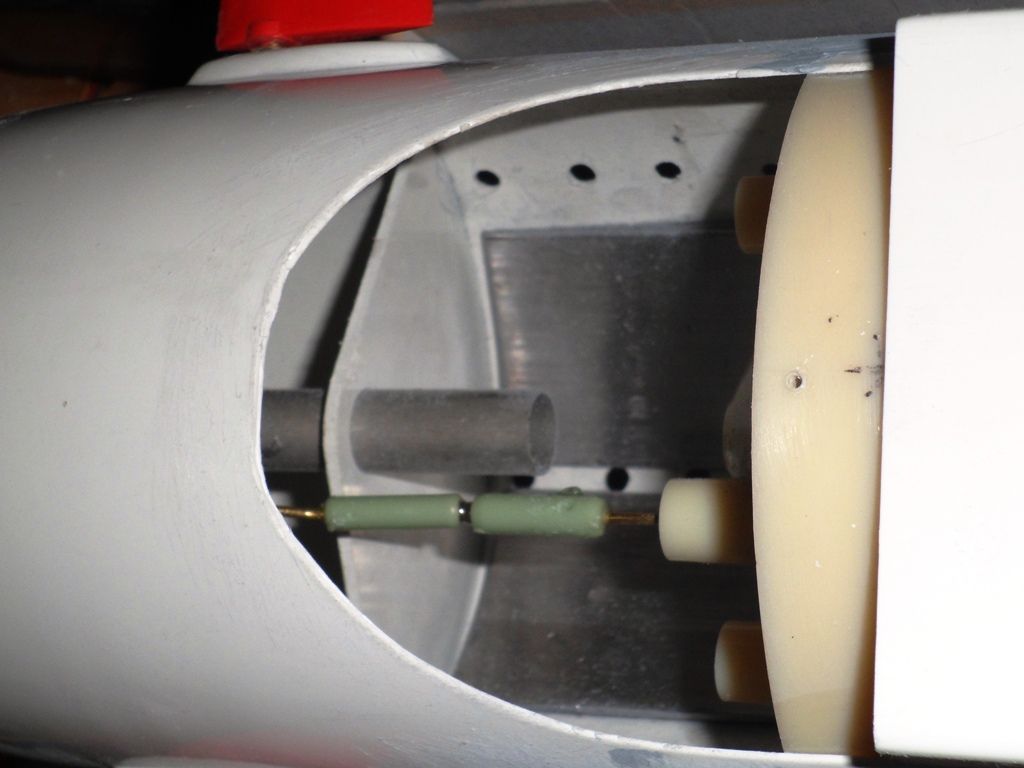
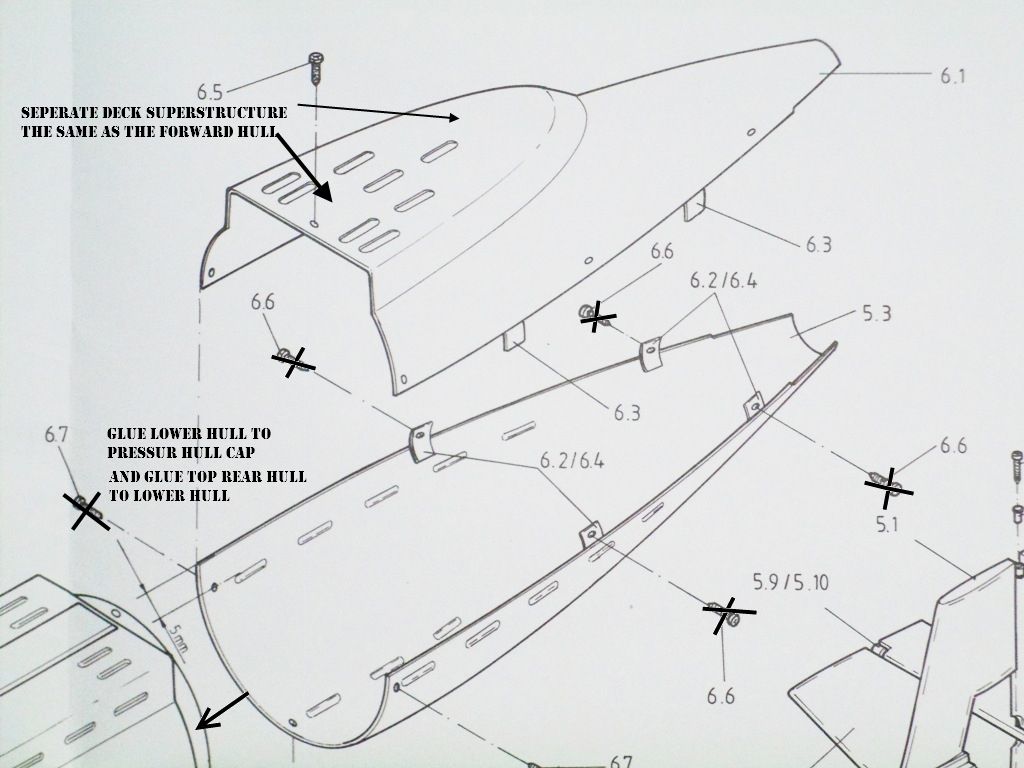
    Other changes were to cut away the forward superstructure as I fixed the forward hull pieces to the front wtc cap. The instructions called for gluing the forward lower hull piece only and then attach the top section by screws... Well that was just not going to happen. The model is crude & toy like enough with out having a stack of screw heads showing that hold it together.... The kit comes with a bunch of collets to hold the linkages together. I tried this with the bow plane assembly but didn't take to much self convincing to change them out for klik-ons


    I plan on doing the same with the rear hull sections too


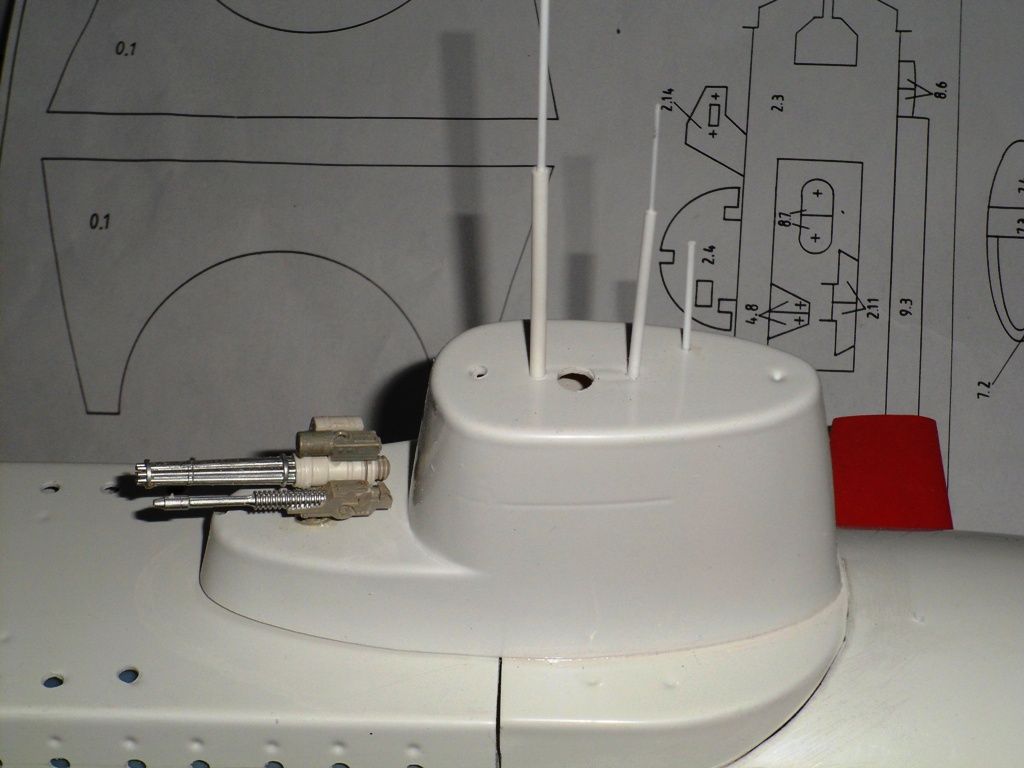
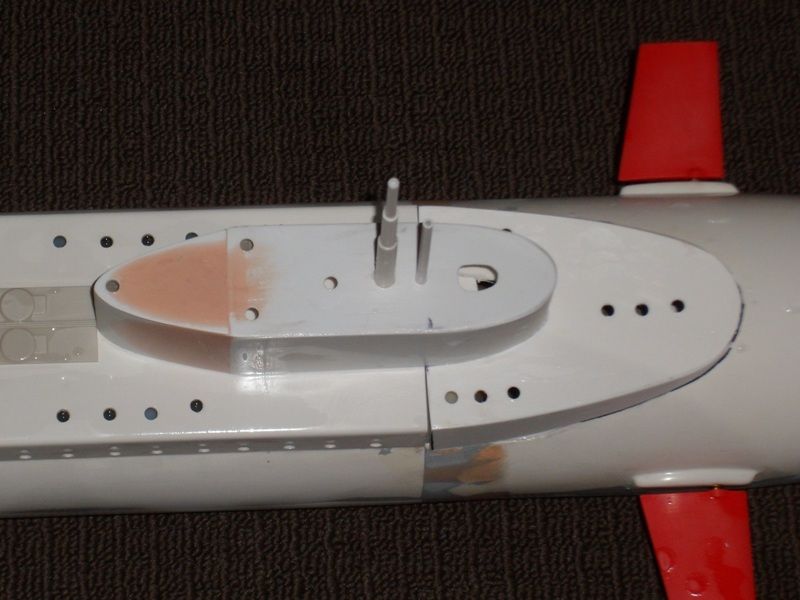
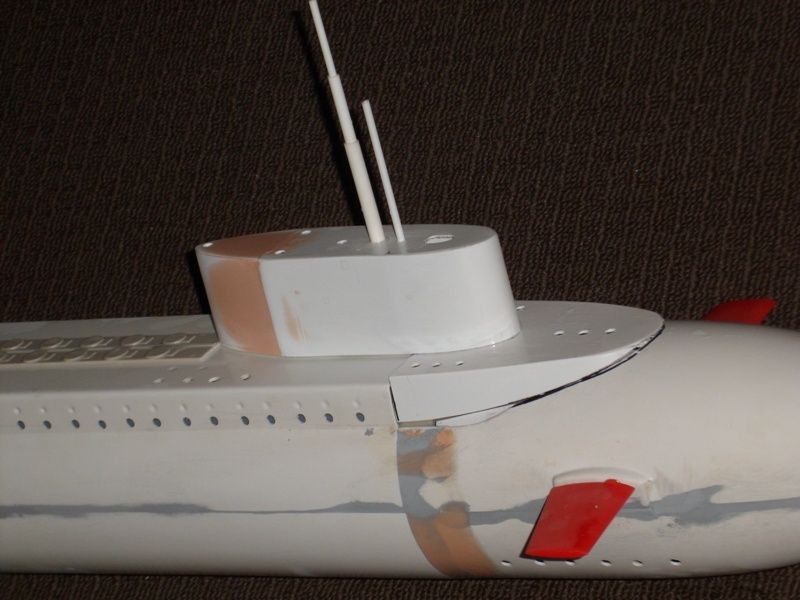
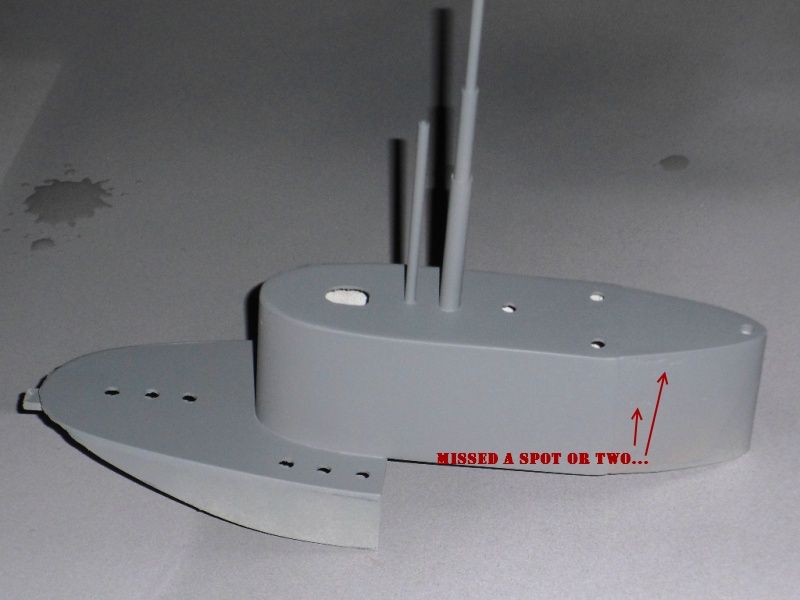
    The other thing I 'tweaked' was the sail. Firstly I am putting it on reversed to the instructions because I like the look... I also added a Gatling gun/laser assembly from an old kit from my bits box along with some tubing for various scopes and I am not going to add the planes for the sail that came with the kit either. To keep the superstructure in place I glued on an indexing tab at the forward section and then sat one of the small screws on the piece that sits on the wtc cap rim. I then glued on the sail to the superstructure and drill an access hole in the top to manipulate the hold down screw.


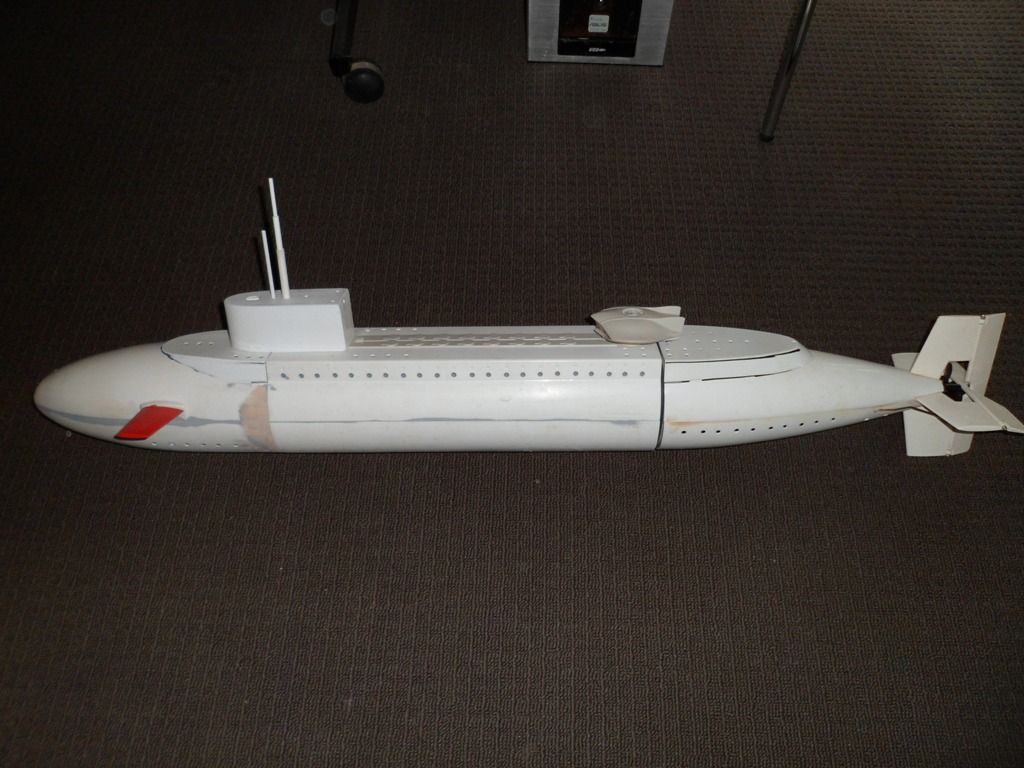
    I also plan to add some extra features such as outer access hatches on the sale and some detailing to the deck such as the little flying sub to the rear deck section of the pressure hull but more on that latter. The other thing that I personally didn't like is the horizontal slots in the hull for air and water vents so I am doing round vents


    Above also shows the first pass at filling the variations between the hull pieces but after sanding it down I will have to give it another pass with a heavier bodied filler before continuing with the rear section.
    Cheers,
    Alec.


    Reality is but a dream...
    But to dream is a reality

  • trout
    Admiral
    • Jul 2011
    • 3549

    #2
    I like the Laser/Gatling defense system. Looks like a fun build.
    If you can cut, drill, saw, hit things and swear a lot, you're well on the way to building a working model sub.

    Comment

    • Subculture
      Admiral
      • Feb 2009
      • 2131

      #3
      I think the Seawolf was the best of the Robbe kits. The smaller size lent itself well to vac-form construction, and the design itself works well, a nice boat to sail.

      I think you've made a good call dispensing with the sail planes. Good upgrades for this boat, are to fit a leveller to the stern planes, and they really shift if you swap out the brushed motor for a brushless type outrunner, although performance is good with the standard drive, and you have the option of hotter wound brushed motors if you want more speed.

      Finally here is a modified Seawolf that is barely recognisable. Amazing what you can do with a few bits of plastic pipe isn't it?

      Click image for larger version

Name:	Peg0506_nostromo_1.jpg
Views:	1
Size:	41.2 KB
ID:	74679
      Last edited by Subculture; 11-18-2012, 02:10 PM.

      Comment

      • trout
        Admiral
        • Jul 2011
        • 3549

        #4
        Subculture,
        The attachment did not work for me.
        If you can cut, drill, saw, hit things and swear a lot, you're well on the way to building a working model sub.

        Comment

        • Subculture
          Admiral
          • Feb 2009
          • 2131

          #5
          Can you see it now?

          Comment

          • alad61
            Commander
            • Jan 2012
            • 476

            #6
            Going without all the screws to fasten the top forward and aft hull sections gave me some extra work. But I recon the finish will look a lot better. I like the prop shroud on the one you posted Subculture. I have a leveler for the rear planes, I just have to install it.

            Last night was a bit of a marathon, mostly because w are flying down to Tassie this morning for a weeks well deserved holiday as I have been dropping 65 - 70 hour weeks at work over the last month.
            Cheers,
            Alec.


            Reality is but a dream...
            But to dream is a reality

            Comment

            • trout
              Admiral
              • Jul 2011
              • 3549

              #7
              Originally posted by Subculture
              Can you see it now?
              Yes an it is really cool looking!
              If you can cut, drill, saw, hit things and swear a lot, you're well on the way to building a working model sub.

              Comment

              • alad61
                Commander
                • Jan 2012
                • 476

                #8
                Well the first sea trials as I mentioned in my adf2 thread were an mix of near disaster and hard taught lessons i had some rebuild/surgery to do. The morning run at clubs lake went ok to a degree. First of all I needed more ballast!!! Even with steep angle on the planes I just couldn't get it to dip fully under. The nose went down but not the tail. This just sat high loosing 70% thrust from exposed cavitation. This I was able to get pretty right by rummaging through the tool box and adding lead weights fore n aft. So then it sat low n level. but still took max prop speed and deep planes to get it wet and then when it went under it was quick when I angled the forward planes up it came up as in full emergency blow n surface. The best visual reference I can give is the Seaview broaching in the opening minutes of the movie Voyage to the Bottom of the Sea. I admit each time the seawolf shot out it was a real crowd pleaser... I knew the ballast wasn't quite right so I back up and headed home to the bench to correct it. Thats when I moved and spun the adf 180 degrees on the horizontal plane and not even giving a second thought to the rear planes operation from said shift. After fixing and adding the extra lead I headed out to check out a new pond our club president found. Feeling cocky I set the seawolf a sail drove it on the surface for a couple of laps and then attempted a dive. And dive it DID!!! So there I am looking at the water I could see the subs white blurry shape some 15 feet out from the dock only it was just hanging under the surface at a steep angle and not moving. I threw it in reverse but there it still hung like a ghostly specter taunting me. So I dialed up the epa on the reverse throttle and toggled it in said direction. Like a missile it launched itself out of the water minus the sail, I really liked that laser/Gatling gun array too, and the nose decorated in a decent film of clay/mud...


                Feeling rather sheepish and annoyed at the same time I headed it to the dock gathered it up with my belongings and skulked home to figure out what went wrong...

                Through forum discussions with Kevin & David it became obvious I screwed up by moving the adf and that the receiver I was using had issues talking with the adf. The said receiver is now binned and replaced with a new JR one that loves chatting with all my electronics including the adf. Not feeling very enthused for a bit I hadn't done much to restore some dignity back to the seawolf till this morning and a four hour marathon to knock up a new forward superstructure and sail. They are I will admit very basic and the sail is a bit of a bread box/block but the look seems to fit the sub for my likings.


                Next on the list is another sea trial and then start on the painting. FYI the flying sub is held on by magnets but to date hasn't seen the water yet and after the original sail dislodging I am thinking that it will be only there for show and not attached whilst in the water.Though I am considering using stronger magnets because it does look good docked on the back...
                Cheers,
                Alec.


                Reality is but a dream...
                But to dream is a reality

                Comment

                • alad61
                  Commander
                  • Jan 2012
                  • 476

                  #9
                  Originally posted by trout
                  I like the Laser/Gatling defense system. Looks like a fun build.
                  Tom it is a fun build. Ahh sorry David I mean assembly...

                  Originally posted by Subculture
                  I think the Seawolf was the best of the Robbe kits. The smaller size lent itself well to vac-form construction, and the design itself works well, a nice boat to sail.

                  I think you've made a good call dispensing with the sail planes. Good upgrades for this boat, are to fit a leveller to the stern planes, and they really shift if you swap out the brushed motor for a brushless type outrunner, although performance is good with the standard drive, and you have the option of hotter wound brushed motors if you want more speed.
                  Andy I don't think I'll be going brushless as the kit motor & prop are more than adequate for me in terms of power & speed. And there are some wild and funky versions out there that's for sure. I did see a video of one bloke who added a brushless and the thing went ito warp speed to the point he could launch it clean out of the water on a steep broach.
                  Cheers,
                  Alec.


                  Reality is but a dream...
                  But to dream is a reality

                  Comment

                  • redboat219
                    Admiral
                    • Dec 2008
                    • 2774

                    #10
                    Wouldn't that squared off trailing end of the sail cause too much drag?
                    Make it simple, make strong, make it work!

                    Comment

                    • alad61
                      Commander
                      • Jan 2012
                      • 476

                      #11
                      Originally posted by redboat219
                      Wouldn't that squared off trailing end of the sail cause too much drag?
                      To be honest Redboat I wasn't really sure nor overly worried but the more I ponder your question it piqued my curiosity. Oh and not to mentioned had my subconscious on the go last night in bed too.Scuba Diving

                      So I did a bit of world wide web research and realized that you are 100% correct and even at that scale the little motor would have certainly lost some efficiency from said drag increase. Out of my research I found these articles by an Aussie professor, granted a lot of the mathematical equations and engineering explanations were lost on me it is still a fascinating read for sure.


                      So I set to rebuilding the sail...I humbly admit that the new version I ended up with is much much more to my liking and really gives the boat a definite look. I took these after giving it a scrub with scourer and cream cleanser


                      Then tonight after visiting friends for Xmas I gave it its first shot of primer/filler...


                      Maybe loosing the original sail was some good karma after all??:biggrin:
                      Cheers,
                      Alec.


                      Reality is but a dream...
                      But to dream is a reality

                      Comment

                      • redboat219
                        Admiral
                        • Dec 2008
                        • 2774

                        #12
                        Kinda looks like a Kilo class.
                        Make it simple, make strong, make it work!

                        Comment

                        Working...