Naw. The scale flood-drain holes are enough. Don't Swiss-Cheese this thing, Ken!
David
-
Finished. I did make a mistake, cut the linkage opening on the wrong side. Patched it up like it didn't happen. Won't bee seen anyway. After filing all the openings, used the backside of an Exacto knife to clean the edges of the openings. This helped get rid of the annoying fuzzies. I'll probably add some additional holes on the centerline at the lowest point of the hull bottom to facilitate draining the water after a run.
Last edited by Ken_NJ; 02-27-2018, 05:54 PM.Leave a comment:
-
Thanks again David. Been grinding away at hull openings. Done except for what gets photo etch, which I'll do later after the hull pieces are joined. A clear plastic ruler comes in very handy.
Leave a comment:
-
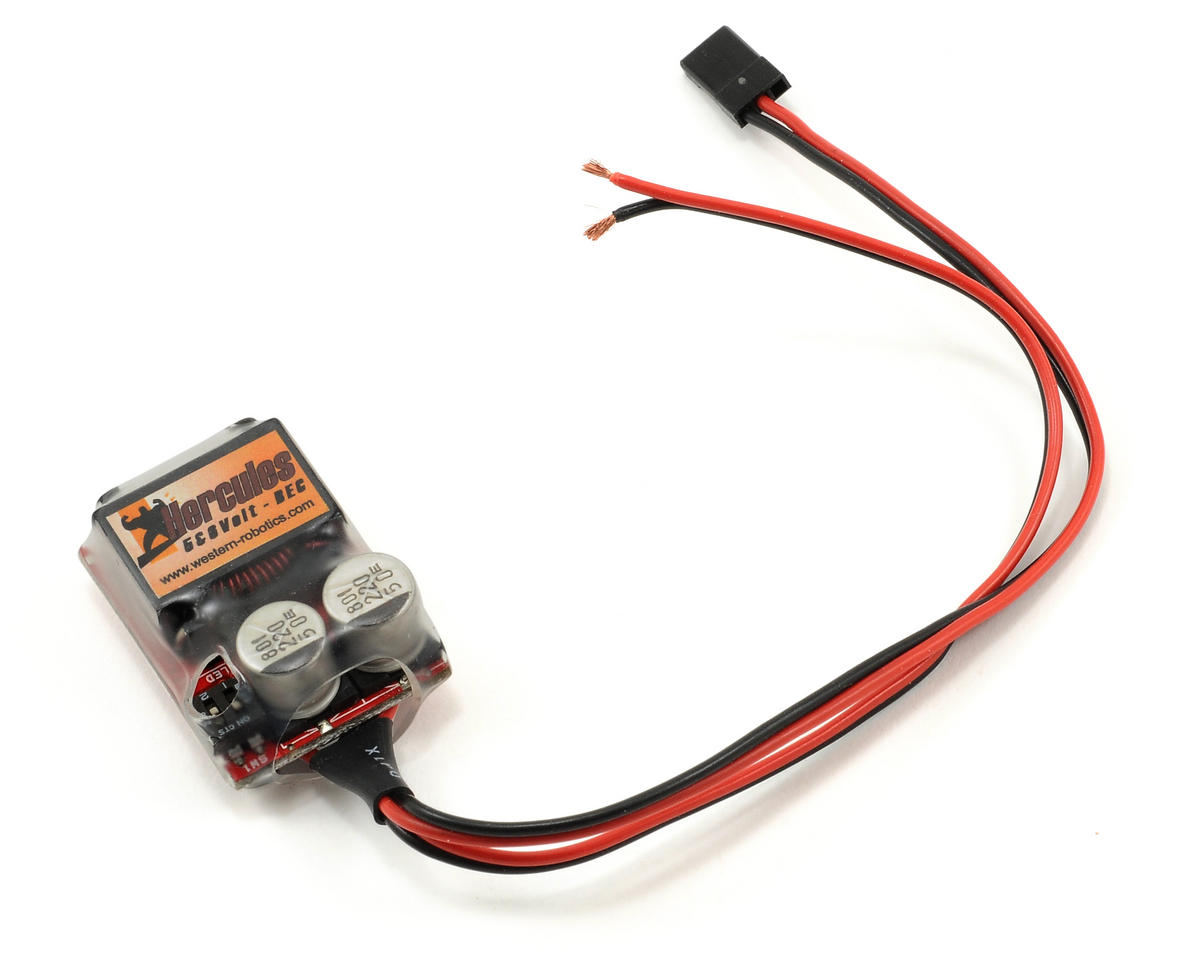
Here's a BEC for you, Ken:

DavidLeave a comment:
-
Thanks David. Revised list...
Viper 15 ESC: https://www.rc-submarine.com/product...eed-controller
AD2: https://www.rc-submarine.com/product...tch-controller
BLM: https://www.rc-submarine.com/product...y-link-monitor
Mini servos: https://www.rc-submarine.com/product-page/mini-servo (Description says Mini, but the item pictures says Micro on it)
Mission switch: https://www.rc-submarine.com/product...ion-switch-10a
Lipo 3s batteries: 3200 mah or better
Y lead: I have my own DIY one
BEC: lookingLeave a comment:
-
The new ADF does not have a fail-safe. That is taken care of by the new battery link monitor (BLM). it not only does fail-safe service, but also monitors r/c link drop-outs, and can be programmed to monitor the battery condition. So, you need a BLM. A must have.

I'm taking care of your WTC. You want to equip it with mini-sized servos, three of 'em. I love your Y-lead substitute -- a real space saver. You want to add a more capable BEC too, something that can output at least 3mAhr at 4.8/5-volts.
Go for the magnetically actuated mission switch -- I'm using them now and wonder how I ever got along without them:


Get hot! Groton's only a few short months away, pal.
David
The Horrible
Leave a comment:
-
My shopping list, anything missing? I guess the ADF2 is no longer available?
Viper 15 ESC: https://www.rc-submarine.com/product...eed-controller
ADF2: Looks like the failsafe has been removed and now its AD2, https://www.rc-submarine.com/product...tch-controller
4 Mini servos: https://www.rc-submarine.com/product-page/mini-servo (Description says Mini, but the item pictures says Micro on it)
Mission switch: https://www.rc-submarine.com/product...ion-switch-10a OR THIS https://www.rc-submarine.com/product...-on-off-switch
Lipo 3s batteries: 3200 mah or better
Y lead: I have my own DIY one
WTC: https://www.rc-submarine.com/product...r-single-shaft
The Viper 15 ESC has a 1.2 amp BEC.Leave a comment:
-
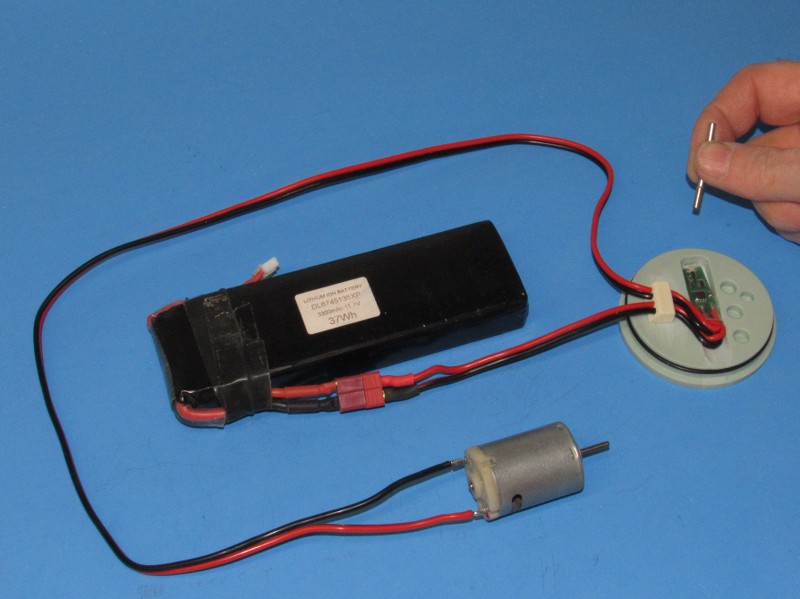
The MTroniks 15 Ampere, brushed, marine ESC will do it. And these items:

This SD will employ any cheap 'mini' sized servo, such as here:

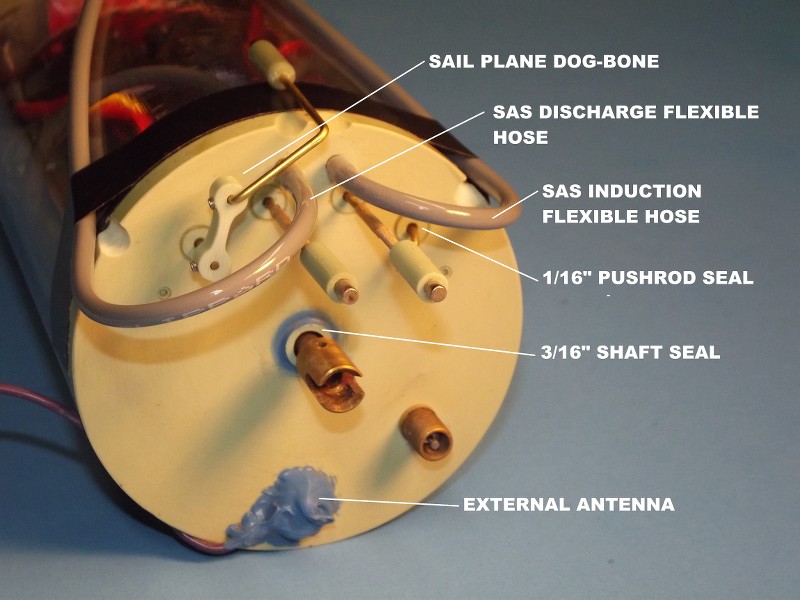
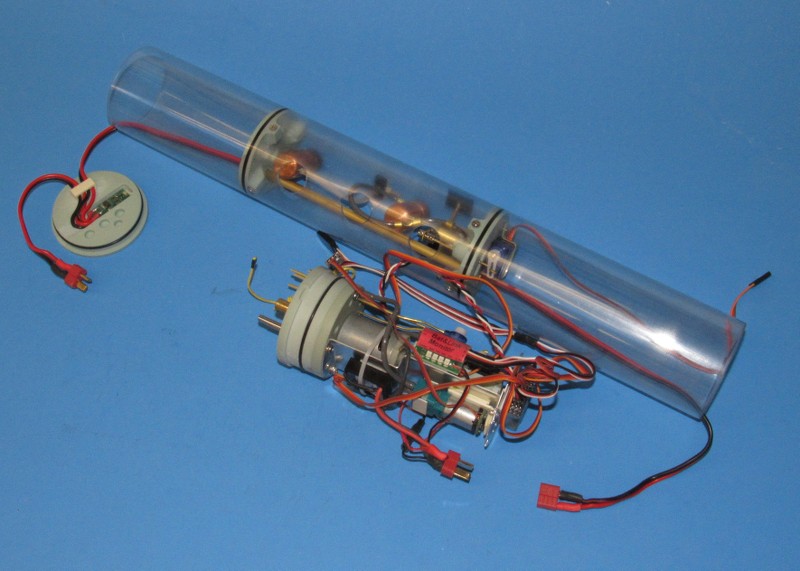
And the assembled SD will look like this:


And spring for Kevin McLeod's excellent little magnetic switch. A must have. Get all this good stuff from Nautilus Drydocks, https://www.rc-submarine.com/shop
Some detail shots on how to hook up the magnetic switch:
DavidLeave a comment:
-
Trying to get an idea what I need in the way of electronics. In the Marlin I have NiMH batteries with a Viper 10 and ADF2. Since all of these were bought years ago things may have changed. So what do I need in the way of ESC, pitch control and whatever else? And what size servos are needed in the 3.5 inch SD?Last edited by Ken_NJ; 02-20-2018, 04:44 PM.Leave a comment:
-
Good job, pal. Slow and easy wins this race.
DavidLeave a comment:
-
Yea thought so on the heat gun. Most of the warp is between the halfway part of the hull (the locator pins on the inside of the hull) up to the dive planes, on both the top and bottom sections. I placed a wedge as you see in the picture, heated the inside keeping the heat gun moving, then heated the outside, placed on the workbench and applied pressure with a slight reverse bend due to the wedge. Let cool. Got the starboard side down to 3/32 and the port side just under a 1/16 so far. Time consuming this is.
These images are from Imageshack as you said. Let's see how this works. Yea!! That did it right! Thanks David!


Last edited by Ken_NJ; 02-15-2018, 09:14 PM.Leave a comment:
-
I used a heat-gun to VERY CAREFULLY heat each half and then block it to size before the work cooled. Worked, but you need to be very, very, very, careful not to exceed the melting temperature of the polystyrene. But, as a practical matter -- don't sweat the warp! It will go away as you assemble the hull.
Use ImageShack for your pictures here -- works better.
When in the 'links' section go to the 'size' block and select, 800X600 and you're good to go.
DavidLeave a comment:
-
I'll get there soon enough!
What can I do about this natural gap in the two stern sections? It takes the force of rubber bands to bring the two sections together. This will be a problem later on. Starboard side is 3/16, port side is 3/32. Majority of the warp is in the upper deck section.
I clicked the Upload Attachments button and did not choose a size. I can't add these inline?Attached FilesLast edited by Ken_NJ; 02-14-2018, 01:21 AM.Leave a comment:
-
-
Leave a comment:
-
Thanks guys. I did something to get it working. It's always asking for a URL since I already had a picture linked, could not delete that last one. I see the 'forums' David, will see what happens next time, or upload the pic like Tom said. BTW Tom, thanks for the complement, not sure if I can top the Marlin on the SJ, but will see.Leave a comment:

Leave a comment: