
Drawers in control room: real thing, item in Trumpeter's box and my scratchbuilded one...
Cheers...
-
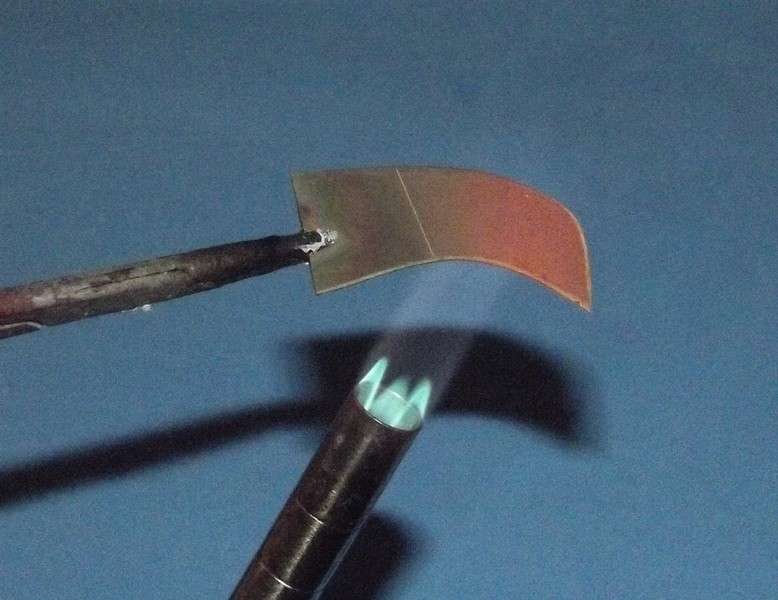
Anneal the copper wire to a red heat, let cool without quenching. The soft copper is then draped and pushed into and around suitably shaped forms to render the desired shape. All the handling and bending work-hardens the copper so it will hold its shape as its pulled from the form and applied to the work.
You do magnificent work, sir!
DavidLeave a comment:
-
Looking good Bianco.
It is easier to buy fine lead modelling wire or fine solder wire.
Copper is ok for grab handles etc but Lead is easier to work find bends like wire looms etc
Leave a comment:
-
Unfortunately I did not get the hoped-for help for the attack periscope casong inside conning tower, so I had to content myself with the material in my possession.
Here the first steps in scratch build....
P.S. : someone could tell me where to find a tutorial on how to fold and shape copper cables ?Leave a comment:
-
Many thanks.
So it's inside the Tower, phew, for a minute there I thought I'd missed something.
RobLeave a comment:
-
Hi buddy,
I've never seen this seat before, do you have any pictures of this in an actual U-Boat, not saying it doesn't exist, I would add this details to my U557 build as I'm near to painting at this stage.
RobLeave a comment:
-
Hi everyone,
as promised I post the photos of the commander's seat on attack periscope inside the conning tower, in comparison with the Trumpeter's one...Leave a comment:
-
Hi everybody,
I made the first attempt to build the inner conning tower floor, with all the drainage holes...I'm not totally satisfied with it, maybe I'll do another try...
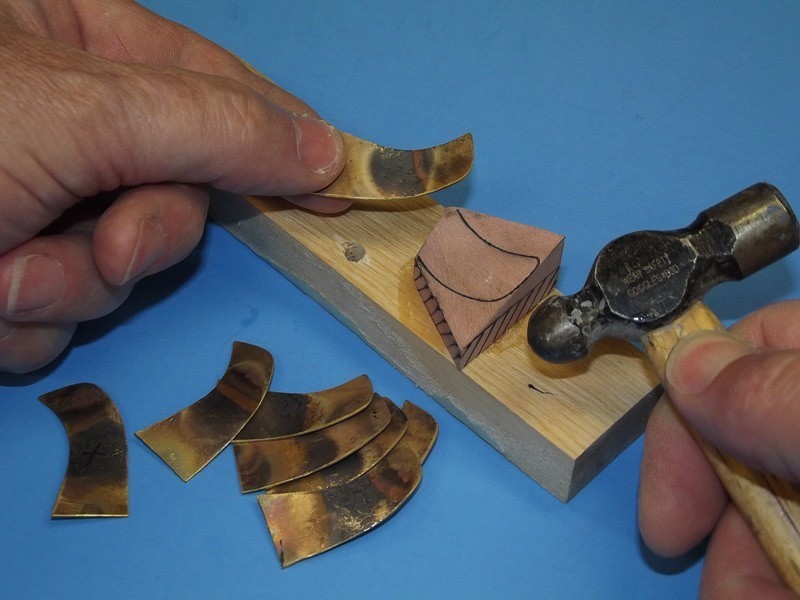
In the meantime I started with the attak periscope post, and precisely with the commander seat; in Trumpeter's model the seat is too flat, and I tried to give to it more "thickness"; now I'm making the seat support with spring system...
Stay tuned...Leave a comment:
-
Before gluing the top cap of conning tower pressure hull, I will redo all the details, removing the existing details.
Obviously, I'll have to build by scratch the inner conning tower floor...
Stay tuned...Leave a comment:
-
Hi everyone,
as noted by a modeler, in Trumpeter's model the conning tower interior floor is totally wrong, at the deck level.
I had to drill the deck, reproducing the conning pressure hull shape; I used the half shell of conning pressure hull ( I'll will make visible all the interior of conning tower ) to extend the missing part.Leave a comment:
-
Hi everybody,
after a long period of inactivity, I resumed work on U 552, starting from where I left off, the exterior of conning tower.
I was not satisfied with the photoetched hatches applied ( they were too protruding from conning tower surface ) and with the photoetched air intake grill ( it was too flat, not very "real" ).
I solved the problem of hatches heating them with the tip of the welder ( I replaced the hinges too ).
About the grill, I rebuilt it by scratch.
Here some photos...
As visible in the last photo, I made by scratch also the part of conning tower surface with the drainage holes...
CheersLeave a comment:
-
Hi, really impressed with your work thus far. I have just purchased this kit as well. Just curious, are any of your added detail parts made with a 3D printer?Leave a comment:


Leave a comment: