

 Tweet
Tweet
There is plenty of room in there for 6 of your working torpedo tubes similar to what you have in the "Gato", now that would be cool. All in a one piece pre-cast bow with the torpedo mountings all ready there and easy to install. Just cut the old off and replace with the new.
-
-
Yah! That does look good, nice workComment
-
-
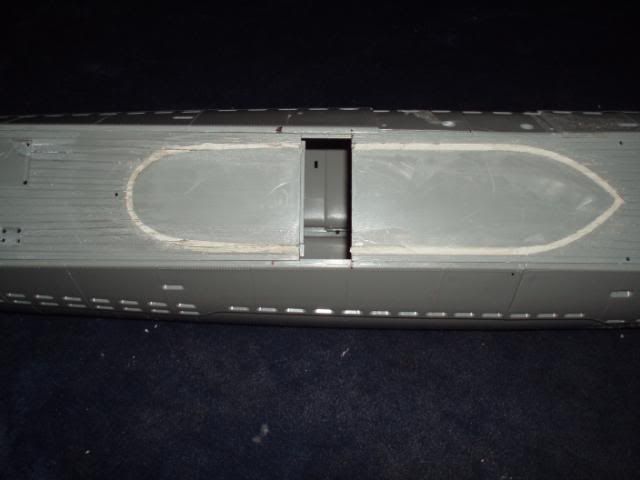
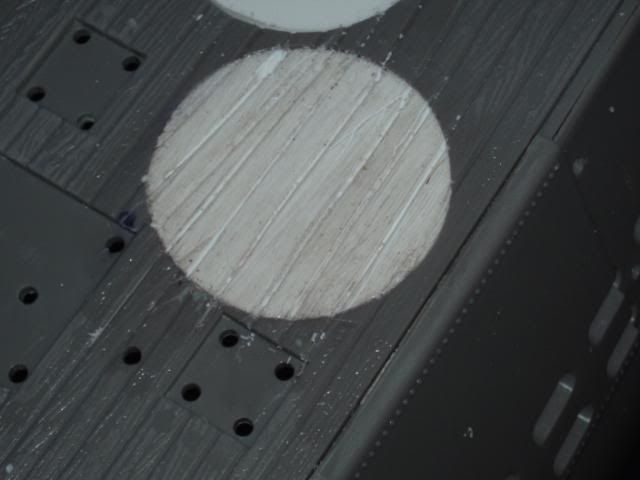
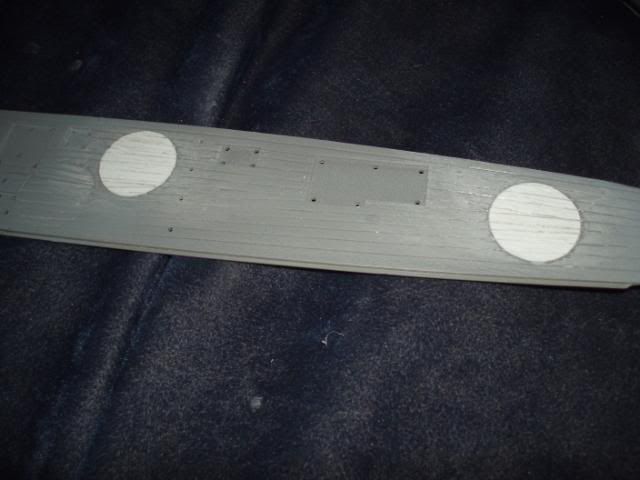
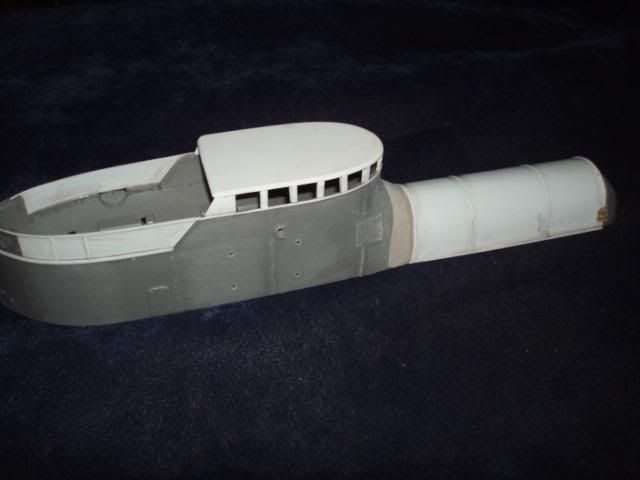
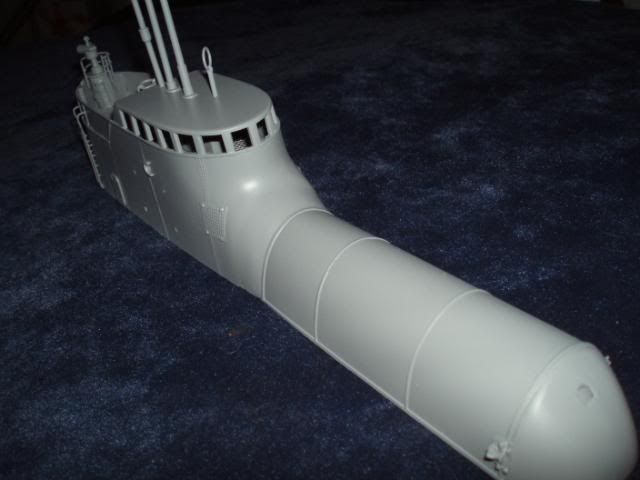
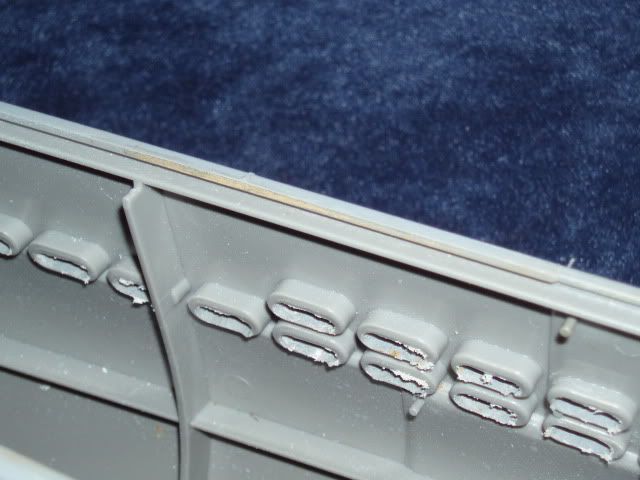
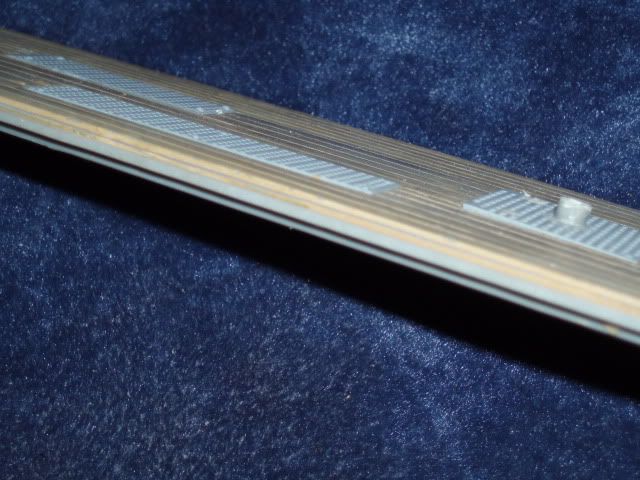
I had to add 36mm to the front deck to get it to join up with the rear section. While I was at it I also removed all of the cast on rivet detail on the deck, in scale they were about the size of a foot ball and just had to go. As other people have already mentioned the deck hatches are over 10 foot in diameter which is a bit too much even for Lindberg. Not only were they too big they were in the wrong places, so what I have done is fill the holes where they were to go with plastic card and then re scribe the wooden plank detail.
The sail was also in the wrong place and needs to be moved back about 60mm and the slots for the old position needed to be filled and also re scribed.
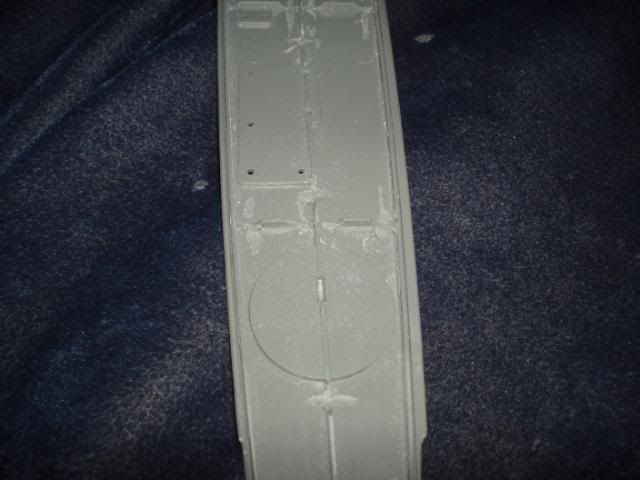
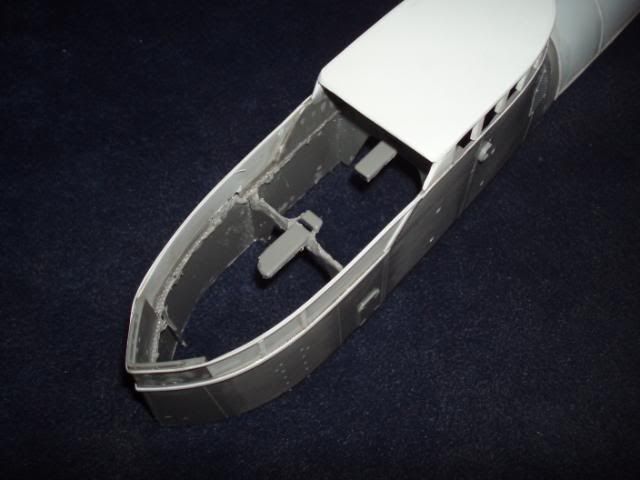
While I still had the decks at hand I turned them over and with my trusty dermal removed any thing that might want to trap air under the deck. I did this by making each section join the next by removing any plastic molding that might act as a air dam. The photos show better what I am trying to say.
Comment
-
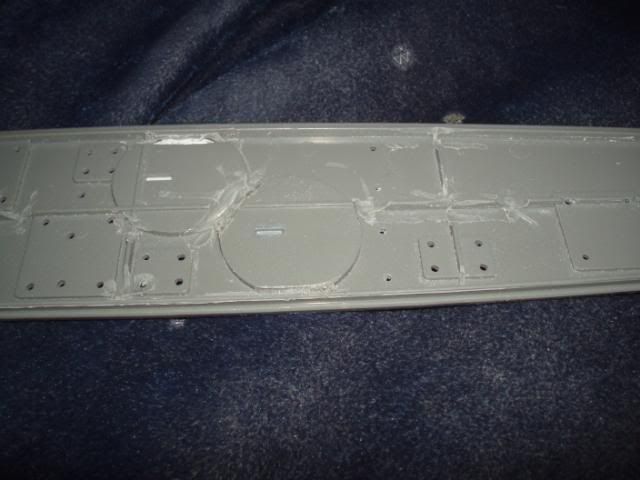
A couple more snaps of the work on the deck.
Comment
-
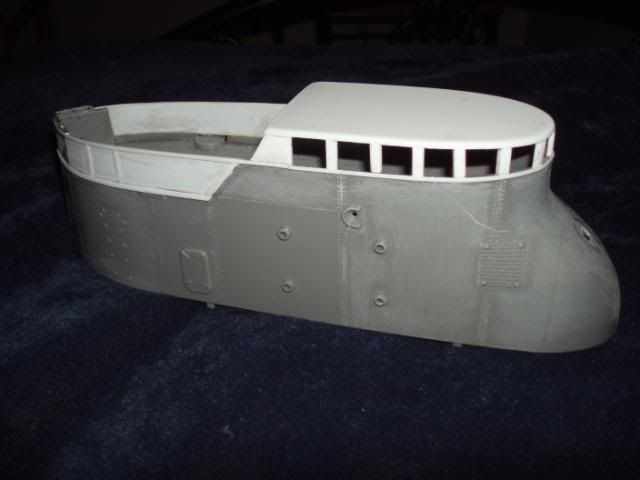
I am happy with the way the hull and deck are starting to look and before I get too carried away with just one area I thought it is time to look at the sail.
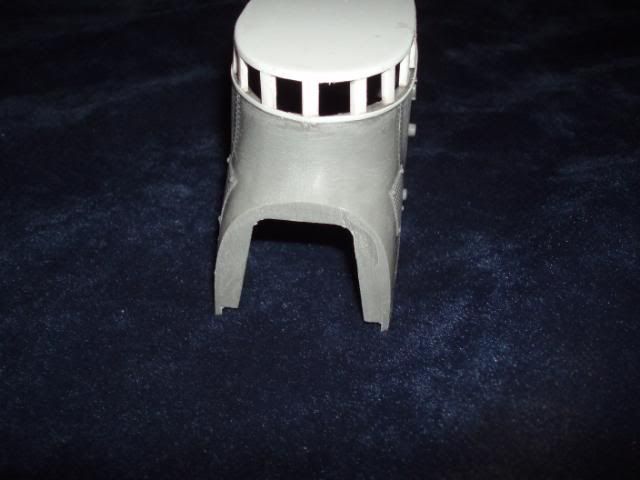
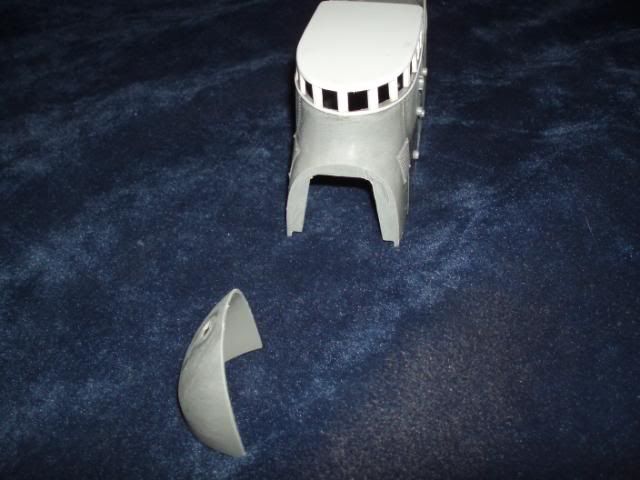
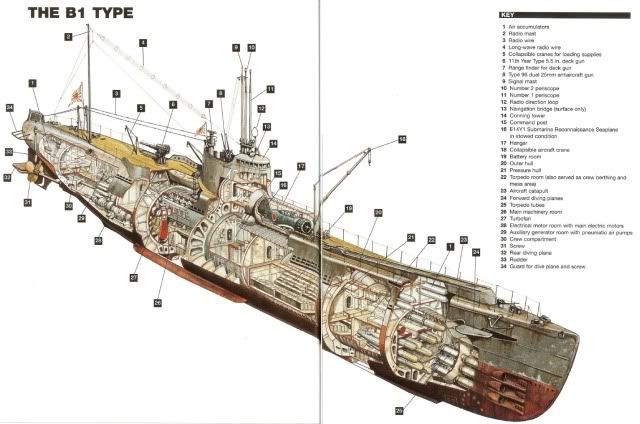
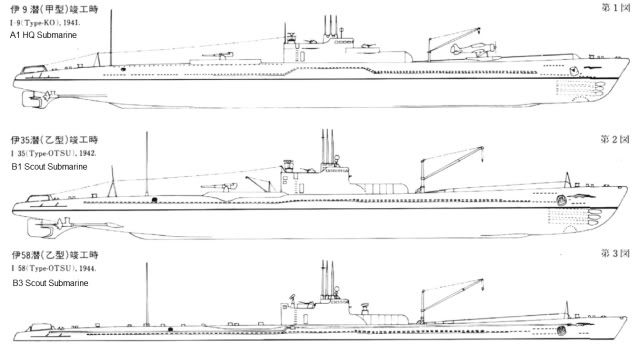
What comes in the kit is nice and strong but not what is needed to make my boat a B1 type. After a long time looking at photos of the real thing I have worked out a plan of attack to convert the kit sail into a sail that looks at home on my I-25.
The first thing that needed to be done was fill in the area at the rear of the sail. I have used 1.5mm Evergreen sheet for this and some .5mm bits for some of the detail parts. The next part was the roof and windows for the con area. Here I used 2.5mm plastic card, cut to the shape and then rounded the sides and blended in the windows. The unit was then put aside to give the glues time to dry and harden. This is what it looks like so far.
Comment
-
What I am looking for.

Comment
-
Looking good! Are you going to fabricate any of the detail parts to replace much of the toy-like sprue Lindberg is famous for?Comment
-
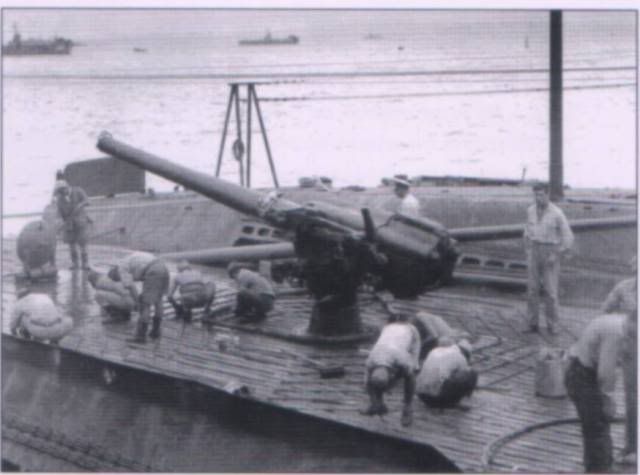
I guess so "herrmill" but I am not any where near thinking about detail parts yet. Where can I get a 1/72 5" IJN deck gun or a twin 96 type 25mm machine gun and its mounts?
Comment
-
Haven't seen the deck gun but you could probably adapt one of the 5" deck guns offered by Great Little Ships, IBS, Nautilus, Sirmar or WEM.
Pit-Road offers a 1:72 Type96 25 triple MG metal/resin display model that you could modify but at 4800yen, it ain't cheap & might be hard to find since its been discontinued. Contact Scott Herds at Hobby Link Japan to see if he knows of any other sources.
You might want to contact one of the 2 gents on Modelwarship.com who are currently doing 1:72 Yamatos since they'll need the Type 96 single & triple open mounts for their late model versions.Comment
-
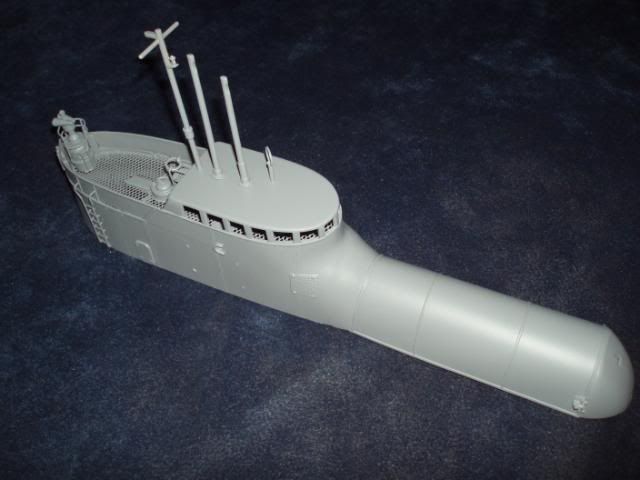
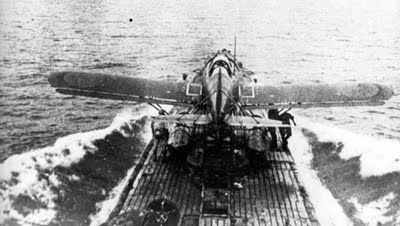
The next part of the conversion is to add the air craft hanger to the sail, I did this the same way the IJN did, cut the front of the sail off and add the hanger and door in its place
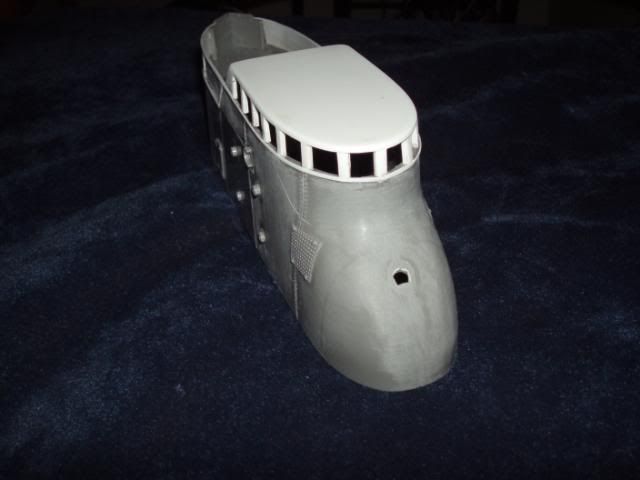
With the front cut off it was time to build the hanger. I used some 1mm plastic card for the main part of the tube and added some .5mm plastic card to add to the detail. Also some extra details from the parts box.
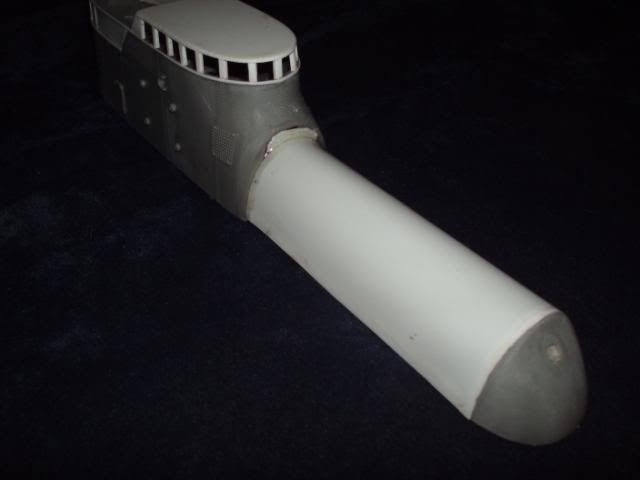
The hanger was then blended into the front of the sail with some 2 part epoxy and finished with body filler.
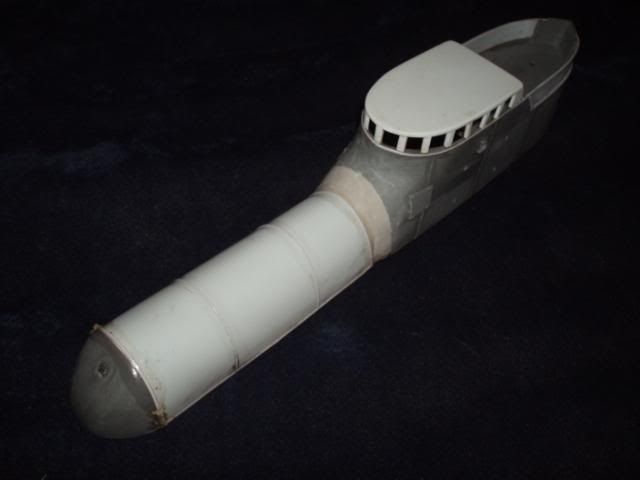
Then put aside for a coat of primerComment
-
Youve done this kind of thing before, Havent you! Looks good!IT TAKES GREAT INTELLIGENCE TO FAKE SUCH STUPIDITY!Comment
-
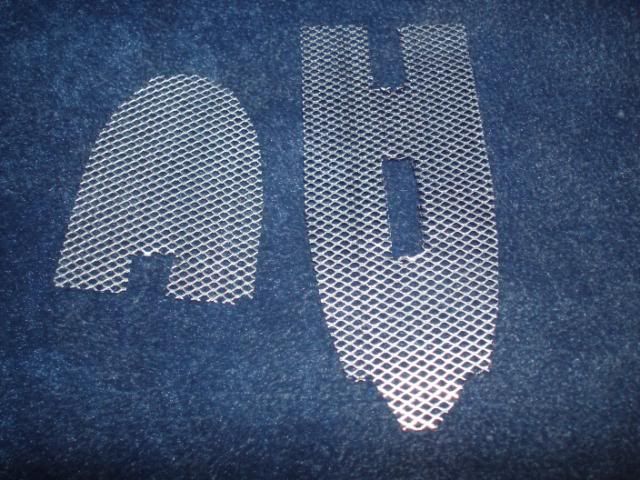
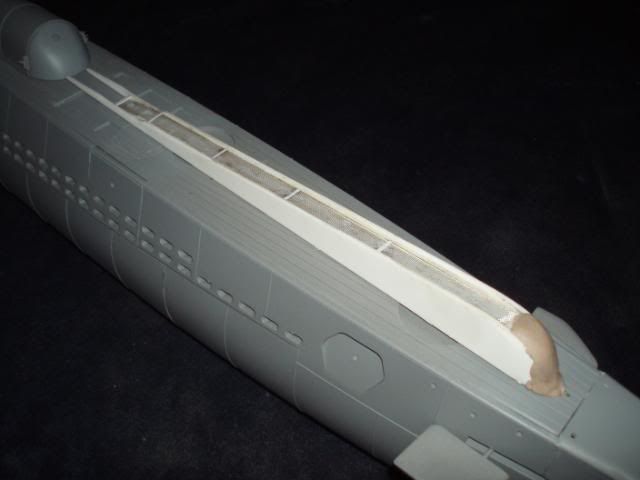
As one of my goals for this build is to have the boat work as good if not better than it looks, the deck area of the sail was going to cause a potential problem. It had a large flat deck with a lot of bracing under it and would be a huge air bubble trap, making trimming almost imposable.
To solve this was easy. Remove the deck and replace it with mesh. Easy to do and no more air bubble traps with out spoiling the look of the boat.
Comment
-
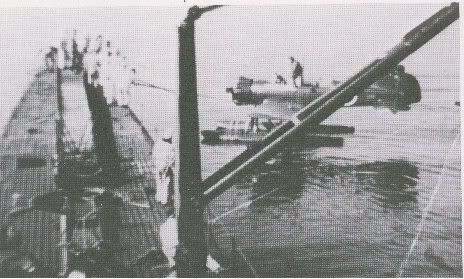
The next item to be looked at is the ramp for the float plane. Again after looking at several photos of the ramp from a few different angles I came to a shape that I was happy with the way it looked. It, like most of the other custom made parts is built from plastic card and a bit of putty. It will also be a good brace to stiffen the front deck area.
Comment
-
Looking damn good! As stated on another forum, its a shame that Ernie Petit of L-H didn't think ahead when he proposed this kit. Imagine how well it could have sold if 1) it was done by a competent designer such as our very own Mssrs. Merriman or Palumbo & 2) they had offered several variations of the B for both original scout & late war kaiten carrier.
On a related note, would anyone have clear photos of the midget sub cradle used on the C1 type? My buddy Steve Lund has decided to backdate his I-53 to this earlier version & is looking for reference info.Comment


Comment